
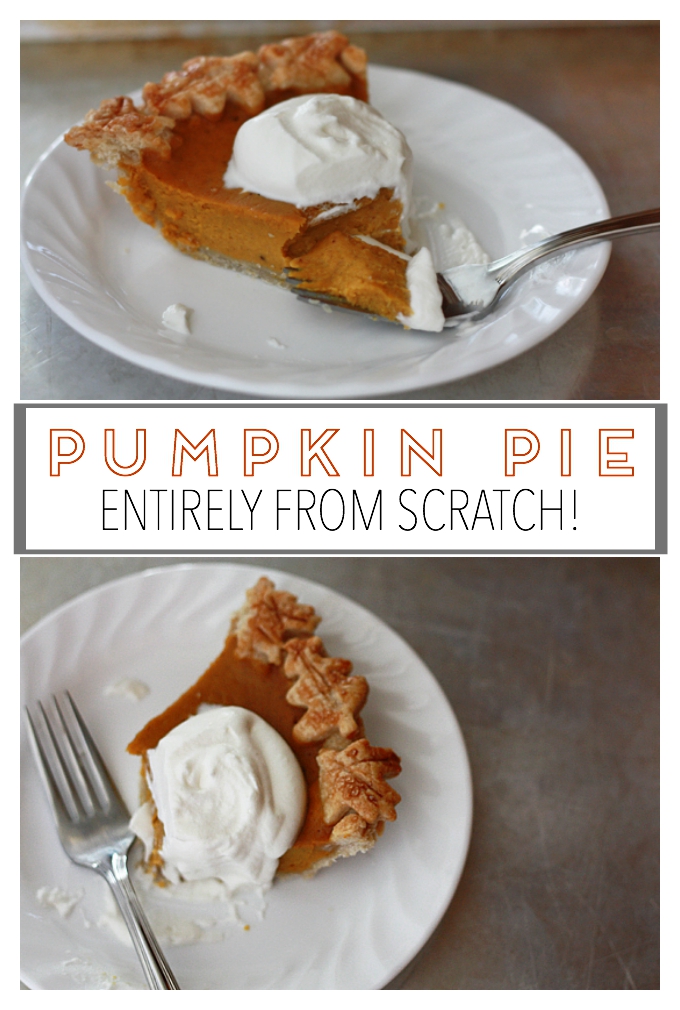
Pumpkin Pie From Scratch
This post may contain affiliate links. Please read our disclosure policy
Oh, friends. I feel like I’m sitting down with you at the end of a fun Thanksgiving meal to share this recipe with you. The house has the lingering smell of roast turkey, starchy side dishes (my fave), and somehow cinnamon is in the air too (for me, it’s practically the official smell of the holiday season). We’re in sweaters, and it’s really chilly outside.
We’re settling in for the night, having come out of our post-binge naps, and it’s time for pie.
In my family, pie was (to me) almost as much an event as the Thanksgiving meal itself (blasphemous confession: turkey is one of my least favorite parts of the meal). My dad’s side of the family especially goes ALL out for pie time. My Uncle Sam and Aunt Amy especially–how I want to be them when I grow up! Honestly, sometimes it feels like there are almost as many pies as adults in the room.
And as much as I usually think of pie as year-round fare, for some reason, I only really ever have pumpkin pie at Thanksgiving.
I’ve also secretly harbored the goal of someday making my very own pumpkin pie from scratch. As in from an actual pumpkin. And this year, I did it! Having learned to make my own pumpkin puree this year, I thought this was the perfect opportunity to give it a go, and thought you might want to try it out yourself this year!
I adapted a Martha Stewart recipe and it really wasn’t difficult. I was sort of surprised it wasn’t more work. Especially when you can make the puree and the pie crust dough ahead of time, the pie pulls together pretty quickly.
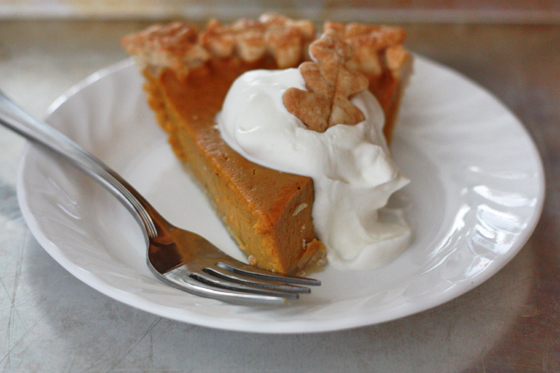
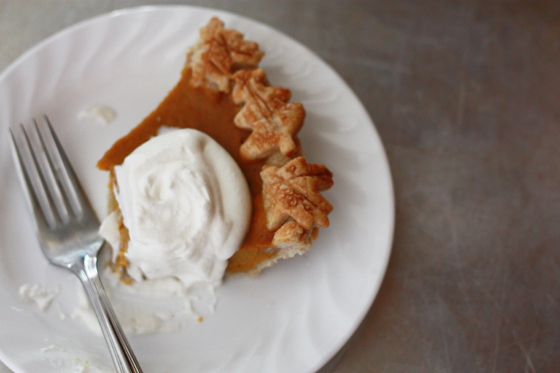
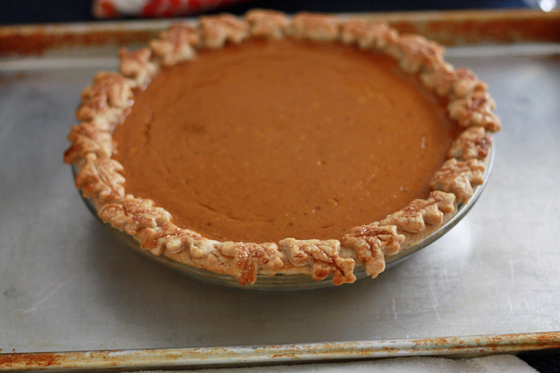
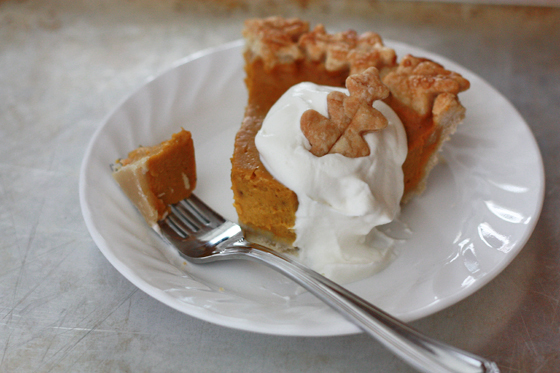
We made a fancy leaf decoration for the crust, but if you like, you can certainly skip this step and crimp it or press it with a fork or something if you prefer. If you plan to make a leaf decoration for the edge, make sure you have dough for a double crust (my favorite recipe does this anyway). We cut out extra leaves for serving and I LOVED the presentation.
**Note: this is a recipe for a 10″ pie. If you only have a 9″ plate, fill the crust, leaving a little less than 1/2″ of space before the edge of the crust, then bake the remaining filling in a ramekin.
Pumpkin Pie
Ingredients
For assembly:
- 1 double pie crust (you can use a single if not doing leaf design)
- egg wash (1 egg + 2 Tbsp milk or cream)
- Coarse sugar (turbinado/sugar in the raw)
For filling:
- 1 1/2c pumpkin puree (fresh or canned)
- 3/4c brown sugar
- 1 1/2tsp cinnamon
- 1tsp ginger
- 1/4tsp nutmeg
- 1/4tsp cloves
- 1/2tsp salt
- 1/2tsp vanilla
- 1 Tbsp cornstarch
- 3 eggs
- 1 1/2c evaporated milk or cream
Instructions
- Preheat oven to 350 degrees.
- Roll out one half of the pie dough to fit inside a 10″ pie plate. Fold dough under flush with the edge of the pie plate. Freeze about 15 minutes, or until firm. While dough is hardening, roll out second half of pie dough to about 1/4″ thickness. Cut out leaves (or other shape) with cookie cutter.
- Remove pie crust from freezer. Whisk together egg wash ingredients (egg and milk) and brush the edges of the crust with egg wash. Arrange leaves along the border (you will have extra leaves). Brush tops of leaves with egg wash and sprinkle with coarse sugar. Return to freezer and freeze 10 minutes longer. While pie shell is hardening, finish brushing and sugaring remaining leaf cut-outs and set aside.
- Remove pie crust from freezer and place on a baking sheet. Prick the bottom of the crust with a fork, and line the middle of the pie crust gently with a piece of foil. Place some rice or pie weights onto the foil to weigh it down.
- Place extra leaf cut-outs on the same baking sheet. Bake for 10 minutes. Remove the rice/weights and the foil. Bake 5 minutes longer.
- While crust is pre-baking, make pie filling by combining pumpkin puree with brown sugar, cinnamon, ginger, nutmeg, cloves, salt, vanilla, and cornstarch. Stir well to combine. Add eggs, one at a time, stirring to incorporate after each addition. Add evaporated milk/cream and stir to mix well (it will seem much more liquid).
- When crust is finished pre-baking, pour filling into pie shell (remember, if you aren’t using a 10″ plate, you will have some filling left over).
- Bake until all but the center is set (it will just be slightly wiggly), about 50-60 minutes.
- **You will need to check on your leaf cut-outs throughout the baking time to remove them when they’re golden brown. This will be before the pie is finished baking.
- Cool completely before slicing. Serve with whipped cream and extra leaf cut-outs.
Notes
**Note: this is a recipe for a 10″ pie. If you only have a 9″ plate, fill the crust, leaving a little less than 1/2″ of space before the edge of the crust, then bake the remaining filling in a ramekin.
Emily! I love reading your recipes. Hope you and Michael are doing well. As far as Pumpkin Pie from scratch… I started making mine from scratch 5 years ago and I’d never go back! I love having my own pumpkin puree and using it in all my pumpkin recipes. Especially pie and pumpkin roll!
This is one beautiful pie! The leaves turned out adorably. As in, I adore that you can do something like this. It is truly a work of art!!
That looks so yummy. I can almost smell it! I love the leaf decor on the edge. Maybe I’ll try it this year!
I am in love with those leaves!!!!
I miss dairy. I’ll keep saying it. Please bless your baby does not have a dairy allergy…though if they do I’ll be in love with diary free recipes on your blog…
Wow 😮 it looks delicious! Can this pumpkin pie be made with a graham cracker crust?
I haven’t tried this exact recipe with a graham crust, but I think it’d work out fine!