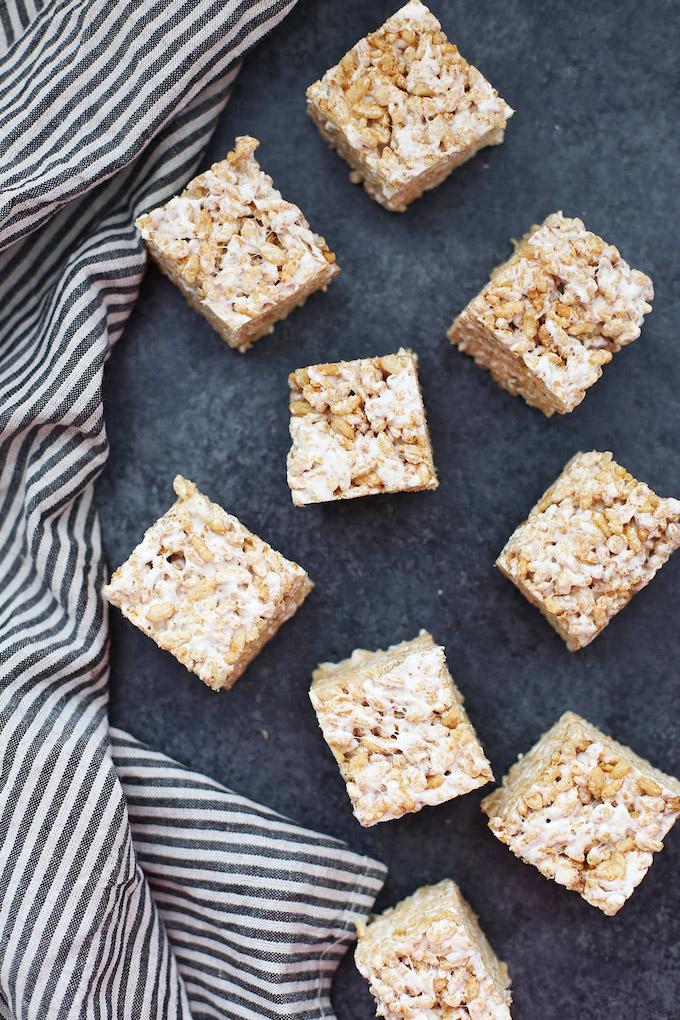
fluffy homemade marshmallows from scratch
This post may contain affiliate links. Please read our disclosure policy

I know. I really know, because I was thinking the same thing when I saw my first homemade marshmallow recipe two years ago and thought… can you even DO that?
Yes, dear reader. Yes, you CAN!
Marshmallow-Making: a History
My family is composed of my dad, my mom, four girls, and one lone boy at the end. Much to the dismay of the males and a certain sister or two of mine, we were about as outdoors-y as the Hilton sisters growing up, meaning… not so much. We (most especially my beloved mother) aren’t bug people. Or dirt people. Or people who eat with our hands after coming in contact with bugs or dirt. And I better not even mention the inch worm incident of last year.
I’m thinking I’ve made it pretty clear.
So we do things like an annual cookout to be outside in our own way, which usually means a picnic table, tablecloth, camping chairs, Eddie Bauer marshmallow roasting sticks, hand sanitizer, bug spray, and wet-naps. And we love it, and I look forward to it every year. And also, please don’t judge us.

Anyway, I got the idea that doing s’mores with homemade marshmallows and graham crackers would be hand-across-alabaster-brow-in-a-swoon romantic. So, naturally I HAD to make them. I did some research, and learned a few things. But of all the things I learned, I learned one very pungent truth from making this recipe:
Unflavored Knox gelatin that’s been softened by water is one of the grossest smells I’ve ever smelled in my life.
I wasn’t even sure I’d be able to EAT a marshmallow ever again after smelling this smell. Land sakes, it was the most revolting smell ever. And yet, magically, once set, homemade marshmallows don’t smell or taste anything like the smell of softening Knox gelatin. They turned out wonderfully! They held their shape, they stored well without hardening, and they were adorable in their perfect square-ness. They cooked like a dream over the campfire. Sigh…I love the outdoors.

Fluffy Homemade Marshmallows
Ingredients
- 3 1/2 envelopes unflavored gelatin
- 1c cold water, divided
- 2c sugar
- 1/2c corn syrup
- generous 1/4tsp salt
- 2 large or 3 medium egg whites
- 1 Tbsp vanilla
- Powdered sugar
- other flavorings or coloring as desired (you can add a few drops of almond, mint, cherry, food coloring, etc.)
Instructions
- Spray a metal 9 x 13 pan generously with cooking spray. Sift powdered sugar to coat. Set aside.
- In the bowl of a stand mixer or a large metal or glass bowl, sprinkle gelatin over 1/2c of the cold water and let stand to soften.
- In a 3-quart saucepan, cook sugar, corn syrup, remaining cold water, and salt over low heat. Stir with a wooden spoon till sugar is dissolved. Increase temperature to medium and bring mixture to a boil without stirring until a candy thermometer reads 240 degrees (this takes 10-12 minutes).
- Remove pan from heat and pour sugar mixture over gelatin mixture, stirring to dissolve gelatin. With the whisk attachment on the stand mixer or using a hand mixer, beat mixture on high speed until white, thick, and tripled in volume (this takes 5-7 minutes with a stand mixer or about 10-15 with a hand mixer).
- In a separate medium bowl with clean beaters, beat egg whites until they reach the soft peak stage. Beat in the vanilla, flavorings, and any food coloring, if using, until you’ve just reached stiff peaks. Pour into the baking pan and smooth with a spatula (Don’t worry yourself about scraping out every last bit. If you try too hard, you’ll end up with a sticky mess).
- Sift about 1/4-1/3c powdered sugar over the top of the mixture and place uncovered in the refrigerator to set. Refrigerate at least 3 hours or up to 1 day.
- Remove pan from refrigerator and run a knife around the edges of the pan. Invert the pan onto a large cutting board and loosen one corner of the marshmallows with your fingers. The rest should come out easily, but you may need to continue loosening until the entire block has come out.
- Slice into squares or rectangles of desired size (a pizza cutter worked well for me) and toss with more powdered sugar to coat all the sides. Store at room temperature in an airtight container up to 1 week for best results.**
- **I recommend making these at least the day before you want to use them to allow the flavor to develop.
adapted from Smitten Kitchen