
How to Make Paper Flowers
This post may contain affiliate links. Please read our disclosure policy
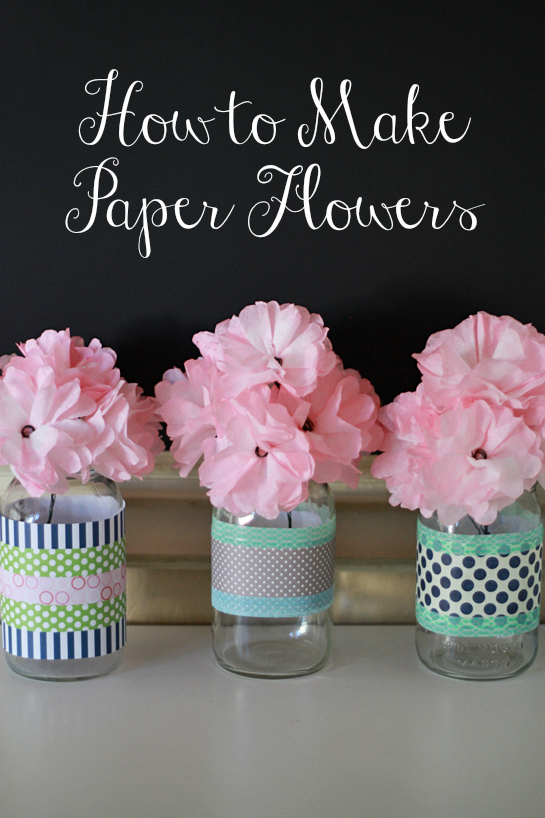
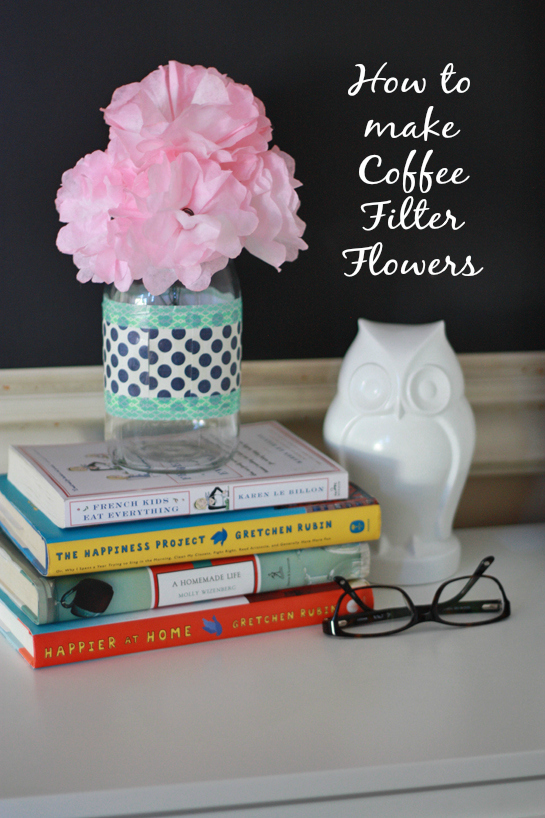
With Easter around the corner, and springtime upon us, I wanted to share a little project I did a few months ago. I helped put on a luncheon for the ladies who help out in the children’s program at church. We had a teeny tiny budget, so lots of DIY and handmade decorations were the name of the game. I put together these little paper flower bouquets for the centerpieces on the tables, and I was really happy with how they turned out. Oh, and did I mention they’re made from coffee filters (which are about the cheapest things on the planet)?
These would make a great addition to a spring party or brighten up a little corner in your house. I’ve got directions for the plain white flowers, and tips for how to dye them. You could make lots of different colors for a bright bouquet or dye them to match nearly any color scheme.
(As always, anytime I do one of these sorts of posts, I’m reminded that I am NOT great at craft tutorials, so please feel free to ask any questions you have. I hope the pictures help!)
For this project, you will need:
- Coffee filters (one package will do the job unless you’re making LOTS)
- Floral wire (10-12″ per flower)
- Floral tape (one roll will do)
- A pencil + Scissors
- Hot glue
If you’re dyeing the flowers, you will also need:
- Food coloring
- Water
- A large bowl or pan
- A cooling rack + Baking sheet for drying
First:
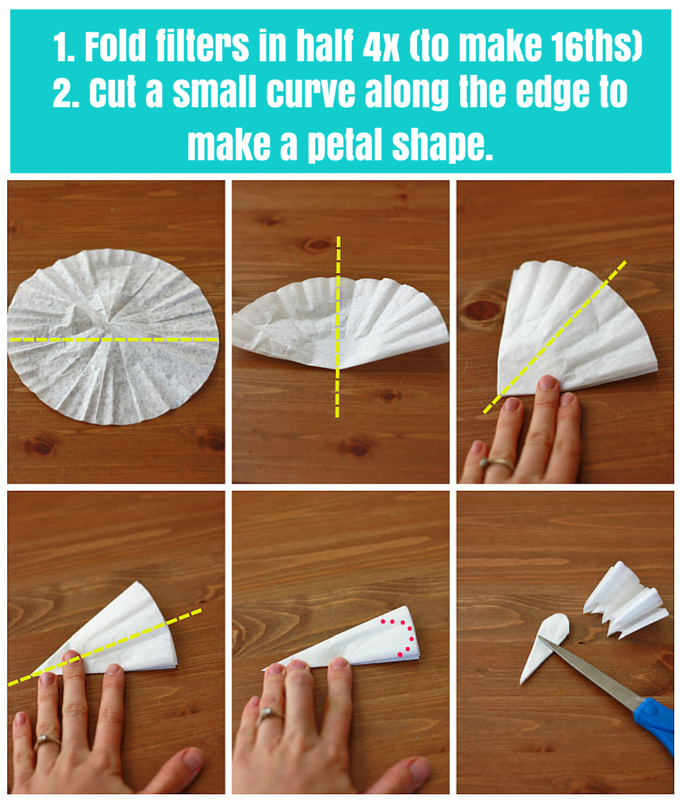
Place 2-3 coffee filters together. Fold them in half four times (to make sixteenths, as shown).
Cut a curve at the end of the coffee filter, cutting off 1 – 1 1/2″ of the border. This will create a petal shape and give you a more manageable size. If you prefer larger flowers, cut right near the edge.
Repeat several times until you have plenty of layers to work with. I used 4-5 layers per flower. It’s okay (and actually a bit better) if they’re not all perfectly identical.
Tip: if you plan on dyeing your flowers, save a few scraps from this trimming to use later.
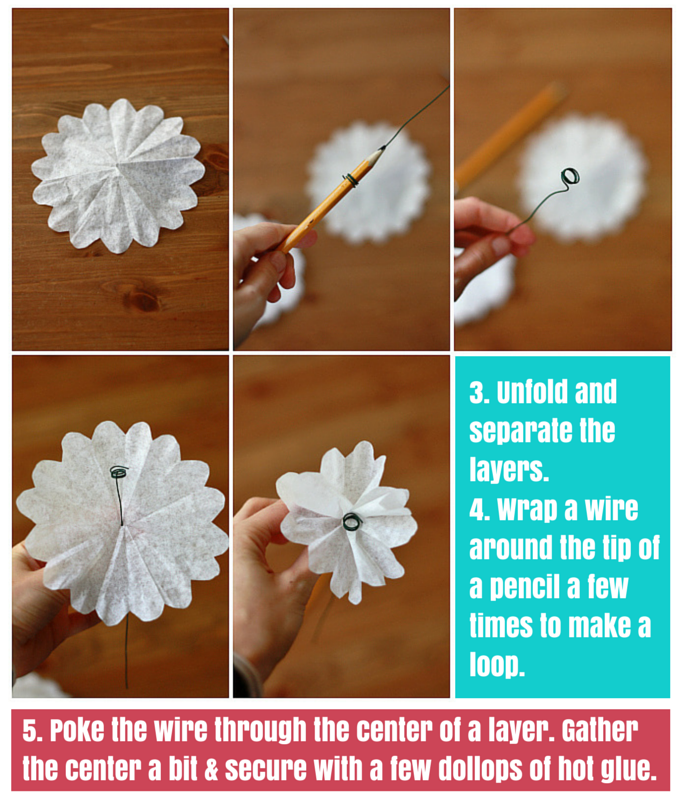
Next:
Open all the cut filters and lay them flat. For each flower, cut 10-12″ lengths of floral wire. Wrap each wire around a pencil a few times to make a small circle. This will act as the center of your flower.
Working with one layer at at time, poke the end of your floral wire through the center of a coffee filter. Slide it up to the center. Gather it in 3-4 places to scrunch it up a bit. If desired, carefully tack it down with a bit of hot glue. (Watch out! Those filters are thin!)
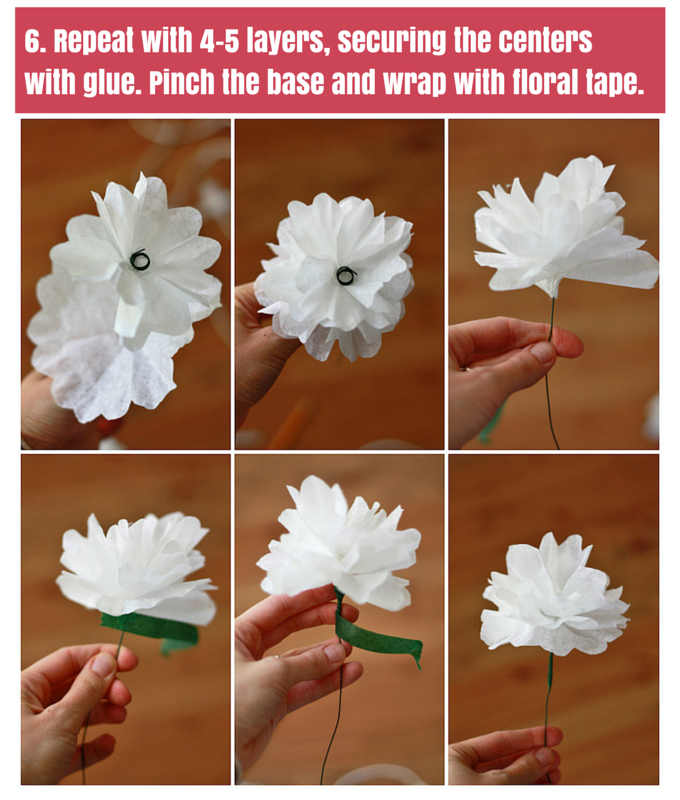
Repeat with 3-4 additional layers, or until flower looks full enough to you. Be sure to tack each layer down with a few dots of glue for best results.
Pinch the bottom layer flat. Wrap with a few inches of floral wire as tightly as you can. If you have difficulty getting the floral tape to stick to the base of your flower, just use a dot of hot glue. Straighten your stem, and you’re done!
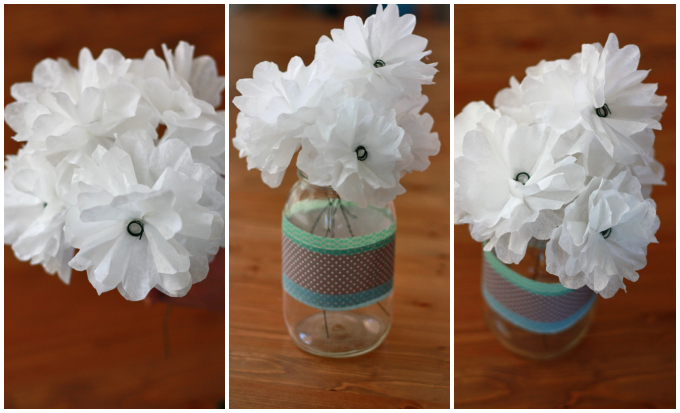
Repeat, repeat, repeat until you have as many flowers as you’re hoping for. I put mine in mason jar vases that I decorated with scrapbook paper and washi tape. It’s an easy way to bring in some color if you’re keeping your flowers white.
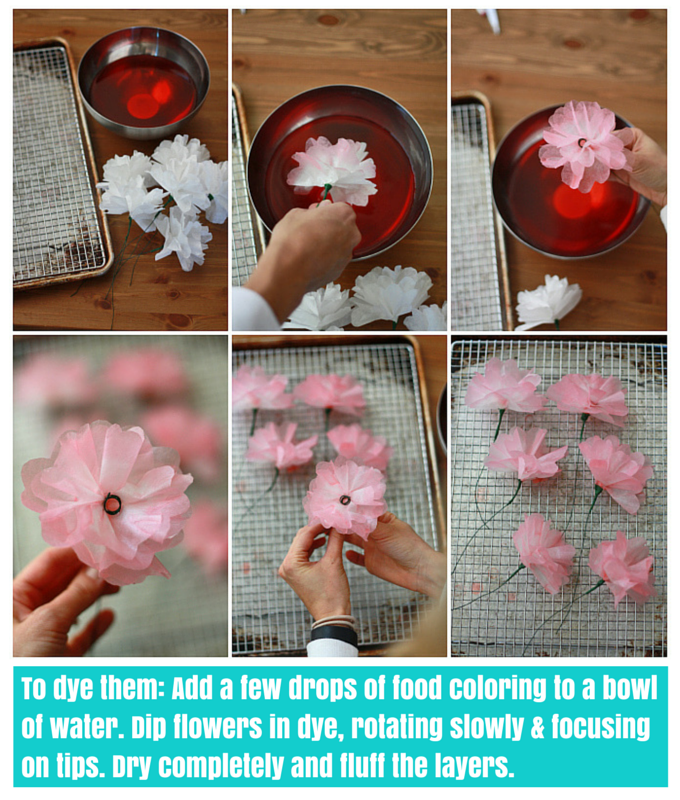
To dye the flowers, fill a large bowl or pan with water. Add a few drops of food coloring and stir to mix. Using scraps from earlier (or a plain coffee filter), test the dye until you have the color where you want it. Know that the color will lighten and fade a little bit as they dry.
Slowly dip the ends of the petals into the dye and twist to coat. I liked the look of focusing on the ends of the petals. This kept the centers light and gave more dimension to the final product.
Place flowers on a cooling rack placed over a baking sheet to catch drips as the flowers dry. As they dry somewhat and are no longer dripping, you can transfer them to vases/jars to continue drying and to make space for more flowers. Allow all flowers to dry completely and fluff the petals as desired.
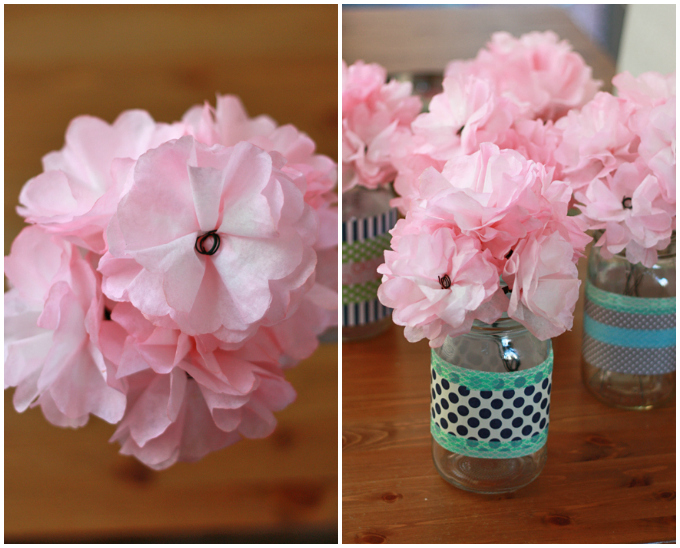
To make bouquets, you can place them loosely in a jar or vase. I liked the look of arranging them how I wanted them and twisting the wires together to make more sturdy bouquets (since I had to transfer them to an event).


What a cute idea! I am pretty much crafting-challenged but I think I might be able to make these. So sweet, especially when tinted pastel colors.
These are so cute and fun for spring! I love those jars that you have them in!
I love these!! And a little someone’s birthday is coming up this summer. I’m all about simple decorations! Definitely gonna make these. PS. Your craft tutorial was perfect. The pictures AND instructions? On point. xo
I think they are adorable ! i am going to try to dye them blue and make fluffy hydrangeas……wish me luck
your tutorial was great.