Gluten-Free Pumpkin Whoopie Pies
This post may contain affiliate links. See our disclosure policy for more.
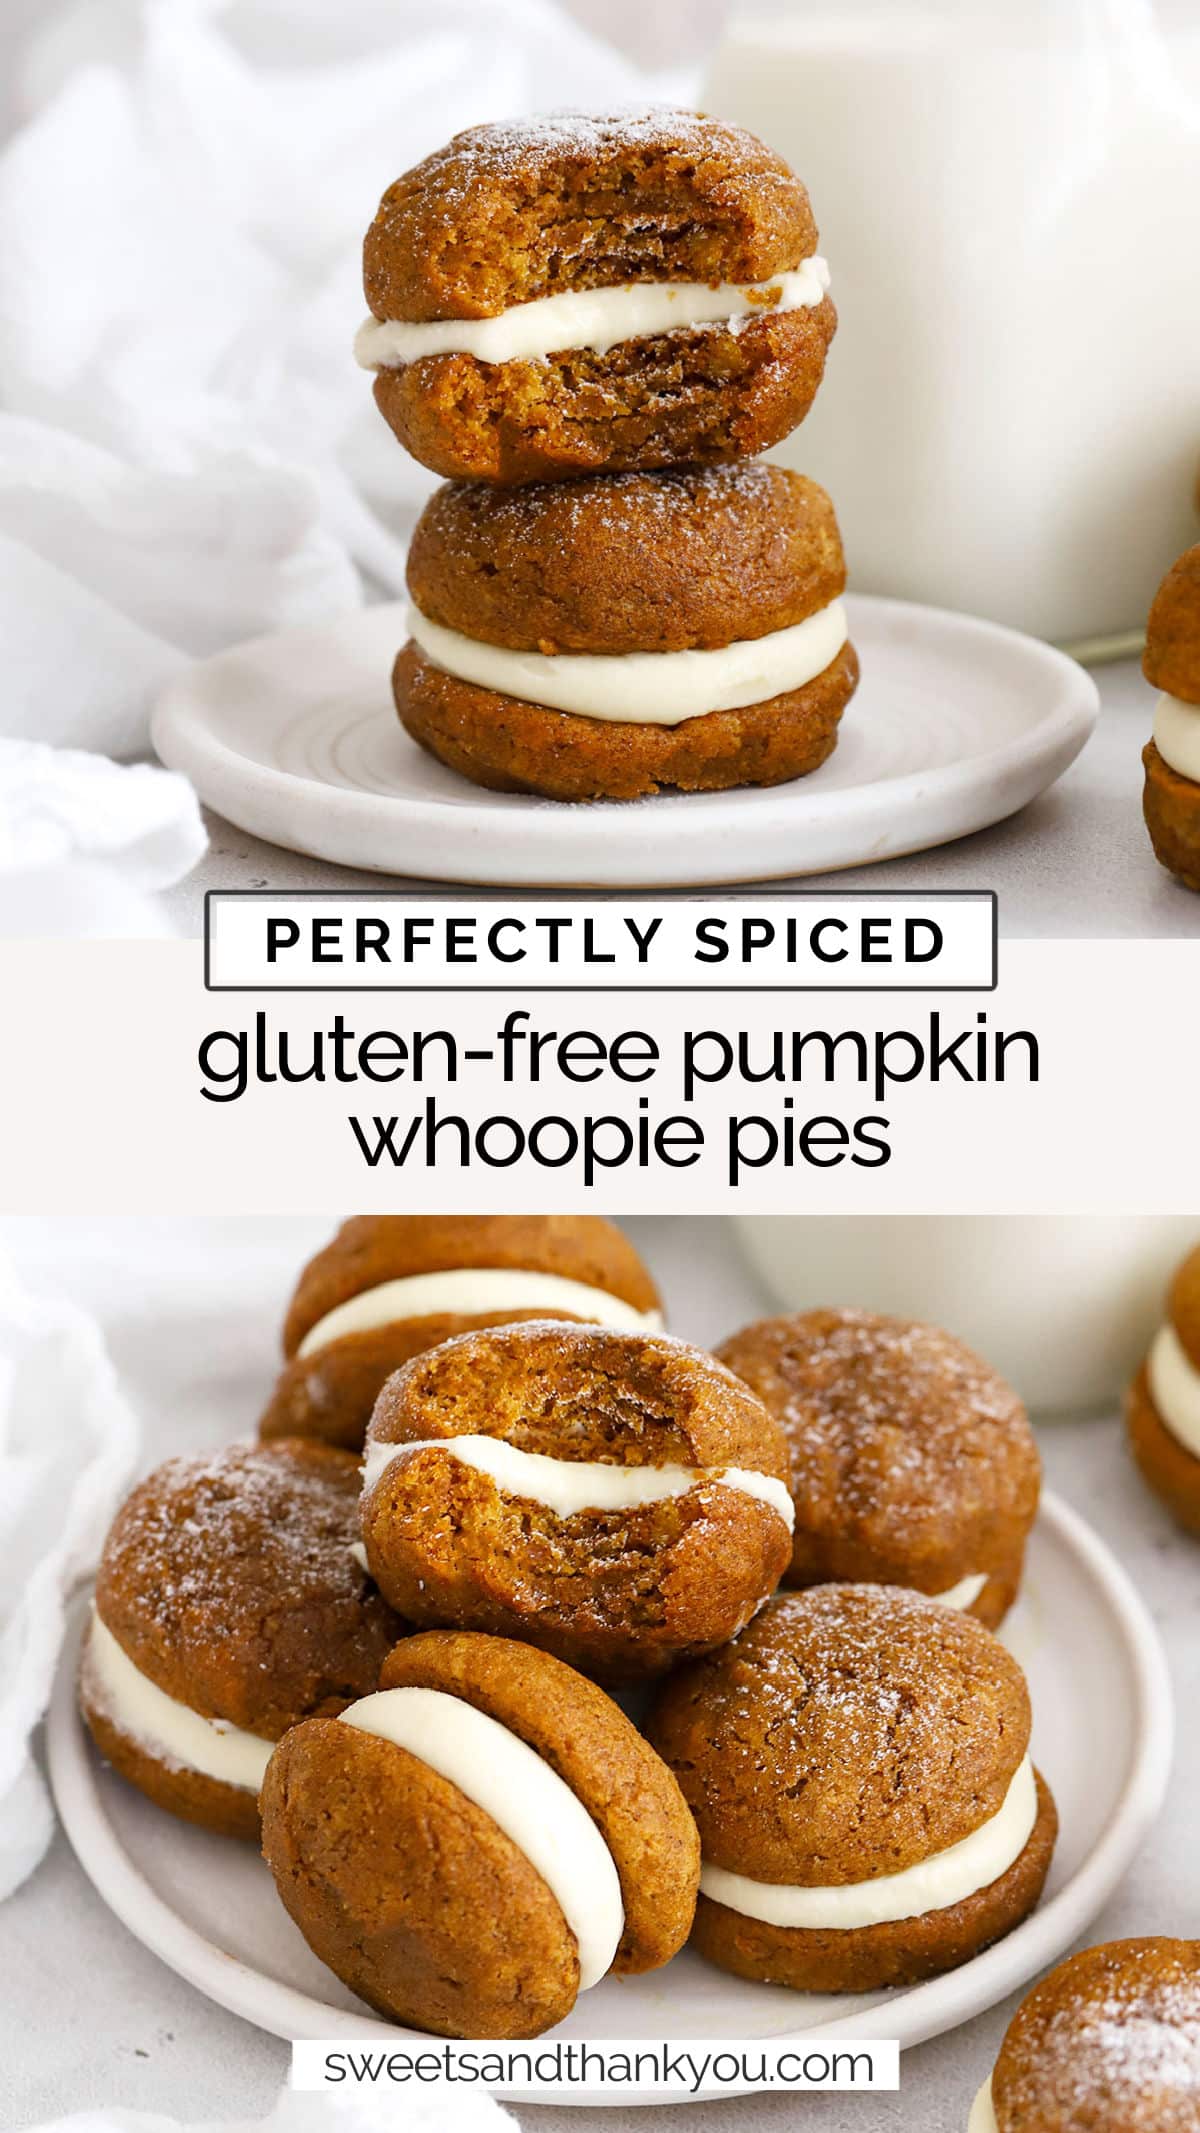
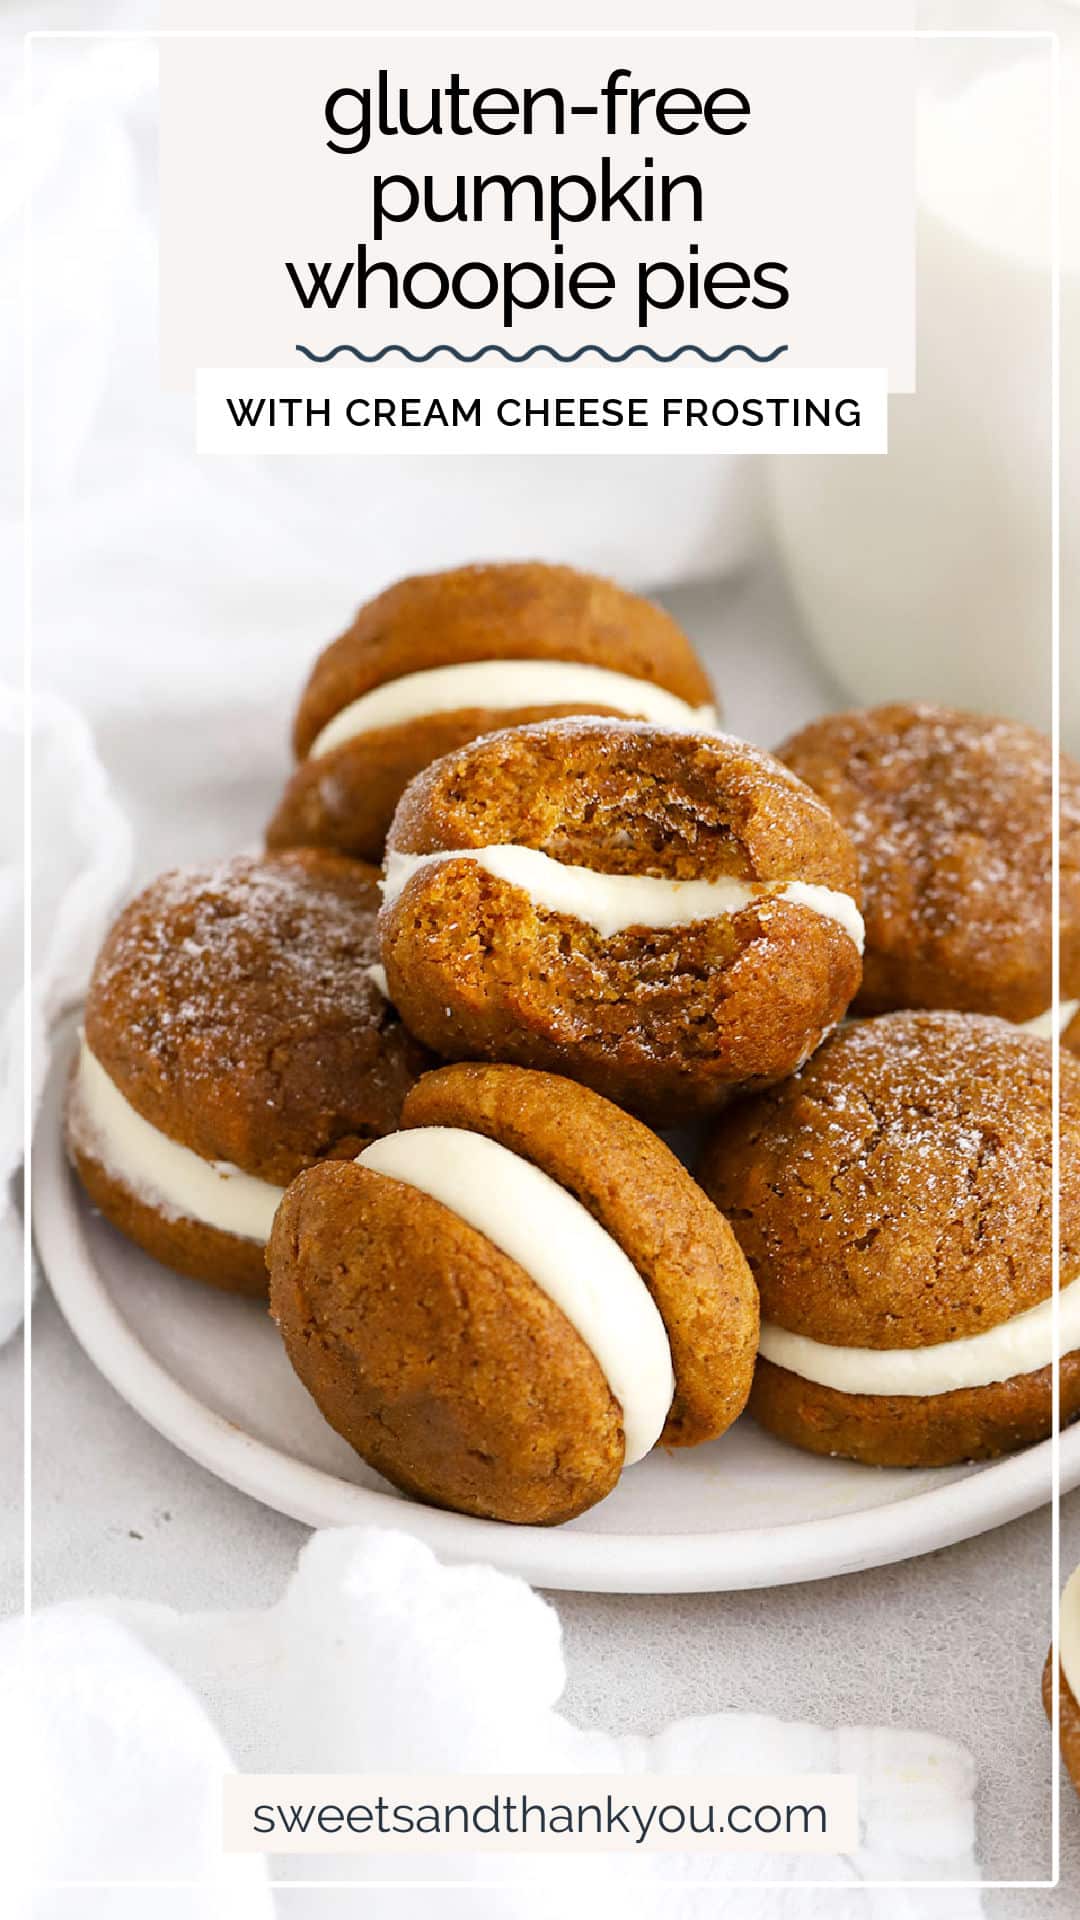
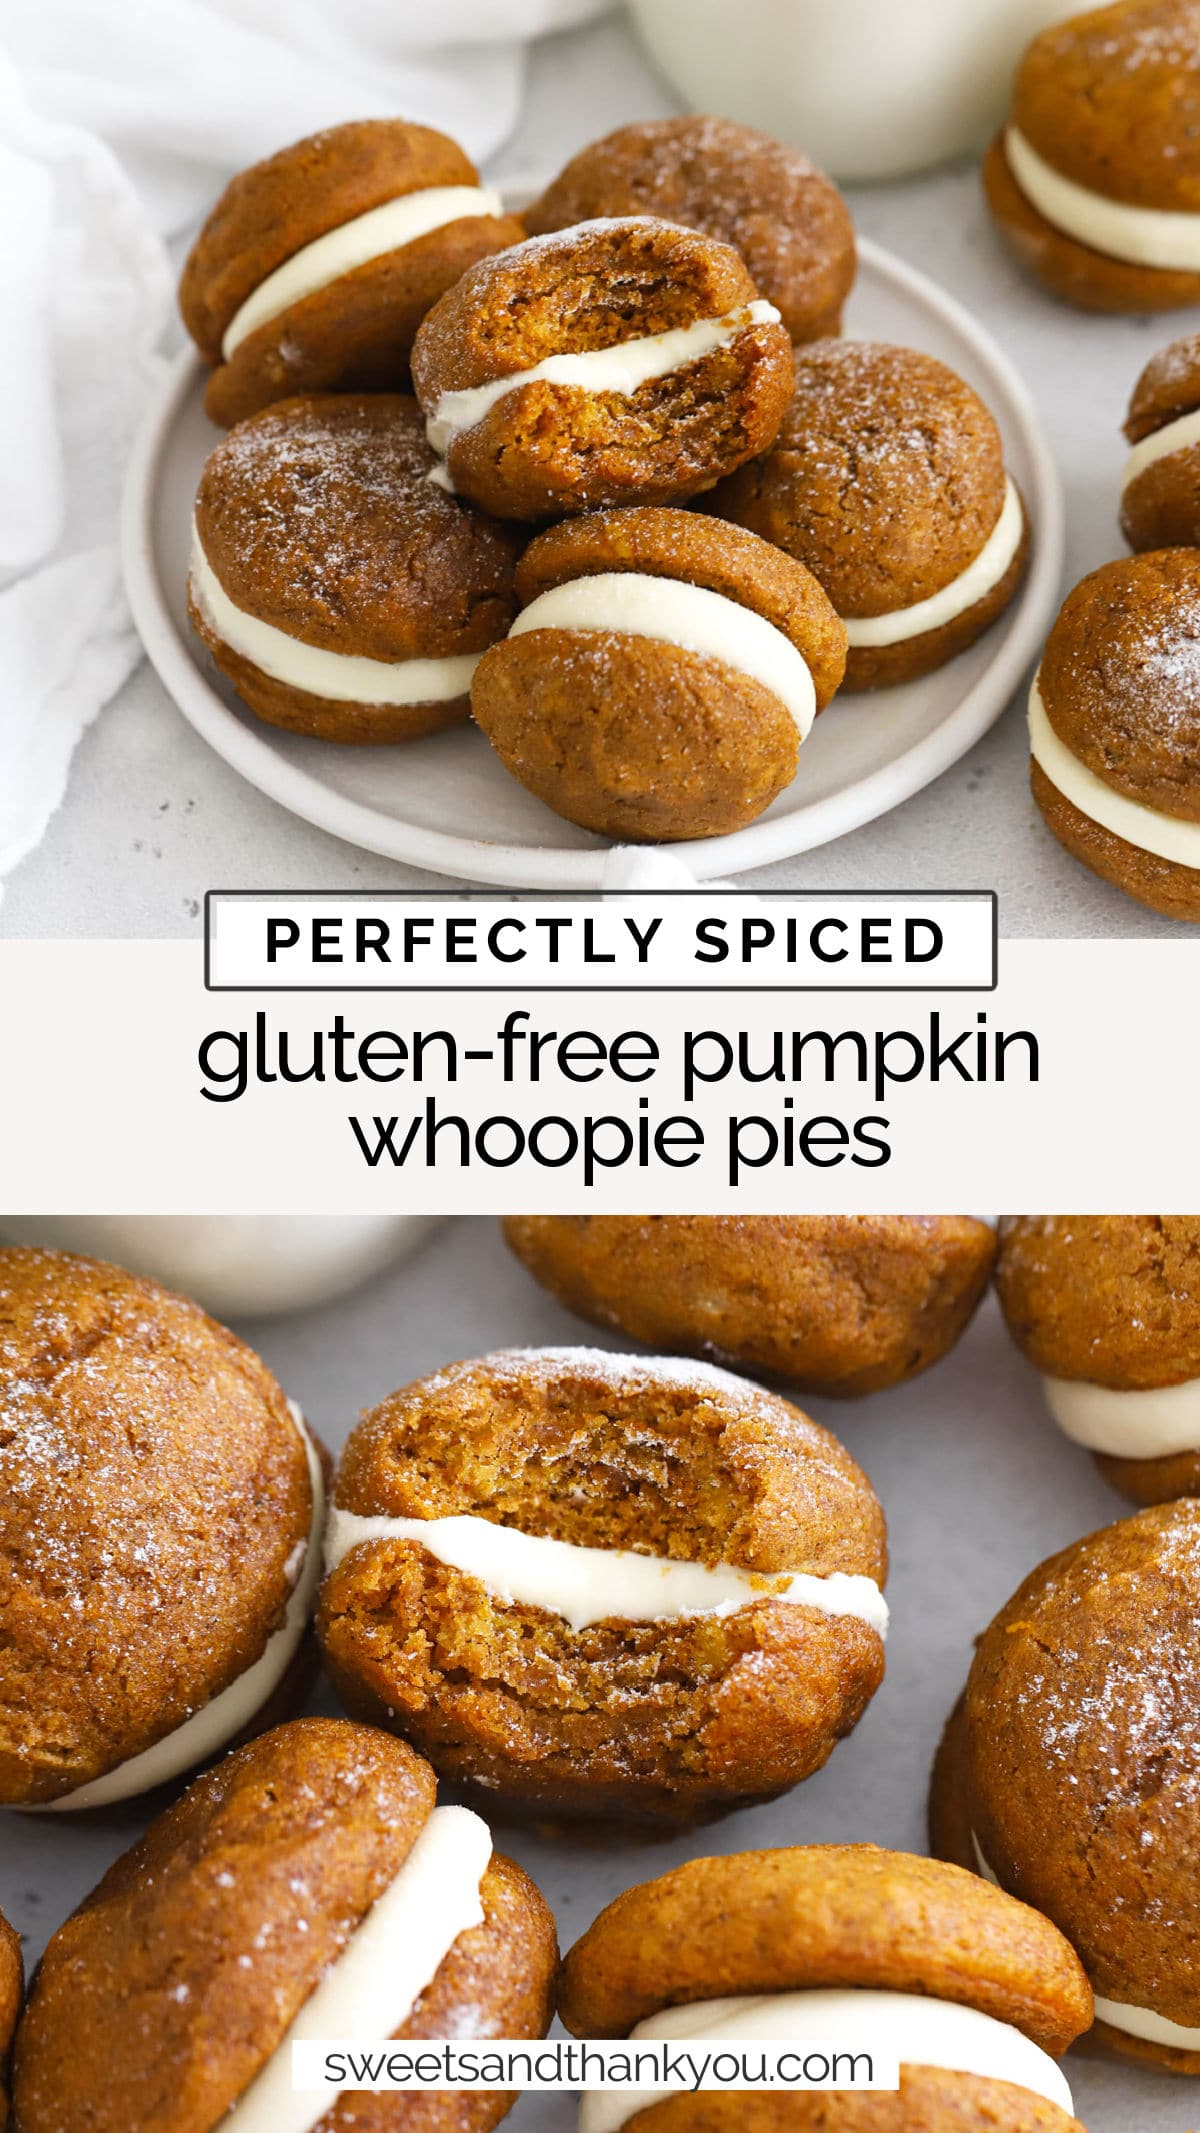
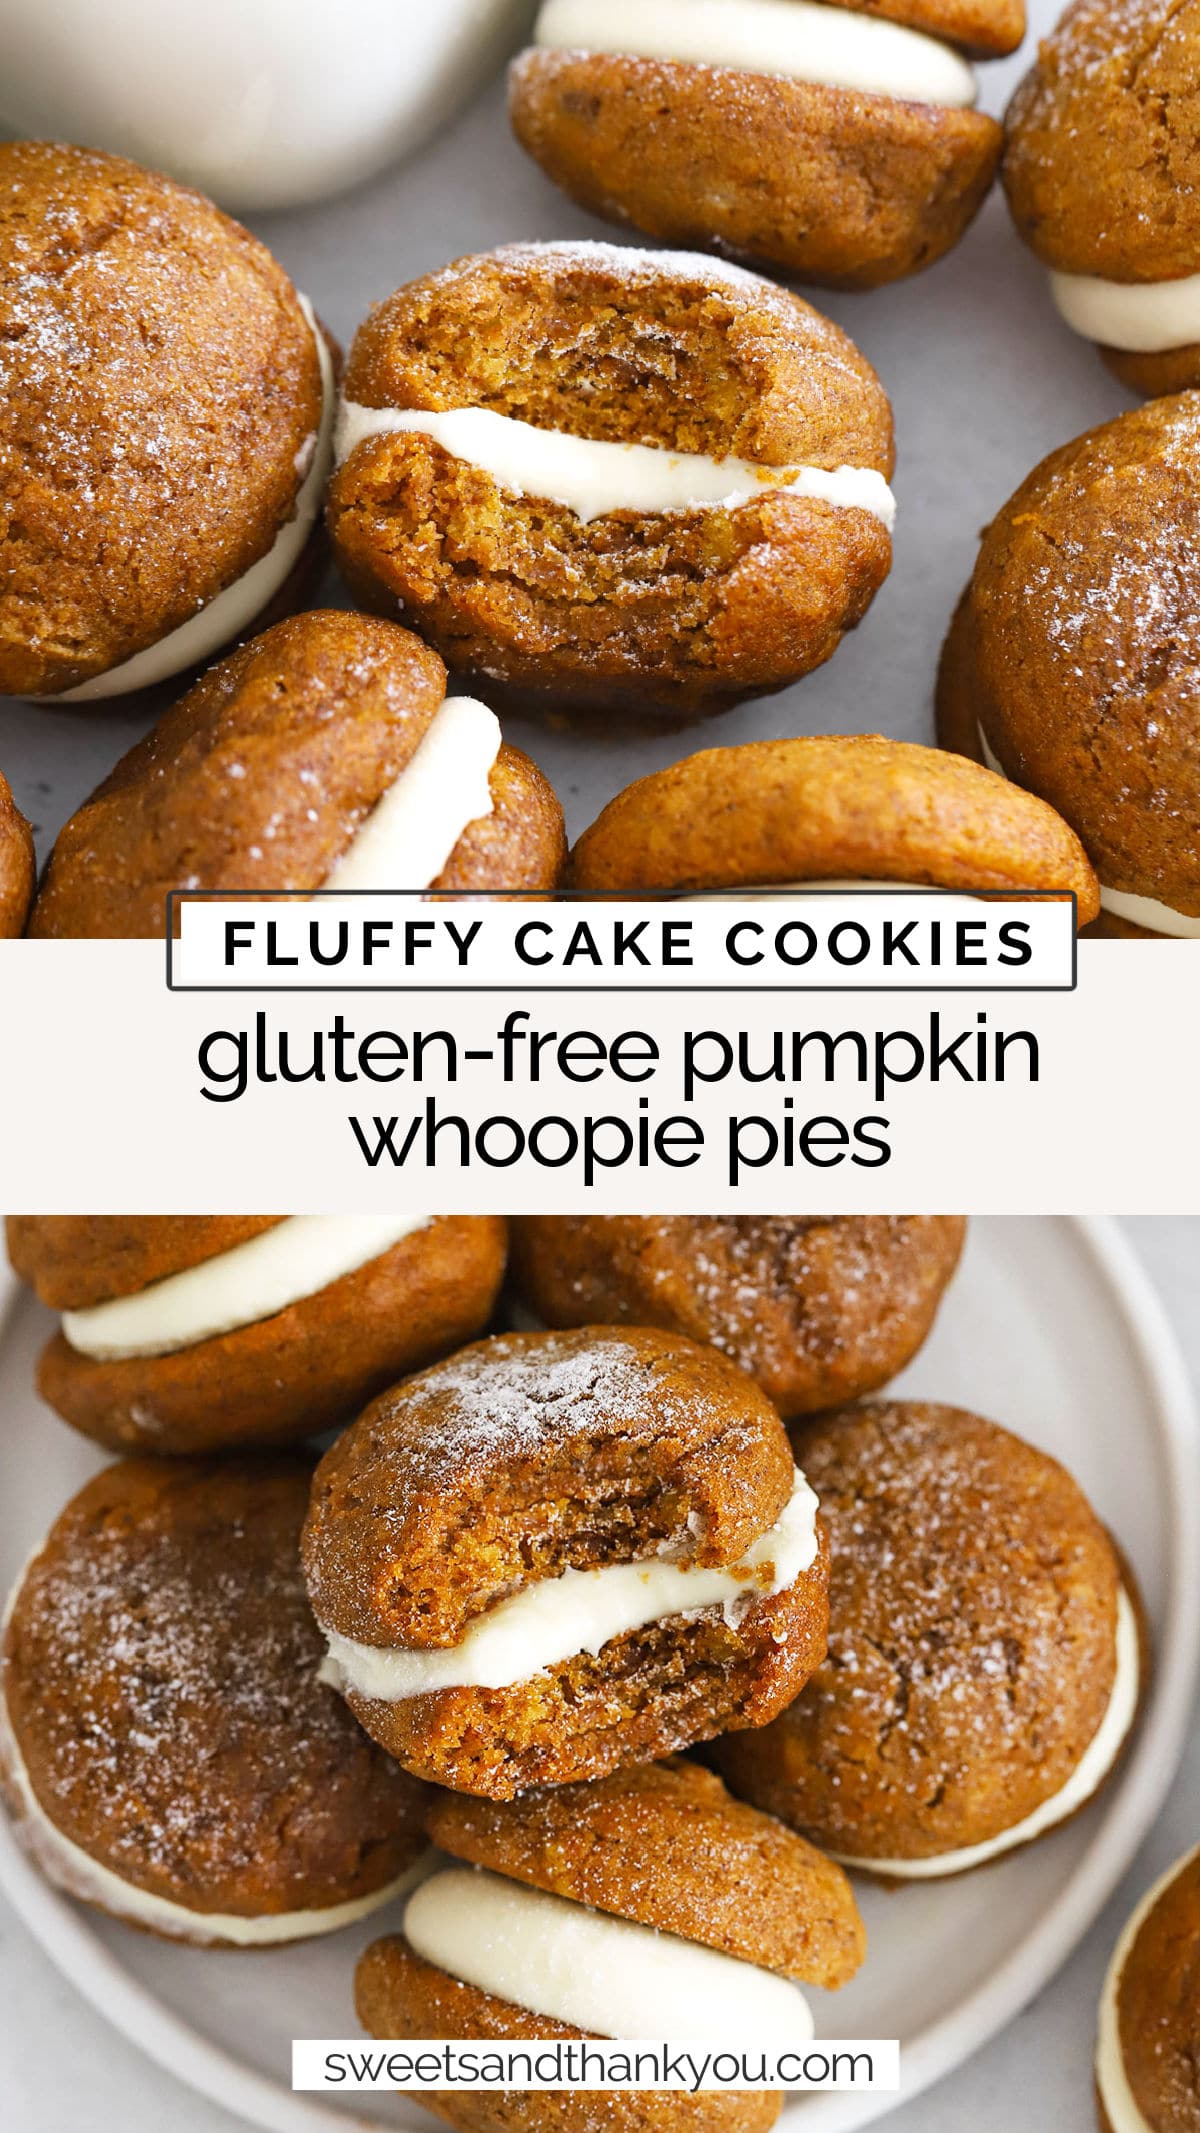
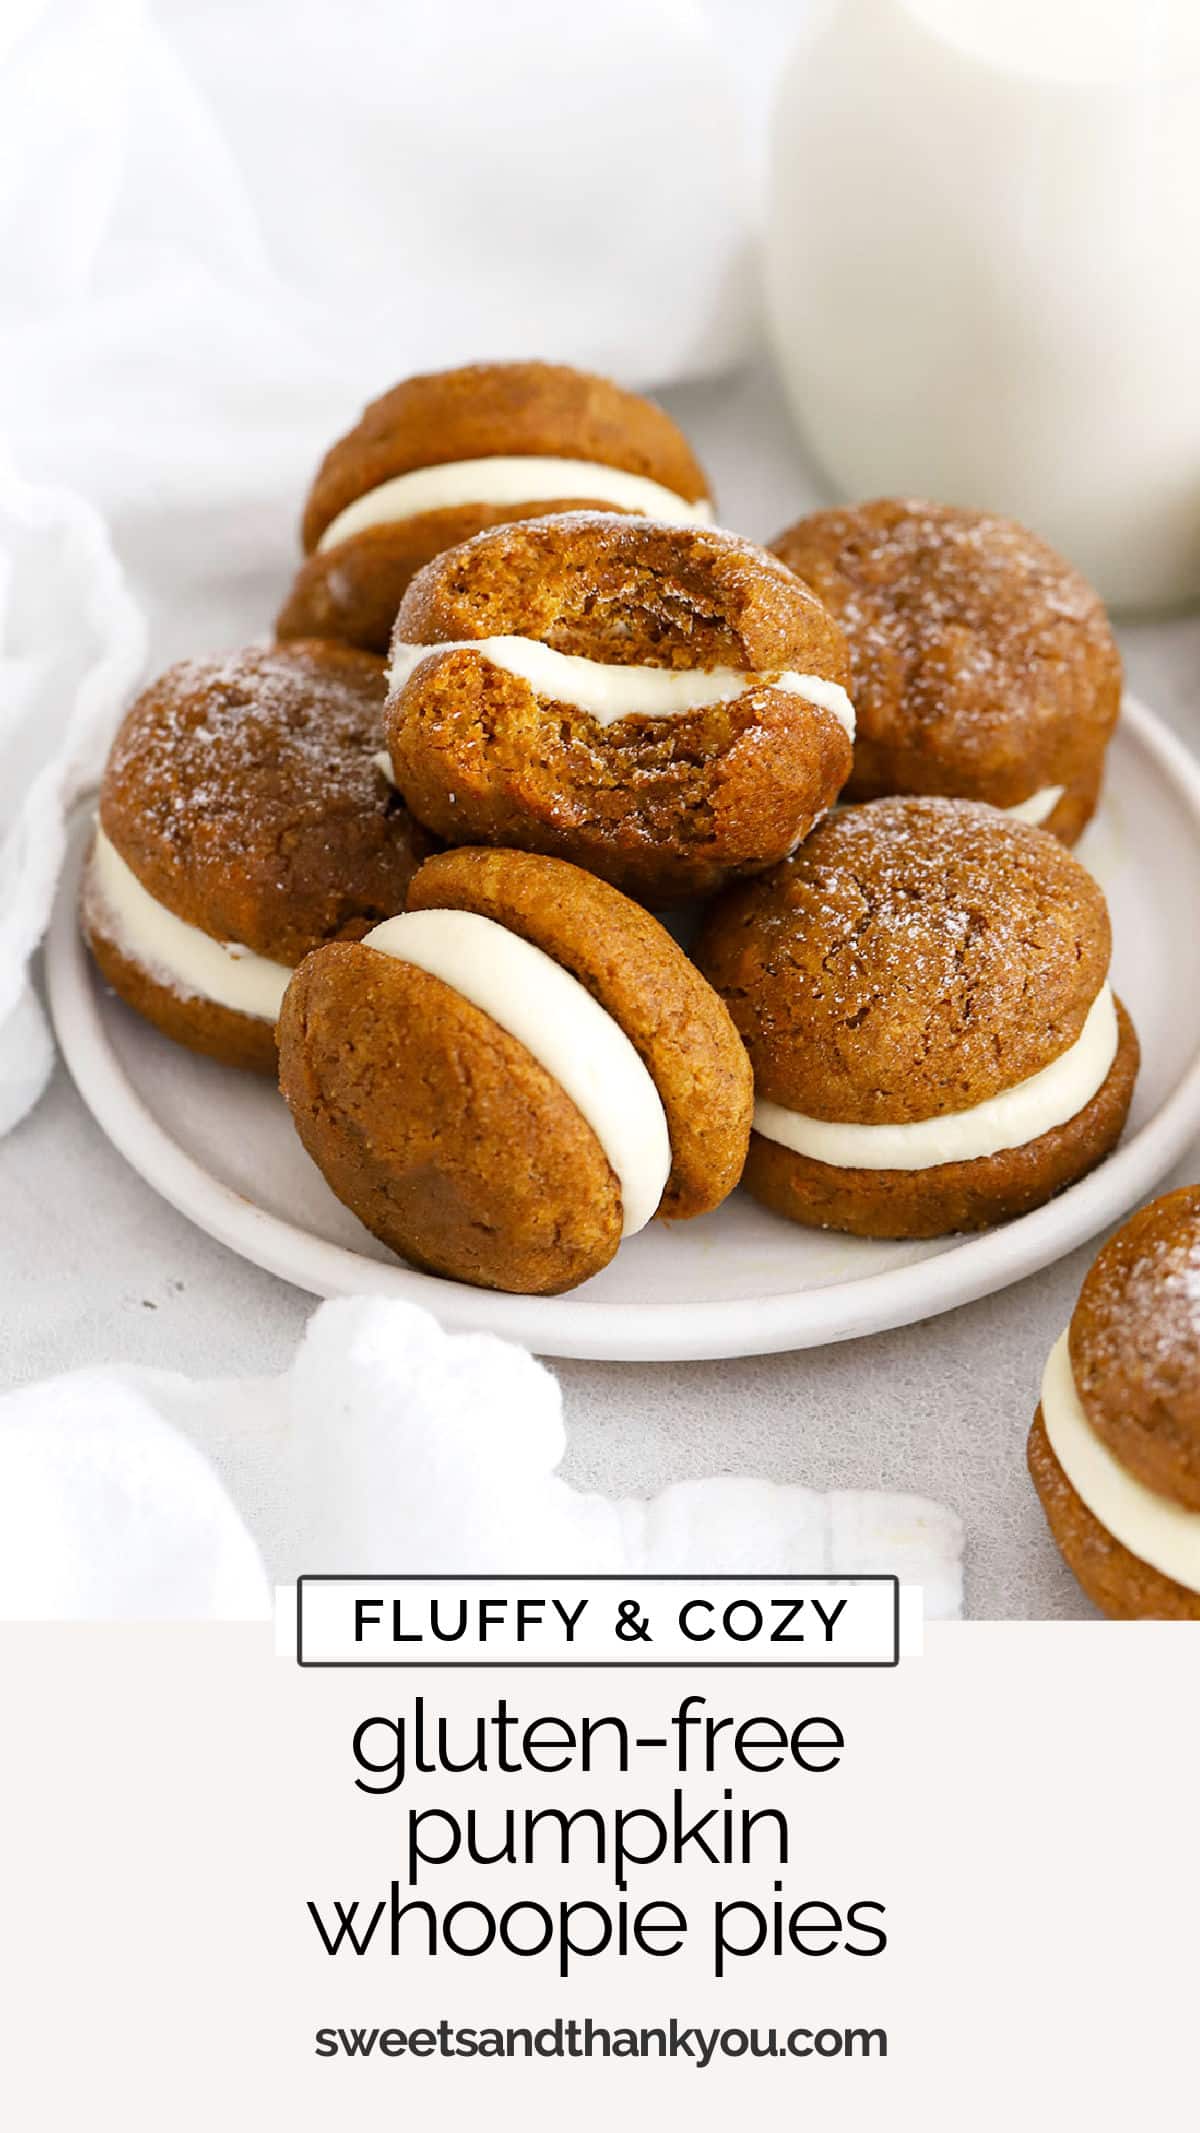
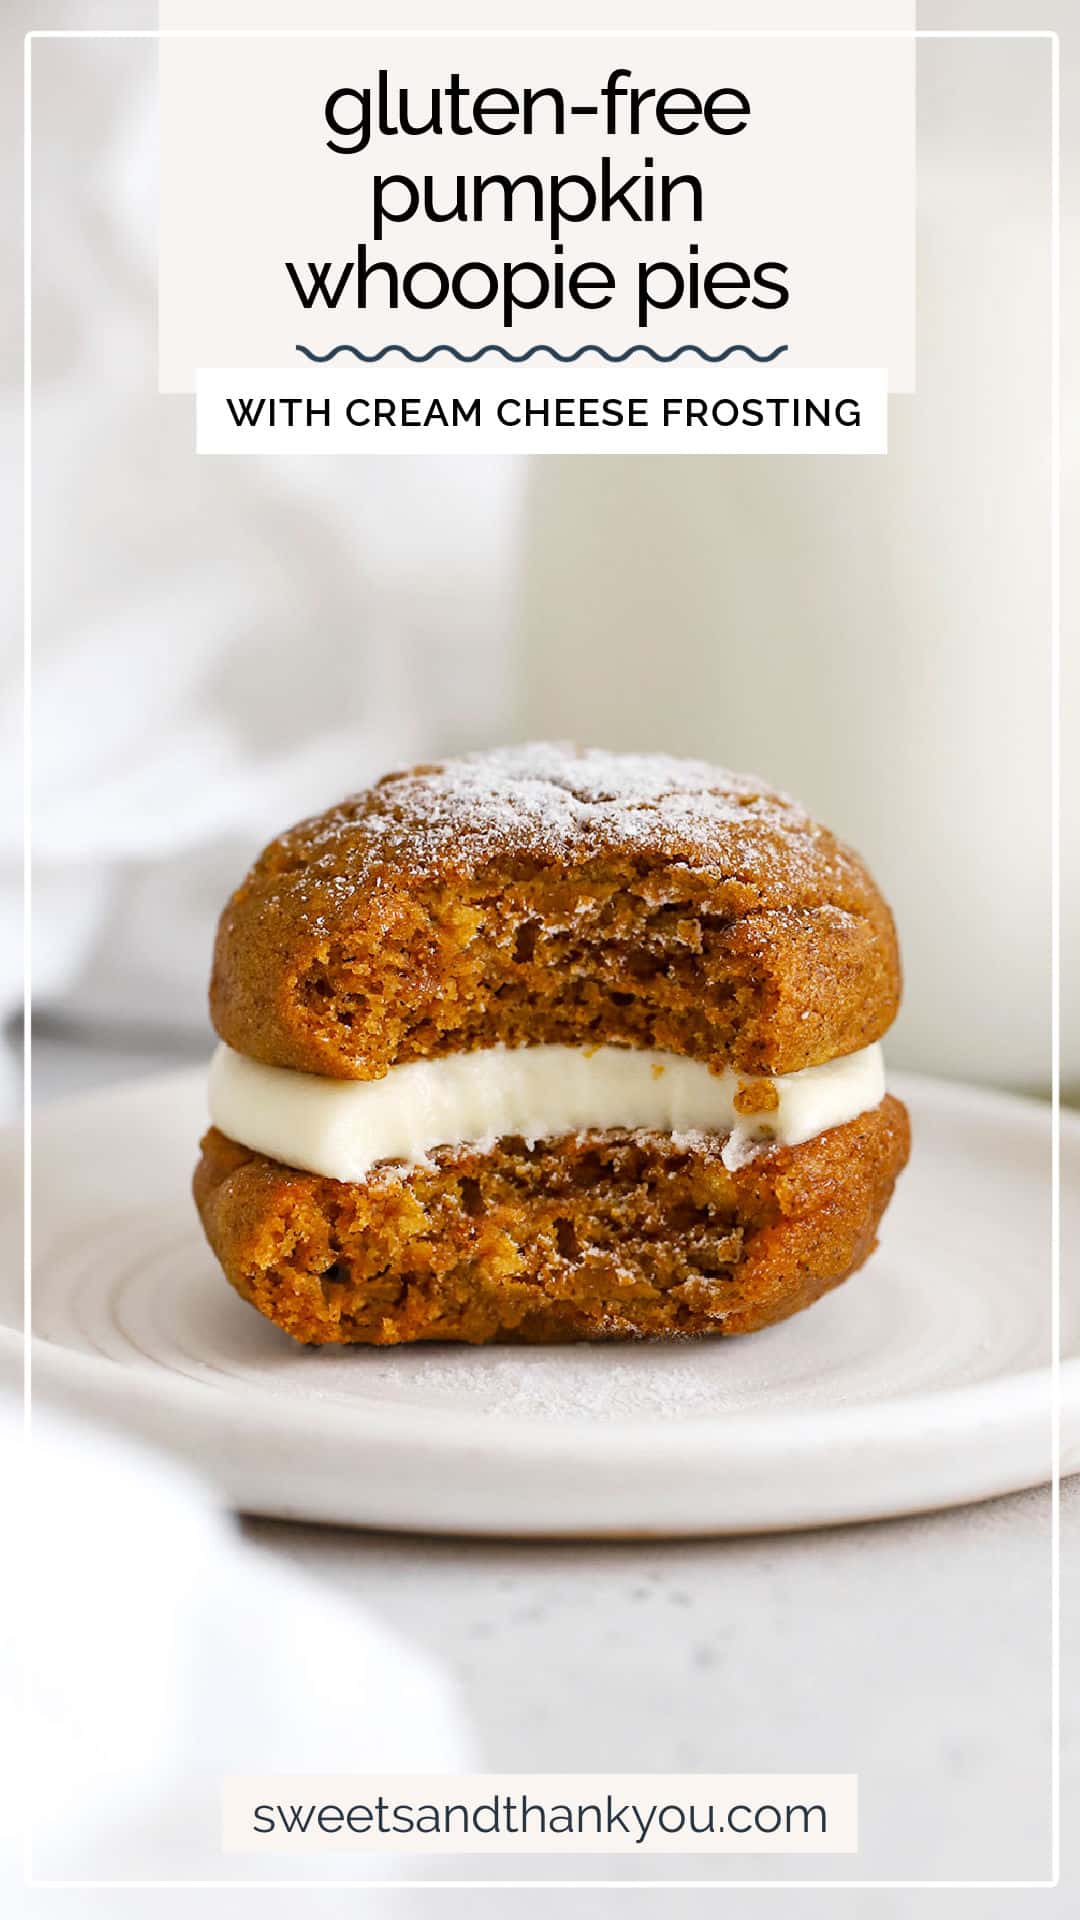
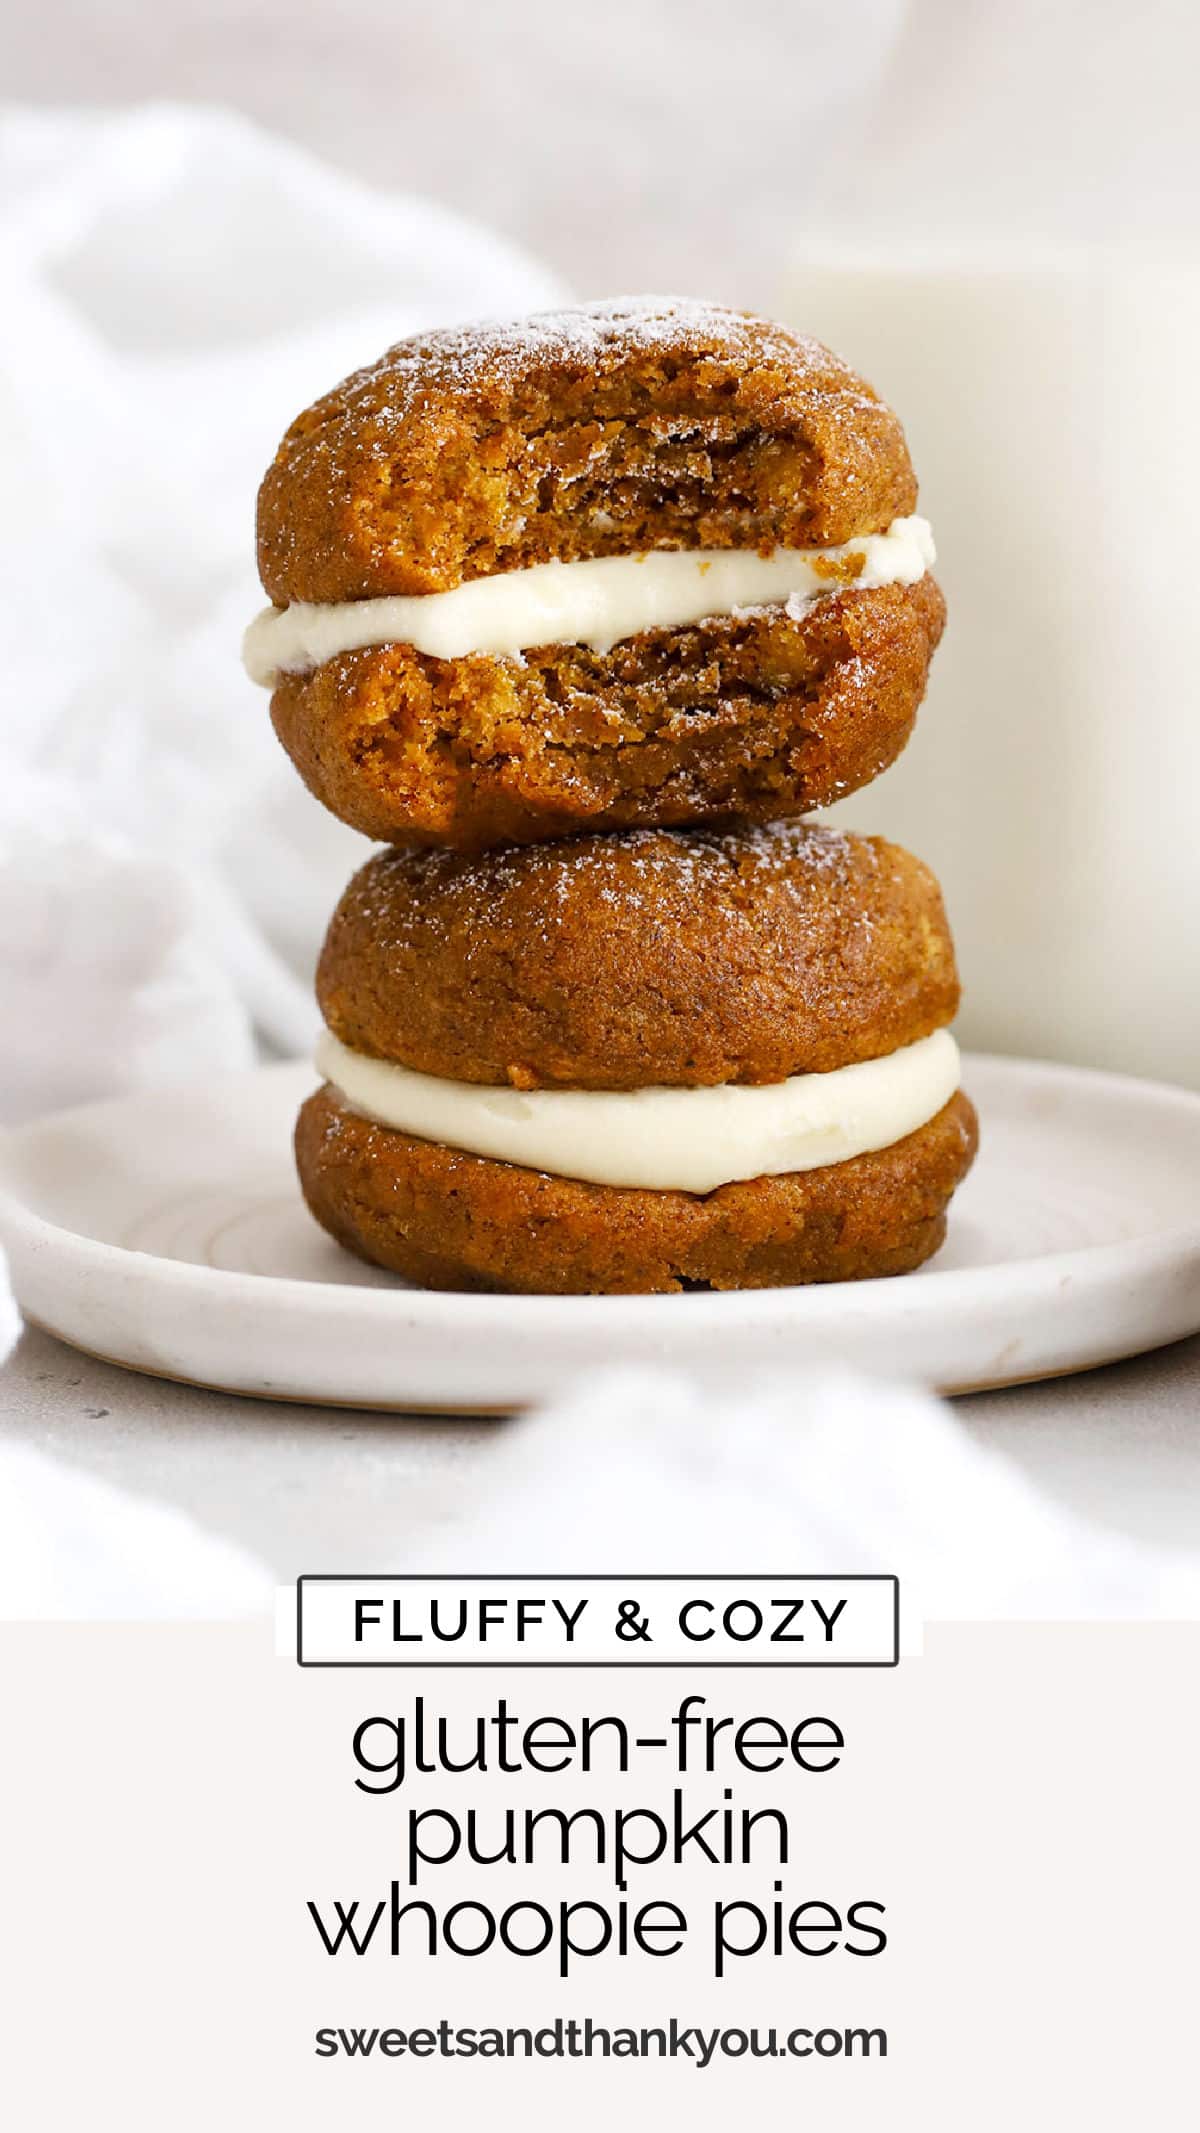
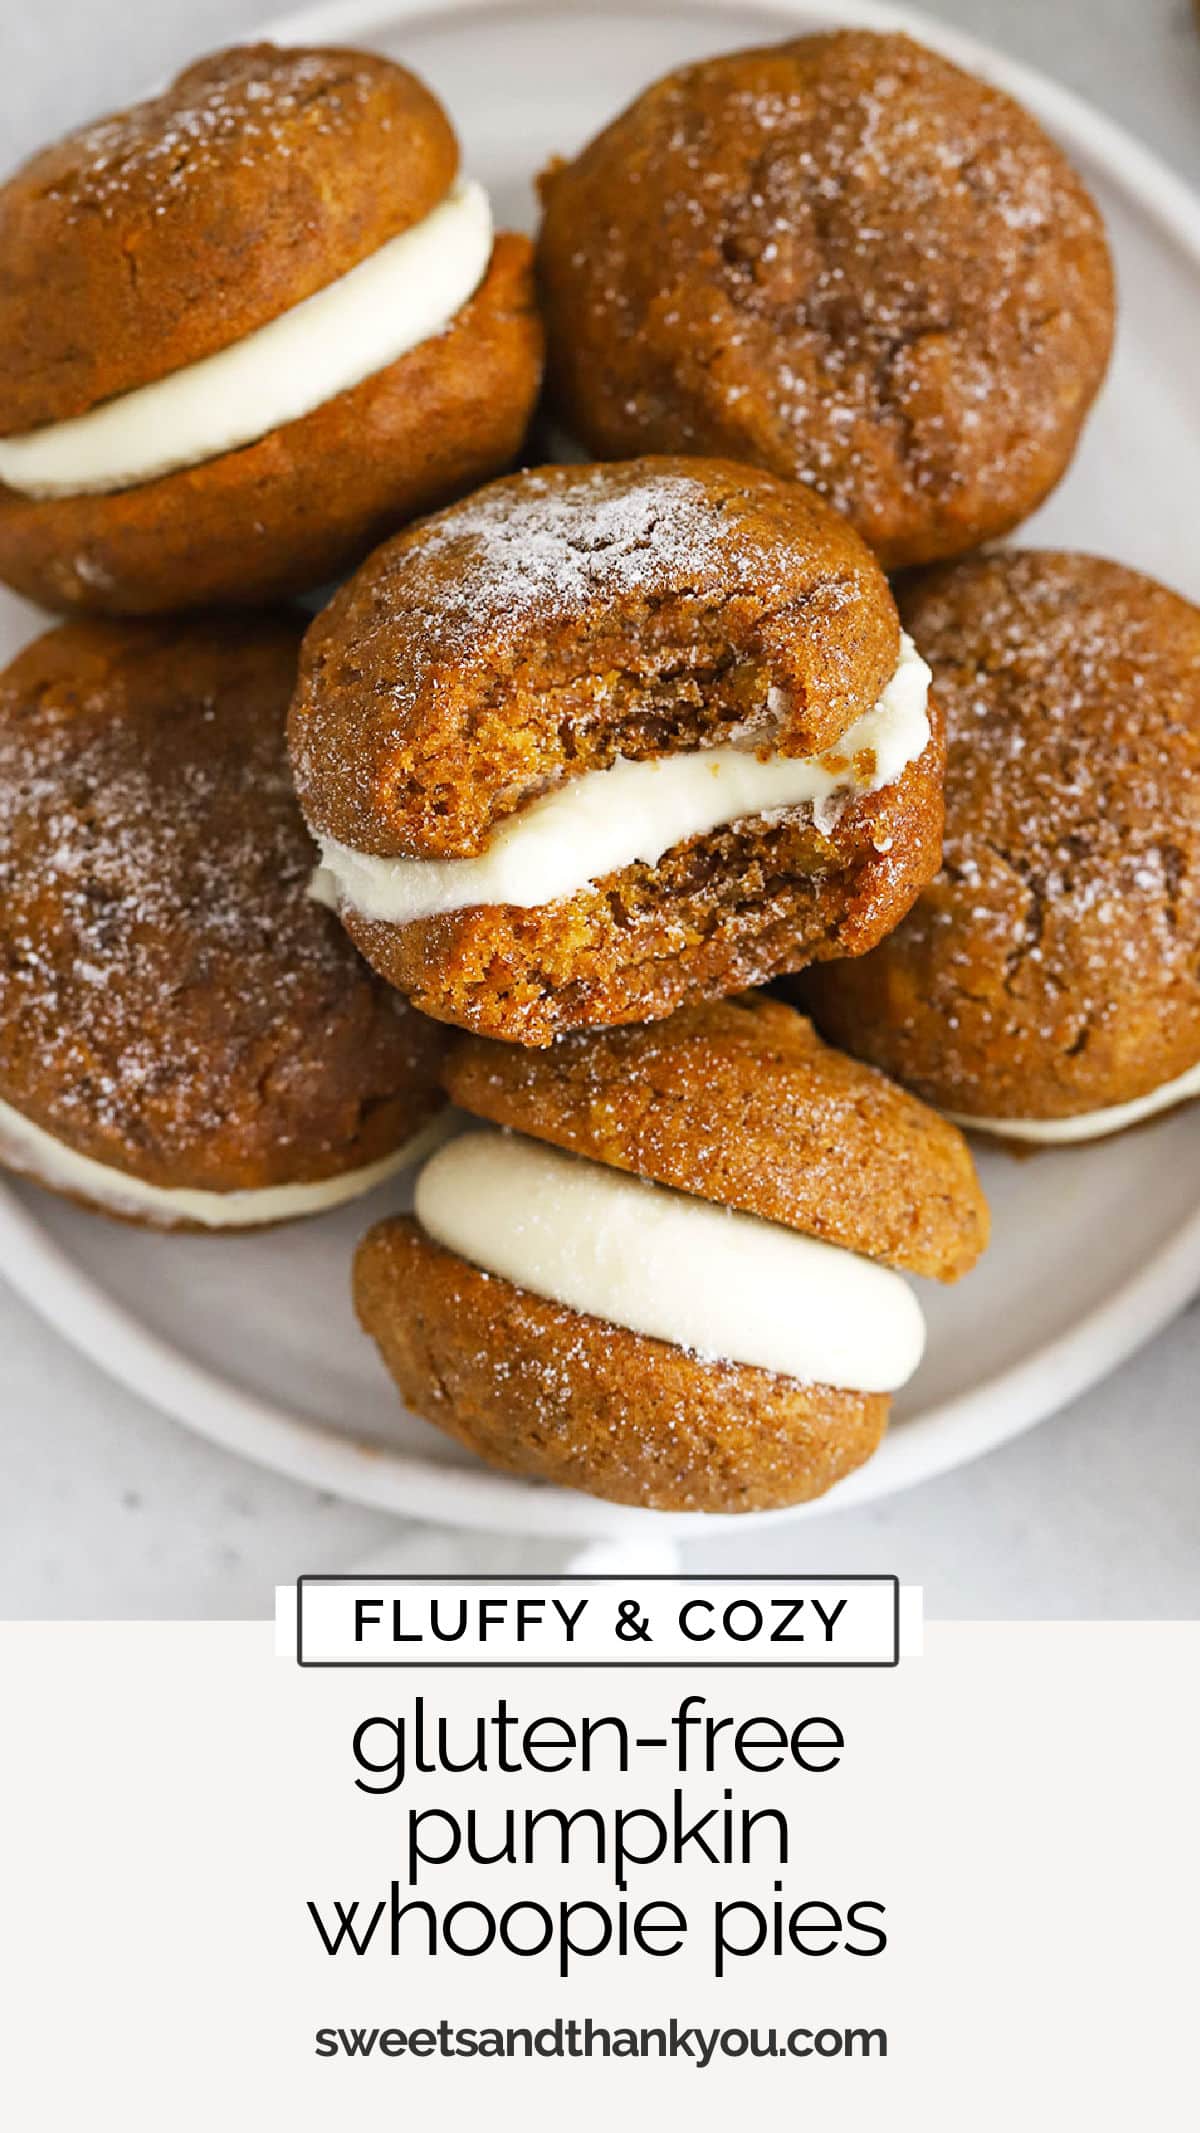
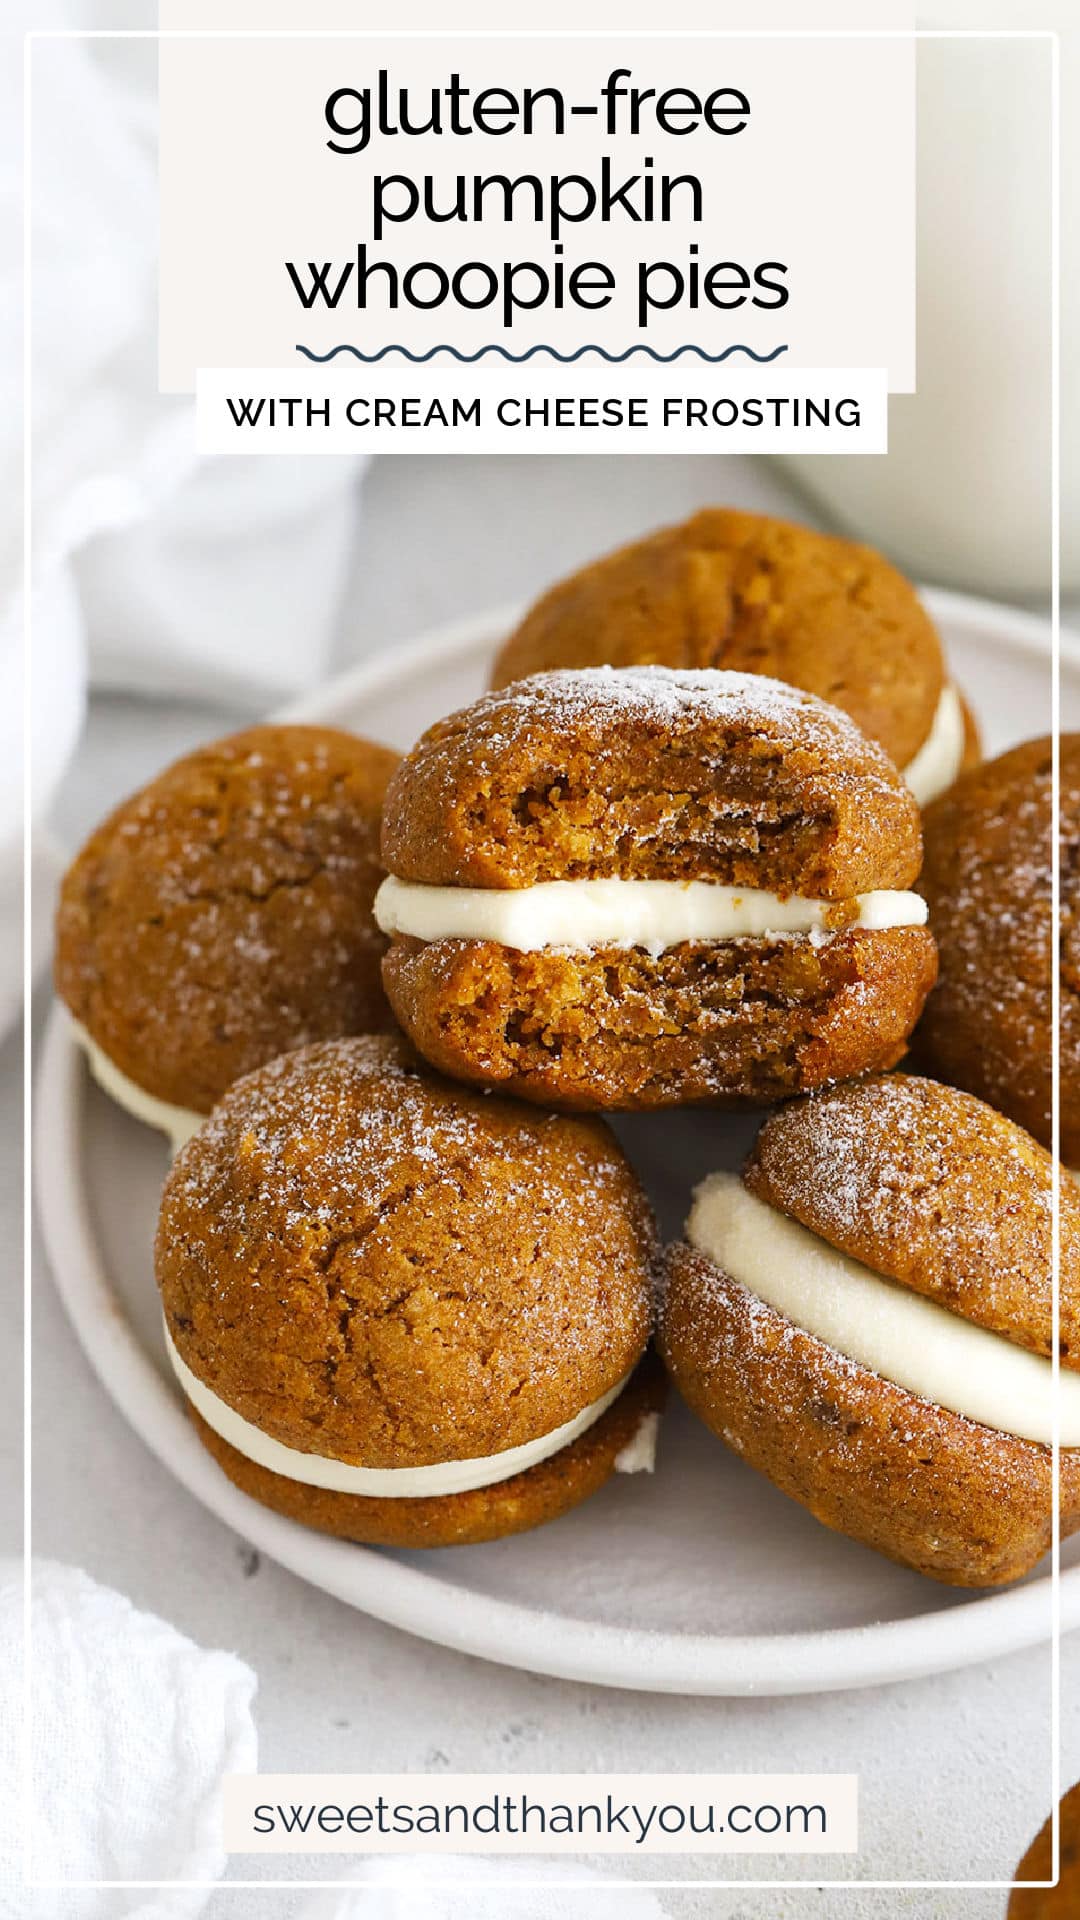
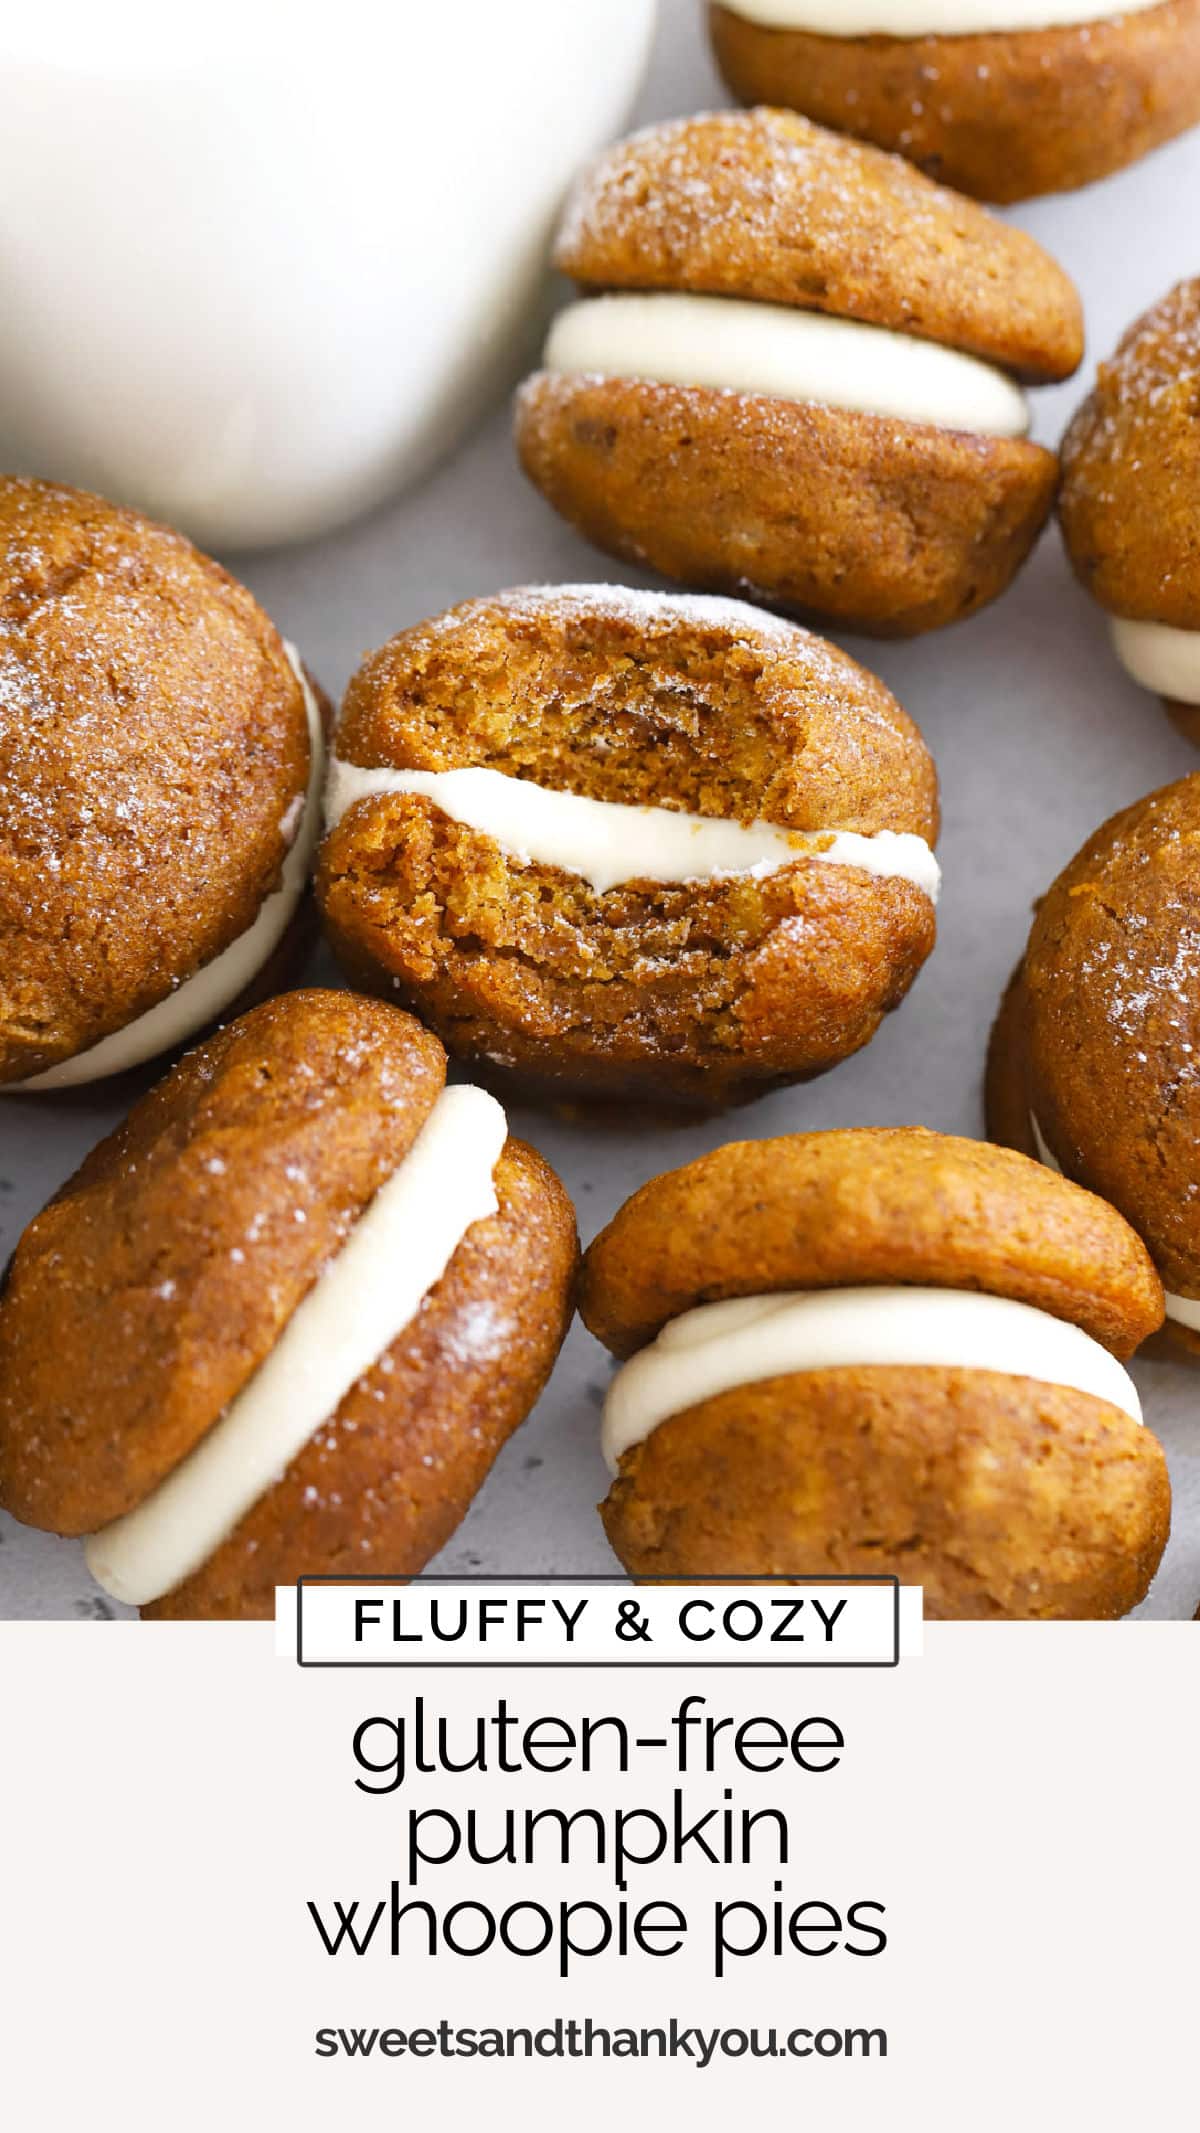
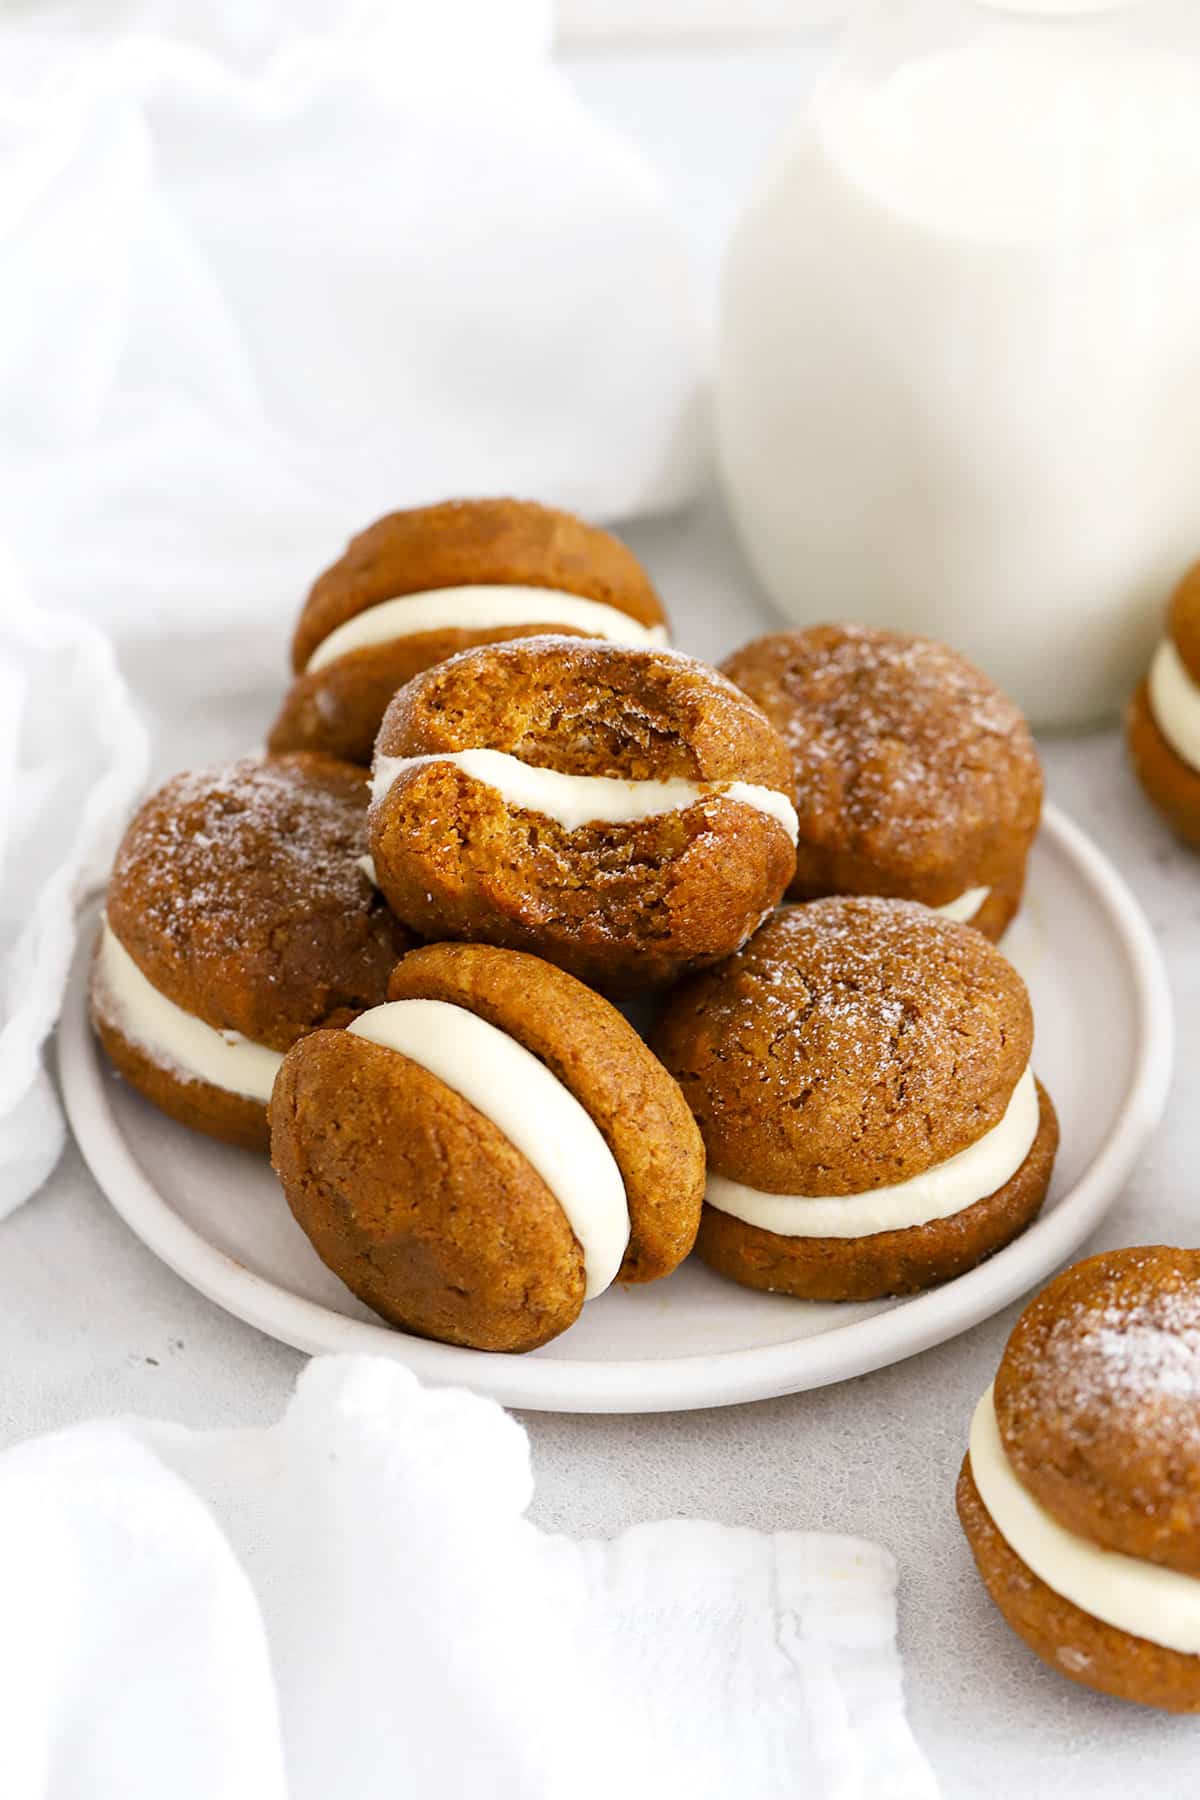
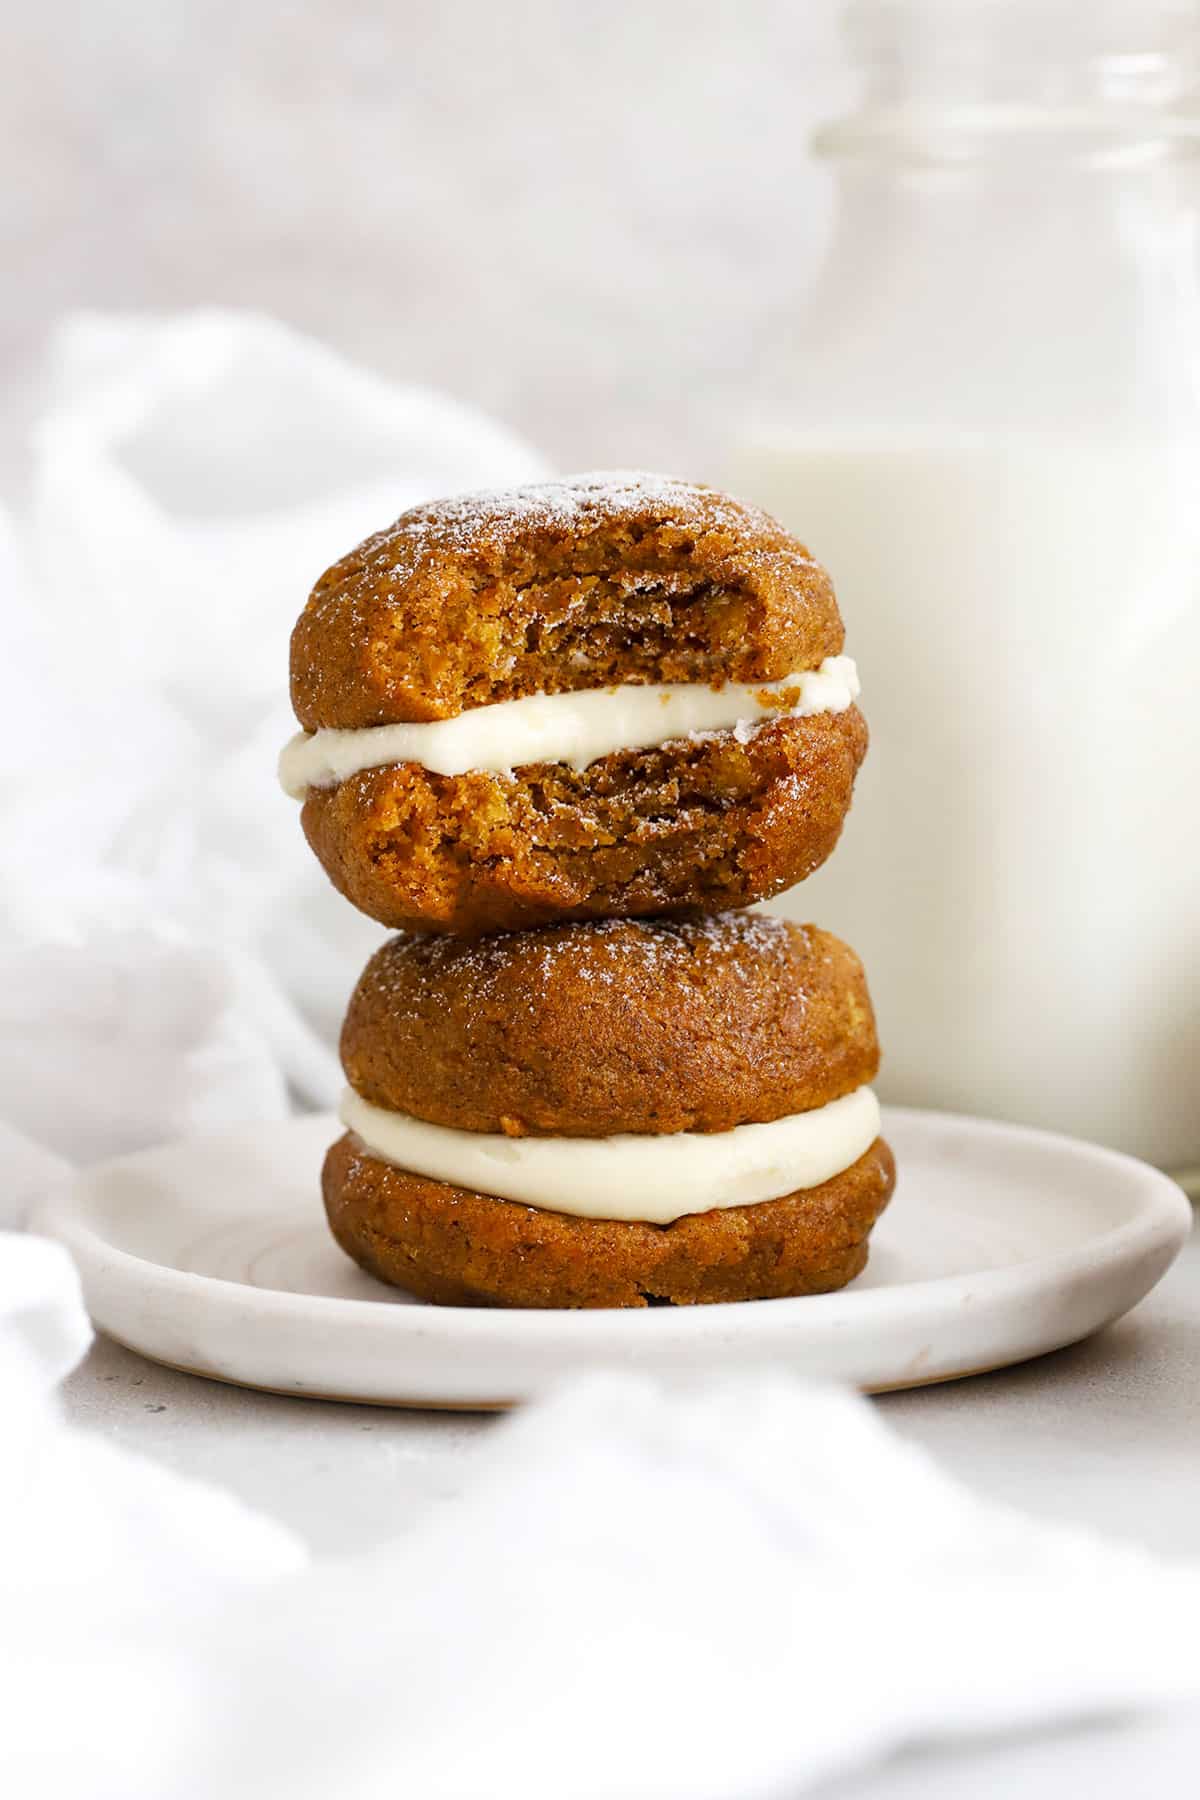
Our Gluten-Free Pumpkin Whoopie Pies recipe is a perfect fall treat, with fluffy cake-like pumpkin cookies & a secret-ingredient cream cheese filling you won’t want to miss.
This time of year, I will have ALL of the pumpkin treats available, thank you s’much. I know it maybe gets over-hyped, but pumpkin recipes like Pumpkin Streusel Bread or Pumpkin Bars or Pumpkin Snickerdoodles are just SO cozy & satisfying.
I mean, take these gluten-free pumpkin whoopie pies, for instance. Soft, spiced gluten-free pumpkin cookies with an easy cream cheese frosting in the middle. Don’t they sound delightful? What’s not to love about warm spices, fluffy texture, and a secret ingredient frosting you won’t stop thinking about?
In case you’ve never heard of them before, whoopie pies can be categorized as cake, cookies, or pie depending on who you ask! This New England dessert is essentially a sandwich cookie made of two cake-like cookies and frosting or filling in the middle. And, all I’m saying is…it’s a perfect way to get your pumpkin fix this season!
Here’s what you need for this easy pumpkin whoopie pie recipe…
Our Gluten-Free pumpkin Whoopie Pie Recipe, At A Glance:
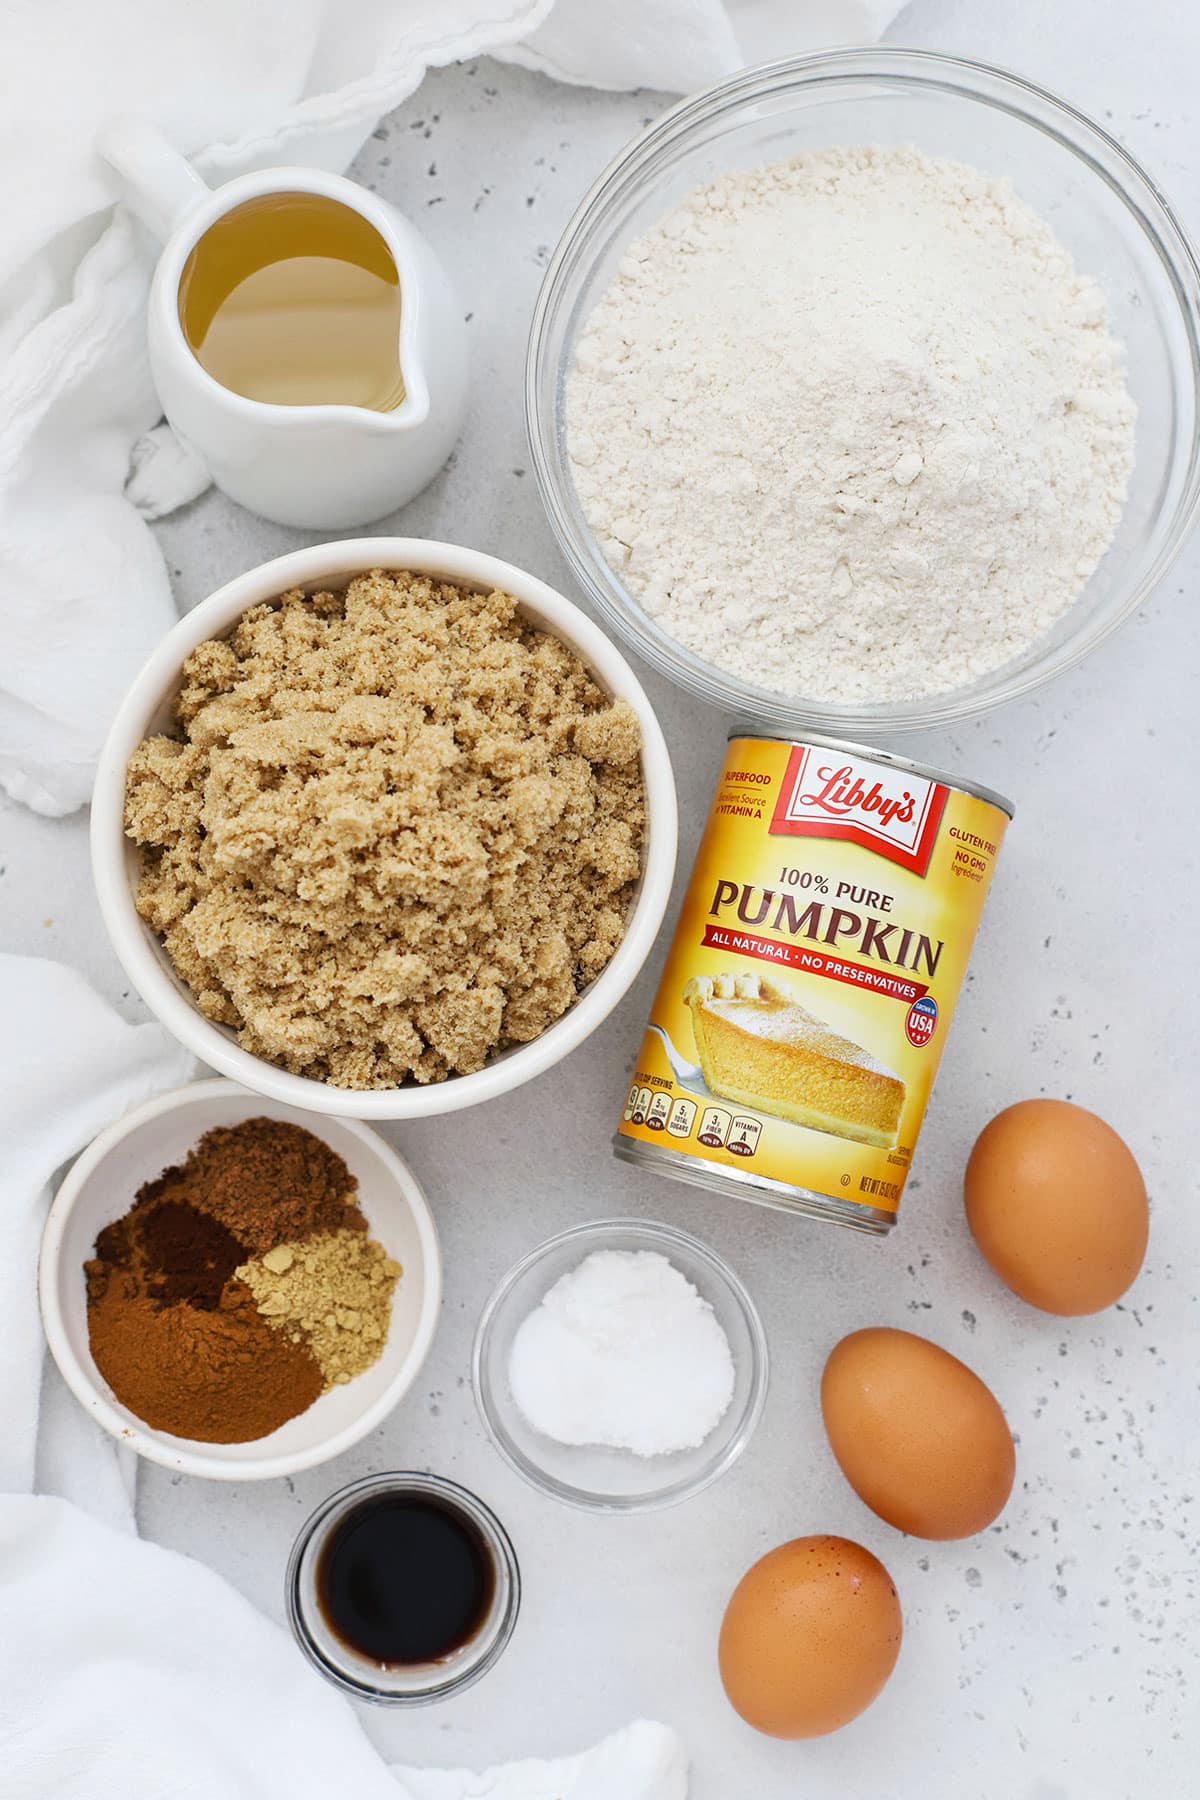
Simple Ingredients To Start
- Brown Sugar. Light brown sugar adds a subtle note of molasses & keeps these pumpkin whoopie pies soft & moist. Feel free to use dark brown sugar if you want a stronger molasses flavor!
- Vegetable Oil. Any neutral oil will work here–canola oil, avocado oil, sunflower oil. I don’t recommend olive oil or coconut oil as they’ll impact the flavor.
- Unsweetened Pumpkin Puree. Canned pumpkin puree adds gorgeous pumpkin flavor. Make sure you’re buying pure pumpkin rather than pumpkin pie filling! We like Libby brand for baking.
- Eggs. These can be straight from the fridge! No need to bring them to room temperature.
- Vanilla. I love a kiss of vanilla extract with the warm spices and pumpkin.
- Gluten-Free Flour. I’m keeping things simple with a measure-for-measure gluten-free flour blend. We highly recommend this one from King Arthur, but if you use another brand (like Bob’s Red Mill), be sure it contains xanthan gum. Do not try to substitute almond flour or coconut flour here.
- Baking Soda & Baking Powder. For just the right spread and puff!
- Warm Spices & Salt. While I’m sure you *could* get away with using pumpkin pie spice, I find the flavor to be MUCH better with our custom blend of cinnamon, nutmeg, ginger, and cloves.
- A Simple Cream Cheese Frosting. Our cream cheese filling is made from butter, full-fat cream cheese, powdered sugar, and a pinch of salt. Then, for the “secret ingredient!” You can add an extra layer of flavor with a little bit of caramel sauce or pure maple syrup. We love both! (I prefer caramel, my kids prefer maple.)
How To Make Pumpkin Whoopie Pies, Step By Step
Start With The Pumpkin Cookies
- Preheat The Oven & Prep. Start by preheating the oven to 350 degrees F. Line two baking sheets with parchment paper or a macaron silicone baking mat (aka macaron silpat). Set out a medium cookie scoop or fit a piping bag with a large open tip for portioning out the pumpkin batter later.
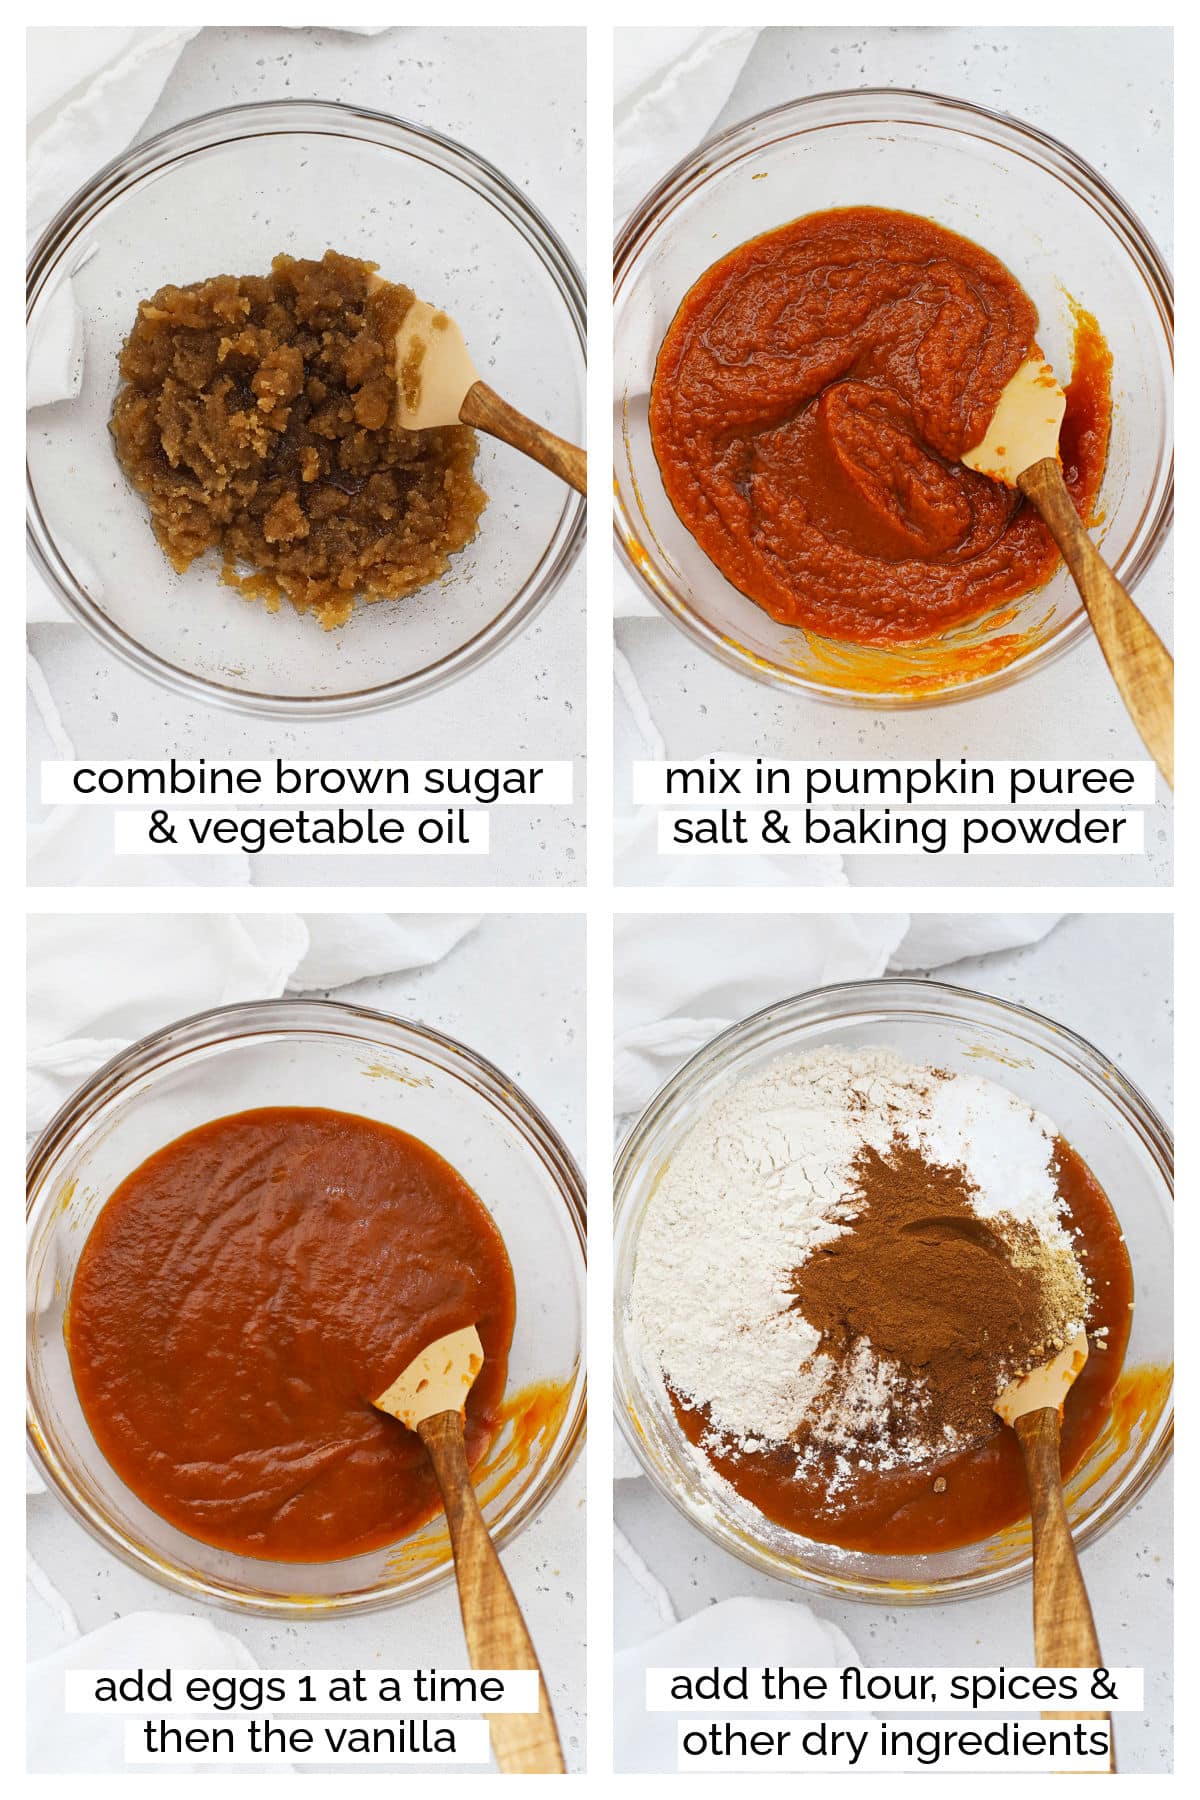
- Combine Sugar & Oil. In a large bowl, combine brown sugar and oil. Whisk until combined. (It will look like wet sand.)
- Finish The Wet Ingredients. Mix in pumpkin puree, then add eggs one at a time, mixing to fully incorporate each egg before adding the next one. Mix in the vanilla.
- Add Dry Ingredients. Next, add gluten-free flour blend, baking soda, baking powder, and salt, along with cinnamon, nutmeg, ginger, and cloves. Stir with a spatula until just combined (no floury patches left). Try not to over-mix the batter.
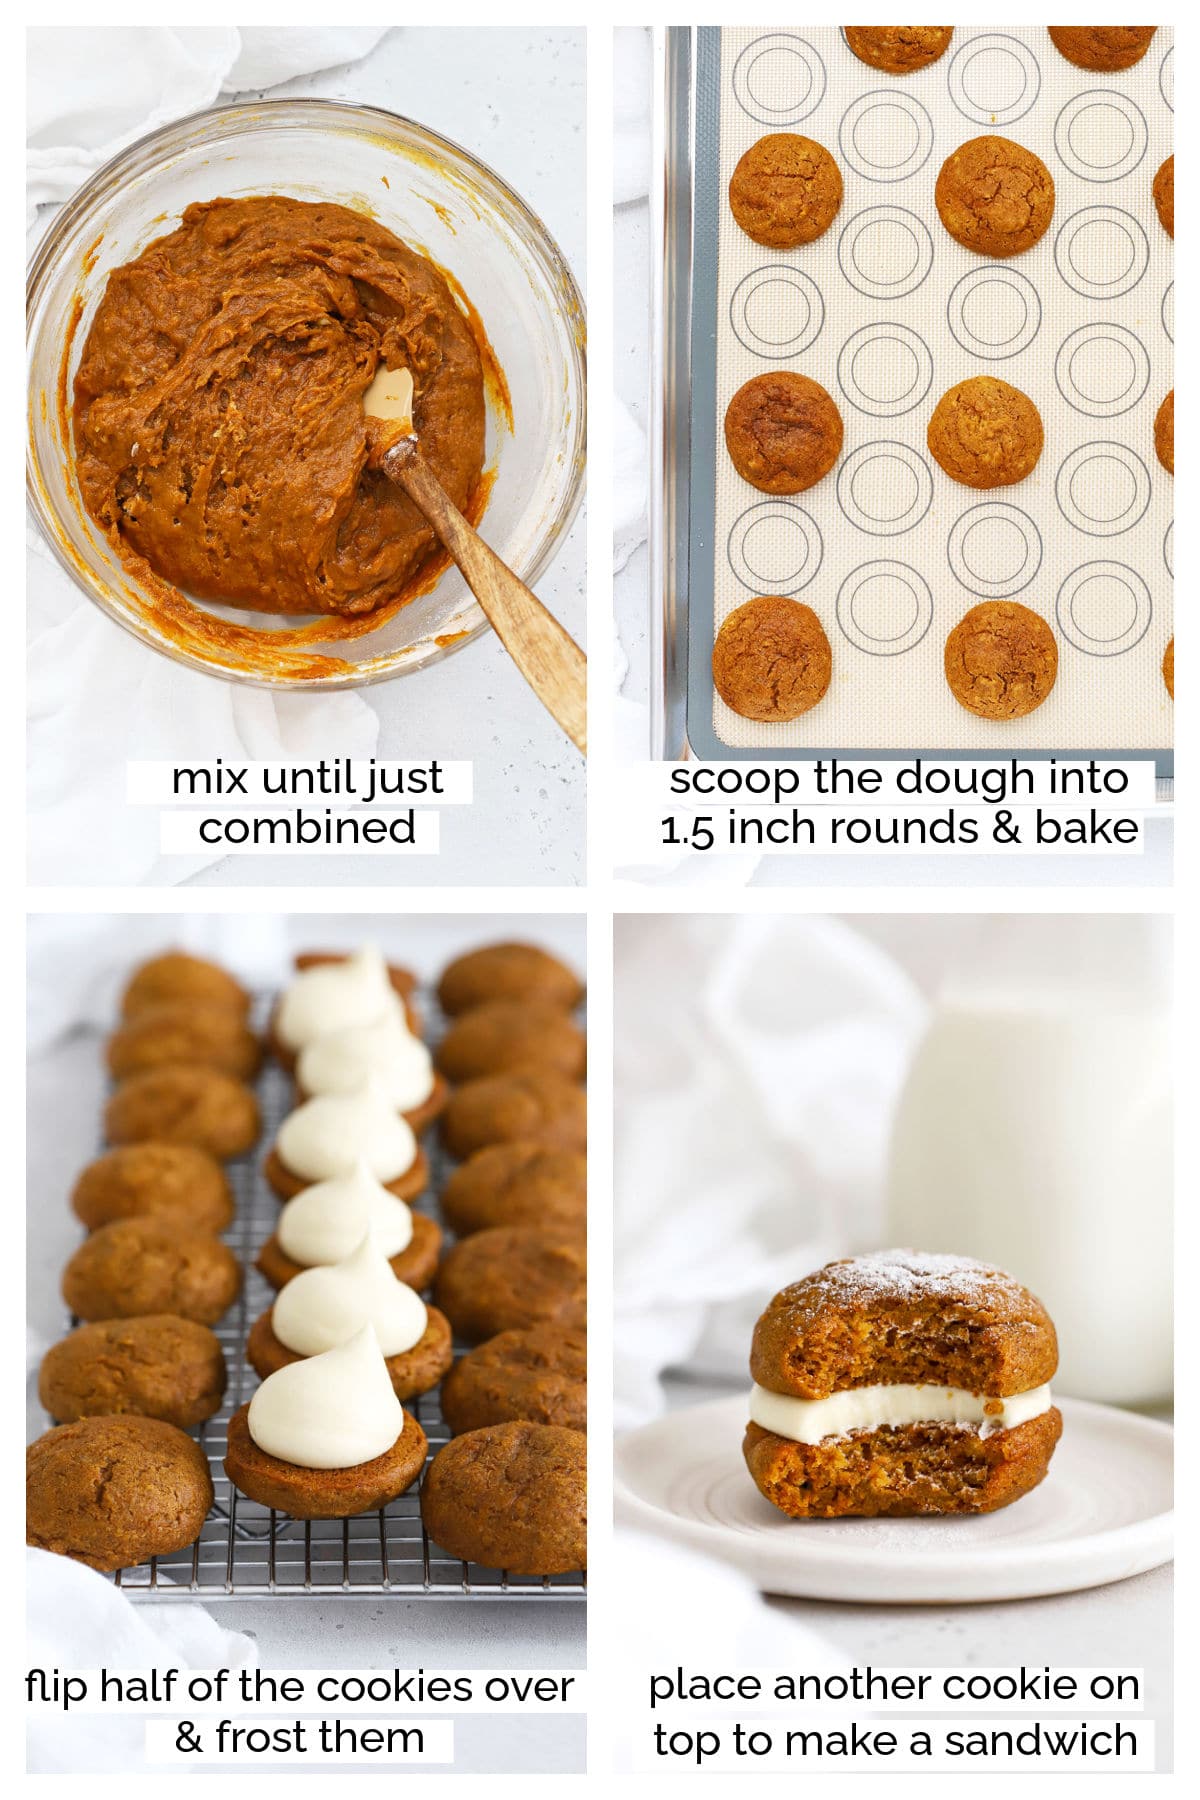
- Portion Out The Cookies. Using either a medium 2-Tablespoon scoop or a piping bag fitted with a large open round tip, measure out the dough into 1.5 inch rounds onto the prepared baking sheet. If needed, use a just barely moist fingertip to smooth out any rough spots. I usually pipe out 9-12 cookies per batch.
- Bake & Shape. Bake the whoopie pie cookies for 10-12 minutes, or until set all around and a toothpick inserted in the center comes out clean with just a few moist crumbs. (The tops of the cookies should spring back when gently pressed.) If desired, use a round cookie cutter to gently coax the cookies into a more perfect circular shape when they’re hot from the oven.
- Cool & Repeat. Cool 1-2 minutes on the baking sheet, then transfer to a wire rack to cool completely. Repeat this baking process, alternating cookie sheets with each batch so you don’t put cool batter on a hot cookie sheet. Allow all cookies to cool completely before frosting.
Then, Mix Up The Frosting
- Cream Butter & Cream Cheese. Make sure the cream cheese and butter are softened to room temperature before combining, or they won’t blend well. In a large bowl or the bowl of a stand mixer fitted with a paddle attachment, combine softened cream cheese and butter. Mix together on medium speed with paddle attachment or a handheld electric mixer for 1-2 minutes or until creamy and combined.
- Add powdered sugar 1/2 cup at a time, mixing on medium-low speed until it’s fully added.
- Finish Adding Ingredients. Scrape down the sides of the mixer, then add vanilla extract, a pinch of salt, 1 Tablespoon of heavy cream and either 1-2 Tablespoons of caramel sauce or pure maple syrup.
- Whip The Frosting. Mix on medium-high speed for 1-3 minutes or until smooth and fluffy. If the frosting seems too thin, you can add powdered sugar 1 Tablespoon at a time until it’s more stiff. If it’s too thick, you can add more heavy cream 1 teaspoon at a time to thin it out.
- Finish The Cookies. Flip over half of the cookies so they are bottom-side up/flat side up. These will be the base of your cookie sandwich. Pipe or spread frosting on the bottom cookies (flat side up), then top with a second cookie (flat side down) on top of the frosting to make a cookie sandwich.
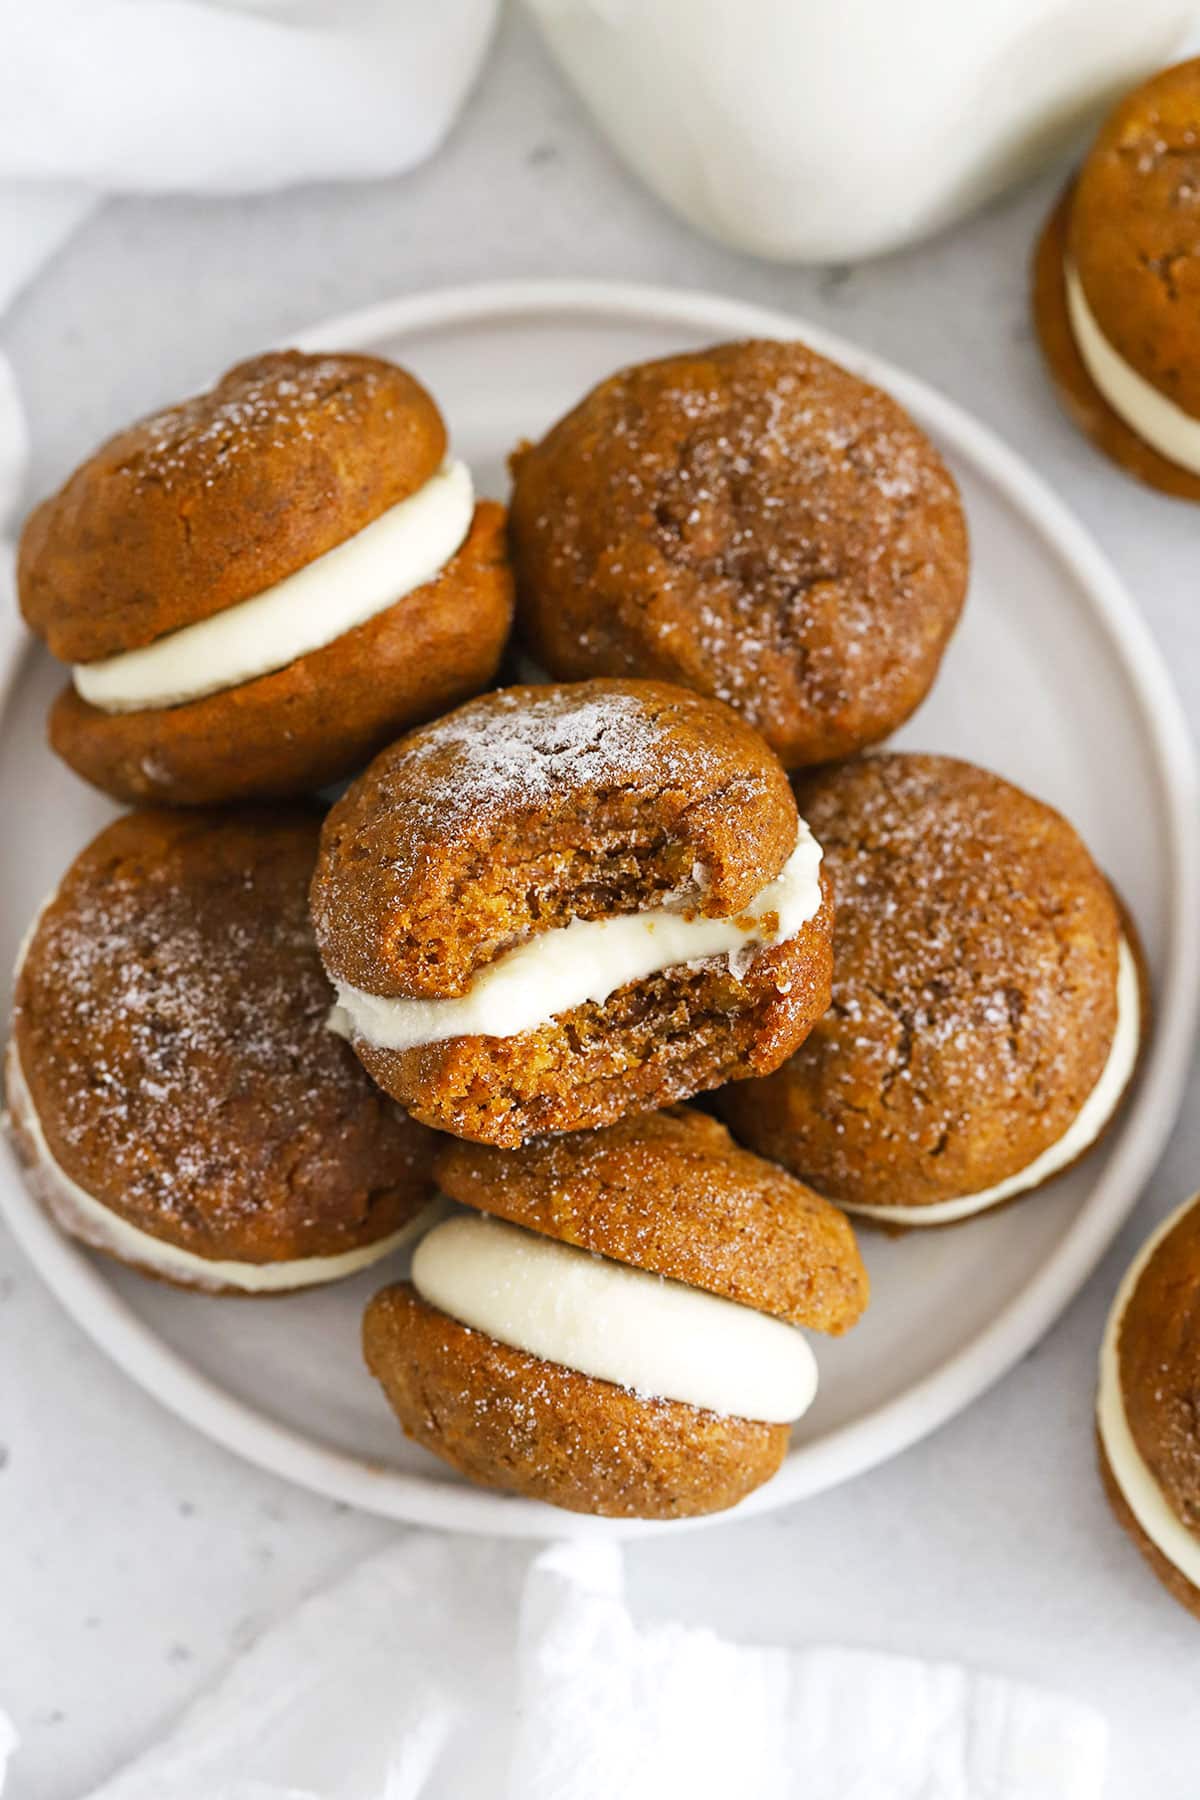
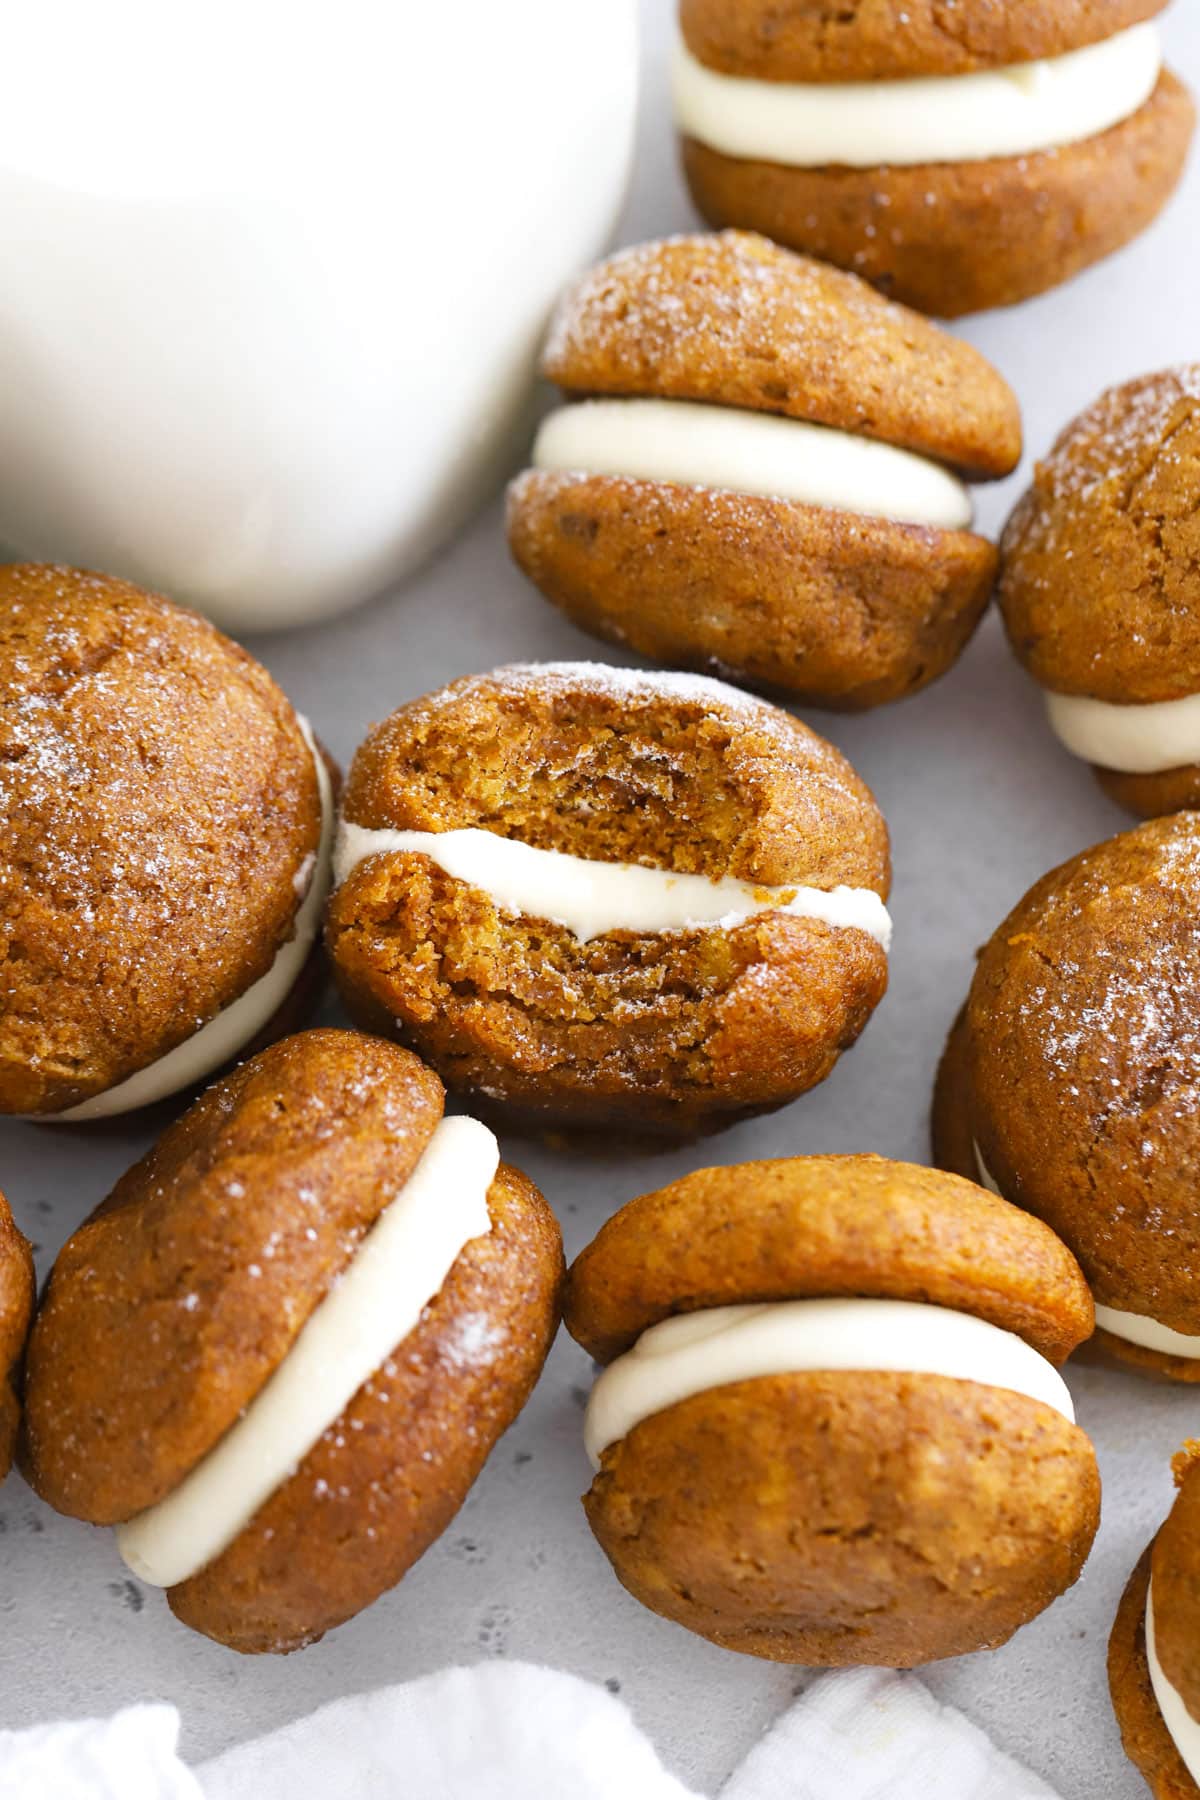
- Store & Serve. Chill gluten-free whoopie pies in the fridge until ready to serve. If desired, garnish with a sprinkle of powdered sugar right before serving. Store leftover pumpkin whoopie pies in an airtight container in the fridge up to 3 days, or freeze up to 2 months.
Cookie Tips To Help You:
- How To Measure Flour Correctly (Scoop & Level Method)
- How To Check If Your Baking Soda & Baking Powder Are Fresh
- 8 Cookie Tools We Use All The Time
- How to Measure Butter Properly (Sticks, grams & more)
- Is Cinnamon Gluten-Free?
FAQ + Tips And Tricks For The Best Gluten-Free Pumpkin Whoopie Pies
Do Pumpkin Whoopie Pies Need To Be Refrigerated? Yes! Any time you’re working with cream cheese frosting, it needs to be stored in the refrigerator to remain food safe. You can keep it at room temperature no longer than 2 hours (or less if it’s warm!)
Why Are My Whoopie Pies Sticky? Whoopie pies, especially pumpkin whoopie pies, are quite moist, so they’ll often get a bit tacky to the touch over time. Some things that can help are ensuring the cookies are fully baked (underbaking makes them extra sticky), and storing in a single layer (rather than stacking).
Tips For Making Whoopie Pies In Advance. If you want to get ahead on whoopie pie prep, the BEST way to get ahead is to bake, cool, and freeze the cookies unfrosted. When you plan to serve them, thaw the cookies in the fridge & top with frosting right before serving. If you want to freeze them fully assembled, that’ll work, too!
Let’s Talk About Frosting Options!
Classic (chocolate) whoopie pies are made with marshmallow fluff or marshmallow frosting. For these pumpkin whoopie pies, I love cream cheese frosting, but you have a few options to choose from:
- Plain/Original. Omit the maple syrup or caramel sauce. Add 1/2 teaspoon vanilla extract, and additional heavy cream, as needed.
- Maple Cream Cheese Frosting. Add 1-2 Tablespoons pure maple syrup (not pancake syrup!)
- Caramel Cream Cheese Frosting. Use 1-2 Tablespoons caramel sauce (homemade or store-bought).
- Cinnamon Cream Cheese Frosting. Add 1/4-1/2 teaspoon ground cinnamon to add another layer of spice. Or, just swap for the Cinnamon Cream Cheese Frosting we use in our Gluten-Free Pumpkin Cupcakes.
- Dairy-Free Cream Cheese Frosting. The cookies are dairy-free, so you’d just need to swap the frosting. Try this vegan option!
🌟 Leave a star rating below when you try our Gluten-Free Pumpkin Whoopie Pies recipe! We can’t wait to hear what you think!
Print
Gluten-Free Pumpkin Whoopie Pies
- Total Time: 1 hour 30 minutes
- Yield: about 25 whoopie pies 1x
- Diet: Gluten Free
Description
Our homemade Gluten-Free Pumpkin Whoopie Pies are a perfect fall treat! Made from fluffy cake-like pumpkin cookies and a secret-ingredient cream cheese filling, they’re a great alternative to traditional pie!
Ingredients
For The Pumpkin Cookies:
- 3 cups (360 grams) gluten-free measure for measure flour (like King Arthur), weighed or scooped & leveled
- 5 teaspoons ground cinnamon
- 1 teaspoon ground nutmeg
- 1 teaspoon ground ginger
- 1 teaspoon kosher salt
- 1 teaspoon baking soda
- 3/4 teaspoon baking powder
- 1/4 teaspoon ground cloves
- 2 cups brown sugar (400 grams)
- 1 cup oil
- 1 (15 oz.) can unsweetened pumpkin puree
- 3 large eggs
- 1 teaspoon vanilla extract
For The Cream Cheese Filling:
- 1/2 cup butter (1 stick/8 Tablespoons)
- 4 oz. cream cheese (full-fat)
- 3 cups powdered sugar (360 grams), plus more, if needed
- 2 Tablespoons pure maple syrup or caramel sauce
- 2 Tablespoons heavy cream
- pinch salt (less than 1/8 teaspoon)
Instructions
First, Make The Pumpkin Cookies:
-
Preheat The Oven & Prep. Start by preheating the oven to 350 degrees F. Line two baking sheets with parchment paper or a macaron silicone baking mat (aka macaron silpat). Set out a medium cookie scoop or fit a piping bag with a large open tip for portioning out the pumpkin batter later.
-
Combine Sugar & Oil. In a large bowl, combine brown sugar and oil. Whisk until combined. (It will look like wet sand.)
-
Finish The Wet Ingredients. Mix in pumpkin puree, then add eggs one at a time, mixing to fully incorporate each egg before adding the next one. Mix in the vanilla.
-
Add Dry Ingredients. Next, add gluten-free flour blend, baking soda, baking powder, and salt, along with cinnamon, nutmeg, ginger, and cloves. Stir with a spatula until just combined (no floury patches left). Try not to over-mix the batter.
-
Portion Out The Cookies. Using either a medium 2-Tablespoon scoop or a piping bag fitted with an open round tip, measure out the dough into 1.5 inch rounds onto the prepared baking sheet. If needed, use a just barely moist fingertip to smooth out any rough spots. I usually pipe out 9-12 cookies per batch.
-
Bake & Shape. Bake the cookies for 10-12 minutes, or until set all around and a toothpick inserted in the center comes out clean with just a few moist crumbs. (The tops of the cookies should spring back when gently pressed.) If desired, use a round cookie cutter to gently coax the cookies into a more perfect circular shape when they’re hot from the oven.
-
Cool & Repeat. Cool 1-2 minutes on the baking sheet, then transfer to a wire cooling rack to cool completely. Repeat this baking process, alternating cookie sheets with each batch so you don’t put cool batter on a hot cookie sheet. Allow all cookies to cool completely before frosting.
Then, Make The Cream Cheese Frosting:
-
Cream Butter & Cream Cheese. Make sure the cream cheese and butter are softened to room temperature before combining, or they won’t blend well. In a large bowl or the bowl of a stand mixer fitted with a paddle attachment, combine softened cream cheese and butter. Mix together on medium speed with paddle attachment or a hand mixer for 1-2 minutes or until creamy and combined.
-
Add powdered sugar 1/2 cup at a time, mixing on medium-low speed until it’s fully added.
-
Finish Adding Ingredients. Scrape down the sides of the mixer, then add vanilla extract, a pinch of salt, 1 Tablespoon of heavy cream and either 1-2 Tablespoons of caramel sauce or pure maple syrup.
-
Whip The Frosting. Mix on medium-high speed for 1-3 minutes or until smooth and fluffy. If the frosting seems too thin, you can add powdered sugar 1 Tablespoon at a time until it’s more stiff. If it’s too thick, you can add more heavy cream 1 teaspoon at a time to thin it out.
-
Finish The Cookies. Flip over half of the cookies so they are bottom-side up/flat side up. These will be the base of your cookie sandwich. Pipe or spread frosting on the bottom cookies (flat side up), then top with a second cookie (flat side down) on top of the frosting to make a cookie sandwich.
-
Store & Serve. Chill in the fridge until ready to serve. If desired, garnish with a sprinkle of powdered sugar right before serving. Store leftover pumpkin whoopie pies in an airtight container in the fridge up to 3 days, or freeze up to 2 months.
Notes
Frosting Options:
- Plain/Original. Omit the maple syrup or caramel sauce. Add 1/2 teaspoon vanilla extract, and additional heavy cream, as needed.
- Maple Cream Cheese Frosting. Add 1-2 Tablespoons pure maple syrup (not pancake syrup!)
- Caramel Cream Cheese Frosting. Use 1-2 Tablespoons caramel sauce (homemade or store-bought).
- Cinnamon Cream Cheese Frosting. Add 1/4-1/2 teaspoon ground cinnamon to add another layer of spice. Or, just swap for the Cinnamon Cream Cheese Frosting we use in our Gluten-Free Pumpkin Cupcakes.
- Prep Time: 35 minutes
- Cook Time: 55 minutes
- Category: Dessert
- Method: Oven
- Cuisine: American

WE ♥

I particularly like the caramel frosting!
There is no powdered sugar listed in the ingredients but is mentioned for the frosting, how much is needed?
So sorry for the confusion Kathryn! You start with 3 cups, then add more, if needed. I’ve updated the recipe card to reflect this!