Description
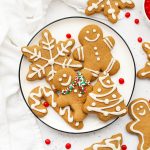
These soft gluten-free gingerbread cookies are the perfect holiday treat. Use this gingerbread dough to make gluten-free gingerbread men, snowflakes, ornaments, trees, and more!
Ingredients
Scale
FOR THE GLUTEN-FREE GINGERBREAD COOKIES:
- 3/4 cup unsalted butter or vegan butter, softened
- 1/2 cup brown sugar (packed)
- 1/2 cup molasses
- 1 egg
- 1 1/2 tsp. vanilla
- 3 1/2 cups (420 grams) gluten-free measure-for-measure flour, like King Arthur Flour*
- 1 Tablespoon ground cinnamon
- 1 Tablespoon ground ginger
- 1/2 teaspoon ground cloves
- 1 teaspoon kosher salt
- 1 teaspoon baking soda
- A few tablespoons additional flour, for flouring the work surface + cookie cutters.
FOR THE COOKIE ICING:
- 2 cups powdered sugar
- 3–4 Tablespoons milk (I use almond milk. You can use whatever you drink)
- 1/4 teaspoon vanilla extract
Instructions
FOR THE GLUTEN-FREE GINGERBREAD COOKIES:
- In a large mixing bowl (or the bowl of a stand mixer), combine butter and brown sugar. Cream 2-3 minutes with a hand mixer (or the stand mixer) until smooth and creamy.
- Add egg, molasses, and vanilla to the butter/sugar mixture. Mix until incorporated into the dough.
- In a medium bowl, combine flour, cinnamon, ginger, cloves, salt, and baking soda. Whisk to combine.
- Add about half of the dry ingredients to the wet ingredients and carefully mix to combine. Add remaining dry ingredients and stir/mix until a soft dough forms (it should be a bit like play-dough).
- Divide the dough into two discs and wrap tightly in plastic wrap or beeswax wrap.
- Chill the dough for at least 1 hour. 1 1/2-2 hours is better! (Don’t skip this step! It will help your cookies hold their shape.)
- Preheat the oven to 350 degrees F. Line 2 baking sheets with parchment.
- Get ready to roll out your dough. Place a piece of parchment paper down on the counter and very lightly flour it with 1 Tbsp. flour or less.
- Unwrap 1 of the dough discs and lightly flour the top. Cover with a second piece of parchment paper and use a rolling pin to roll dough out to about 1/4″ thick. Carefully, remove the top piece of parchment paper.
- Dip your cookie cutter into flour and use cookie cutters to punch out your shapes. (Try to put the cutouts close together to avoid waste and to cut down on the number of times you’ll need to re-roll the dough.)
- Transfer any cutouts to a prepared baking sheet. When you can’t get any more shapes out of the dough, scrape together all the scraps and re-roll them out using the same steps above.
- Repeat steps 8-11 with the second disc of dough.
- Bake your cookies at 350 degrees for about 8-10 minutes.
- Allow them to cool 2-3 minutes on the cookie sheet before transferring to a wire cooling rack. Cool baked cookies completely (at least 10-15 minutes) before icing the cookies.
FOR THE ICING:
- To make the icing, add powdered sugar to a bowl or large liquid measuring cup.
- Add 3 Tbsp. milk and the vanilla.
- Whisk until smooth, adding an additional 1 Tbsp. of milk as needed.
- Check the icing’s consistency. When you lift up your whisk and drizzle the icing back into the bowl/cup, you should be able to see the trail of icing clearly for a few seconds.
- If it immediately disappears into the icing, your icing is too thin. Add powdered sugar 1 Tbsp. at a time until it can hold its shape better.
- If the icing doesn’t drizzle smoothly, it’s too thick. Add milk a *tiny* bit at a time (1/2-1 tsp.), whisking well after each addition.
- You can also test the icing by adding a drop of icing to the tip of your finger. If it holds its shape when you move your hand around, it’s probably just right!
- Transfer the icing to a piping bag or squeeze bottle and decorate your cooled cookies as desired.
- Let the decorated cookies set completely on a wire rack before transferring to an airtight container. Store at room temperature 2-3 days or freeze up to 2 months.
Notes
*I like King Arthur Measure-for-Measure flour or Bob’s Red Mill 1:1 Gluten-Free Baking Flour. Both mixes have xanthan gum and were tested in this recipe. If you use another flour blend, you may get slightly different results.
- Prep Time: 30-40 minutes + 1 hour to chill
- Cook Time: 16 minutes
- Category: Dessert
- Method: Baking
- Cuisine: American