Description
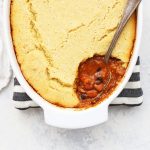
This cozy chili & cornbread pot pie combines two favorites into one delicious, cozy meal. Gluten free, dairy free, and easily vegan! You can use any chili you like here–I like to assume about 1 cup of chili per person, so I usually use about 6-7 cups of chili.
*Nutrition facts will vary based on what chili you use, so the nutrition facts below are for the cornbread topping only.
Ingredients
Scale
For the Cornbread Topping:
- 2/3 cup milk (I used unsweetened almond or cashew milk)
- 1 tsp cider vinegar
- 1/2 cup gluten free 1:1 all purpose flour (or white flour if not GF)
- 1/2 cup cornmeal (certified gluten free, as needed)
- 1 tsp baking powder
- 1/2 tsp salt
- 2 eggs (or 2 eggs’ worth of egg replacer, if vegan)
- 2 Tbsp avocado oil, butter, vegan butter, or ghee (melted if solid)
- 1 1/2 Tbsp maple syrup or honey
For chili: 6-8 cups of your favorite chili
Instructions
- Preheat oven to 400 degrees F.
- In a small bowl or liquid measuring cup, combine milk + cider vinegar. Set aside while you mix up the dry ingredients.
- In a medium bowl, whisk together flour, cornmeal, baking powder, and salt.
- Add milk mixture, eggs (or egg replacer), oil, and syrup to the dry ingredients.
- Stir until just combined. (A few small lumps are ok.)
- Pour your chili into a 2-3 quart baking dish (8×8 or 2-quart oval/circle are fine!).
- Gently spoon the cornbread batter over the surface of the chili (this will keep it a distinct layer instead of sinking down into the chili).
- Bake at 400 degrees 25-30 minutes, or until edges are golden and a toothpick inserted in the center comes out clean.
- Run a thin knife around the edges to loosen the cornbread from the sides and serve!
Notes
- Freezer Meal Notes: if you want to freeze this, you’ll need to make it start-to-finish before freezing, as unbaked batter won’t keep well in the freezer. I also recommend using a metal baking dish, which can handle reheating without temperature shock of going from the freezer to the oven (very cold/frozen glass or ceramic can sometimes crack or burst in a hot oven). After baking, cool it completely, cover with foil, and freeze!
- To Heat From the Freezer: If you’ve used a metal pan, you can put it right in the oven from the freezer. I don’t even preheat the oven first, as the pan will warm up along with the oven (which can prevent warping the pan). I just remove the foil, put it in the cold oven, then turn the oven on and bake for 20-25 minutes, or until it’s bubbly and hot.
- Make it Vegan/Egg Free – You can absolutely use an egg replacer in this to make it vegan or egg free. I’ve had good luck with The Neat Egg, which is a powdered egg replacer. Follow the directions on your package for substituting. (You may also be able to get away with a flax egg, but I haven’t tested it.)
- Not Gluten Free or Dairy Free? You can use traditional white flour in place of the gluten free flour blend and/or use traditional buttermilk in place of the nut milk + vinegar option I used here. Out of buttermilk? Use cows milk + vinegar in the same proportions I use below.
- Make it Mini. You can totally make these in ramekins for individually portioned pot pies. Depending on the size of your ramekins, you’ll need to adjust the baking time. Narrow/deep ramekins will cook slower than wide/shallow ones.
- Prep Time: 10 minutes
- Cook Time: 30 minutes
- Category: Main Dish
- Method: Oven
- Cuisine: American
Nutrition
- Serving Size: 1/6 Recipe (Crust Only)
- Calories: 167
- Sugar: 4.4 g
- Sodium: 246.8 mg
- Fat: 6.9 g
- Carbohydrates: 23.2 g
- Fiber: 1.1 g
- Protein: 3.8 g
- Cholesterol: 62 mg