
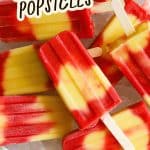
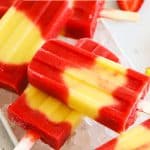
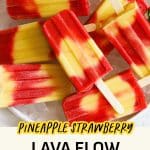


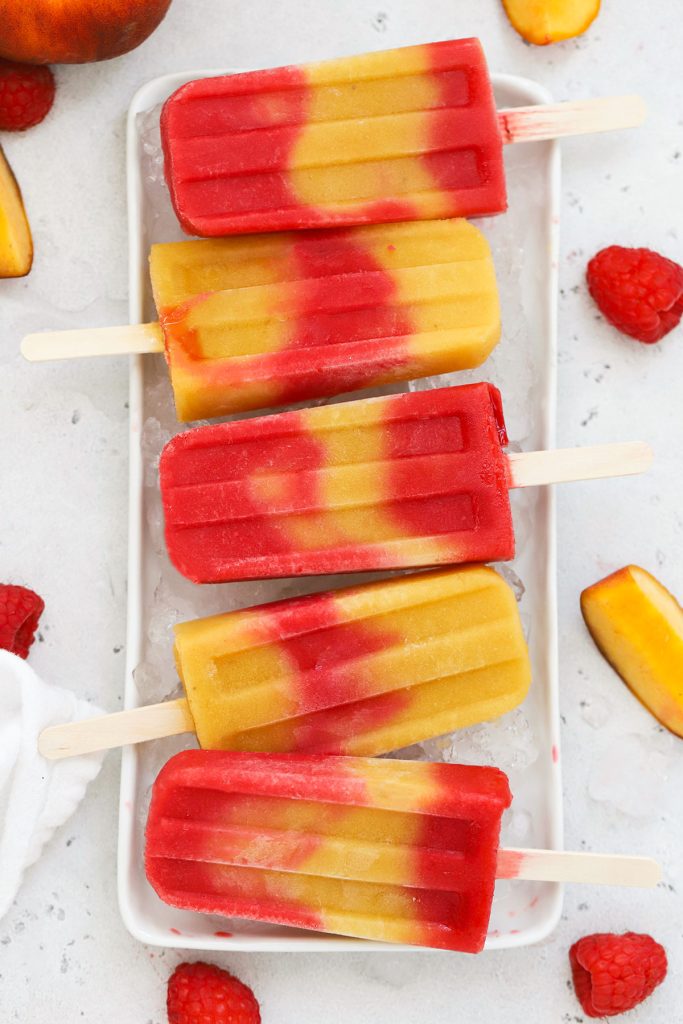
These healthy Lava Flow Popsicles are such a refreshing way to cool off in the summer. Made with a creamy pineapple layer swirled with a fresh strawberry puree, they’re full of fresh flavor! Even better? They’re naturally sweetened, vegan, and paleo-friendly!

Have you tried a lava flow? Basically it’s a really awesome pineapple-coconut drink with a strawberry swirl layer. It’s ahhhhmazing. Fresh, creamy, light, and perfectly sweet all at once.
It’s an awesome drink, sure, but in my opinion, I love it even better as Lava Flow Popsicles. I love the creaminess of the pineapple coconut layer swirled with the bright, fresh strawberry layer. It’s like a non-alcoholic piña colada + a strawberry daiquiri.
These lava flow popsicles take everything we love about that fun mocktail and turn it into a refreshing popsicle that’s perfect for summer!
Here’s what you need to make our Lava Flow Popsicles recipe…
Gather Your Ingredients

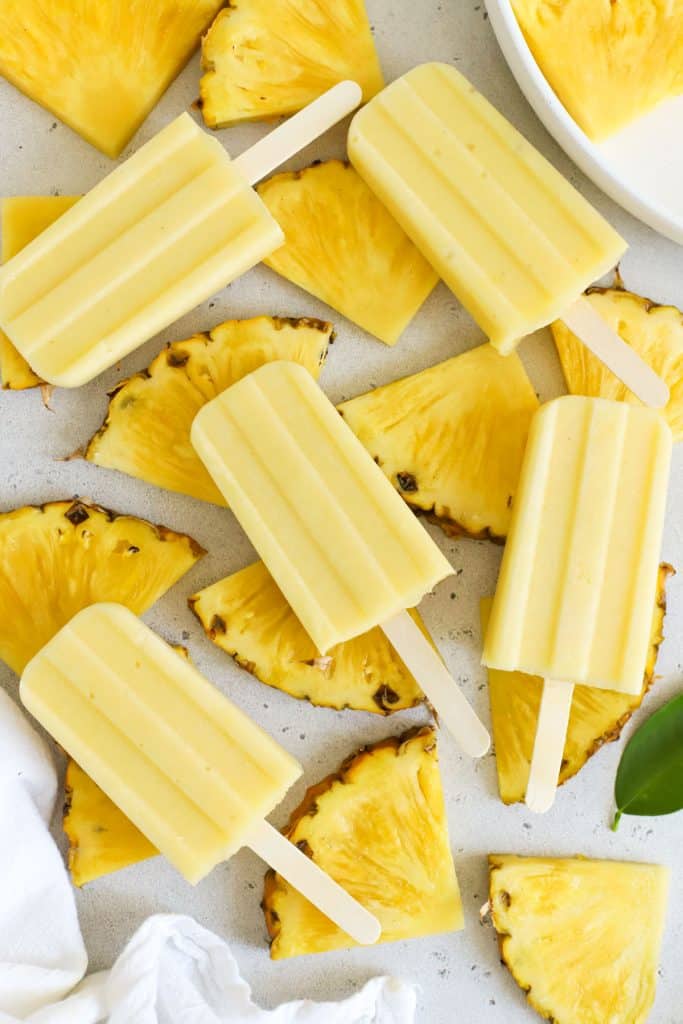
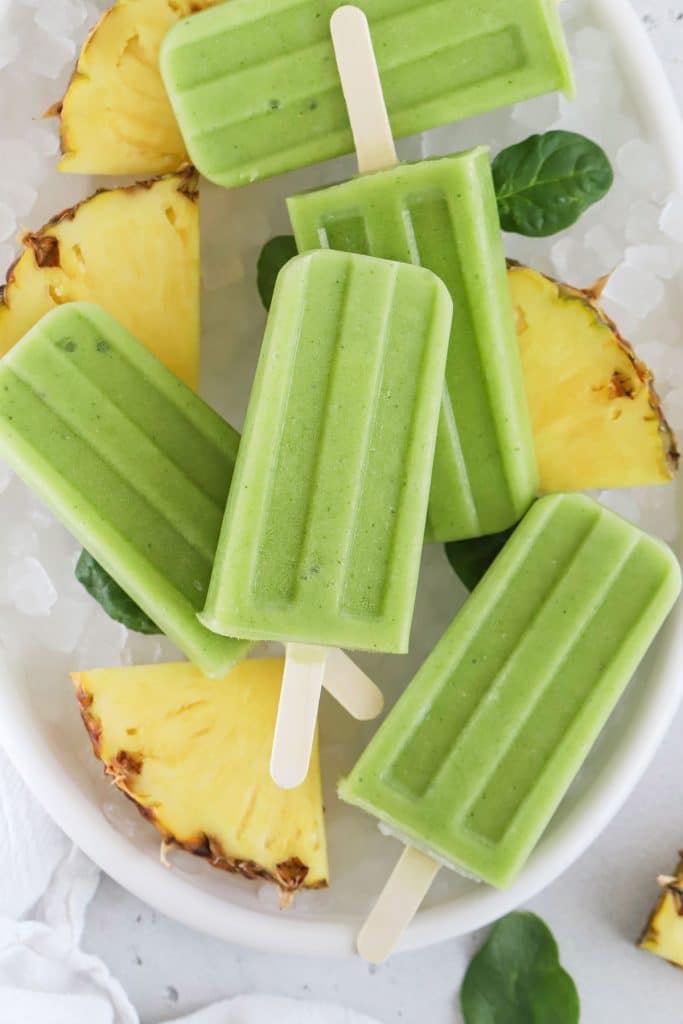
- Pineapple. Fresh pineapple or thawed frozen pineapple starts the pineapple layer off with fresh, bright flavor. I don’t recommend canned pineapple for this recipe.
- Mango. Next up is some mango! You can use fresh mango or frozen mango here. It rounds out the tropical flavor and adds some sweetness and creaminess that’s lovely!
- Coconut Milk. Speaking of creaminess, you’ll blend the pineapple layer with some full-fat canned coconut milk. This will give these lava flow popsicles a delicious creamy texture that’s perfect on a hot day!
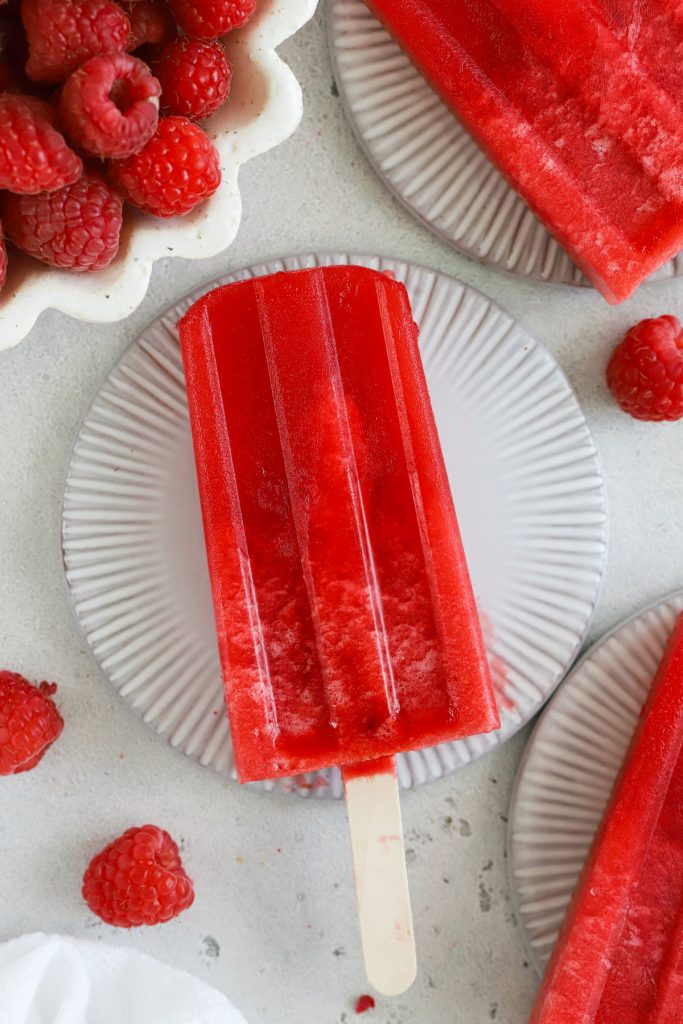
- Strawberries. For the strawberry layer, you can use fresh strawberries or thawed frozen strawberries. We’ve made them with both with great results!
- Orange Juice. Some orange juice adds natural sweetness, plus some acidity, which brightens up the flavors of the strawberry, mango, and pineapple. Think of it as a flavor booster!
- A Little Honey or Agave. Last, but not least, you’ll add a little more sweetness with some honey or agave syrup. (Granulated sugar or cane sugar also works here, if that’s easier for you!)
WE RECOMMEND:

Our Favorite Popsicle Mold
We’ve tried literally dozens over the years, but this popsicle mold is our FAVORITE. Easy to use, easy to clean, stands up well in the freezer AND has a lid to hold the sticks in place!
How To Make Lava Flow Popsicles, Step By Step
As always, you can find the full recipe with ingredient amounts, detailed instructions, and tips in the recipe card below.

- Start With The Pineapple Layer. Add pineapple, mango, and coconut milk to a blender. Puree until completely smooth, adding additional coconut milk as needed. Taste the mixture, and blend in a drizzle of honey or agave, if needed. Pour the pineapple mixture into a liquid measuring cup or small pitcher and set aside while you make the strawberry layer.
- Next, Blend The Strawberry Layer. Add strawberries, orange juice, and honey or agave to a blender. Puree until completely smooth. Taste and add more honey or agave, if needed.
- Layer The Popsicles In The Popsicle Mold. Alternate scoops of the pineapple mixture and the strawberry mixture into popsicle molds. For more distinct layers, use a small funnel or a spoon to add the fruit purée mixtures. (If you pour straight from the blender/liquid measuring cup, they’re more likely to combine.)
- Finish & Freeze. Insert popsicle sticks and freeze until completely solid, at least 3-4 hours. To remove popsicles from the popsicle mold, run the sides of each well of the popsicle mold under cool water for a few seconds, then gently wiggle the popsicle stick side to side to loosen the pop. (If it’s not budging, run it under water for a few more seconds) Enjoy right away or transfer to a freezer bag to store 2-3 weeks.
A Trick For Layering These Pops
I’ve tried a lot of things but, simply going slow and adding a spoonful or small drizzle at a time gives you great layers. It’s okay if they’re not all perfectly equal or look identical. That’s part of the magic! While we’re absolutely going for a lava flow/blended look, pouring the mixture onto the spoon will help you keep some distinction between layers.

FAQ + Tips And Tricks For The Best Lava Flow Popsicles
DON’T HAVE A POPSICLE MOLD? TRY THIS! Pour the popsicle mixture into small paper cups (3 oz. size), and cover the cups with foil. Insert the popsicle sticks through the foil (it’ll help keep them upright) and place the cups on a level surface (like a plate, cutting board, or baking sheet) and freeze until completely solid. When you’re ready to serve, remove the foil and peel away the paper cup!
HOW TO GET POPSICLE OUT OF THE POPSICLE MOLD. My favorite trick is to run the sides of each well of the popsicle mold under cool water for a few seconds, then gently wiggle the popsicle stick side to side to loosen the pop. (If it’s not budging, run it under water for a few more seconds)
CAN U USE SOMETHING BESIDES COCONUT MILK? I highly recommend using the coconut milk for flavor and texture, but if you have an allergy, intolerance, or aversion, you can technically use heavy cream or half and half instead. I don’t recommend almond milk or low fat milk, since it’ll make the pops more icy than creamy.
HOW DO I STORE LAVA FLOW POPSICLES? After they’re totally frozen solid, I typically remove them from the mold and put them into a zip-top freezer bag. It works like a charm! Popsicles will keep 2-3 weeks, though I doubt they’ll last that long without being eaten!

Did You Make This Recipe?
Tell me all about it! Leave a star rating below when you try our Healthy Lava Flow Popsicles recipe. I can’t wait to hear how it goes!
Lava Flow Popsicles
Ingredients
For the Pineapple Layer:
- 1 1/2 cups cubed pineapple
- 1 cup diced mango
- 1/2 cup coconut milk I prefer full-fat canned
For the Strawberry Layer:
- 2 1/2 cups strawberries
- 1/4 cup orange juice
- 1 Tablespoon honey or agave optional–only as needed
Instructions
- Start With The Pineapple Layer. Add pineapple, mango, and coconut milk to a blender. Puree until completely smooth, adding additional coconut milk as needed. Taste the mixture, and blend in a drizzle of honey or agave, if needed. Pour the pineapple mixture into a liquid measuring cup or small pitcher and set aside while you make the strawberry layer.
- Next, Blend The Strawberry Layer. Add strawberries, orange juice, and honey or agave to a blender. Puree until completely smooth. Taste and add more honey or agave, if needed.
- Layer The Popsicles In The Popsicle Mold. Alternate scoops of the pineapple mixture and the strawberry mixture into popsicle molds. For more distinct layers, use a small funnel or a spoon to add the fruit purée mixtures. (If you pour straight from the blender/liquid measuring cup, they’re more likely to combine.)
- Finish & Freeze. Insert popsicle sticks and freeze until completely solid, at least 3-4 hours. To remove popsicles from the popsicle mold, run the sides of each well of the popsicle mold under cool water for a few seconds, then gently wiggle the popsicle stick side to side to loosen the pop. (If it’s not budging, run it under water for a few more seconds) Enjoy right away or transfer to a freezer bag to store 2-3 weeks.
Notes
- Don’t Have a Popsicle Mold? Try This! Pour the popsicle mixture into small paper cups (3 oz. size), and cover the cups with foil. Insert the popsicle sticks through the foil (it’ll help keep them upright) and place the cups on a level surface (like a plate, cutting board, or baking sheet) and freeze until completely solid. When you’re ready to serve, remove the foil and peel away the paper cup!
- Fresh or Frozen Fruit Works! You can make these with fresh or frozen fruit (or a combination). Your proportions will be the same. If you’re using frozen fruit, you’ll want to let it thaw, so it blends easier. Otherwise, you’ll need slightly more liquid to blend frozen fruit than fresh.
Video
Nutrition
Nutrition facts are an estimate only and will vary based on brands and amounts used.
Find it Online:
https://www.onelovelylife.com/lava-flow-popsicles/Originally shared May 2018. Updated with additional photos, new video, and updated tips and republished May 2025.
These feel like summer and my kids love these almost as much as I do.
Can I substitute cream or milk for the coconut milk?
Yep! The flavor will be slightly different, but still delicious 🙂
cool!
All these popsicles look amazing. My question is can I substitute some other sweetener for the honey or agave?
April – What did you have in mind? I’m sure you could do sugar if you prefer!
I wanted to know if I could use splenda. I have a diabetic friend that these would be amazing as a snack for her and my kids.
April – I haven’t used Splenda before, but I think it would work! You’d likely want to start small, as Splenda runs sweeter than natural sweeteners. Just sweeten to taste 🙂
These look are delicious and soooo healthy and easy to make. I’m gonna try to make it this weekend for sure. Thanks a lot for the recipe.
I have no idea how you got those strawberries to blend with only a 1/4 cup of orange juice????
If I use frozen strawberries, I usually let them soften a bit. Thawed frozen strawberries or fresh strawberries usually blend right up for me! 🙂
Hi! Does these have a coconut flavor? Not a big fan of things that taste like coconut?
Gabby – They don’t to me. 🙂 The strawberry and pineapple is really what comes through to my tastebuds (and my husband’s, who’s not big on coconut). The strawberry layer is bright and fresh (lots of berry flavor) and the pineapple layer just tastes creamy and luscious (kind of like a Dole Whip pineapple soft serve). We love it! If you tolerate dairy, you could sub in some whole milk or cream for the coconut milk if you’re nervous. 🙂
Can we use something in place of coconut milk?
The flavor will be different, but you can use whatever milk your family drinks and enjoys. 🙂
I’m happy to have finally found someone who shares my obsession with homemade popsicles! Love this recipe! We also love your coconut lime popsicles!
Ah! I love hearing this! Aren’t homemade popsicles THE best!? I LOVE THEM!!! So glad you do too 🙂
We can’t do fruit juices here is the orange juice important in the strawberry layer?
It does add a bit of sweetness and brightness. But you could probably get away without it. You’ll just need to add another liquid instead (like water) to help it blend.
This is look so delicious, I can try it my home
This is such a pretty treat and these two flavours are amazing together! Thanks for sharing this. 🙂
MY pleasure! We LOVE them!!!
Do you skim the coconut cream off the top of the can or reintegrate it with the milk?
Keegan – I usually reintegrate it with the milk. (I’ll often shake the can before opening, otherwise a whisk will do the job!)
Super simple, healthy, and kid approved!
YAY! I love hearing that. My kids just LOVE them!
These look amazing! Curious, how long do these need to freeze for before they are ready to eat?
Bethany – Great question! It’ll depend on what popsicle mold you use, but for the one pictured, about 2 1/2-3 hours is perfect.
Hello, can I use boxed coconut milk or does it have to be canned? I have both either way, just curious. Thank you!
Boxed will work, but it will be slightly less creamy than canned. Great question!
Do you have a suggestion for an alternate to coconut milk? Have some relatives allergic to coconut.
Amanda – The coconut is pretty important for the flavor, but if you are working with a coconut allergy, I’d suggest dairy milk.
Would almond milk work?
I only recommend it in cases of allergies, since it won’t be as creamy or have quite the same flavor. 😊
Where did you find your popsicle molds?
Maria – I put a link in the post to the popsicle mold I ordered. It’s from Amazon. I’ve seen similar ones on Zulily or at World Market. I love it!
We’re on a huge popsicle kick this summer and these will fit in perfectly!
These look delicious, I’m going to give them a try this afternoon! Your pictures look beautiful, too 🙂
Can you use the canned coconut milk for this or does it matter?
Rene – That’s what I use! Canned coconut is preferred! I’ll put that in with my notes. Best of luck!
These look amazing! They’re definitely going on the summers “to eat” list!
Good Heavens. This may be the most beautiful popsicle I’ve ever seen!