


Dinner tonight is crispy baked gluten-free chicken tenders! They’re easy to make, with a satisfying crispy crunchy coating. They’re always a hit with kids AND grown-ups!

I know I’m not the only one looking for dishes my whole family loves. Sometimes, I find that going back to the classics is a great way to spark creativity and inspire my kids to try something new!
Our crispy gluten-free chicken tenders recipe is a perfect example. Made from simple ingredients, this crispy-crunchy baked chicken is one of those classic chicken recipes you can come back to again and again. With the basic technique for these crispy chicken tenders in your back pocket, there are so many ways you can reinvent and reimagine the flavors. It’s a go-to recipe SURE to be a family favorite.
I’ve got a few tips that make these the BEST baked chicken tenders we’ve ever tried, plus a TON of ideas for keeping the flavor interesting. But first, let’s gather our ingredients. Here’s what you’ll need to get started…

Simple Ingredients To Start
One thing I LOVE about these tender chicken strips is how simple the ingredients list is. Let’s take a look:
- Gluten-Free Bread. To start, we’ll make some quick gluten-free bread crumbs that we’ll use for breading. You’ll need 4-5 slices of gluten-free bread. Use your favorite brand!
- Chicken Tenders. Next up is boneless, skinless chicken tenders. If you can’t find any at the grocery store, you can pound boneless, skinless chicken breasts into even thickness with a rolling pin and cut 2-inch strips to use instead.
- An Egg. Using an egg helps the breading stick to the chicken tenders.
- Mayonnaise. A little trick! Adding some mayo to the egg mixture cuts down on the eggs you need and helps create that ultra-thick coating we’re going for.
- Dijon Mustard. For some tang. Even if you’re not a mustard fan, it’s worth using here, since the acidity brightens up the flavor and the mustard helps emulsify the batter so it’s smooth and creamy.
- Gluten-Free Flour. We’ll whisk gluten-free measure-for-measure flour (a 1:1 gluten-free flour blend) into the batter. Don’t try to use coconut flour, almond flour, oat flour, etc. for this batter. It won’t work well!
- Kosher Salt & Black Pepper. Simple, but essential!
- Garlic Powder & Onion Powder. To round out our seasonings. They add a lovely savory flavor!
- Spray Oil. No fussing with hot oil or deep frying here! We’re baking these tasty chicken fingers instead. To help the chicken tenders crisp properly in the oven. I like 100% oil, rather than a baking spray or anything with added propellants. Avocado oil, olive oil, and coconut oil spray all work!
Our Unique Breading Set-Up! Instead of setting up a 3-step breading process (flour, egg, bread crumbs), we whisk all the wet ingredients and the flour together, then dip them in the seasoned crispy bread crumbs. We find this to work better and be easier for prep & clean-up! Win-win!
How To Make Crispy Baked Gluten-Free Chicken Tenders, Step By Step
As always, you can find the full recipe with ingredient amounts, detailed instructions, and tips in the recipe card below.

- Preheat Oven. To start, preheat oven temperature to 350 degrees.
- Make The Bread Crumbs. Start by making the bread crumbs. Pulse bread in a food processor until you have fairly fine crumbs. Spread out on a large baking sheet and spray lightly with cooking spray/spray oil. Bake crumbs at 350 degrees for 10-12 minutes, stirring every 3-4 minutes for even browning. Remove from oven and transfer to a shallow bowl or plate.
- Increase oven temperature to 400 degrees. If possible, place a metal cooling/baking rack on top of a baking sheet. This will promote even browning/crisping. If you don’t have a wire rack like this, spray your baking sheet with cooking spray or oil.
- Make batter, by whisking together egg, mayonnaise, mustard, gluten-free flour, salt, pepper, garlic powder, and onion powder together. Whisk until smooth and place in a shallow bowl.
- Batter your chicken. Pat chicken off with a paper towel to blot away any extra moisture. Then, dip chicken pieces one piece at a time by first dipping into the wet batter to coat well, then rolling in the breadcrumbs. Place breaded chicken strips on the prepared baking sheet (on top of the rack if possible). Repeat with remaining chicken until all pieces are coated. Lightly spray the top of the chicken with another round of cooking spray or oil.
- Bake chicken tenders at 400 degrees 12-15 minutes, or until chicken is completely cooked through and the coating is golden brown. (The internal temperature of the chicken tenders should be at least 165 degrees F.) Feel free to garnish with fresh herbs, if desired.
- Serve & Store. Enjoy warm with your favorite dipping sauce—honey mustard, ranch, barbecue sauce, ketchup, etc. Store leftover chicken tenders in an airtight container in the refrigerator up to 3 days. I like to reheat them in a single layer in an air fryer or in the oven for a few minutes so they crisp back up!

Add Some Flavor With Dipping Sauces!
These tasty chicken tenders are delicious enough to eat all on its own, but part of the fun of chicken recipes like this is dipping them in a yummy sauce!
- Ketchup. Always a winner with kids!
- Homemade Ranch. This paleo ranch is THE BEST ranch I’ve ever tried, hands down.
- Buffalo Sauce. For some kick!
- Honey Mustard. If you want something sweet & tangy!
- Chipotle Ranch. For a smoky, subtle heat.
- Comeback Sauce. This classic sauce has ALL The flavors–savory, sweet, smoky, spicy, salty, umami, you name it!
- BBQ Sauce. We love this homemade BBQ sauce!
Try Other Serving Ideas!
The beauty of a classic recipe like this is that there are ENDLESS ways to flavor and change them up. For instance, you could use these chicken tenders to top pasta (a la Chicken Parmesan), to make crispy chicken sandwiches & wraps, or to top an awesome Cobb-style or BBQ Chicken salad, loaded with goodies.

FAQ + Tips And Tricks For The Best Crispy Gluten-Free Chicken Tenders
More Air Circulation = Crispier Chicken! Rather than baking your chicken tenders directly on a baking sheet, I like to first put an oven-safe wire rack on top of the baking sheet (be sure yours is heat safe and doesn’t have any kind of coating on it). This allows air to circulate all around the chicken, which means no mushy spot sticking to the baking sheet when they come out of the oven. Instead, you get 360 degrees of awesomely crispy coating!
Can I Use An Air Fryer Instead? Yep! I find that 350-360 degrees F for 12-15 minutes usually does the trick! You’ll want to work in batches so none of the pieces of chicken are touching. Better air circulation = crispier chicken tenders!
Flavor Boosts. Again, there are SO many ways to flavor these homemade chicken tenders. Try using sriracha or chipotle mayo instead of regular, mixing in a little parmesan cheese, or adding a little taco, ranch, or Italian seasoning to your mixture. A few shortcut ideas…
- Shortcut Italian Seasoning: 1/4 tsp oregano + 1/4 tsp garlic powder+ 1/4 tsp onion powder
- Shortcut Taco Seasoning: 1/4 tsp cumin + 1/4 tsp chili powder + 1/4 tsp onion powder
- Shortcut Ranch Seasoning: 1/4 tsp garlic powder + 1/4 tsp onion powder + 1/4 tsp dried dill
- Shortcut Steakhouse Seasoning: 1/4 tsp garlic powder + 1/4 tsp onion powder + 1/4 tsp smoked paprika


Recipe Card
🌟 Did you make this recipe?
Leave a star rating below when you try our Gluten-Free Crispy Baked Chicken Tenders recipe! We can’t wait to hear what you think!

Gluten Free Baked Chicken Tenders
- Total Time: 40 minutes
- Yield: 4 servings 1x
- Diet: Gluten Free
Description
Gluten-Free Crispy Chicken Tenders with a fabulous crispy crunch!
Ingredients
- 4–5 slices gluten free bread, such as Canyon Bakehouse Country White or 7 Grain
- 1 lb. boneless, skinless chicken tenders (or chicken breast, sliced into strips)
- 1 egg
- 2 Tablespoons mayonnaise
- 1 Tablespoon Dijon mustard
- 2 Tablespoon gluten free flour, such as Bob’s Red Mill 1-to-1 Gluten Free Baking Mix
- ½ teaspoon salt
- ¼ teaspoon pepper
- ¼ teaspoon garlic powder
- ¼ teaspoon onion powder
- Oil spray or cooking spray (I like coconut oil spray)
- Optional: fresh herbs, for garnish (like parsley!)
- To Serve: Your favorite dipping sauce–honey mustard, ranch, BBQ sauce, ketchup, etc.
Instructions
- Preheat Oven. To start, preheat oven temperature to 350 degrees.
- Make The Bread Crumbs. Start by making the bread crumbs. Pulse bread in a food processor until you have fairly fine crumbs. Spread out on a baking sheet and spray lightly with cooking spray/spray oil. Bake crumbs at 350 degrees for 10-12 minutes, stirring every 3-4 minutes for even browning. Remove from oven and transfer to a shallow bowl or plate.
- Increase oven temperature to 400 degrees. If possible, place a metal cooling/baking rack on top of a baking sheet. This will promote even browning/crisping. If you don’t have a wire rack like this, spray your baking sheet with cooking spray or oil.
- Make batter, by whisking together egg, mayonnaise, mustard, gluten-free flour, salt, pepper, garlic powder, and onion powder together. Whisk until smooth and place in a shallow bowl.
- Batter your chicken. Pat chicken off with a paper towel to blot away any extra moisture. Then, dip chicken pieces one piece at a time by first dipping into the wet batter to coat well, then rolling in the breadcrumbs. Place breaded chicken strips on the prepared baking sheet (on top of the rack if possible). Repeat with remaining chicken until all pieces are coated. Lightly spray the top of the chicken with another round of cooking spray or oil.
- Bake chicken tenders at 400 degrees 12-15 minutes, or until chicken is completely cooked through and the coating is golden brown. (The internal temperature of the chicken tenders should be at least 165 degrees F.) Feel free to garnish with fresh herbs.
- Serve & Store. Enjoy warm with your favorite dipping sauce—honey mustard, ranch, barbecue sauce, ketchup, etc. Store leftover chicken tenders in an airtight container in the refrigerator up to 3 days. I like to reheat them in a single layer in an air fryer or in the oven for a few minutes so they crisp back up!
Notes
- Can’t Find Chicken Tenders? You can pound boneless, skinless chicken breasts into even thickness and cut 2-inch strips to use instead.
- Can I Use An Air Fryer Instead? Yep! I find that 350-360 degrees F for 12-15 minutes usually does the trick! You’ll want to work in batches so none of the chicken tenders are touching. Better air circulation = crispier chicken tenders!
- Flavor Variations. Feel free to add a sprinkle of Cajun seasoning or smoked paprika to the batter for extra flavor! Or, check out the quick seasoning blends in the FAQ of the blog post for more ideas!
- Prep Time: 25 minutes
- Cook Time: 15 minutes
- Category: Main Dish
- Method: oven
- Cuisine: American
Nutrition
- Serving Size: 1/4 recipe
- Calories: 337
- Sugar: 2.1 g
- Sodium: 1047.5 mg
- Fat: 12.4 g
- Saturated Fat: 1.7 g
- Carbohydrates: 24.1 g
- Fiber: 1.4 g
- Protein: 26.2 g
- Cholesterol: 114.3 mg
Originally shared July 2017. Updated Jan 2022.
These are FANTASTIC! A house favorite – do you happen to have the breakdown of nutritional info for the recipe?
I don’t yet, but it should be coming soon! I’m working my way through our archives to add nutrition info. 🙂
Hello! Has anyone tried these in the airfryer?
I have! I’ve had good luck following similar instructions–400 degrees for 12-15 minutes. They can sometimes stick, so make sure you either grease the bottom of the fryer well or use air fryer parchment paper (the kind with little holes to allow air circulation).
Love these for a quick dinner. I have used GF Panko and GF Italian bread crumb with great success
The batter…..no substitute for that !
Yum! Love the idea of Italian bread crumbs! I’ll have to try that for sure!
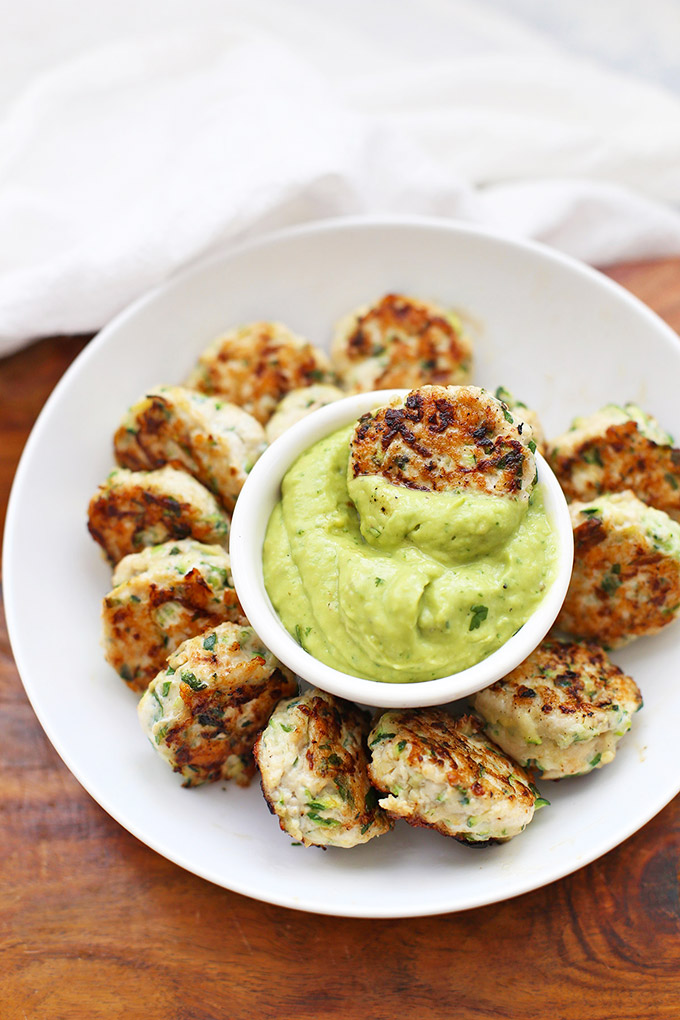
Looking forward to trying this recipe, one question: I see bits of green in the tenders, nothing in the recipe for the batter has anything green. What is that?
Michele – That was just a little garnish at the end to make it look pretty :). I use cilantro or parsley, but it’s 100% optional and just for decoration.
Can I just say, I LOVE these. I actually find them addicting! My 16 yr old daughter has celiac. The rest of us don’t eat GF all of the time, but if I’m cooking – we usually do (I’m not making two meals!) I must also confess that I tend to read recipes 2 or 3 times, get the gist of what is going on, then see what I have in my cabinets, fridge that is on the list or reasonably should work. Most of the time, I do pretty well. It is a practice that is currently coming in very handy during our STAY AT HOME orders, because I’m definitely not running to the store if I’m missing an ingredient. So on that note — I have made these and skipped the egg – they were great, replaced dijon with spicy brown – also great, used rice flour instead of Bob’s baking mix, used GF Hol-Grain chicken coating mix in place of it too – both worked great. Oddly enough, I have never used the Hol-Grain chicken coating mix the way it actually suggests too on the box, lol. I will also say the first time I made this recipe, I was incredibly doubtful. The thick batter like coating was very strange and I just thought it would be a mushy mess. I was SO wrong. Kudos to the chef on this one – apologies that I have morphed your perfection every time – but that is how perfect of a recipe it is — slight variations are still great because it is such a phenomenal recipe!!
Amy – WOW WOW WOW! You totally made my day! I loved hearing about all your variations. It’s so nice to know the recipe can be so flexible!
Thank you, too, for taking the time to leave a review. It’s so helpful! 🙂
Love these! Has anyone tried freezing?
I have! They re-heat pretty well! I like to heat them in the oven so they crisp up again 🙂
My 9 year old has Celiac. She likes foods that are kid friendly. We make these for the whole family and she LOVES them. We ALL do. Her teenage brother and father don’t even know their gluten free! 😬
YES! I consider that a huge victory! I’m so glad you all enjoy it 🙂
These are me and my fiancé’s fave!! Yay. 5 stars!
Yay! Mine too!
I’m making this the day after Thanksgiving for my GF cousin and her 7 year old daughter. I would like to make them either today and reheat tomorrow or make early in the day and reheat for dinner. Do you think that would work out? How do you recommend storing and reheating. If you think it will be too dry please tell me and I will make fresh. I want them to be the best they can be. Thanks for your recipe Emily! Hopefully you will be able to respond quickly, I do however know it is Thanksgiving and I hope you have a lovely one. I will understand if you don’t even get a chance to look at this message until way after the holiday.
Emily – Happy Thanksgiving! For best results, I’d recommend making them fresh. They do dry out a touch upon reheating, but will taste great, too! I hope you all love them as much as we do!
Made this for my newly gluten free dairy free son and he loved it. Shallow fried in oil but will bake next time. I’m a vegetarian so I did not try, but they looked so tempting. Thank you so much.
I’m so glad he loved it! Thanks for sharing your review!
Best GF baked tenders. Thanks for the recipe – my husband loved it!
Lia – THANK YOU! I’m so glad you enjoyed them! They’re a favorite around here too!
These chicken strips were amazing. My very picky three year old ate them up. I used Ezekiel bread instead of gluten free and I used Primal kitchen chipotle lime mayo for a little extra zing ( not too spicy either). So so so good. Thank you for a wonderful recipe that I will be using again and again.
Megan – How wonderful! I’m so glad you enjoyed them. (And I LOVE that chipotle lime mayo! I’ll have to try that next time!)
These look amazing!!! I can’t wait to try these and that homemade ranch of yours!
They’re SO GOOD! I love the crispy-crunchy crust and dipped in ranch…they’re amazing! Miss you. Let’s talk soon!
These chicken strips look yummy. I’ll be trying this recipe soon.
I make fresh bread crumbs using a blender. It works for soft bread crumbs (use fresh bread), or dry bread crumbs (use dry or toasted bread).
I’ve also read that you can use a box grater to make dry bread crumbs, starting with toasted bread.
Sturdy breads (“Farmhouse” or other hearty white or whole wheat breads) make the best crumbs IMO.
Ellen – I’ve tried it in a blender too. Works great! I’ve never tried it with a box grater, but love the ease of using my food processor or blender.
I’m sure those breads make great crumbs! This has been a great gluten free solution for us now that those breads aren’t an option.