


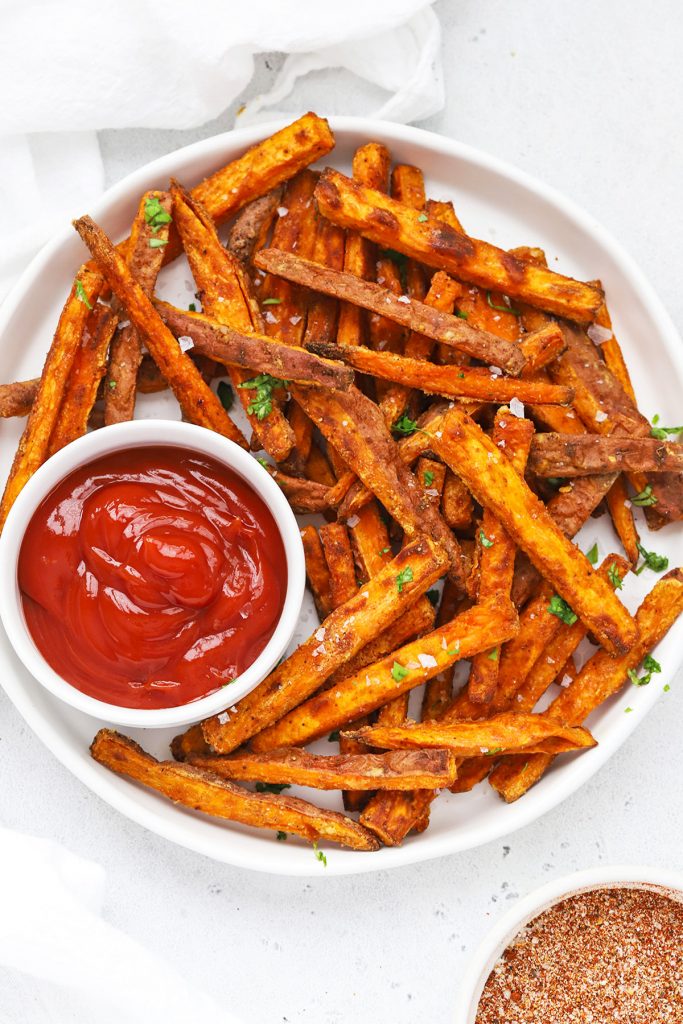
These Crispy Oven Fries are everything a good baked french fry should be–beautifully seasoned, gorgeously crispy, and perfect for dipping! (And there’s a scientific reason why!)


These Crispy Oven Fries Have The BEST Flavor!
The book The Food Lab taught me everything I need to know about how to make my roasted potatoes extra crispy, so I decided to take that knowledge to the next level. I’m talking about the BEST homemade fries of your life.
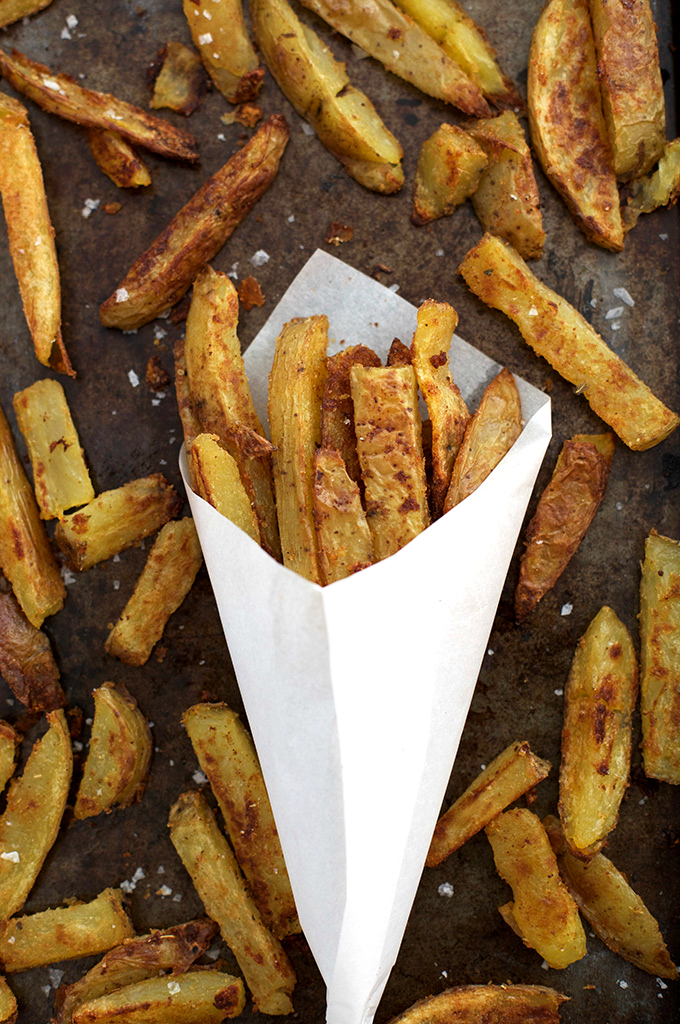
Crispy on the outside, fluffy on the inside, golden brown, and beautifully seasoned. Basically everything a person could want in crispy oven-baked fries. And the best part is there’s o deep frying required!
⏱️ EASE: While you do have the extra step of pre-boiling the potatoes, there’s nothing difficult about this simple recipe skills-wise! It’s simple slicing, boiling, stirring, and roasting. That’s it!
🍟 FLAVORS: The flavor is UNREAL! Smoky, salty, savory, delicious! Our fry seasoning paired with the extra crispy edges of the potatoes makes these oven fries really stand out.
💡 TOP TIPS: Plan ahead on time & don’t rush! Taking the time to simmer the potatoes first, then roast them for a full 50ish minutes after that is the secret to the perfect texture. It’s worth doing right, but you do need to start early enough for dinner 🙂
Happy cooking! xo, Emily
Gather Your Ingredients
So what do you need to make the best baked french fries around? Let’s take a look:

How To Make Crispy Oven Fries, Step By Step
As always, you can find the full recipe with ingredient amounts, detailed instructions, and tips in the recipe card below.

- Preheat & Prep. To start, preheat the oven to 425 degrees F. Grease a rimmed sheet pan and set aside.
- Boil The Potatoes. Scrub the potatoes well to remove and dirt or grit, then cut potatoes into evenly sliced wedges. (Leve the peels on!) Place the potatoes in a medium saucepan and cover them with water so the water is 1-inch above the surface of the potatoes. Bring the water to a boil over medium-high heat then simmer the potatoes 8-10 minutes, or until just fork tender.
- Combine Seasoning. While the potatoes are simmering, mix up your seasoning mix. In a small bowl, combine salt, garlic powder, onion powder, paprika, smoked paprika, oregano, and cayenne pepper. Whisk until evenly blended and set aside.
- Coat Potatoes. When the potatoes are done cooking, drain them in a colander then add to a large bowl. Drizzle with olive oil (or cooking fat of choice), then sprinkle with seasoning mix. Gently stir with a spatula until well combined. The potatoes will get a bit roughed up and some may break. This is fine!
- Roast. Spread the potatoes out into an even layer on your greased sheet pan. Give the pan a shake or two so the potatoes are fairly evenly spaced. Roast 20-25 minutes.
- Flip & Roast Some More. then flip the potatoes and roast another 20-25 minutes, till they’re golden brown. (If, at any point, the potatoes are sticking to the pan, just give them another 3-5 minutes, then try again. They should naturally release from the pan when they’re browned.)
- Serve & Store. Enjoy fries hot from the oven with classic ketchup, fry sauce, ranch dressing, or a little extra salt, as desired, and serve with your favorite meal. Store leftover fries in an airtight container in the fridge 3-4 days. (I like to reheat mine in the air fryer or oven so they crisp back up!)


4 Scientific Secrets For The Crispiest Potatoes
The Food Lab goes much further into detail about the science of why and how this method works so well (involving terms like “dehydrated layer of gelatinized starch”), but here are the simple tricks to keep in mind:
- Use The Right Potatoes. Russet potatoes will give you the best result here, since they’re starchier than other potatoes. They rough up better during the stirring, and crisp up better in the oven, leaving a nice, fluffy interior. Basically: the perfect baked french fry.
- Par-Cooking The Potatoes. Par-boiling, or simmering, the potatoes to soften them a bit is our first step in achieving maximum crispiness. The reason is that, when you’ve partially cooked them (boiling for a few minutes) and then toss them with olive oil and seasonings, you rough up the surface a bit. That roughed up surface gets extra crispy and extra delicious in the oven, and the inside is fluffy and cooked through.
- A Super Hot Oven. Roasting at high temperature = crispy french fries! We’re roasting at 425 degrees F, though you can go as high as 450 degrees F if you like!
- Do NOT over stir. If they’ve been coated with a layer of cooking fat and you’ve got your oven hot enough, the potatoes shouldn’t stick to the pan. Seriously. No little potatoes stuck or accidentally cutting off the crispy outer layer as you try to pry potatoes off the pan. They’ll naturally release from the pan when they’re good and ready. It’s like magic.

FAQ + Tips And Tricks For The Best Crispy Oven Fries
Choose a Light Baking Sheet. Your pan material makes a big difference in the end result! For the best homemade french fries, I recommend a light colored aluminum sheet pan, NOT a dark sheet pan. The dark one will likely burn the fries, while the light one will more gently and evenly brown them. I also prefer metal over ceramic coated, enamel, or colorful sheet pans.
For Best Results, Follow The Recipe. I know it sounds basic, but keep in mind that every small change you make to the recipe will impact how it turns out. If you skip the boiling, use a different kind of potato, bake at a different temperature, or stir the potatoes a bunch of times, yours won’t look like mine. Just follow the recipe, and you’ll get great results!
Prep Ahead. To get ahead on this side dish recipe (since there IS some extra prep involved), you can mix up the seasoning blend and simmer the potatoes in advance. When I do this, I can simmer the potatoes in the morning, drain them and pop them in the fridge, then roast them in the super-hot oven for dinner, which saves me time on evenings where we don’t have quite as much time for dinner prep.
Can I Use Other Seasonings? Sure! Feel free to use just salt + oil for a classic fry, swap in our Sweet Potato Fry seasoning, or use a store-bought blend that you love. Do note that if your seasoning blend doesn’t include paprika, the fries will look slightly less golden than mine.


Did You Make This Recipe?
Tell me all about it! Leave a star rating below when you try our Crispy Oven Fries recipe. I can’t wait to hear how it goes!
Crispy Oven Fries
Ingredients
- 2 Pounds Russet Potatoes
- 2 Tablespoons Olive Oil (can use bacon fat or avocado oil, if desired!)
For the spice mixture:
- 1/2 teaspoon Kosher Salt (Can use more, if desired)
- 1/2 teaspoon Garlic Powder
- 1/2 teaspoon Onion Powder
- 1/2 teaspoon Smoked paprika
- 1/2 teaspoon Paprika
- 1/4 teaspoon Oregano
- 1/4 teaspoon Cayenne Pepper (Optional)
Instructions
- Preheat & Prep. To start, preheat the oven to 425 degrees F. Grease a rimmed sheet pan and set aside.
- Boil The Potatoes. Scrub the potatoes well to remove and dirt or grit, then cut into evenly sliced wedges. (Leve the peels on!) Place the potatoes in a medium saucepan and cover them with water so the water is 1-inch above the surface of the potatoes. Bring the water to a boil over medium-high heat then simmer the potatoes 8-10 minutes, or until just fork tender.
- Combine Seasoning. While the potatoes are simmering, mix up your seasoning mix. In a small bowl, combine salt, garlic powder, onion powder, paprika, smoked paprika, oregano, and cayenne pepper. Whisk until evenly blended and set aside.
- Coat Potatoes. When the potatoes are done cooking, drain them in a colander then add to a large bowl. Drizzle with olive oil (or cooking fat of choice), then sprinkle with seasoning mix. Gently stir with a spatula until well combined. The potatoes will get a bit roughed up and some may break. This is fine!
- Roast. Spread the potatoes out into an even layer on your greased sheet pan. Give the pan a shake or two so the potatoes are fairly evenly spaced. Roast 20-25 minutes.
- Flip & Roast Some More. then flip the potatoes and roast another 20-25 minutes. (If, at any point, the potatoes are sticking to the pan, just give them another 3-5 minutes, then try again. They should naturally release from the pan when they're browned.)
- Serve & Store. Enjoy fries hot from the oven with ketchup or fry sauce. Store leftover potatoes in an airtight container in the fridge 3-4 days.
Notes
- Choose a Light Baking Sheet. I recommend a light colored aluminum sheet pan, NOT a dark sheet pan. The dark one will likely burn the fries, while the light one will more gently and evenly brown them. I also prefer metal over ceramic coated, enamel, or colorful sheet pans.
- Prep Ahead. To get ahead on this recipe (since there IS some extra prep involved), you can mix up the seasoning blend and simmer the potatoes in advance. When I do this, I can simmer the potatoes in the morning, drain them and pop them in the fridge, then roast them in the super-hot oven for dinner, which saves me time on evenings where we don’t have quite as much time for dinner prep.
Video
Nutrition
Nutrition facts are an estimate only and will vary based on brands and amounts used.
Find it Online:
https://www.onelovelylife.com/crispy-oven-fries/Recipe originally shared 2008. Updated in 2016. Updated again with updated photos, improved recipe notes, and video and re-posted in 2026. We’ve been making these fries a LONG time! Check out the photos we posted for them in the past. We’ve gotten a lot better!

These are amazing!
Riiight!? I can’t get enough.
My college girls were home for dinner yesterday and RAVED about these! They told me the seasoning was perfection. (I left out the cayenne and smoked paprika.)They told me to definitely keep this recipe. I will for sure! I baked them on the air fry setting in my convection oven in big air fry (perforated) pans. They took a bit longer than stated but came out crispy.
I’m so glad they were a hit for your girls! I LOOOOVE the seasoning! (Thanks, too, for sharing your convection oven tips!)
These are some of the easiest yet best oven fries I’ve ever had! Next time I need to make a quadruple batch.
Finally found your recipe…again! This time I remembered to save it
YAY! I’m so glad you found it and loved it!
This is brilliant- don’t know why it never occurred to me to try cooking them a bit first! I love the science behind the method. Thanks for the great recipe!
I felt just the same way when I was reading the book! “What haven’t I thought if this before?! So smart!”
This is super interesting and I can’t wait to give them a try. Thanks for doing all the ‘science’ and taking one for the team so we can just move forward with your best end results!!
I tried these and girl are they so good. So what books do you recommend a girl reading to plan/get ready for pregnancy? I have really enjoyed taking a step into your world. You are amazing and you and Michael are going to be great parents.
Lynn–thanks so much for your sweet comments. I should probably do a blog post about this, but I read a TON of books during my pregnancy. For a first time pregnancy, I really appreciated the Mayo Clinic Healthy Pregnancy book because it’s written by very well-respected doctors and has LOTS of reference information. I also have a copy of What to Expect When You’re Expecting, but I found myself using the Mayo Clinic book more. I would recommend that every potential parent read a few books about sleep habits, so you can kind of wrap your brain around that before you have a newborn and things are crazy. I read The Baby Whisperer, On Becoming Babywise, and Healthy Sleep Habits Healthy Child. Baby Whisperer and Babywise were my preferred books of those two. Thanks again for your comments! I’ll be sure to write more about this soon.