


These gorgeous gluten-free chocolate crinkle cookies are ultra-fudgy and absolutely delicious! Perfect for the holidays or your next chocolate craving. (Gluten-Free & Dairy Free)
Do you have a favorite childhood cookie?
Chocolate Crinkle Cookies are Michael’s favorite. He grew up eating his mom’s (so good!), and they’re one of those recipes that make it really seem like the holidays for him. (My holiday childhood faves = my mom’s dipped ginger cookies and sweet sticky Chex mix!)
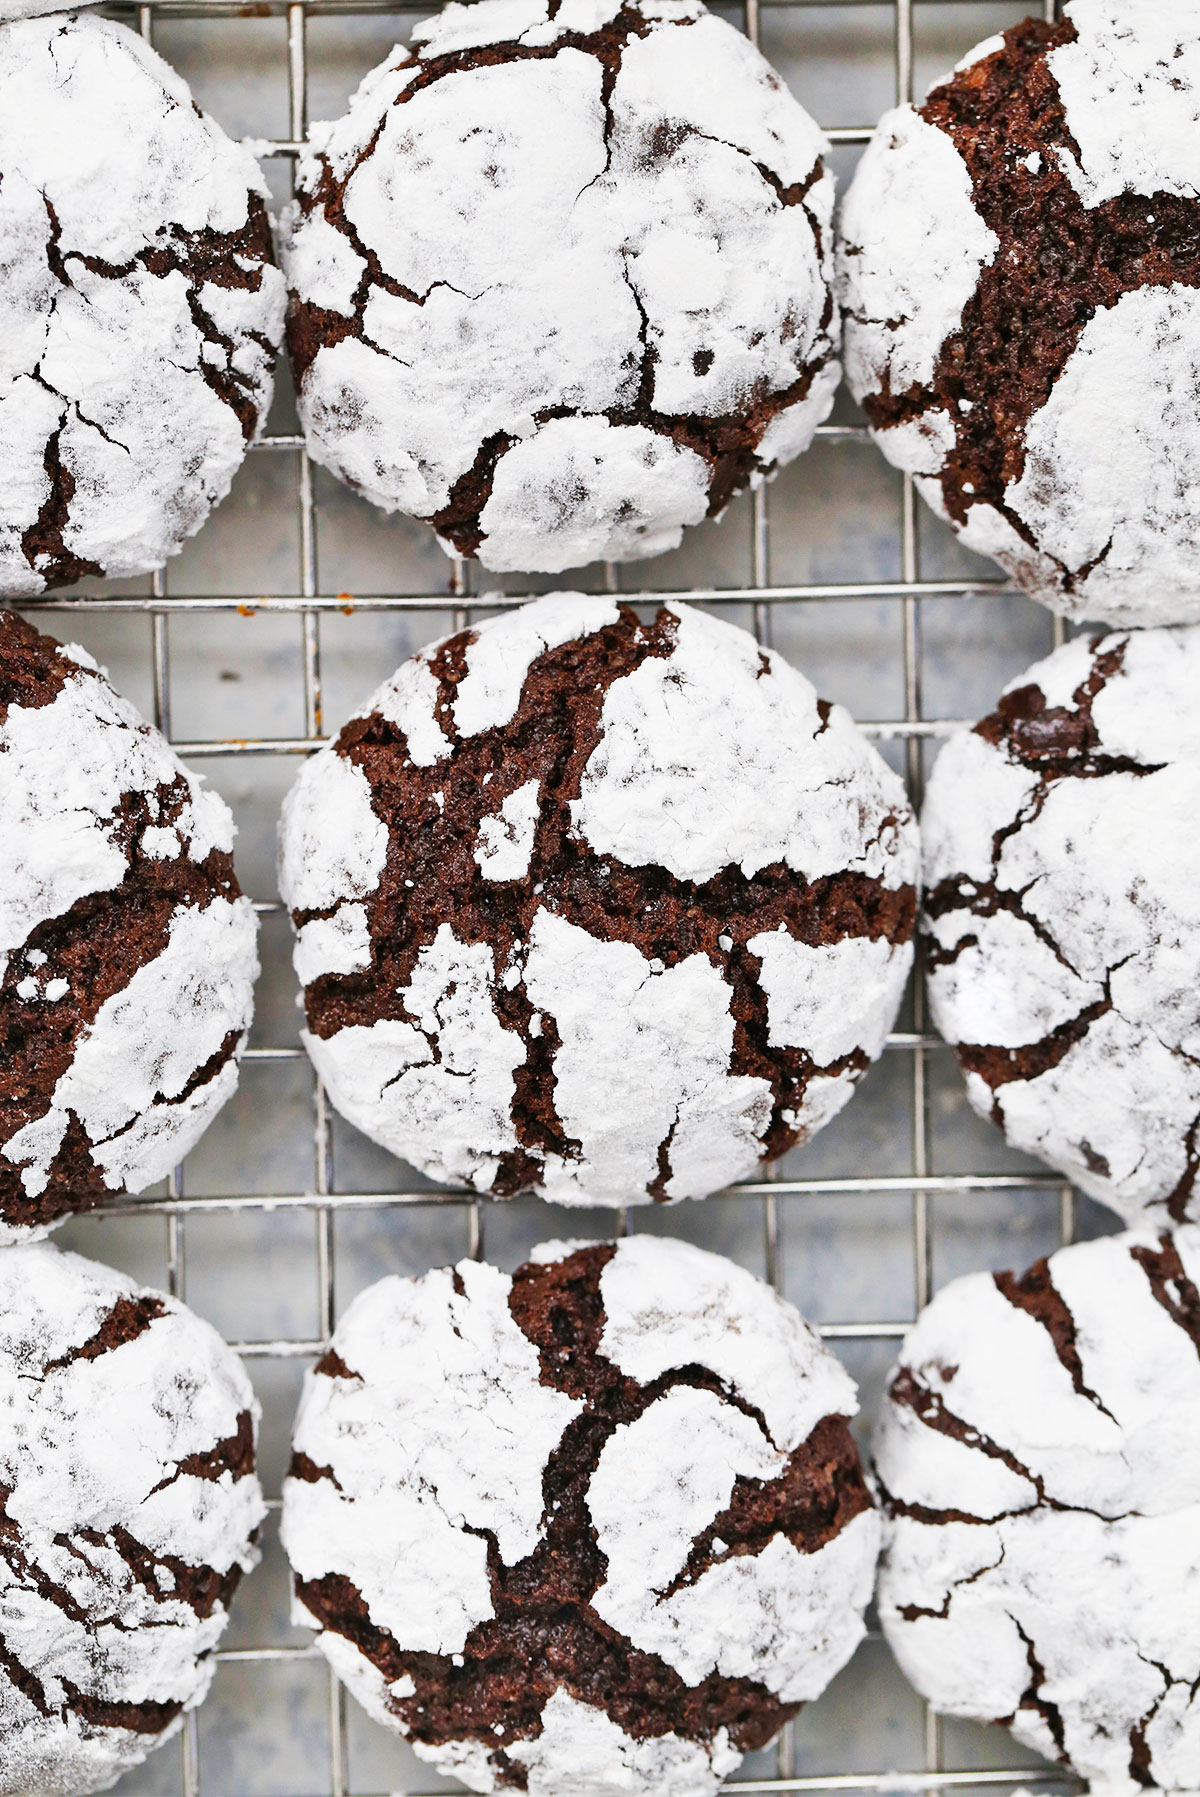
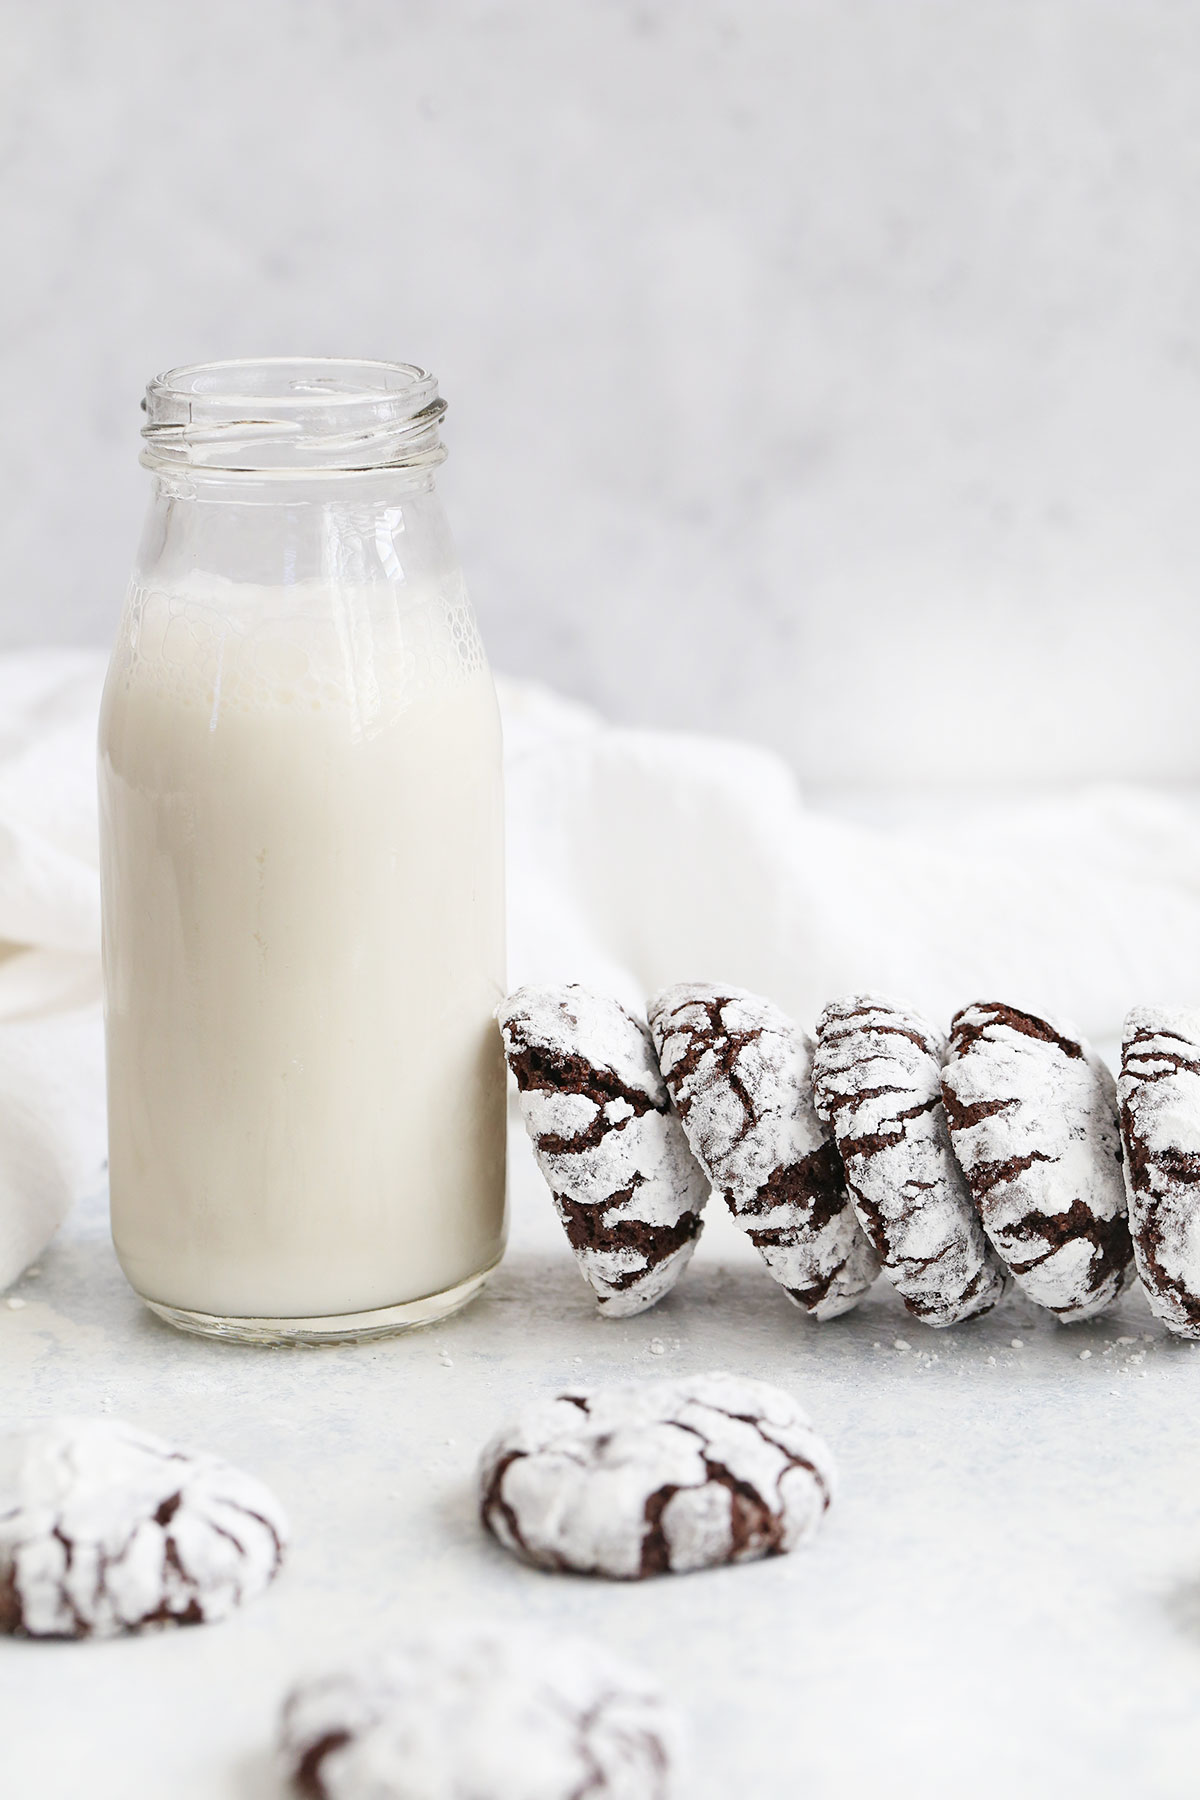
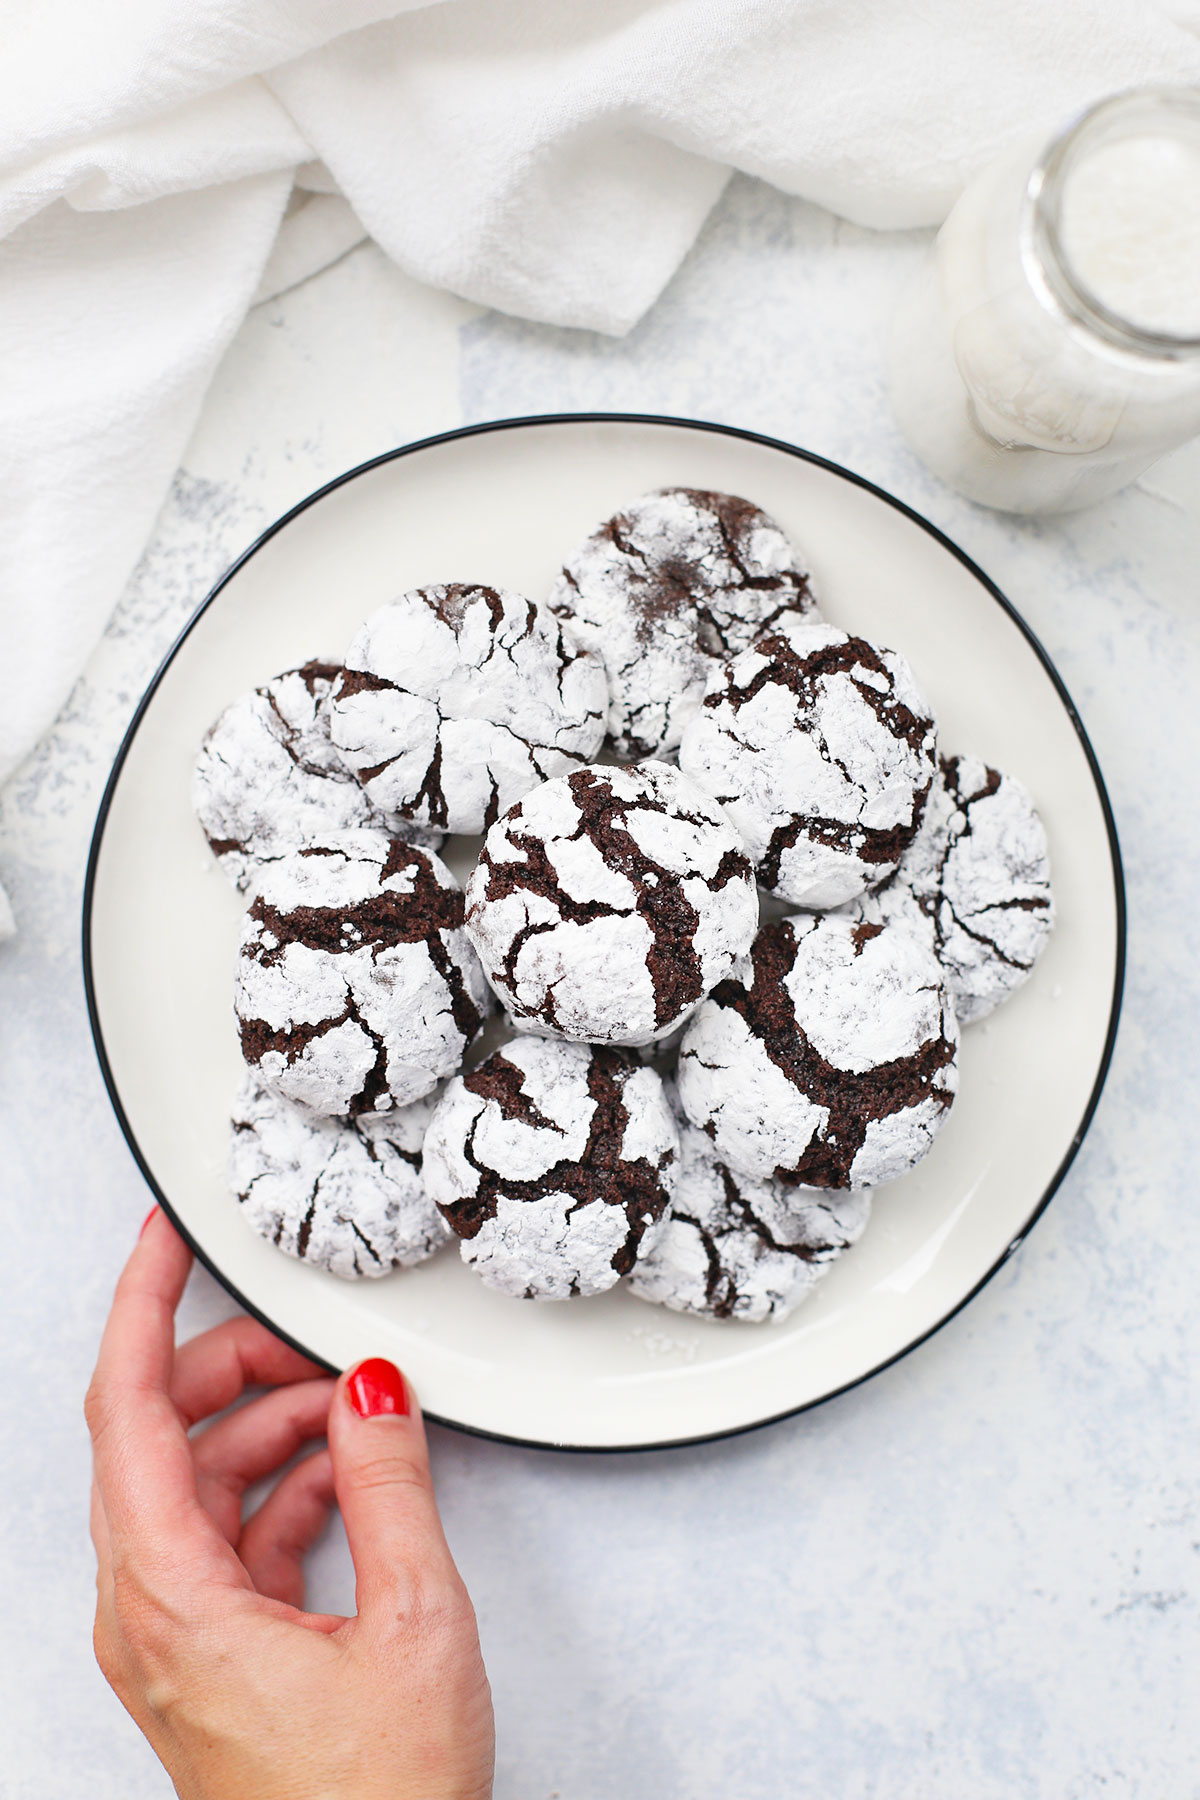
Every holiday season, we like to re-work one or two recipes from our pre-gluten free days so we can add them to our holiday traditions, and this year we perfected these gluten-free chocolate crinkle cookies. If you’ve never had them before, chocolate crinkles are fudgy, brownie-like chocolate cookies rolled in powdered sugar and baked. When the cookies spread in the oven, they create this gorgeous “crackle” effect on the tops that not only looks impressive on a cookie plate or dessert tray but tastes amazing too.
These gluten-free chocolate crinkle cookies are based on our original recipe and have all the same soft, chocolatey goodness of the original. They’re a perfect addition to your holiday (or a great way to satisfy your next chocolate craving!). Here’s how easy they are to make…
Start With Simple Ingredients
Gluten-free chocolate crinkle cookies only take 9 ingredients, and they’re all simple and straightforward. (Isn’t that just the best?!). Ours are made from…
- GLUTEN-FREE FLOUR. These gluten-free chocolate crinkle cookies are based on our original recipe. I LOVE that they’re easily converted to gluten-free cookies thanks to a 1:1 gluten-free baking flour. Our favorites are this one and this one. If you use another gluten-free flour blend, be sure it contains xanthan gum!
- UNSWEETENED COCOA POWDER. The ultra chocolatey-brownie flavor comes from plenty of unsweetened cocoa powder. I usually use dark cocoa powder (sometimes sold as Dutch-processed or alkalized cocoa powder). You can also mix regular cocoa powder and dark cocoa powder!
- SUGAR. I almost always use unrefined sweeteners in my dessert recipes, but sometimes a special occasion calls for the white stuff! I like this organic cane sugar.
- AVOCADO OIL. I use a neutral oil, like avocado oil, as the fat for these cookies. You get that decadent brownie texture without any added flavor (like you get from olive or coconut oils). You can substitute another neutral-tasting oil (like vegetable oil or canola oil), if you prefer.
- EGGS + VANILLA. We round out the wet ingredients with eggs and vanilla extract. I love that the eggs give them a deeply fudgy texture and just enough puff, while the vanilla really plays up the chocolate. (See the next section for other fun flavor twists you can try!)
- BAKING POWDER + SALT. lastly, the baking powder helps the cookies rise, while the salt keeps these from being too sweet.
- POWDERED SUGAR. What makes these gluten-free chocolate crinkle cookies extra special is the powdered sugar “crackle” effect they get when baked. You’ll roll the chocolate cookie dough balls in a bit of powdered sugar (confectioners’ sugar/icing sugar) and during the baking, they’ll spread and create that pretty crinkle effect you’re looking for.
A Few Notes On The Powdered Sugar
You won’t use all of the powdered sugar for these gluten-free crinkle cookies. It’s just MUCH easier to roll them if you have plenty of powdered sugar in the bowl.
Additionally, I recommend fluffing the sugar with a fork every few cookies, since it can become compact when you roll the dough in the sugar. You want a really good coating in order to get that lovely crackled, crinkled effect when the cookies bake.
How To Make Gluten-Free Chocolate Crinkle Cookies, Step By Step
As always, you can find the full recipe, with ingredient amounts, detailed instructions, and tips in the recipe card below!
- Combine. In a large bowl (or a stand mixer), combine oil, cocoa powder, and sugar. Stir until well-combined. (It’ll look like very dark wet sand). Add eggs 1 at a time, mixing in-between each addition to incorporate well. Add vanilla and stir to combine. Add salt, baking powder, and gluten free flour. Stir until just combined.
- Chill the dough 3-4 hours (or overnight). Do NOT skip this step, or your cookies will spread too much in the oven.
- Preheat & Prep. When ready to bake, preheat oven to 350 degrees F. Line a baking sheet with parchment and place powdered sugar in a bowl.
- Scoop & Roll Cookie Dough. Use a small cookie scoop or a tablespoon to roll out 1″ balls of chilled dough. Roll each cookie dough ball in powdered sugar to coat well.
- Bake Cookies. Place 8-12 coated cookie dough balls on the prepared baking sheet. Bake at 350 degrees F. for 8-10 minutes, or until just the edges are set and the centers are still wet.
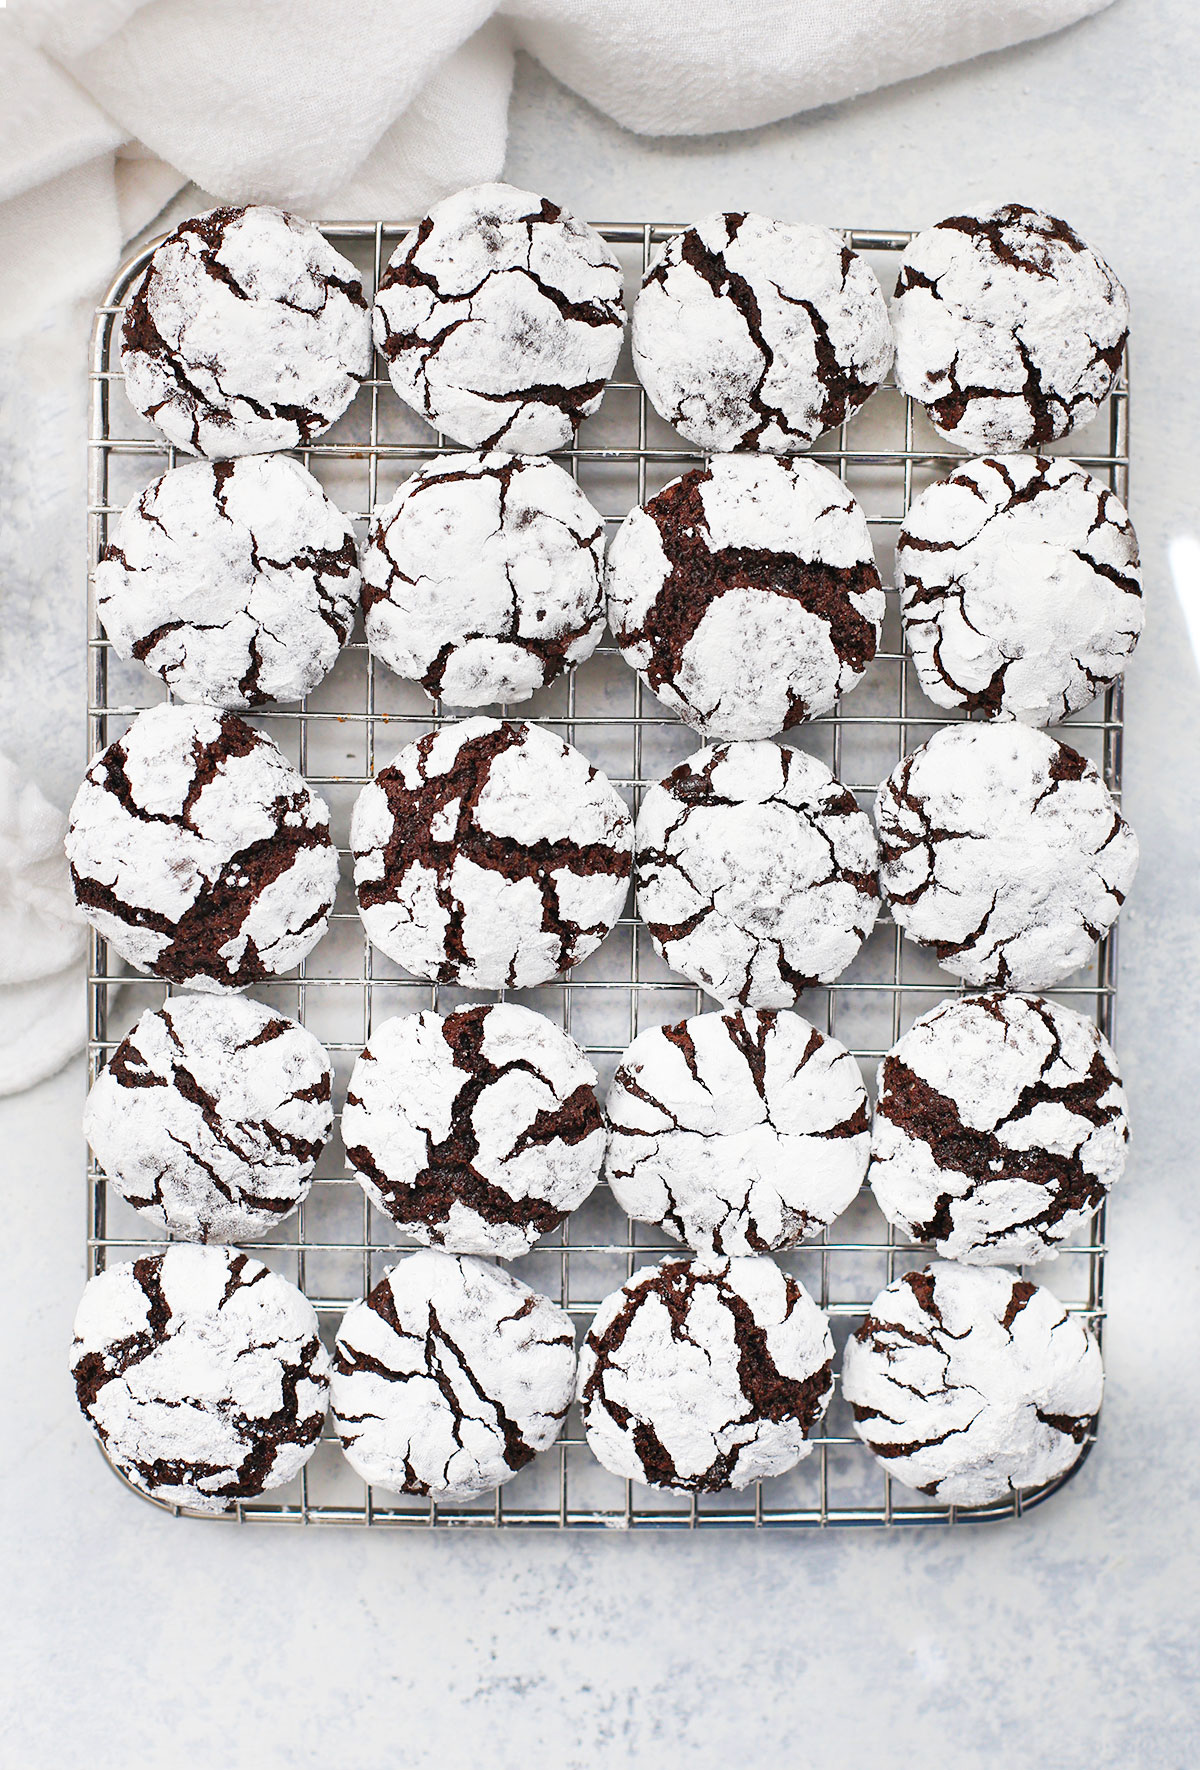
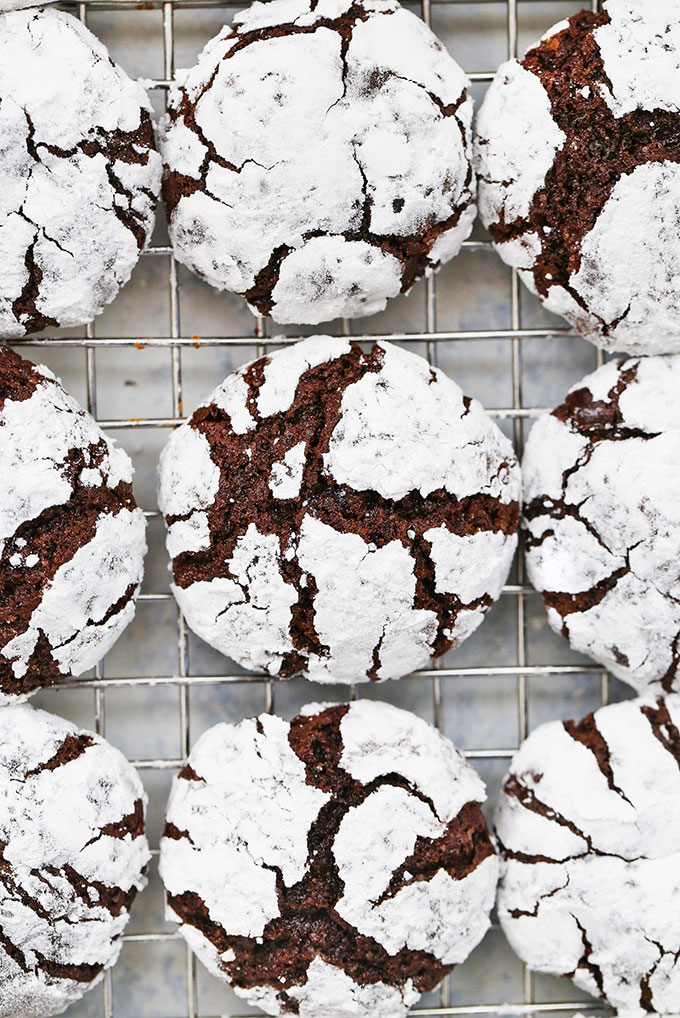
- Cool. Allow the cookies to cool 2-3 minutes on the baking sheet to allow them to continue to set, then transfer to a cooling rack.
- Repeat with remaining dough until all the cookies are baked.
- Serve & Store. Enjoy cookies right away, or store in an airtight container at room temperature 2-3 days. Or, freeze 2-3 months.
How To Get The Perfect Bake
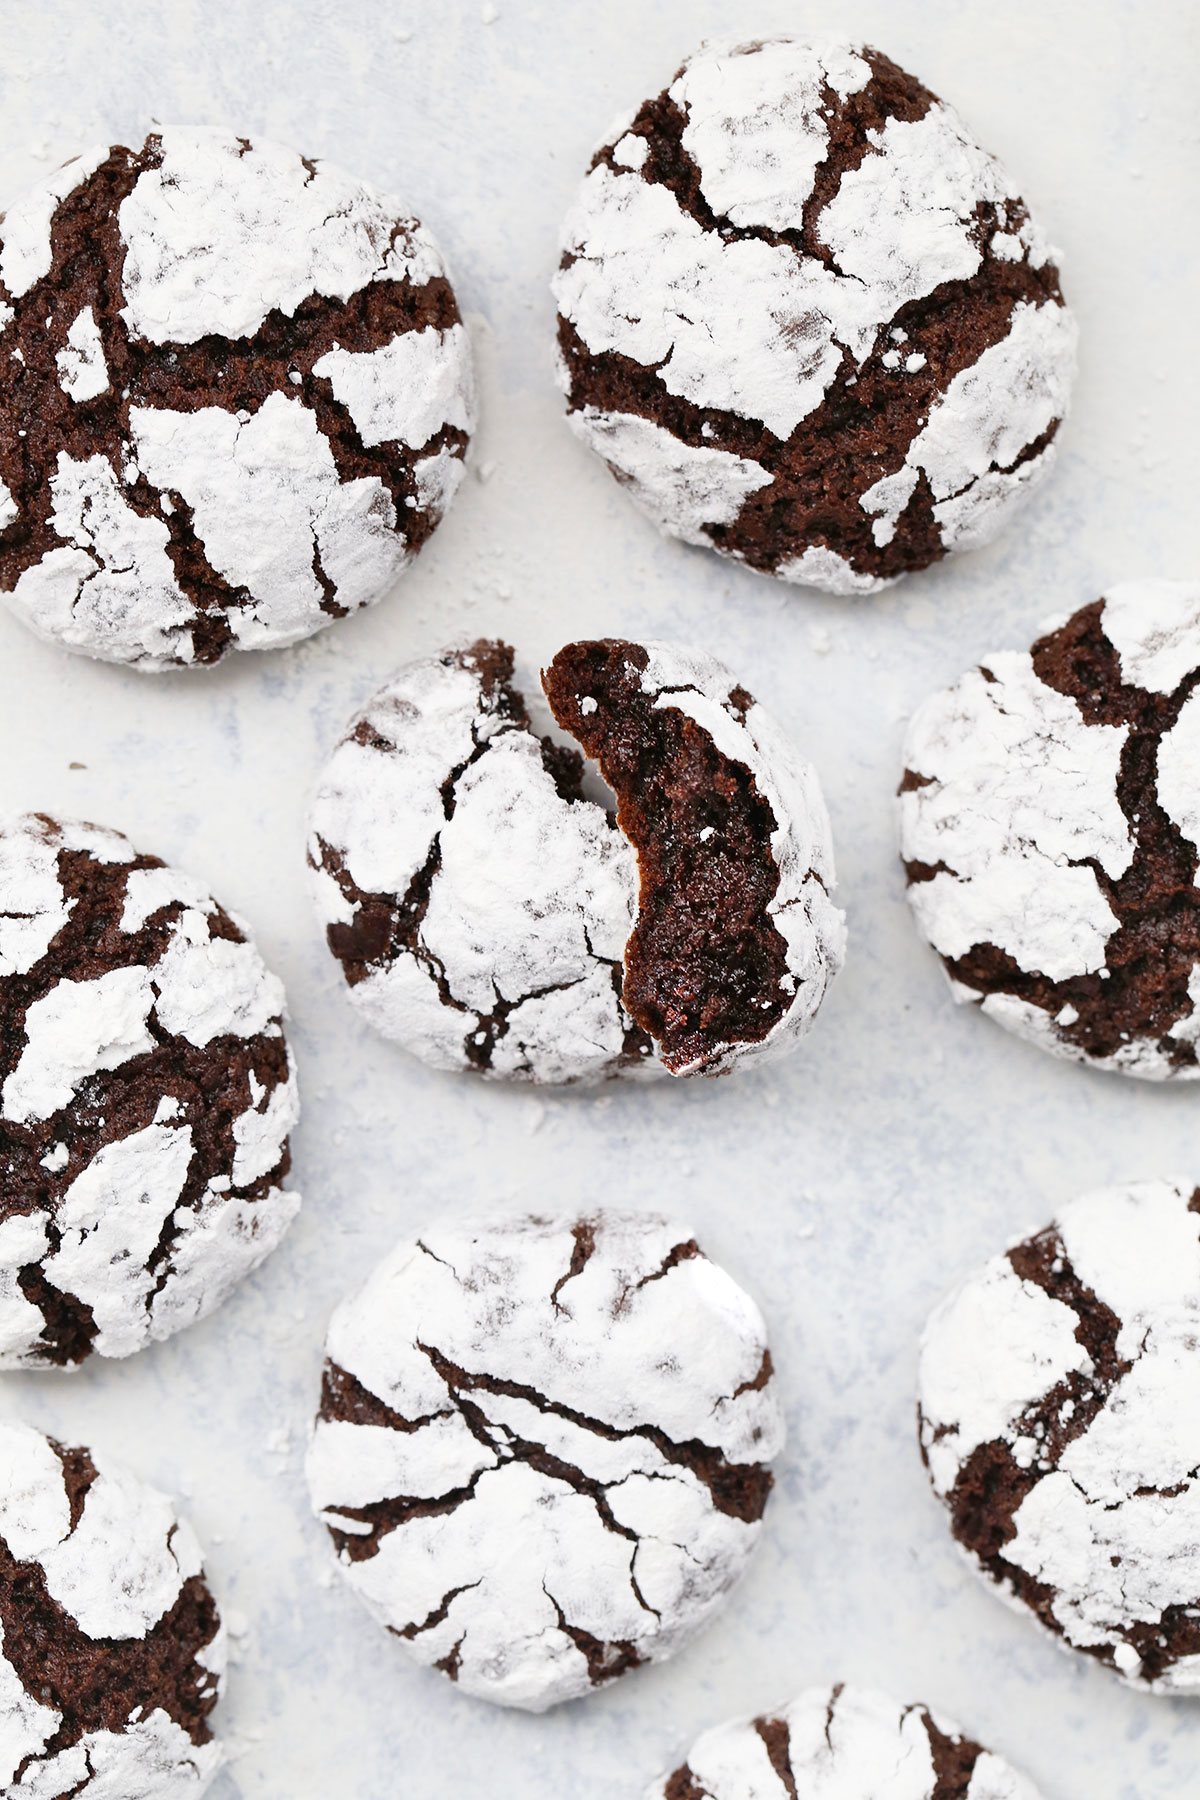
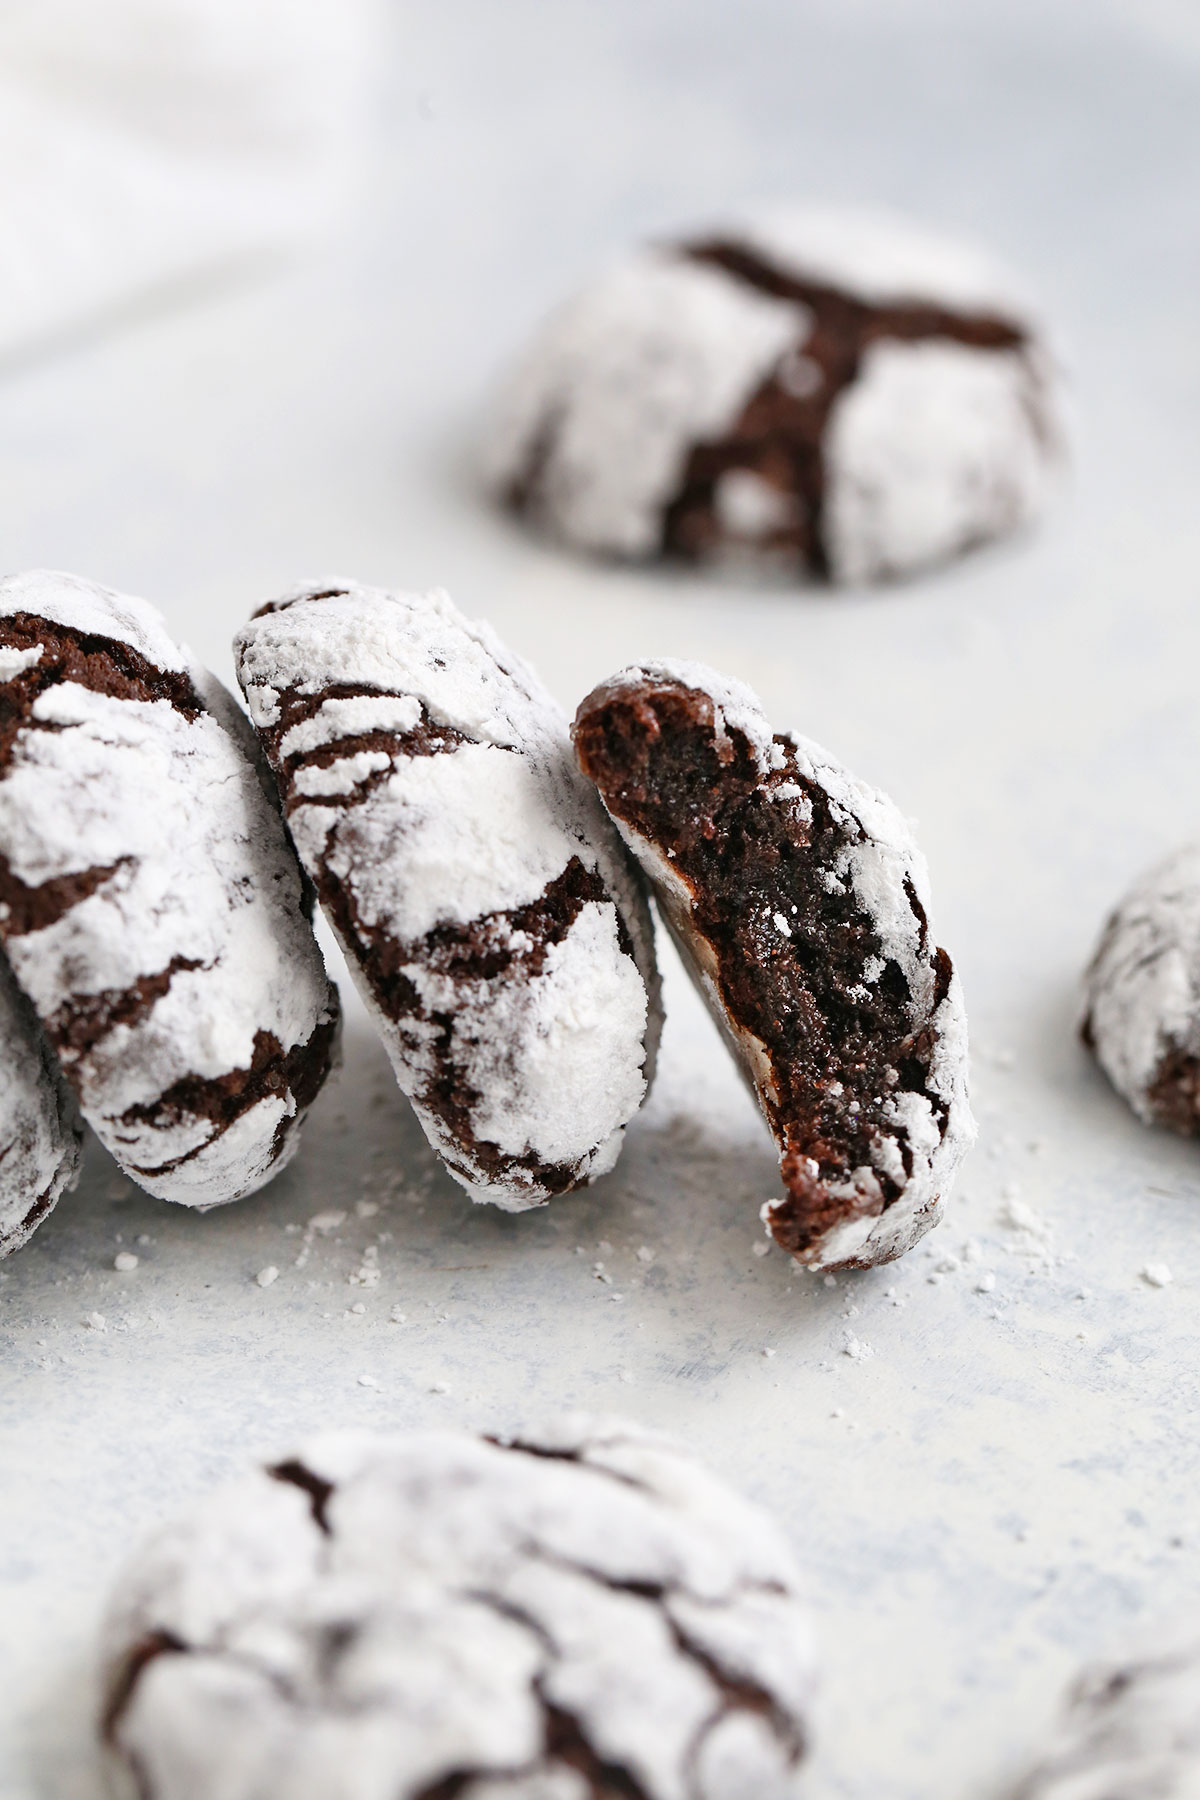
One REALLY important tip is to pull chocolate crinkle cookies out of the oven *before* they seem done. The centers should still look a little wet/gooey, while the edges are just set. That way, as they cool on the pan, the residual heat will set the centers and you’ll still have the soft, brownie-like texture and fudgy center you’re looking for.
Add A Yummy Flavor Twist!
For a change of pace, you can add a little extra flavor to these chocolate crinkle cookies. It’s a great way to add a special little twist.
- PEPPERMINT CHOCOLATE CRINKLE COOKIES. Add 1 tsp. peppermint extract (depending on how strong you like it!) along with the vanilla. It gives major candy cane/hot chocolate vibes that are PERFECT for the holidays.
- AMARETTO CHOCOLATE CRINKLE COOKIES. Add 1/2-1 tsp. almond extract along with the vanilla. We LOVE almond with chocolate, and this amaretto twist is really something special.
- OTHER OPTIONS. You could also play with orange zest or extract (start small!) for a chocolate-orange effect. Really, just think of anything that plays nice with chocolate! You could also add some chocolate chips for a non-traditional but delightful twist.
FAQ + Tips For The Best Gluten-Free Chocolate Crinkle Cookies
DON’T SKIP THIS IMPORTANT STEP! The chilling time might seem excessive but do. not. skip. this. step. Chilling the dough will help develop the flavor and texture, but it will also help your powdered sugar coating to really stand out. If you roll the dough when it’s not chilled, the powdered sugar will look more faded and absorb a bit into the cookies. They also won’t puff and spread the same way.
IF YOU’RE IN A RUSH… If you’re in a rush, you *can* roll the cookie dough into balls, place them on a plate or cookie sheet lined with parchment or a silicone mat and pop them in the freezer for 30-40 minutes, or till they’re firm.
IF YOUR CRINKLES AREN’T LOOKING THE WAY YOU WANT THEM TO: make sure you’ve chilled the dough completely. COLD dough works best. Coat the cookie dough in powdered sugar COMPLETELY before adding them to the baking sheet. If that’s still not working, you can roll the cookie dough in white sugar (granulated sugar) first, THEN roll them in powdered sugar.
I’M NOT GLUTEN-FREE. CAN I MAKE THESE WITH REGULAR FLOUR? Yes! I recommend baking a test batch with just 1-2 cookies to see how they spread (everyone’s oven is different). If your cookies spread more than you’d like, just add a few tablespoons (1-2 Tbsp more all purpose flour) and try again.
CAN I USE ALMOND FLOUR OR COCONUT FLOUR INSTEAD? No. Not for this recipe. You’d need to adjust the amounts of other ingredients and liquids to get the ratios right. Almond flour will make them too moist & fall apart, while coconut flour will turn them into a dry, crumbly mess. This gluten-free crinkle cookies recipe works best with a gluten-free measure-for-measure flour with xanthan gum.
What’s The Best Way To Freeze Chocolate Crinkle Cookies?
Since they have a rather delicate appearance, you’ll want to handle them carefully. I recommmend freezing the gluten-free chocolate crinkle cookies in a single layer when possible. If you do need to stack them, separate each layer with parchment paper or waxed paper to prevent them from sticking together and to help preserve their pretty appearance.
A freezer-safe box or container can work better than a bag, since the cookies will get bumped and jostled less.
Once frozen, chocolate crinkle cookies will keep in the freezer about 6-8 weeks. (But I can never make mine last that long–they’re too yummy!)
When you’re ready to eat them, just thaw the cookies at room temperature or transfer to the refrigerator.


Did You Make This Recipe?
Tell me all about it! Leave a star rating below when you try our Gluten-Free Chocolate Crinkle Cookies recipe. I can’t wait to hear how it goes!
Gluten Free Chocolate Crinkle Cookies (Dairy Free, Too!)
Ingredients
- 3/4 cup avocado oil can sub another neutral-tasting oil, like vegetable oil or canola oil
- 1 cup unsweetened Dutch-processed cocoa powder* (96 grams)
- 1 1/2 cups cane sugar (300 grams)
- 4 large eggs
- 2 teaspoons vanilla extract
- 1/2 teaspoon salt
- 2 teaspoons baking powder
- 1 3/4 cups gluten free measure-for-measure flour * (210 grams)
- 1 cup powdered sugar (or more, if needed) (120 grams)
Instructions
- Combine. In a large bowl (or a stand mixer), combine oil, cocoa powder, and sugar. Stir until well-combined. (It’ll look like very dark wet sand). Add eggs 1 at a time, mixing in-between each addition to incorporate well. Add vanilla and stir to combine. Add salt, baking powder, and gluten free flour. Stir until just combined.
- Chill the dough 3-4 hours (or overnight). Do NOT skip this step, or your cookies will spread too much in the oven.
- Preheat & Prep. When ready to bake, preheat oven to 350 degrees F. Line a baking sheet with parchment and place powdered sugar in a bowl.
- Scoop & Roll Cookie Dough. Use a scoop or a tablespoon to roll out 1″ balls of chilled dough. Roll each cookie dough ball in powdered sugar to coat well.
- Bake Cookies. Place 8-12 coated cookie dough balls on the prepared baking sheet. Bake at 350 degrees F. for 8-10 minutes, or until just the edges are set and the centers are still wet.
- Cool. Allow the cookies to cool 2-3 minutes on the baking sheet to allow them to continue to set, then transfer to a cooling rack.
- Repeat with remaining dough until all the cookies are baked.
- Serve & Store. Enjoy cookies right away, or store in an airtight container at room temperature 2-3 days. Or, freeze 2-3 months.
Notes
- *Gluten-Free Flour. Our favorites for this recipe are King Arthur Flour Measure-for-Measure gluten free flour and Bob’s Red Mill 1:1 Gluten Free Baking Flour. Use a spoon to scoop the flour into your measuring cup to avoid packing extra flour into the cookie dough.
- Cocoa Powder. I recommend Dutch processed cocoa powder for the best color and flavor, or you can use half natural cocoa powder (like Hershey’s) and half Dutch-processed/dark cocoa powder. If you use all natural cocoa powder, the chocolate flavor will be much weaker.
- **Powdered Sugar. You won’t use all the powdered sugar for this recipe. You’ll need about 1/3-1/2 cup total to coat the cookies, but it’s MUCH easier to coat them if you measure out a full cup.
- If Your Crinkles Aren’t Looking The Way You Want Them To: make sure you’ve chilled the dough completely. COLD dough works best. Coat the cookie dough in powdered sugar COMPLETELY before adding them to the baking sheet. If that’s still not working, you can roll the cookie dough in white sugar (granulated sugar) first, THEN roll them in powdered sugar.
Video
Nutrition
Nutrition facts are an estimate only and will vary based on brands and amounts used.
Made these for a ladies cookie exchange and they were a hit!
Hooray! I’m so glad to hear it!
A hit with the family every Christmas. Even those who need not eat GF, absolutely loved them!
Thank you so much for this kind review! It’s the same for us! Whenever we bring these to family events, EVERYONE loves them (and we’re the only ones who are gluten-free!)
great gluten free recipe – a cross between a brownie and a cookie. I rolled them in regular sugar first and then the icing/powdered sugar.
Awesome! So glad you loved them Janet!
These are both delicious and beautiful!!!! The crown jewel of crinkle cookies!!!
1,000,000,000 stars (I didn’t have enough stars to express my love of these tasty treats)!!!
No one could tell they were gluten free. Perfect for my daughter! Nice to have a new cookie to share.
YAY! I’m so glad to hear that!
Perfection! I followed the recipe – did not change anything. These were SO delicious! They also crinkled beautifully (sometimes that doesn’t happen in GF crinkles). This will be my go-to recipe :o) Thanks for sharing!
I’m so glad you loved them Holly! They’re a family favorite for us!
I made these 3 different times this holiday season. They are awesome! Thank you so much for this recipe!!! It’s a keeper for me and my family!
These were more fudgy than my regular flour recipe. My husband actually preferred these. Super yummy!
My powdered sugar is melting and completely disappearing, what am I doing wrong? I followed the cook time and temperature instructions exactly and I completely coated the cookies in powdered sugar.
Hi, Melanie! A few things to check:
1. Did you chill the dough for the full time? If not, the dough can absorb the powdered sugar. Nice, cold dough works best.
2. Are you at high altitude or baking in high humidity? Those things can impact the bake.
3. Another trick you can try is rolling the dough balls in REGULAR sugar first, then rolling in powdered sugar. The regular sugar can sometimes help powdered sugar stick!
WOW! These are AMAZING. I thought I was eating a brownie. the texture and taste and perfect. Easy to make.
Riiiiiight!? Brownie texture forever!
Made these and they are SO! GOOD! Fluffy and dark chocolatey and gooey if you undercook them just a little bit. I used a regular stand mixer instead of hand mixing and also whisked my dry ingredients beforehand to make sure they were evenly incorporated. Great recipe, thank you!
Thank you for making GF version of these. Do you have any suggestions for a good substitution for eggs (allergies).
Hi! I haven’t made them egg free, but you can try flax eggs or a powdered egg substitute! (Powdered egg substitute will have the smoothest texture)
how come its dairy free if you use eegs?
Eggs are dairy-free! While they’re often sold near dairy products in the grocery store, eggs themselves contain no dairy.
Made this recipe with coconut sugar instead of cane, however the dough came out very batter like and sticky. I ended up having to add more flour in order to handle it. Somehow, after all my tweaks they came out great!
Phew! I’m glad you were able to make it work!
Can I make the dough in advance and freeze it?
You can! I recommend chilling the dough in the refrigerator, then scooping and rolling the cookie dough balls out before freezing. It can be a bit more finicky when you’re rolling frozen cookie dough balls in powdered sugar, so I recommend letting it thaw a bit in the refrigerator before baking. Hope that helps!
These cookies came out great for me! I used canola oil and Bob’s Red Mill 1-to-1 flour. I ended up refrigerating the dough for several days due to lack of time in the kitchen but I don’t think this caused any problems. I don’t have a little scooper so used spoons and probably handled the dough a bit more than I should have. I kept the dough in the fridge while a batch cooked so it wouldn’t stick to my hands so much. I also had to play with cooking time – partly because my oven isn’t great but also because all the cookies weren’t the same size. I do think I overcooked some – they were more cakey and less gooey inside. I definitely think the scooper would be a great benefit. One thing about the texture – I don’t think you can away from that slight grittiness you get with gluten-free flours. There really is nothing as smooth as wheat flour!
Question: do you have to only bake 8-12 cookies at a time? Why not 2 baking sheets to bake all at once?
Okan – It allows for better air circulation and a more even distribution of heat. Most ovens do not bake two trays of cookies evenly, so working in smaller batches helps the cookies bake more evenly and consistently 🙂
Just made these and they turned out amazing. Will definitely add peppermint at Christmas time. I’ve been gluten free over 30 years and it’s so fun to find good recipes. Thank you 😊
YAYYY! So glad you loved them Teena!
Have you tried this recipe with add-ins such as nuts or chocolate chips? I noticed the gluten free flour aftertaste. Don’t get me wrong, the cookies are good, but I don’t think my “normal” friends would enjoy these. I just wondered if add ins would help mask the aftertaste.
Linda – I’d love to help! What flour did you use? Some blends taste stronger than others. Chocolate chips can work in these cookies, or you might like these peppermint crinkle cookies.
I followed the recipe exactly, using the peppermint option and these turned out great. I used President’s Choice gluten free all purpose flour. It was a surprisingly easy recipe. Prepared the dough in the morning and baked in the afternoon. Everyone loves the cookies and they look pretty. I have already shared this recipe and I know this will become a cookie I make regularly. Thank you!
I’m so glad you enjoyed them Genoa! Thank you so much for taking the time to leave a review!
I made these same as the recipe but the flavor of the avocado oil carried over into the cookies. Its not a flavor i like which is a bummer! Additionally they are quite flat but I am at altitude.
Sarah – I’m sorry they weren’t what you were looking for. If dairy isn’t a problem for you, you might really like these ones made with butter. As for altitude, I do think that’s probably why they were quite flat. I’m sorry!
Hi! Can I use the same amount of regular all-purpose flour instead of gluten-free flour?
Aubrey – I can’t try it because of our gluten intolerance, but I believe it will work! This was based on our old recipe, which used regular AP flour 🙂
These cookies turned out amazing!!! My neighbors who aren’t gluten free enjoyed them too. I had to make a few changes after reading the comments, so I used 2 cups of flour and baked for 10-12 mins.
That’s great! So glad you loved them!
Hi,
Can I use an egg substitute (the neat egg) instead of eggs?
Thanks😊
I haven’t made these with egg substitute yet, but I’d love to know how it goes if you give it a try!
Hello, I followed the recipe exactly as is, but the cookies were incredibly undercooked. I let them cook the 6-7 min, along with keeping them on the baking sheet for up to 3 min.
Tracy – I’m so sorry you ran into trouble. Ovens can vary in temperature, so I always try to leave a range for baking times, along with other clues to look for (like the edges are set and the centers are still wet). I hope you were able to pop them back in the oven for a few minutes to get them your liking. Again, I’m so sorry!
Can you replace the oil with butter?
I think so, so long as you melt it first. The texture will end up slightly different because of the structure of the fats, but I think they’ll still work!
How are you able to store them once baked? I don’t want to mess up the pretty sugar coating.
I usually put parchment paper between layers of cookies and they keep pretty well! But we’ve also put them in bags in the freezer and while they’re not pristine, they look pretty good even then!
Do you think they’ll freeze well?
They freeze great! The powdered sugar can get a bit fussed if the cookies are packed too tight, but the flavor and texture are spot on! I usually separate layers of cookies with parchment paper to help protect the powdered sugar finish 🙂
Can I use a cup of almond flour in this recipe?
Great question! Typically almond flour isn’t a 1:1 substitute for other flours, so I wouldn’t be able to guarantee the results without a bit of testing.