Gluten-Free Focaccia with Rosemary
This post may contain affiliate links. Please read our disclosure policy
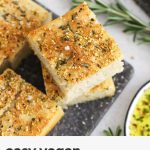
Our easy gluten-free focaccia recipe has a perfect crispy crust & tender, fluffy center. It’s the easiest gluten-free bread around! (Vegan-Friendly!)
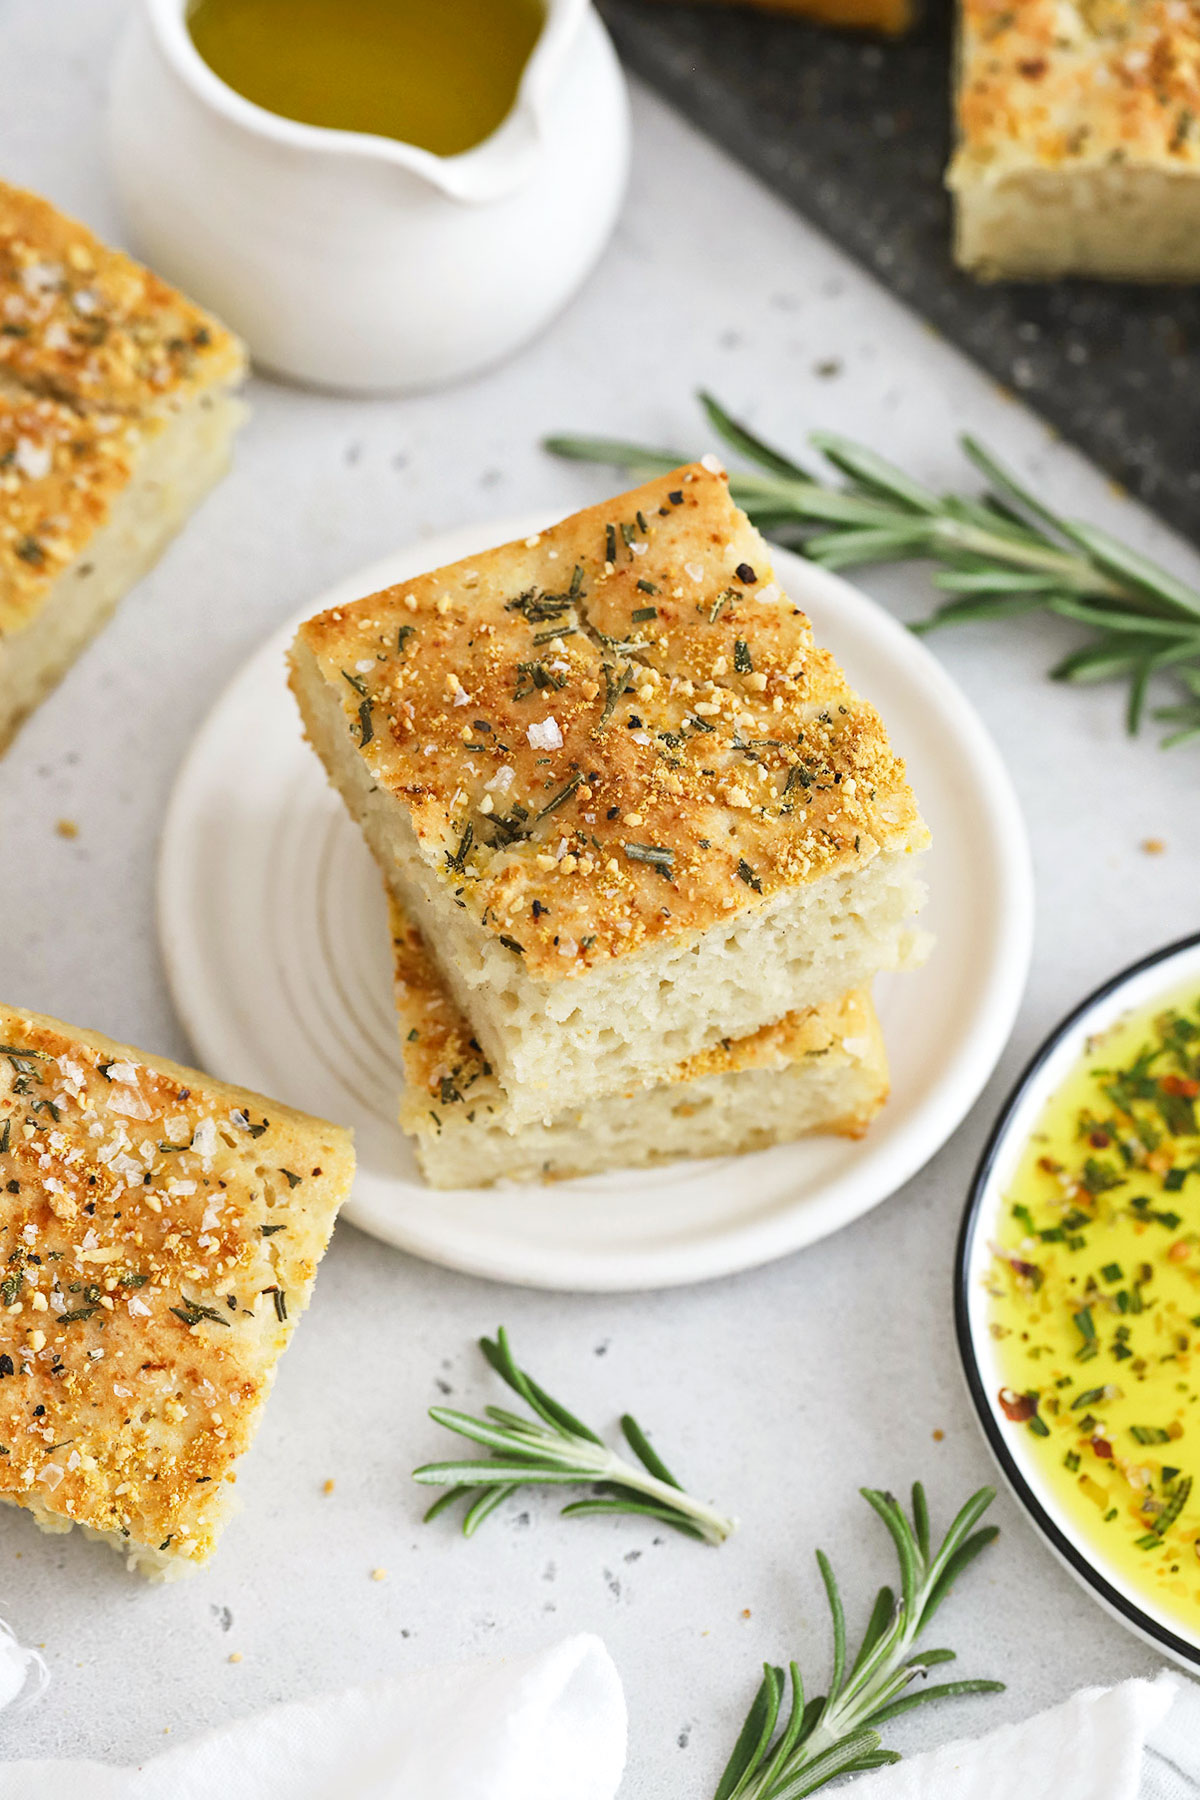
This gluten-free rosemary focaccia has been one of our top posts for the last several years, and it’s better than ever, thanks to updated, more thorough directions & helpful tips!
Before we went gluten-free a decade ago, I used to bake bread all the time. But gluten-free bread is a totally different ballgame! Since there’s no gluten, gluten-free bread dough can be trickier to work with and takes a little extra skill & know-how to get just right.
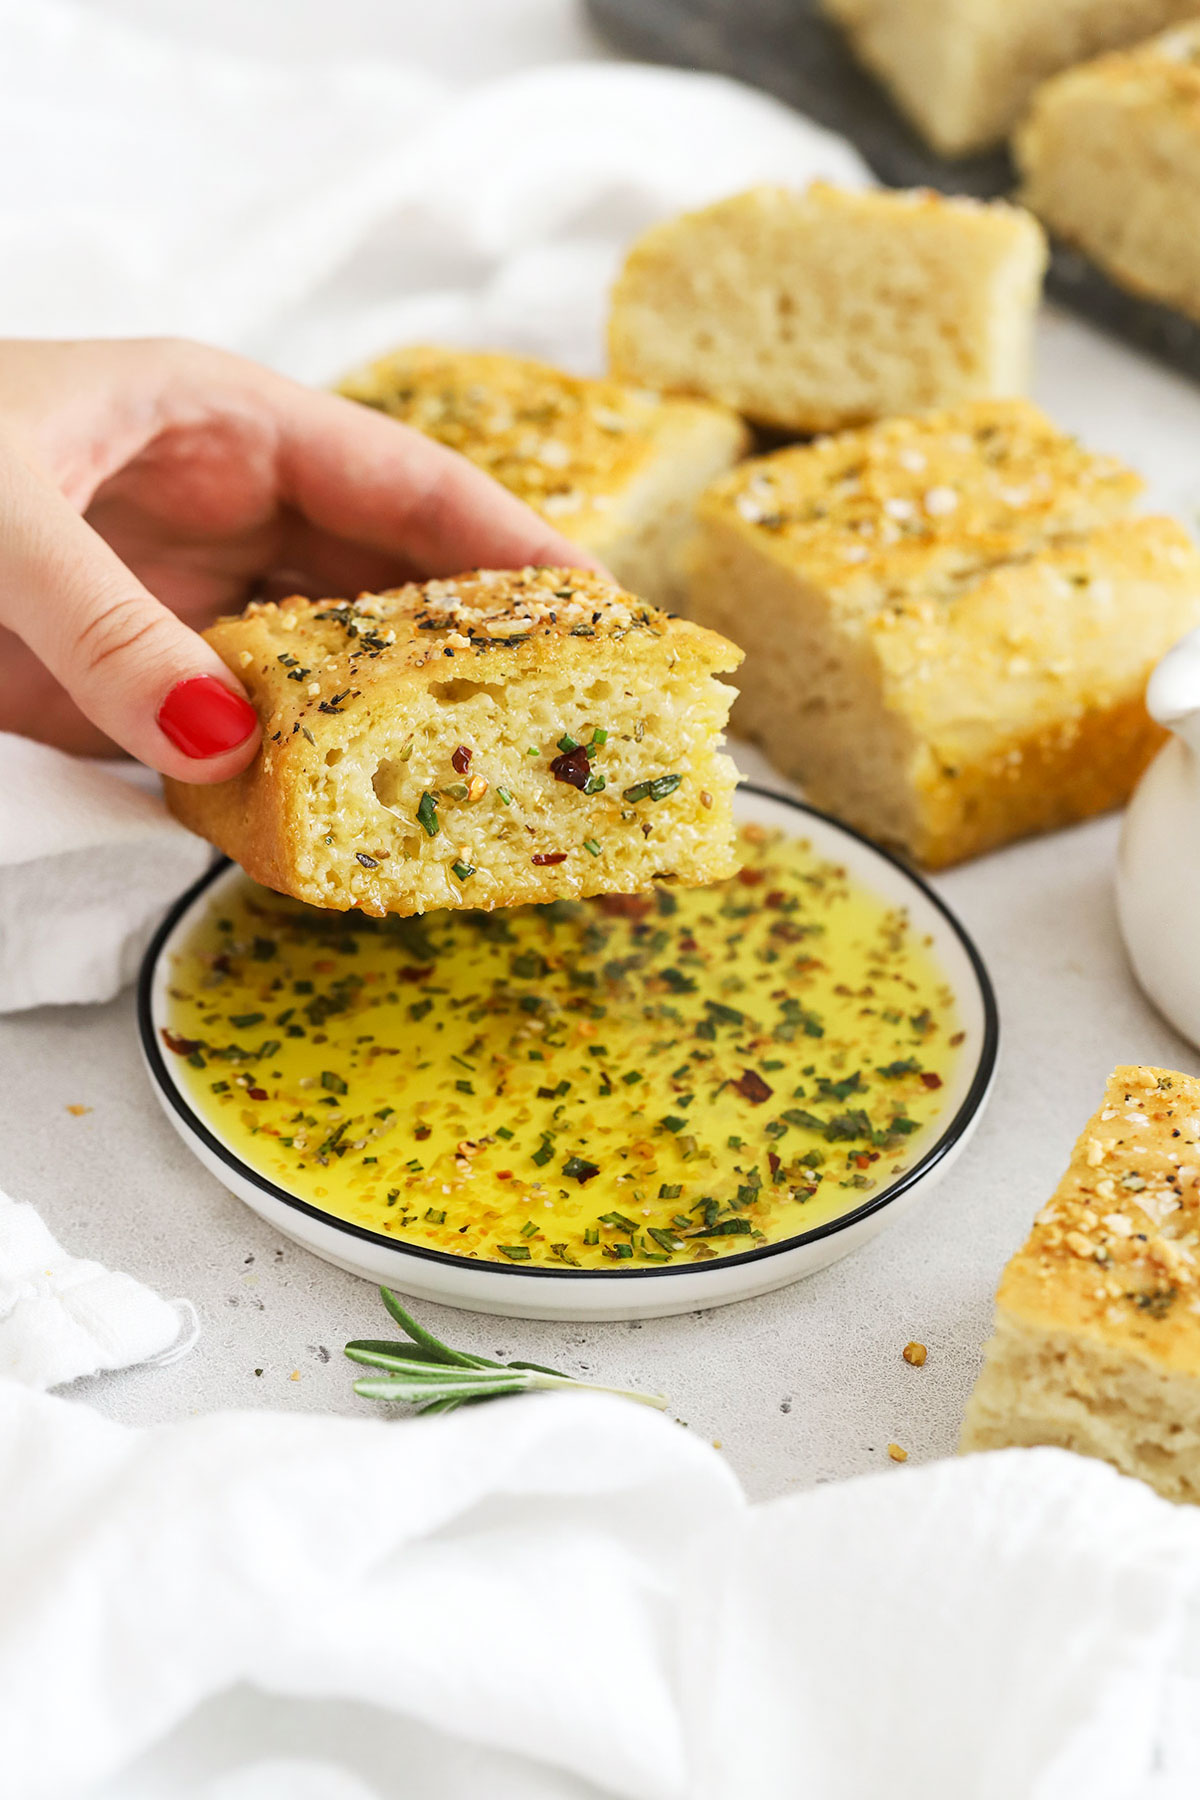
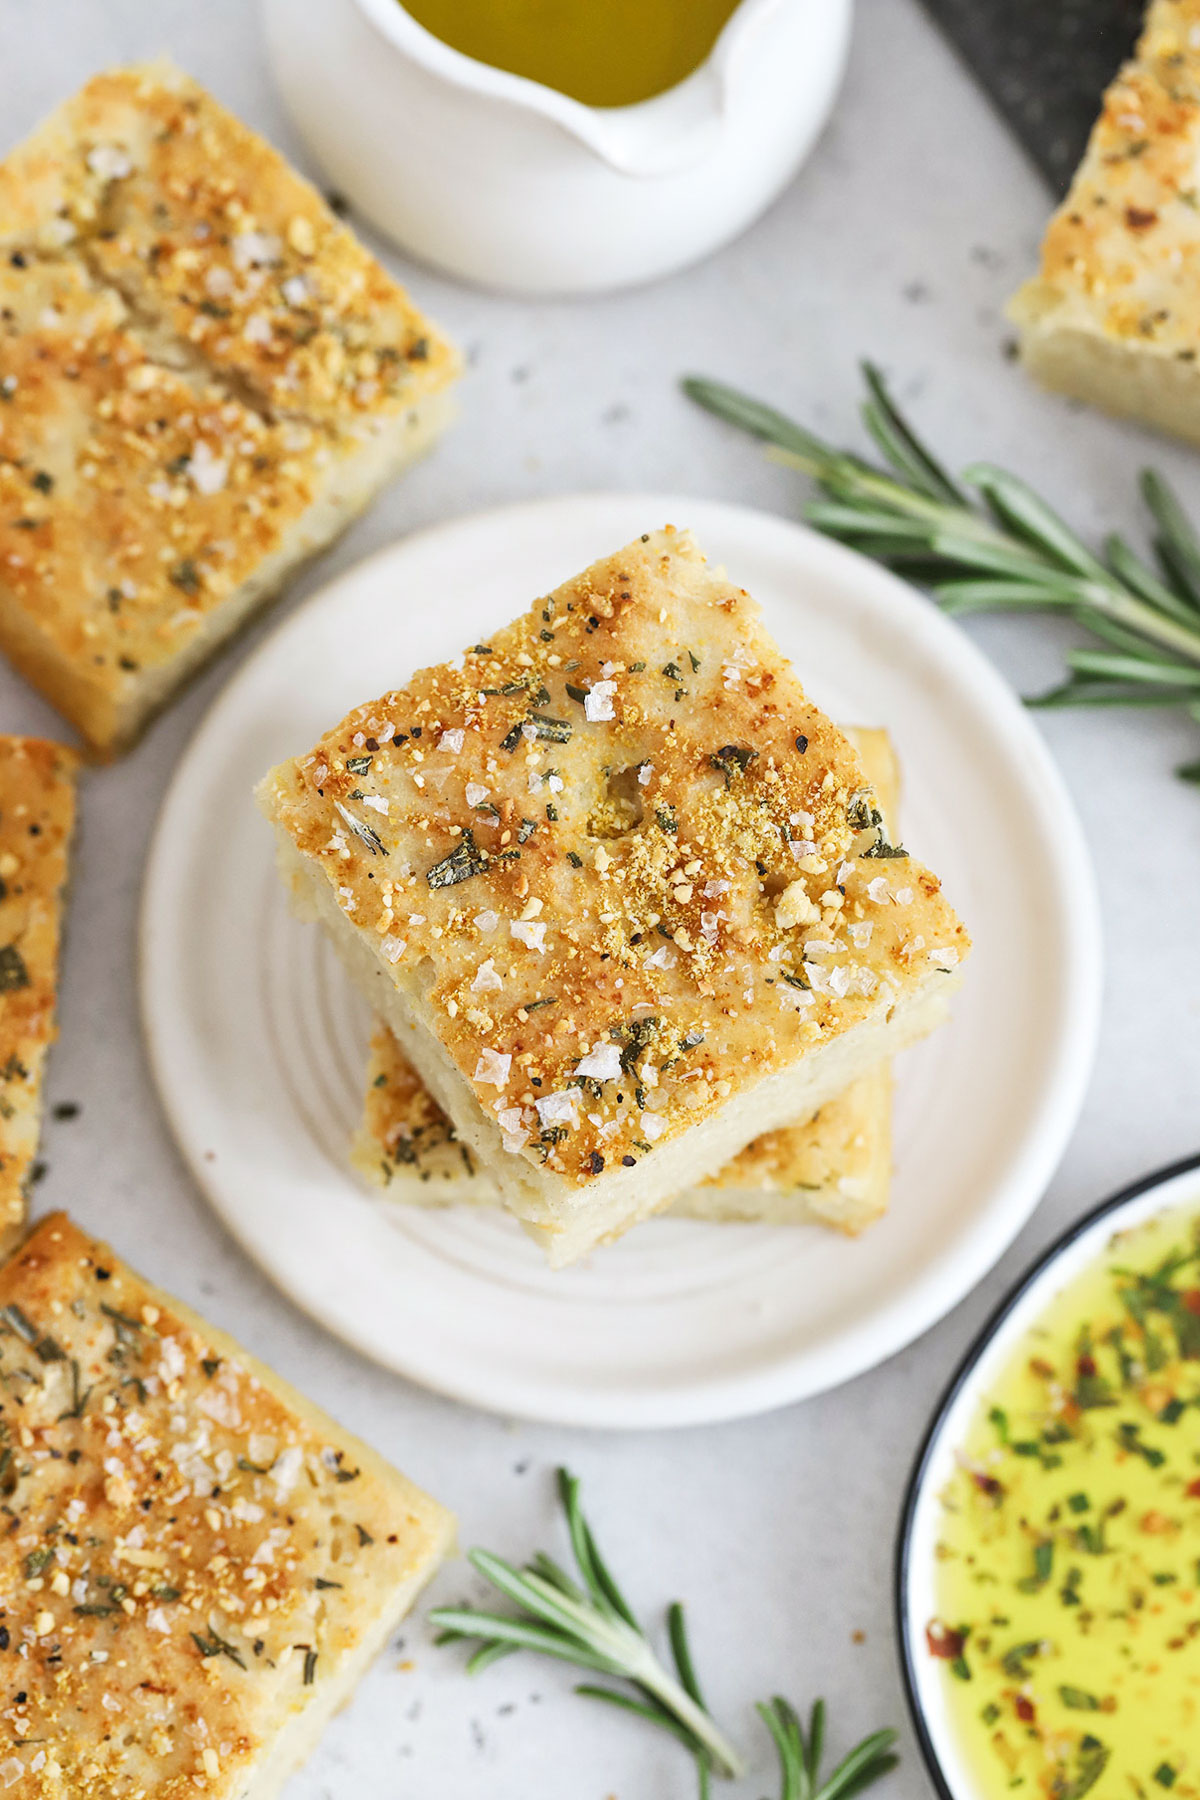
But do you know what’s probably the easiest gluten-free bread recipe around? Focaccia! This gluten-free focaccia bread recipe has a crisp, golden top and bottom, a soft & pillowy center, and just the right seasonings. It’s enough to send me into a swoon!
If you’re new to gluten free baking or haven’t made gluten-free bread recipes before, don’t worry! We’ve got everything you need to be successful. You’ll be baking loaf after loaf of this delicious Italian bread in no-time!
Lets jump in, yes? The carbs are calling!
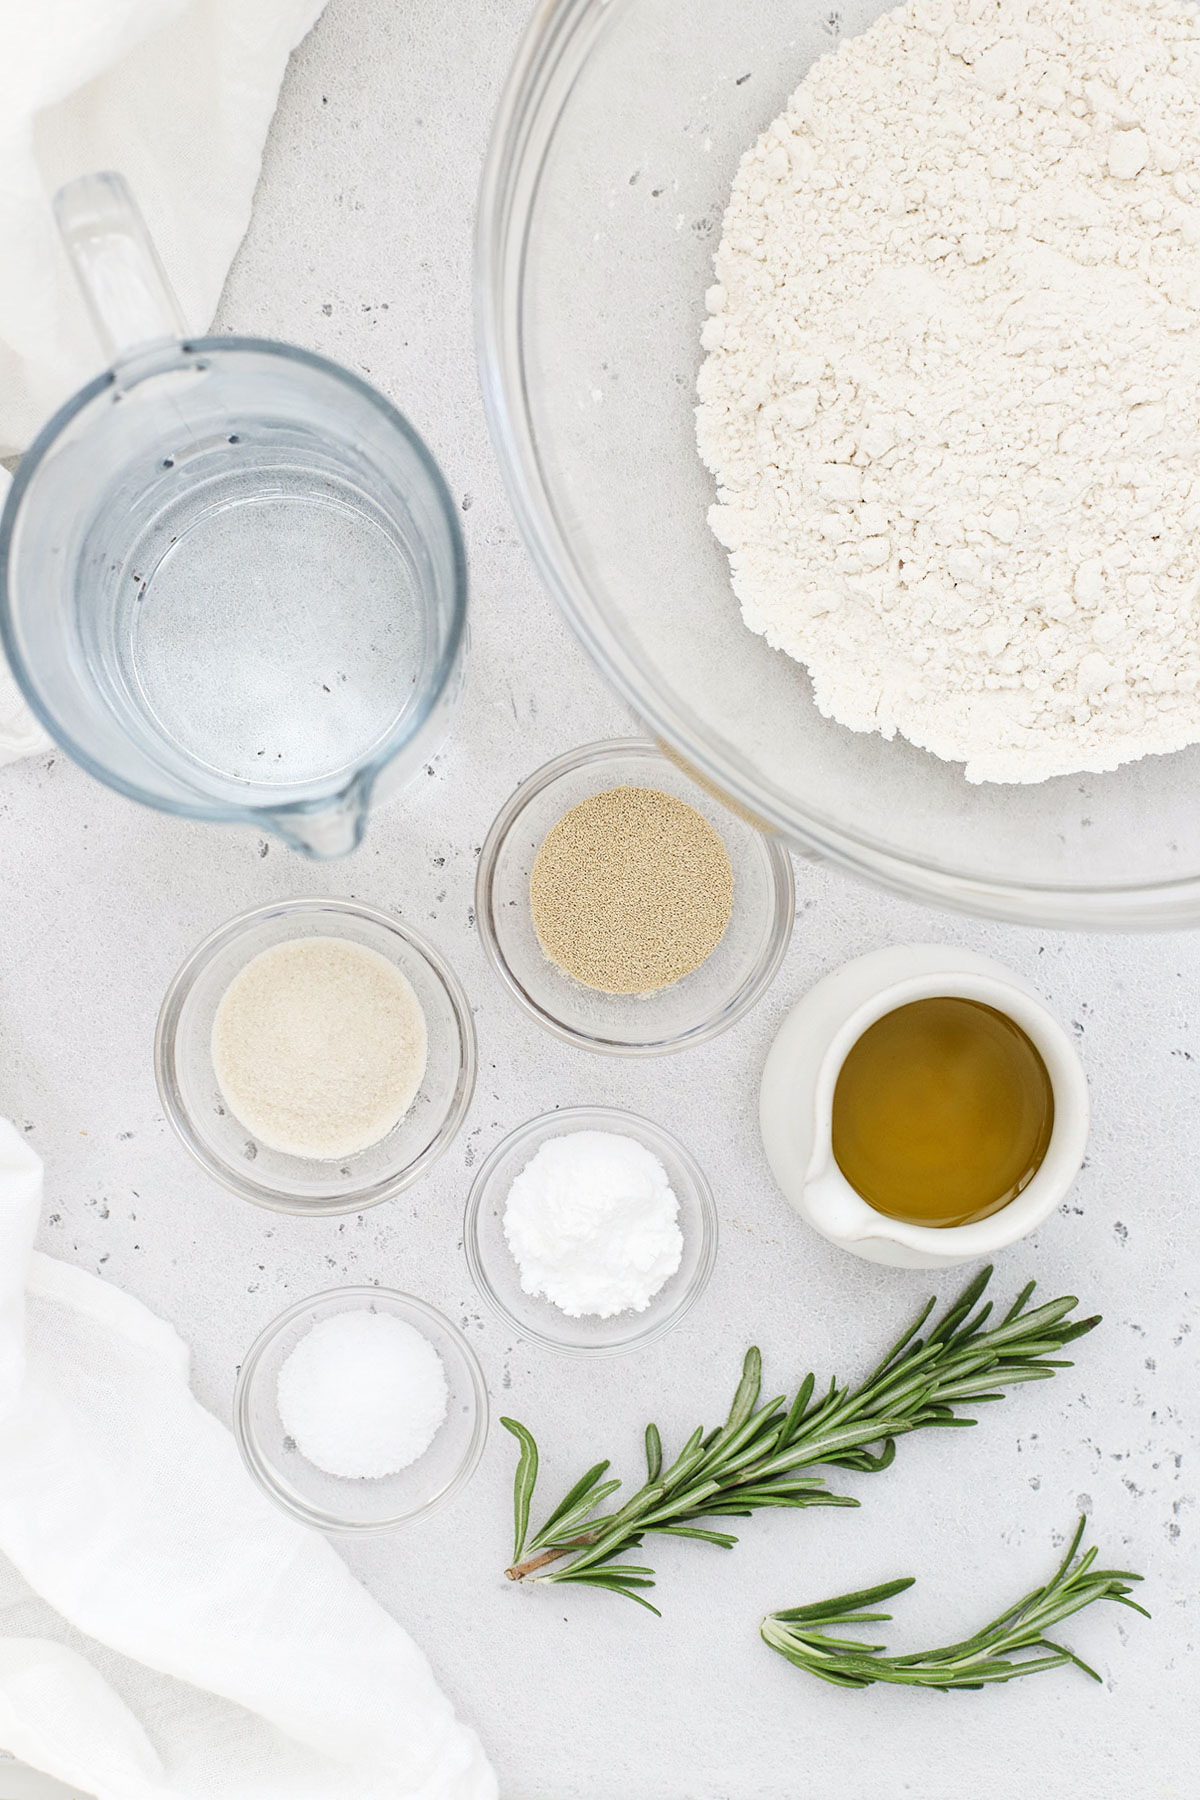
Simple Ingredients For Gluten-Free Focaccia:
- Gluten-Free Flour. You’ll keep things simple with a 1:1 gluten-free flour blend. We HIGHLY RECOMMEND King Arthur Measure For Measure Baking Flour with xanthan gum because it gets nice and golden on top and has the best texture inside. I have also tried it with Bob’s Red Mill 1-to-1 gluten free baking flour with decent results, though the Bob’s Red Mill blend usually doesn’t get quite as crisp or “done” as the King Arthur Blend, and some readers report their focaccia stays wet or gummy in the center when they use the Bob’s Red Mill blend.
- Baking Powder & Salt. Using baking powder with the yeast gives this focaccia a little extra lift and really improves the texture. Then, salt comes in to make the flavor amazing!
- Warm Water. Ideally, the water will be between 120-130 degrees to help activate the yeast. I recommend an instant read thermometer for best results, but you can use the touch test, too. If the water is too warm to comfortably keep your finger in it for a few seconds, it’s too hot!
- Honey or Sugar. Adding a little honey or sugar not only helps with the flavor of this bread, but it also helps activate the yeast. Don’t skip it!
- Active Dry Yeast. We’ve made this with instant yeast and regular yeast. Instant yeast will bloom and rise faster (great when you’re short on time!), and regular dry yeast works well, too.
- Olive Oil. You’ll need plenty of extra virgin olive oil for this focaccia recipe! You’ll use some in the dough, some on the pan, some on top, and some to dip!
- A Few Toppings. Then, you’ll top the focaccia with a few little extras before baking. I like a mix of fresh rosemary, parmesan cheese (or vegan parmesan cheese), flaky salt, and black pepper.
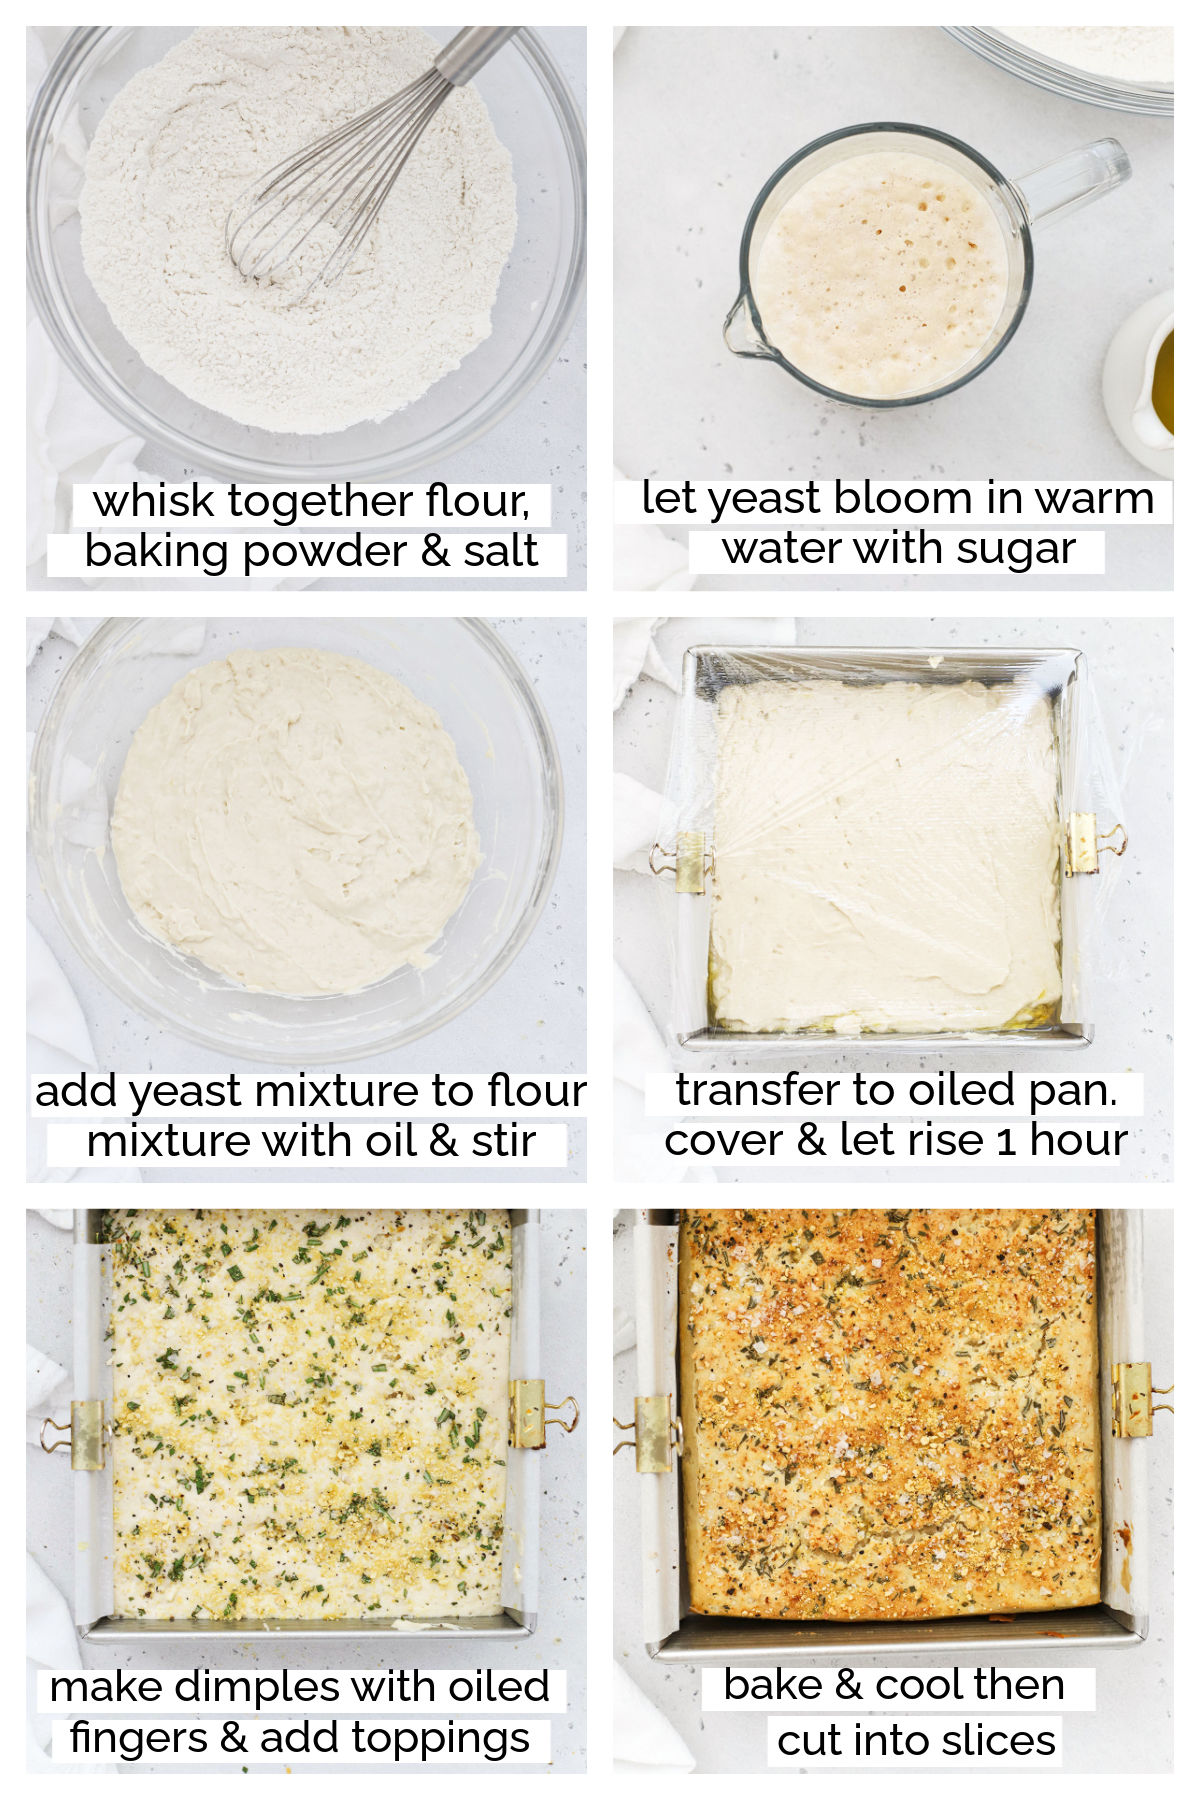
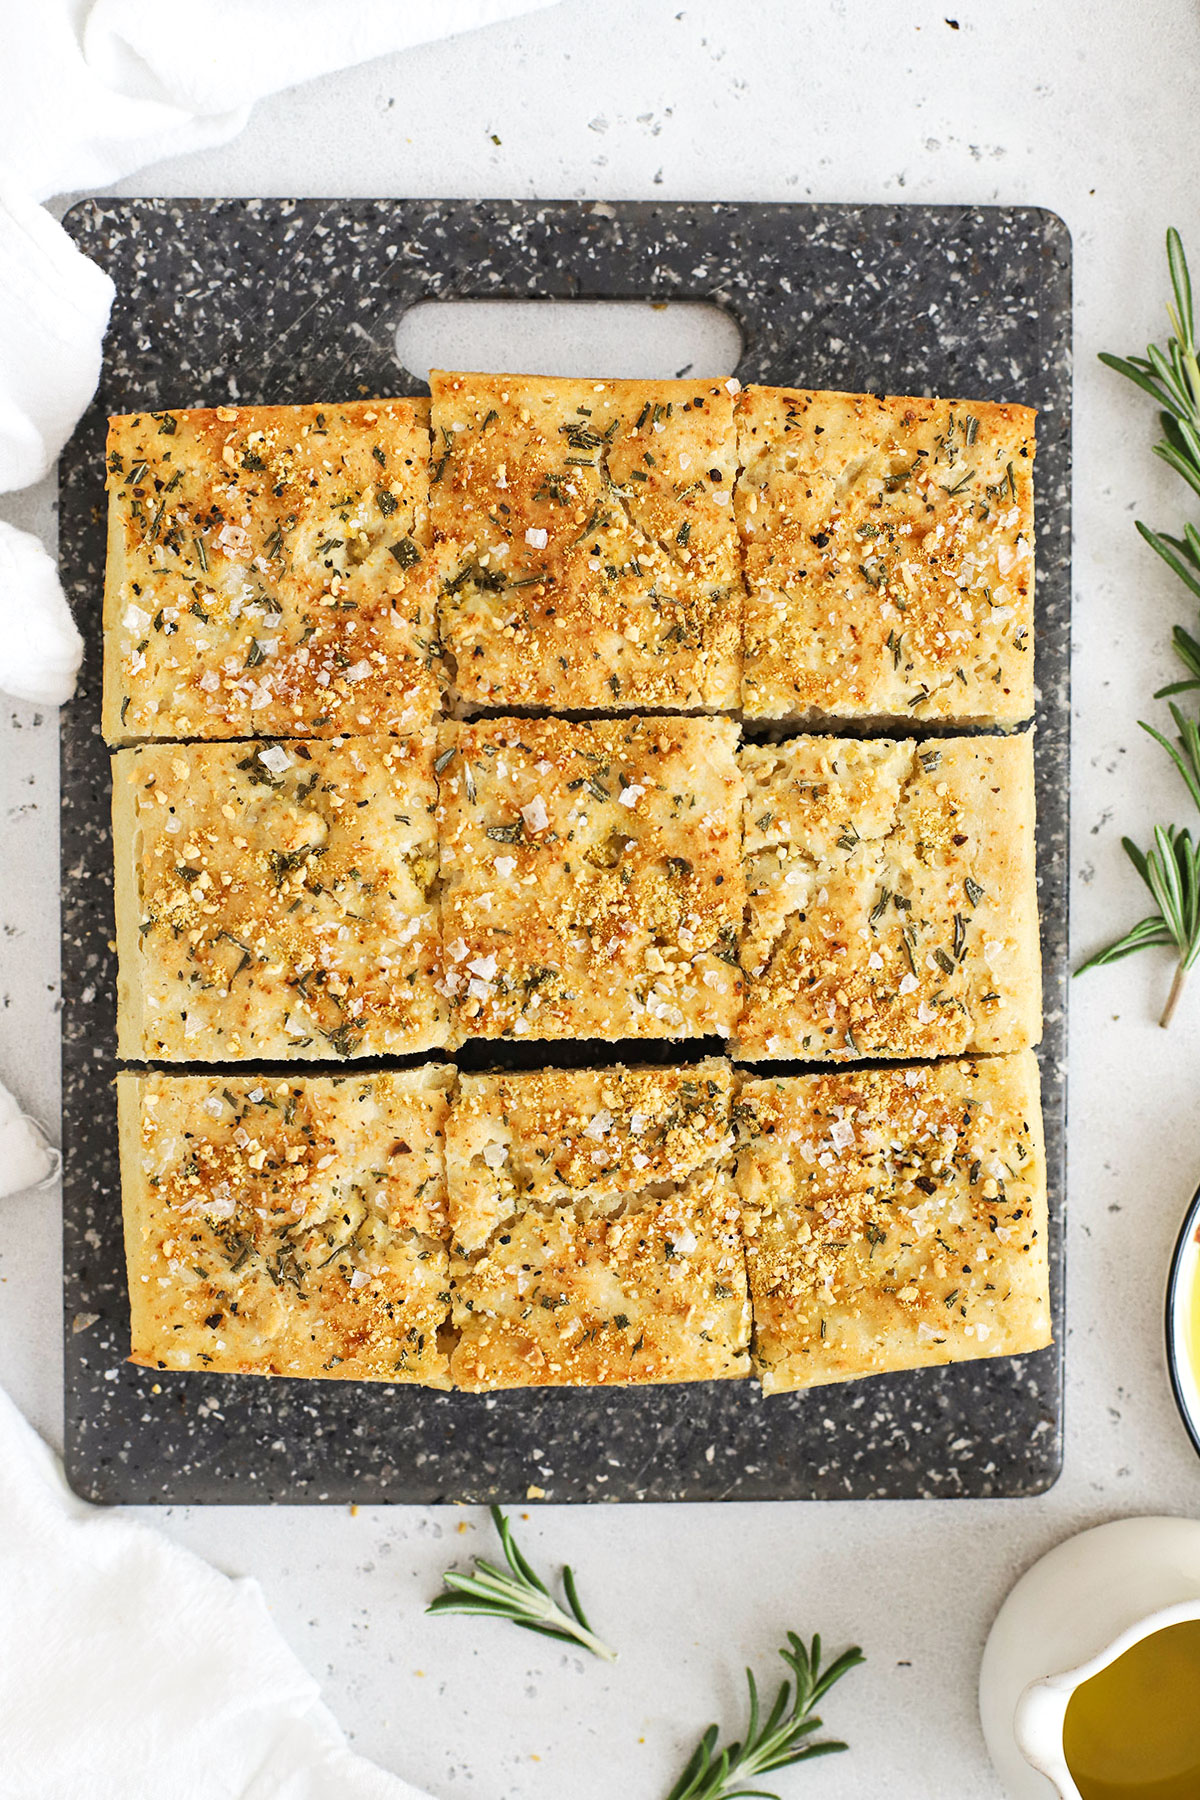
How To Make Gluten-Free Focaccia Step By Step:
- Combine Dry Ingredients. In a large mixing bowl, whisk together flour, salt, and baking powder. Set aside.
- Warm The Water. Warm your water in the microwave or on the stovetop until it’s warm but not hot. (Ideally, the temperature should be between 120-130 degrees F, but you can use the touch test to tell if it’s ok. If the water is too warm to put your finger in comfortably for several seconds, it’s too hot)
- Bloom The Yeast. Add yeast and honey or sugar to the warm water. Stir to combine, then let it bloom by setting it aside to rest for for 3-5 minutes. (It’ll start to look foamy on top)
- Combine Wet Ingredients & Dry Ingredients. Pour 2 Tablespoons olive oil and the the water/yeast mixture over the flour mixture and stir to combine. Note that the dough will actually be more like batter than dough. You will not knead it.
- Transfer To The Pan. Line an 8×8 or 9×9 metal baking pan with parchment paper. Drizzle 2-3 Tablespoons of olive oil onto the parchment. Gently transfer the focaccia dough to the pan and pat it out or spread it with a spatula. (I usually find it easiest to dip my fingertips into the oil and pat it out by hand). Drizzle the top of the dough with 1 more Tablespoon of olive oil.
- Let The Dough Rise. Cover the pan with plastic wrap or a clean dish towel and set it to rise in a warm place for at least 30 minutes if using rapid rise yeast and about an hour if you use regular yeast. The batter/dough will be roughly double in size.
- Preheat The Oven. During the last 20 minutes of the rise time, preheat the oven to 400 degrees F.
- Dimple The Dough. Coat your fingertips with olive oil and use greased fingers to poke several holes in the dough to form the characteristic “dimples” of focaccia. I find this easiest if I drizzle the surface of the dough with a little olive oil first, then use my fingertips to gently spread the oil before making the dimples. (Try not to smash the dough down)
- Add Toppings. Sprinkle the surface of the dough with fresh rosemary, parmesan or vegan parmesan (if using), coarse sea salt and pepper.
- Bake at 400 degrees 25-30 minutes, or until golden brown. Remove from oven and let cool at least 10-12 minutes before slicing and eating. Store leftover focaccia in an airtight container at room temperature 2-3 days, or store in the freezer and freeze up to 2 months.
ANOTHER OPTION FOR SHAPING: We used to make this rosemary focaccia free-form, by letting the dough rise in a bowl, then pouring it out onto a parchment lined baking sheet on top of 2 Tablespoons of olive oil. I’d shape the dough into roughly an 8×10 shape, then top and bake as directed. This will give you a more organic look, but the focaccia will be much thinner. In the last few years, I’ve exclusively made it in a square pan for a higher rise.
A Few Tips To get This recipe Just Right:
Use Fresh Ingredients
It might seem silly, but it’s important to know you’re using fresh ingredients. If you’re using old baking powder or old yeast, this bread WILL NOT rise no matter what you do. Use this quick test to check your baking powder to see if it’s still active, and watch for the foaming, bubbling reaction in the recipe instructions to make sure your yeast is still active.
Know How To Handle The Dough
If you’ve ever baked with wheat-based flours (white all-purpose, wheat, bread flour, etc.) you’ll be able to tell right away that gluten-free focaccia “dough” is really more like batter. It’s not pliable (there are no gluten or wheat proteins to give it that structure!), and you won’t knead it–you can’t! It’ll be a rather sticky, wet batter instead of a cohesive, stretchy dough. Don’t panic, and DON’T add extra flour!
Use Parchment On Your Pan
Your gluten-free focaccia batter will be sticky, and it can stick to the baking sheet if you don’t prep it. A surefire way to keep your dough from sticking to the pan is to use parchment paper, then drizzle the olive oil on top of it, as directed. I highly recommend you don’t skip the parchment. If you don’t like using parchment paper, at least use a reusable silicone baking mat to help prevent sticking.
Don’t Skimp On Olive Oil. Seriously.
Don’t do it! I know it’ll feel like a lot (especially on the baking pan), but I promise the olive oil is essential for the texture of the interior and exterior of gluten-free focaccia bread. Olive oil helps give that gorgeous crispy crust on the exterior and keeps things light on the interior. I promise your results will not be as good if you try to skimp on the olive oil. It’ll be more dry and spongy. And it won’t get the same gorgeous color. Trust me!
FAQ + MORE IDEAS FOR THIS GLUTEN-FREE FOCACCIA
HOW TO SERVE FOCACCIA – I’ve got to say it: my favorite way is when it’s burn-your-mouth hot from the oven. But. After it’s had enough time to actually cool down somewhat, my favorite way to enjoy gluten-free focaccia is dipped in olive oil. We love to make a seasoned dipping oil to serve with it! (It’s also great with marinara sauce!)
HOW TO STORE FOCACCIA – Like most gluten free baked goods, this gluten-free focaccia bread is best enjoyed in 1-2 days. I store mine wrapped tightly or in an airtight bag with extra air pressed out in the refrigerator, then heat it up in the oven (you can use the microwave or a toaster oven) before serving again.
MORE FOCACCIA TOPPINGS TO TRY. Part of what’s so fun about making this focaccia is choosing the toppings! Since this recipe was originally published in 2019, I’ve had dozens and dozens of readers send me their focaccia photos! Play around with the toppings! Readers have tried:
- Sun-Dried Tomatoes
- Caramelized Onions
- Roasted Garlic
- Olives – black, green, Kalamata, Castelvetrano, etc.
- Edible Flowers
- Fresh Herbs – sage, basil, rosemary, dill, parsley, thyme, etc.
- Dried Herbs & Spices – dried oregano, Italian seasoning, dried basil, red pepper flakes, etc.
- Different cheeses – asiago, parmesan, aged white cheddar, and more!

What To Serve With This Yummy Bread:
⭐ Don’t forget to leave a star review and comment below when you make our Gluten-Free Focaccia recipe. I can’t wait to hear how it goes!
Print
Gluten-Free Focaccia with Rosemary
- Total Time: 1 hour 40 minutes
- Yield: 9–12 slices 1x
- Diet: Gluten Free
Description
Our easy gluten-free focaccia recipe has a perfect crispy crust & tender, fluffy center. It’s the easiest gluten-free bread around! (Vegan-Friendly!)
Ingredients
For Gluten Free Focaccia:
- 2 1/2 cups (300 grams) gluten free 1:1 flour (I highly recommend King Arthur Flour Measure-for Measure flour)*
- 2 teaspoons baking powder
- 1 1/2 cups warm water (ideally 120–130 degrees F.)
- 1 (1/4 oz.) package instant or rapid rise yeast (2 1/4 teaspoons)
- 1 Tablespoon sugar, honey, or agave
- 1 teaspoon kosher salt
- 4 Tablespoons olive oil, divided
For Topping:
- 1 Tablespoon fresh rosemary
- 1–2 Tablespoons vegan parmesan or Parmesan cheese
- 1/2 teaspoon flaky sea salt (like Maldon)
- 1/4 teaspoon black pepper
Instructions
-
Combine Dry Ingredients. In a large mixing bowl, whisk together flour, salt, and baking powder. Set aside.
-
Warm The Water. Warm your water in the microwave or on the stovetop until it’s warm but not hot. (Ideally, the temperature should be between 120-130 degrees F, but you can use the touch test to tell if it’s ok. If the water is too warm to put your finger in comfortably for several seconds, it’s too hot)
-
Bloom The Yeast. Add yeast and honey or sugar to the warm water. Stir to combine, then let it bloom by setting it aside to rest for for 3-5 minutes. (It’ll start to look foamy on top)
-
Combine Wet Ingredients & Dry Ingredients. Pour 2 Tablespoons olive oil and the the water/yeast mixture over the flour mixture and stir to combine. Note that the dough will actually be more like batter than dough. You will not knead it.
-
Transfer To The Pan. Line an 8×8 or 9×9 metal baking pan with parchment paper. Drizzle 2-3 Tablespoons of olive oil onto the parchment. Gently transfer the focaccia dough to the pan and pat it out or spread it with a spatula. (I usually find it easiest to dip my fingertips into the oil and pat it out by hand). Drizzle the top of the dough with 1 more Tablespoon of olive oil.
-
Let The Dough Rise. Cover the pan with plastic wrap or a clean dish towel and set it to rise in a warm place for at least 30 minutes if using rapid rise yeast and about an hour if you use regular yeast. The batter/dough will be roughly double in size.
-
Preheat The Oven. During the last 20 minutes of the rise time, preheat the oven to 400 degrees F.
-
Dimple The Dough. Coat your fingertips with olive oil and use greased fingers to poke several holes in the dough to form the characteristic “dimples” of focaccia. I find this easiest if I drizzle the surface of the dough with a little olive oil first, then use my fingertips to gently spread the oil before making the dimples. (Try not to smash the dough down)
-
Add Toppings. Sprinkle the surface of the dough with fresh rosemary, parmesan or vegan parmesan (if using), coarse sea salt and pepper.
-
Bake at 400 degrees 25-30 minutes, or until golden brown. Remove from oven and let cool at least 10-12 minutes before slicing and eating. Store leftover focaccia in an airtight container at room temperature 2-3 days, or store in the freezer and freeze up to 2 months.
Our original instructions called for making this focaccia free-form on a baking sheet. This produces a more organic shape, but a thinner dough. If you prefer to follow the old instructions, mix up the dough as directed, but let the dough rise in the mixing bowl covered with plastic wrap. Pour 2 Tablespoons of olive oil on a baking sheet lined with parchment and shape the dough into an 8×10 rectangle. Top & bake the bread as directed.
Notes
CHOOSE THE RIGHT FLOUR. I *highly* recommend King Arthur Flour Measure-for-Measure flour for this recipe. Bob’s Red Mill 1:1 flour is my other favorite, but will not get as light, as browned, or as “done” in the center as King Arthur Flour. Some readers report their focaccia stays wet or gummy in the center with Bob’s.
FOR A YUMMY DIPPING SAUCE: Pour 1/3 cup olive oil over granulated garlic, coarse salt, pepper, red pepper flakes, and rosemary, oregano, and/or basil. I usually use 1/4 tsp dried flaked garlic, 1/2 tsp fresh rosemary, 1/4 tsp oregano, 1/4 tsp coarse salt, 1/4 tsp pepper, and 1/4 tsp red pepper flakes
- Prep Time: 15 minutes
- Rise time: 1 hour
- Cook Time: 25 minutes
- Category: Side dish
- Method: Baking
- Cuisine: Italian
Originally posted June 2019. Fully updated with video, photos, and updated instructions Aug 2023.





I’m confused on the amount of yeast. A package of instant yeast is 1/4 oz. you have listed 1 package but 1 oz. is that a typo somehow? thanks . Am looking forward to making it
Andy – Oh my goodness!!! Thank you! I DID make a typo. I’m SO glad you said something. It should read 1/4 oz for 1 package. I’ve corrected it!
Did I miss the size of baking sheet? I want to make this for a bake sale and may adjust to smaller size pans
Marylue – Sorry! Just a standard cookie sheet (half sheet pan). It doesn’t fill the whole baking sheet (as you can see in the video), but that size has plenty of room to spread out the focaccia. 🙂
Can this recipe be cold fermented and took out to proof before baking
I have never tried that before. I’d love to know how it goes if you give it a try!
I am Celiac and a Chef was lucky enough to find a job being the Avoiding Gluten Chef at a local college. I tried this recipe to see if we could start adding bread items to the AG area….My Chef ate 4 pieces of the test run and gave a double thumbs up on it. I tried making it 6 times the amount and baking it on a large sheet pan! Yes it works great! I have to add this are also serves food that avoids the top 8 allergens so this was right on spot. Thank You
Pam – WOW!!! That’s incredible! Thank you so much for sharing this with me!
The students devoured it!
The KAF flour you used (Measure for Measure) actually does have Xanthan gum in it.
Hi Emily, I tried this recipe but it didn’t turn out at all. It was gluey and didn’t rise. I used new baking powder and Bob’s GF. Hate to admit but it went into the garbage but it sure smelled amazing while it was baking. I followed the directions carefully…any suggestions? PS – the only thing I can think of was I keep my flour in the freezer to stay fresh, could that be it?
Sandra – Hmm. That’s frustrating! New baking powder and Bob’s GF are both good… and you’re sure you had active yeast, let it proof with the water/honey before adding it to the dry ingredients and allowed for enough rise time?
Hi Emily, yes to all your questions, maybe I should let it proof longer? It was about an hour but maybe the flour was still cold before it mixed it in?? I’ll try again and see if that fixes the problem.
I may also just buy another yeast, could be that it was a bit older.
I’m just so sorry! The dough is definitely pretty liquid going onto the pan (you can see in the video that it doesn’t stick together like traditional dough–it’s more like batter), and it doesn’t rise a ton, but it should definitely puff up a bit during cooking. I’m so sorry you had trouble, and *really* hope the second test is a huge win. Another reader has been making this at a college cafeteria and the students are loving it!
I tried it and it was gummy in the center and raw like. It was brown on the outside!
I’m sorry to hear that!
Can we use almond or coconut flour
Sadly, not for this recipe. You’d have to make a lot more adjustments to make that work.
What if my water with the quick rise yeasts and sugar and salt do the really foam? And the water was warm
Doesn’t foam *
If it doesn’t foam, after several minutes, it most likely means your yeast is dead and the bread will not rise. I’m so sorry!
I’m surprised this recipe has you add the salt in with the water, sugar and yeast. Salt kills yeast. Your yeast could be old or dead, but I’d just add the salt to the dry ingredients rather than the yeast mixture to be sure it’s not accidentally killed.
This sounds great. Could this recipe be used for focaccia with a crushed tomatoes and green onions topping?
Jacquie – That sounds tasty! You’d probably need to be careful about crushed tomatoes since they’d likely add a lot of moisture and could disrupt the texture of the bread, but sun-dried tomatoes would be delicious!
Thanks Emily! I would probably make a marinara… !? Will absolutely use sun dried tomatoes 🍅 at some point.
But I’ve decided to make it as described in recipe. First batch came out more like a flatbread/ scone ish! I think I didn’t add enough liquid and a semi kneaded it! :/ But flavor was awesome and my kids and grands loved it and will definitely have to make two batches at a time. Will share when I make it again.
Five star for flavor:)
Tasty! I hope the next batch is even more successful! 🙂
I am on a gluten free diet due to Ibs I was wondering can I use a warm oven to let it rise or where else would u suggest thanxs
Lauri – On a countertop in a warm room is fine, or in an oven with the light on, but you don’t want it *too* warm in the oven or it can start to cook and mess up the rise. Hope that helps!
Hi Emily! This recipe was great! I used bob’s red mill 1:1 and regular yeast (rested for 1 hour as instructed). Mine didn’t rise as much as yours. Do you think I should go for King Arthur or was it because i used regular yeast?
Connie – I’m so glad you enjoyed it! And I’d love to help on the rise… Did you feel like your dough rose to double its size during the 1-hour wait time? How thick was your finished bread?
If it rose properly (and just about doubled in size while it was rising), it could be that yours was spread onto the baking sheet in a larger rectangle than mine was. Mine usually ends up about 1″ tall after baking, but if I spread it in a larger rectangle, it rises less since the dough is spread thinner.
My “batter rectangle” is usually around 8.5×10″ or so (sometimes a little wider or longer), if that helps.
Thanks so much for your tips! I made it again and it turned out so much better. I let it proof in the bowl for 1 hour and another 1 hour in the pan and it’s risen much more. I do think my spread was too thin earlier! Xx
Connie – I’m SO, SO glad to hear it. Thank you so much for circling back with me! I’ve thought about you and your comments a lot!
We love this recipe. I have used it l to make hamburger and hot dog “rolls”. Since my husband, who is GF, has not found some he has liked in stores.
Thank you for creating an easy go to recipe that we all like.(little ones included.)
Wow, that sounds great! So glad you’re enjoying it!
This is an awesome recipe but your website is broken.
I did the 2x button however the grams of flour did not double… so I made some really nice flat bread because I didn’t put the necessary amount of flour in.
I demand compensation! ( ha ha kidding )
Love you Karen
Karen – So sorry you ran into trouble! I’ve tried the 2x button in two browsers on my phone, tablet, and computer and can’t replicate the problem. I’ll try to circle back with the recipe plugin folks to see if there’s an issue they know about on their end.
I want to try this recipe but really don’t want it to fail! I have a question: I don’t have that size of baking sheet, can I do it in a cast iron pan instead (I have an 8” and 10” I think). Thanks so much!
Sara – Honestly, cast iron would probably make for fantastic crust! If possible, I still recommend lining it with parchment and adding oil on top of the parchment as directed in the recipe to prevent sticking, then just keeping an eye on it. I usually pat my dough out into an 8×10″ rectangle, so I’d probably go with the 8″ over the 10″ for thicker focaccia. If you prefer it thinner, you can use the 10″ size.
I am in love with this bread and have made it like 8 times this past week alone! I cannot beluce how satisfying it is, as I have been searching for something so delicious since I developed sensitivities almost 10 years ago! Thank you so much for sharing this 🤤
I dip my fingers in olive oil over and over while I’m making the dimples.
I also add garlic and onion powder to the top before I put it in the oven!
I have also baked it half-time and covered it in pizza toppings and continued to bake it…OMG🤤
So obsessed with how delicious it comes out, as is everyone I have shared it with 🤤
Thank you again!
💗🙏🙌
Madison – You TOTALLY made my day! Thank you so much for sharing this with me! We’ve done it as pizza before too and LOVED it. SO GOOD!