One Lovely Life

Healthy Food + Happy Thoughts + Inspiration for Living Your Best Life

  • Home
  • about
    • Privacy Policy
  • Recipe Search
    • Recipes by Category
    • Recipes by Dietary Needs
  • lovely kitchen
    • appetizers & dips
    • breads
    • breakfast & muffins
    • condiments, marinades, & spreads
    • desserts
    • drinks
    • legumes
    • Main Dish
      • beef & pork
      • chicken & turkey
      • meatless main dishes
      • pizza
      • seafood
    • pasta & rice
    • potatoes
    • salads
    • sandwiches
    • snacks
    • soups, stews, & chowders
    • vegetables & sides
  • lovely living
    • 101 THINGS TO DO
    • AUTISM
    • BOOKS
    • Disney
    • FAVORITE THINGS
    • FUN WITH KIDS
    • OUR HOUSE + HOME TOUR
    • PROJECTS, CRAFTS + DIY
  • VALENTINE’S DAY IDEAS

Gluten Free Focaccia with Rosemary (with Video!)

June 10, 2019 by Emily 90 Comments

Jump to Recipe

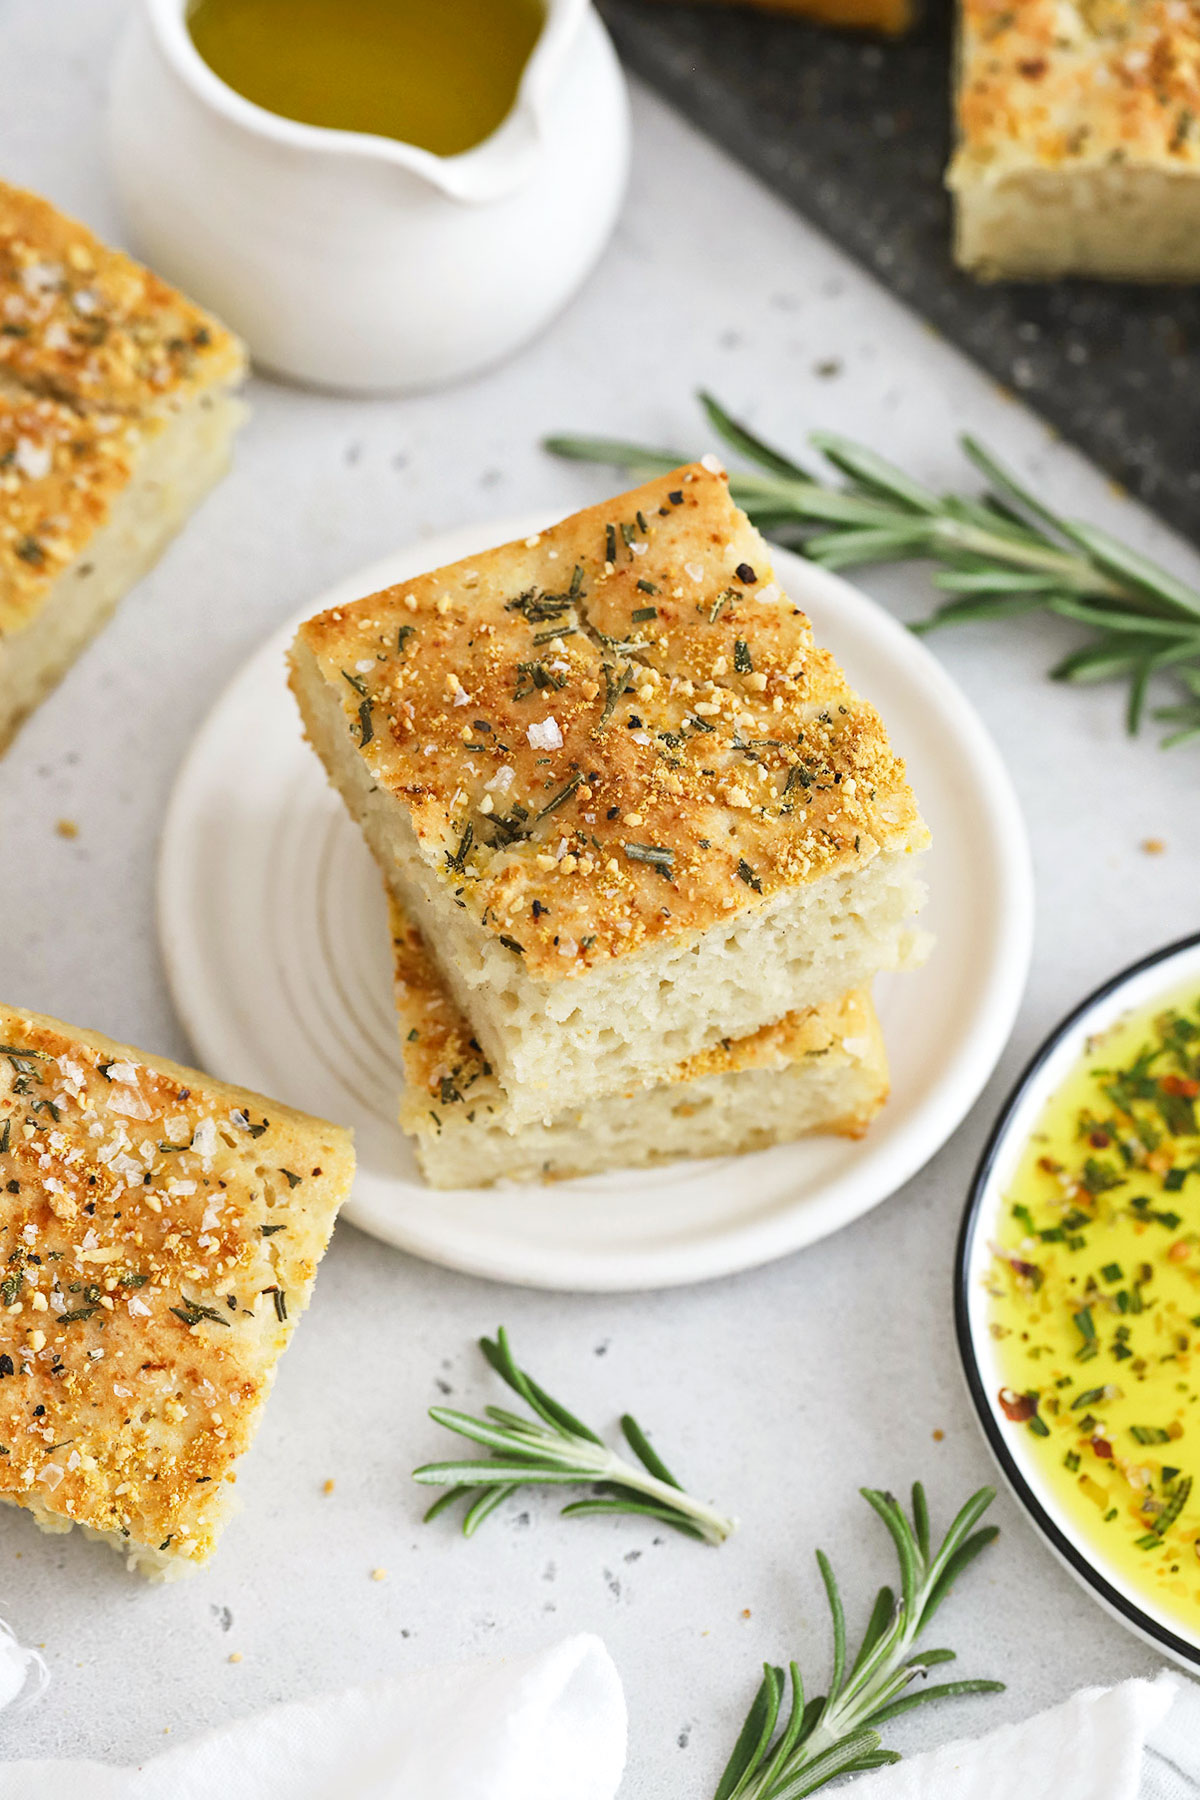
Gluten Free Focaccia – This gluten free rosemary focaccia is made entirely gluten free and vegan-friendly! It’s easier than you think and has the perfect crispy crust and tender, light center. Yum!

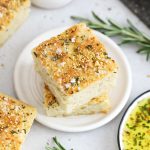
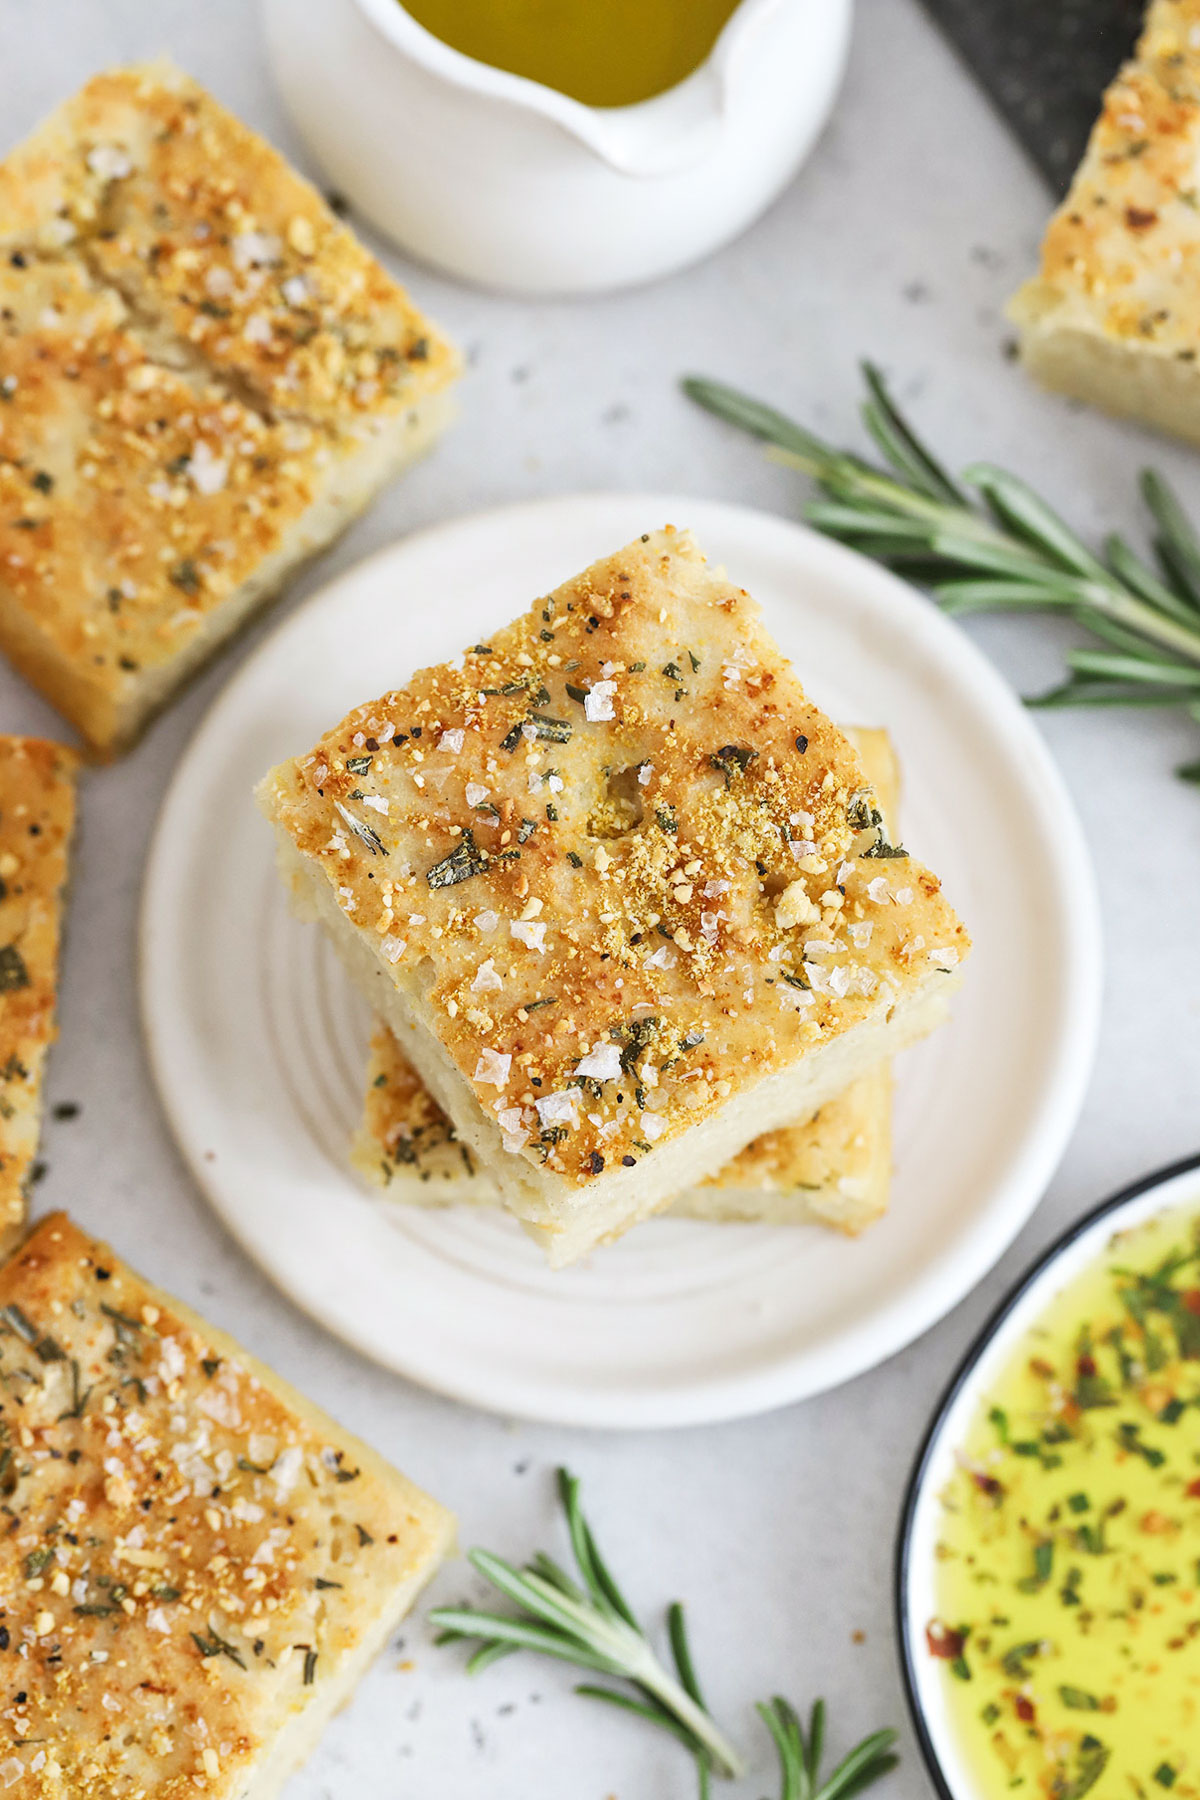
Slices of Gluten Free Rosemary Focaccia on White Parchment

I’m pretty sure my kids could live on carbs alone, if I let them. I don’t blame them. Other than avocados (my first and forever love), carbs are basically my second love language. So even though we eat fewer grains these days than we used to a few years ago, I always hold space for some of my favorites.

After a recent Raddish Kids box (see why we love it here), we played around a bit with gluten free focaccia recipes till we got this one right where we like it. The end result is perfect for satisfying a carby craving. This gluten free rosemary focaccia has a crisp, golden top and bottom, a soft & pillowy center, and just the right seasonings. It’s enough to send me into a swoon!

If you’re new to gluten free baking or haven’t made gluten free breads before, I *highly* recommend you read through the notes below to help you along the way. This is a relatively easy recipe to follow, but it IS different than baking with traditional flour.

Lets jump in, yes? The carbs are calling!
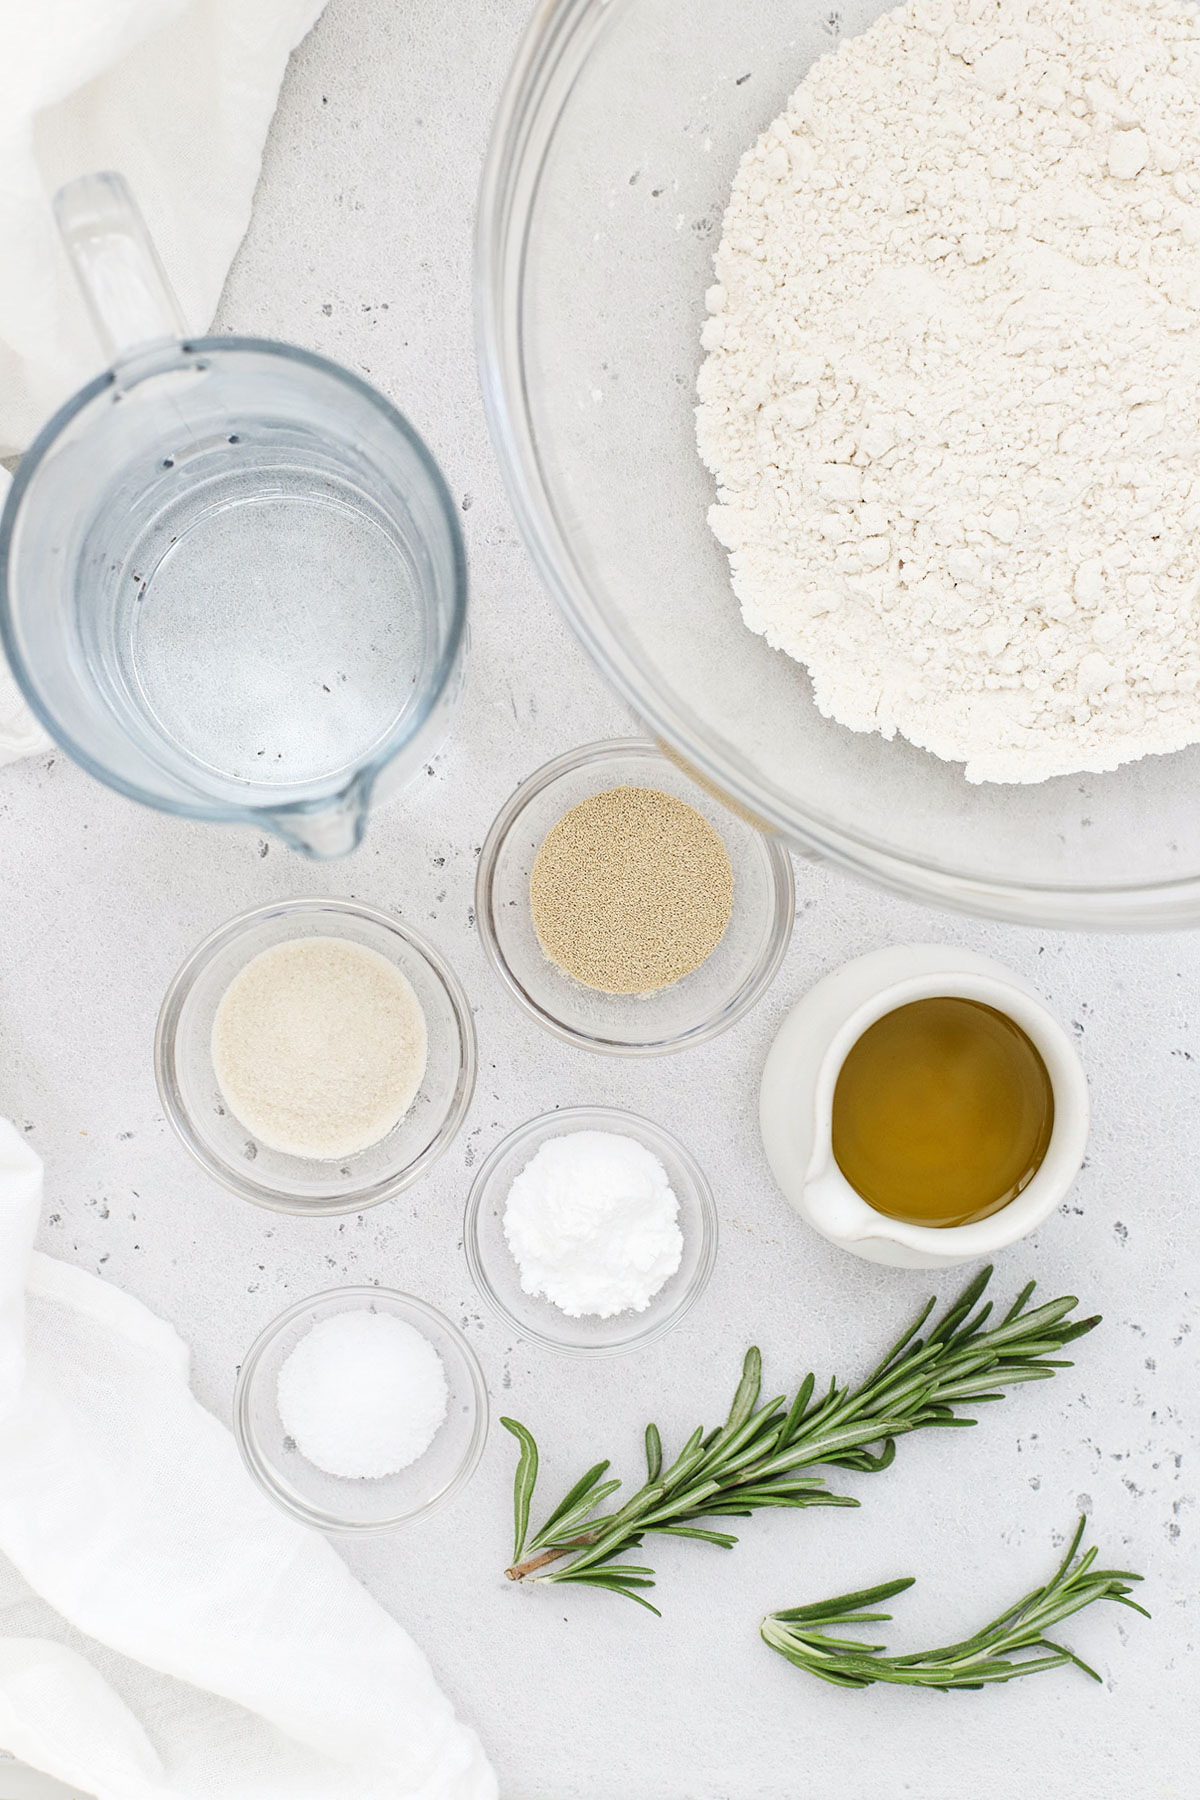
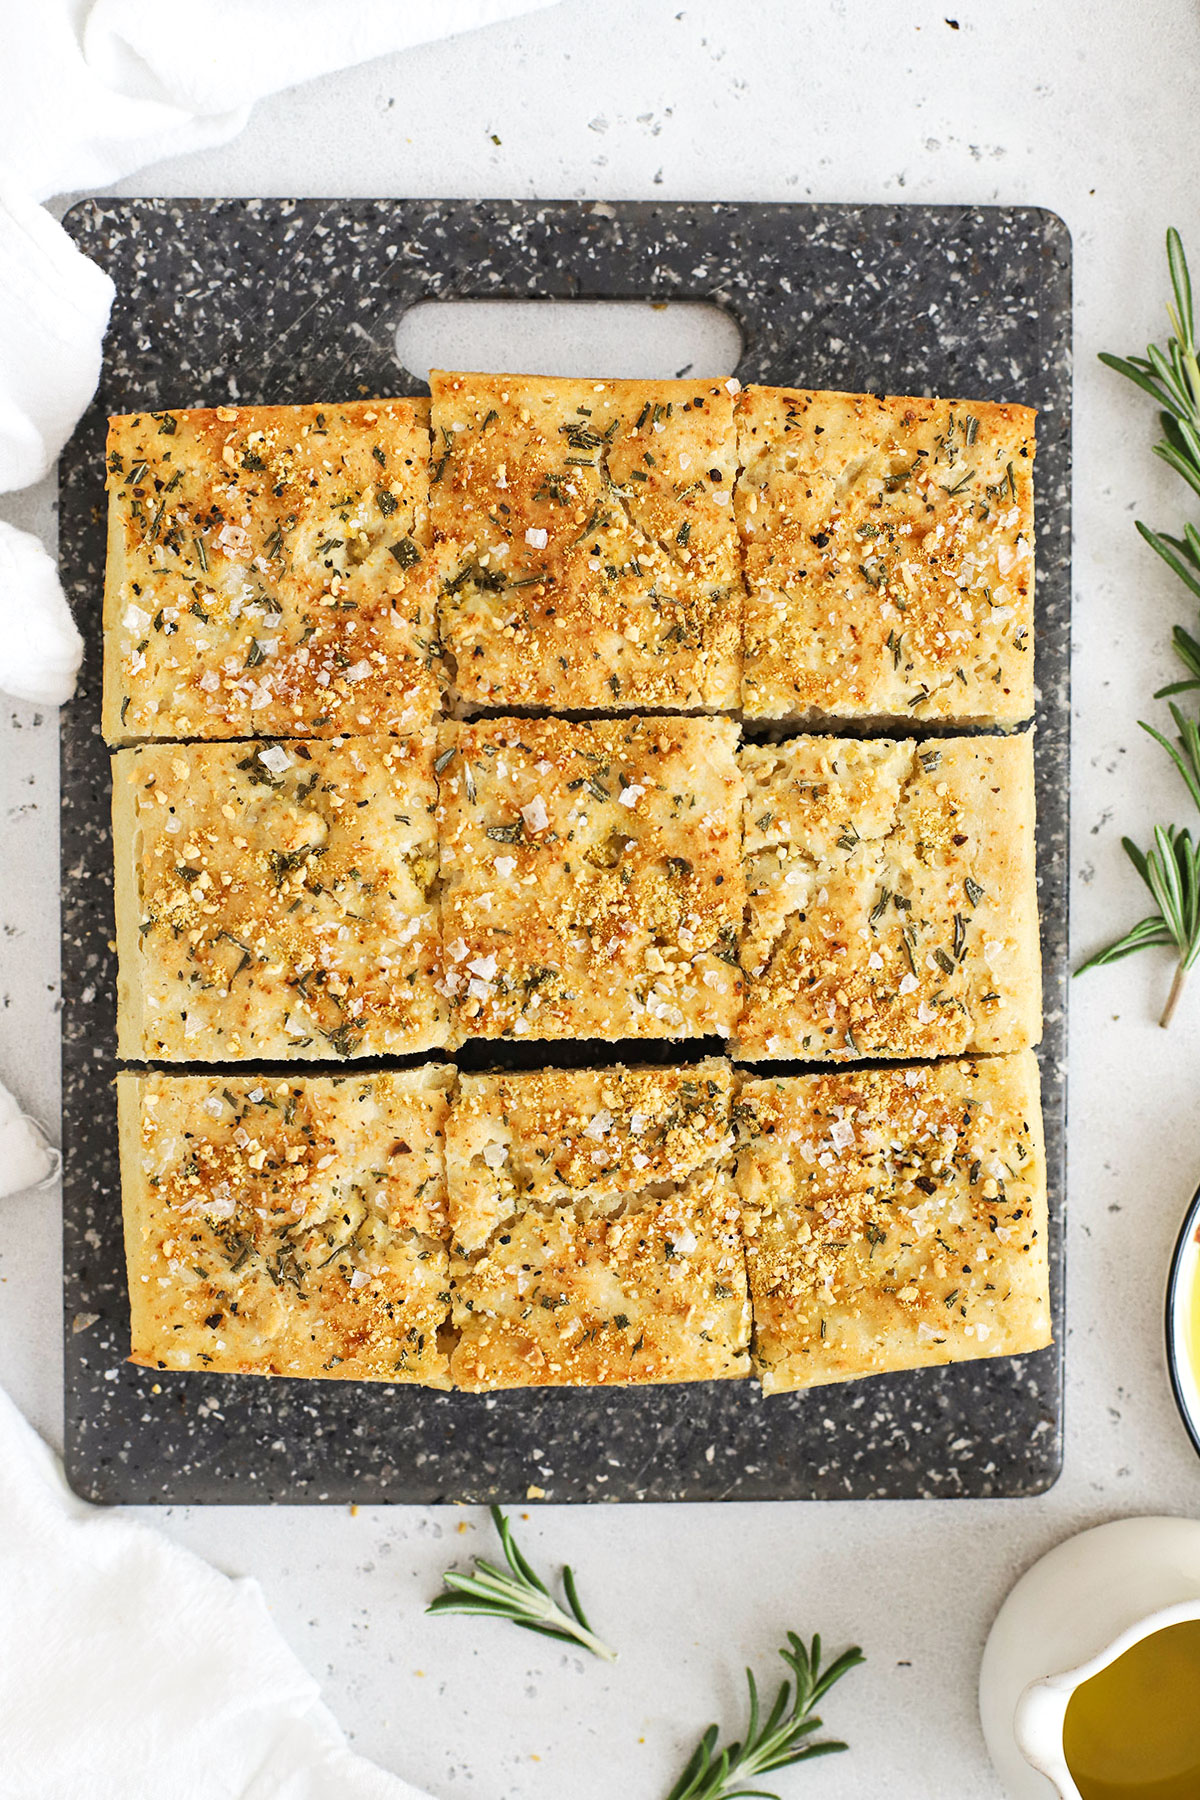
Gluten free focaccia dough rising in a bowl A sliced loaf of gluten free rosemary focaccia TIPS FOR THE BEST GLUTEN-FREE FOCACCIA:

USE FRESH INGREDIENTS. It might seem silly, but if you’re using really old baking powder or a packet of yeast you don’t *exactly* remember buying because it’s been so long, you might want to swap them out for fresh.

WATCH YOUR WATER TEMPERATURE. The water should ideally be between 120-130 degrees F before you add your yeast. I almost never use a thermometer for this. I use the touch test–if the water is too warm to put your finger in comfortably for several seconds, it’s too hot. You need the warmth to help activate it, but you don’t want it so hot it kills the yeast. If it’s too hot, wait a few minutes for it to cool down, or pour out half and cool it down by adding some room temperature water.

KNOW THAT GLUTEN FREE FOCACCIA DOUGH IS MORE LIKE BATTER. If you’ve ever baked with wheat-based flours (white all-purpose, wheat, bread flour, etc.) you’ll be able to tell right away that gluten-free focaccia “dough” is really more like batter. It’s not pliable (there are no gluten or wheat proteins to give it that structure!), and you won’t knead it–you can’t! It’ll be a rather sticky, wet batter instead of a cohesive, stretchy dough.

USE PARCHMENT PAPER ON YOUR PAN. Your gluten-free focaccia batter will be sticky, and it can stick to the baking sheet if you don’t prep it. A surefire way to keep your dough from sticking to the pan is to use parchment paper, then drizzle the olive oil on top of it, as directed. I highly recommend you don’t skip the parchment. If you don’t like using parchment paper, at least use a reusable silicone baking mat to help prevent sticking.

DON’T SKIMP ON THE OLIVE OIL. SERIOUSLY. Don’t do it! I know it’ll feel like a lot (especially on the sheet pan), but I promise the olive oil is essential for the texture of the interior and exterior of gluten-free focaccia. Olive oil helps give that gorgeous crispy crust on the exterior and keeps things light on the interior. I promise your results will not be as good if you try to skimp on the olive oil. It’ll be more dry and spongy. And it won’t get the same gorgeous color. Trust me!
GET BETTER DIMPLES. Great for smiles, yes, but they’re also a characteristic of focaccia. In gluten-free focaccia, your “dough” is really more like batter, so it won’t hold the dimples as well in its uncooked state. If you want clearly defined dimples in your batter, I recommend doing them in the uncooked batter (as shown in the video), then pulling the focaccia out 5-10 minutes into baking to carefully reinforce the dimples a second time. (Since the dough will be hot, you may have better luck with using the back of a small measuring spoon (like 1/4 tsp or 1/2 tsp) than your fingers.

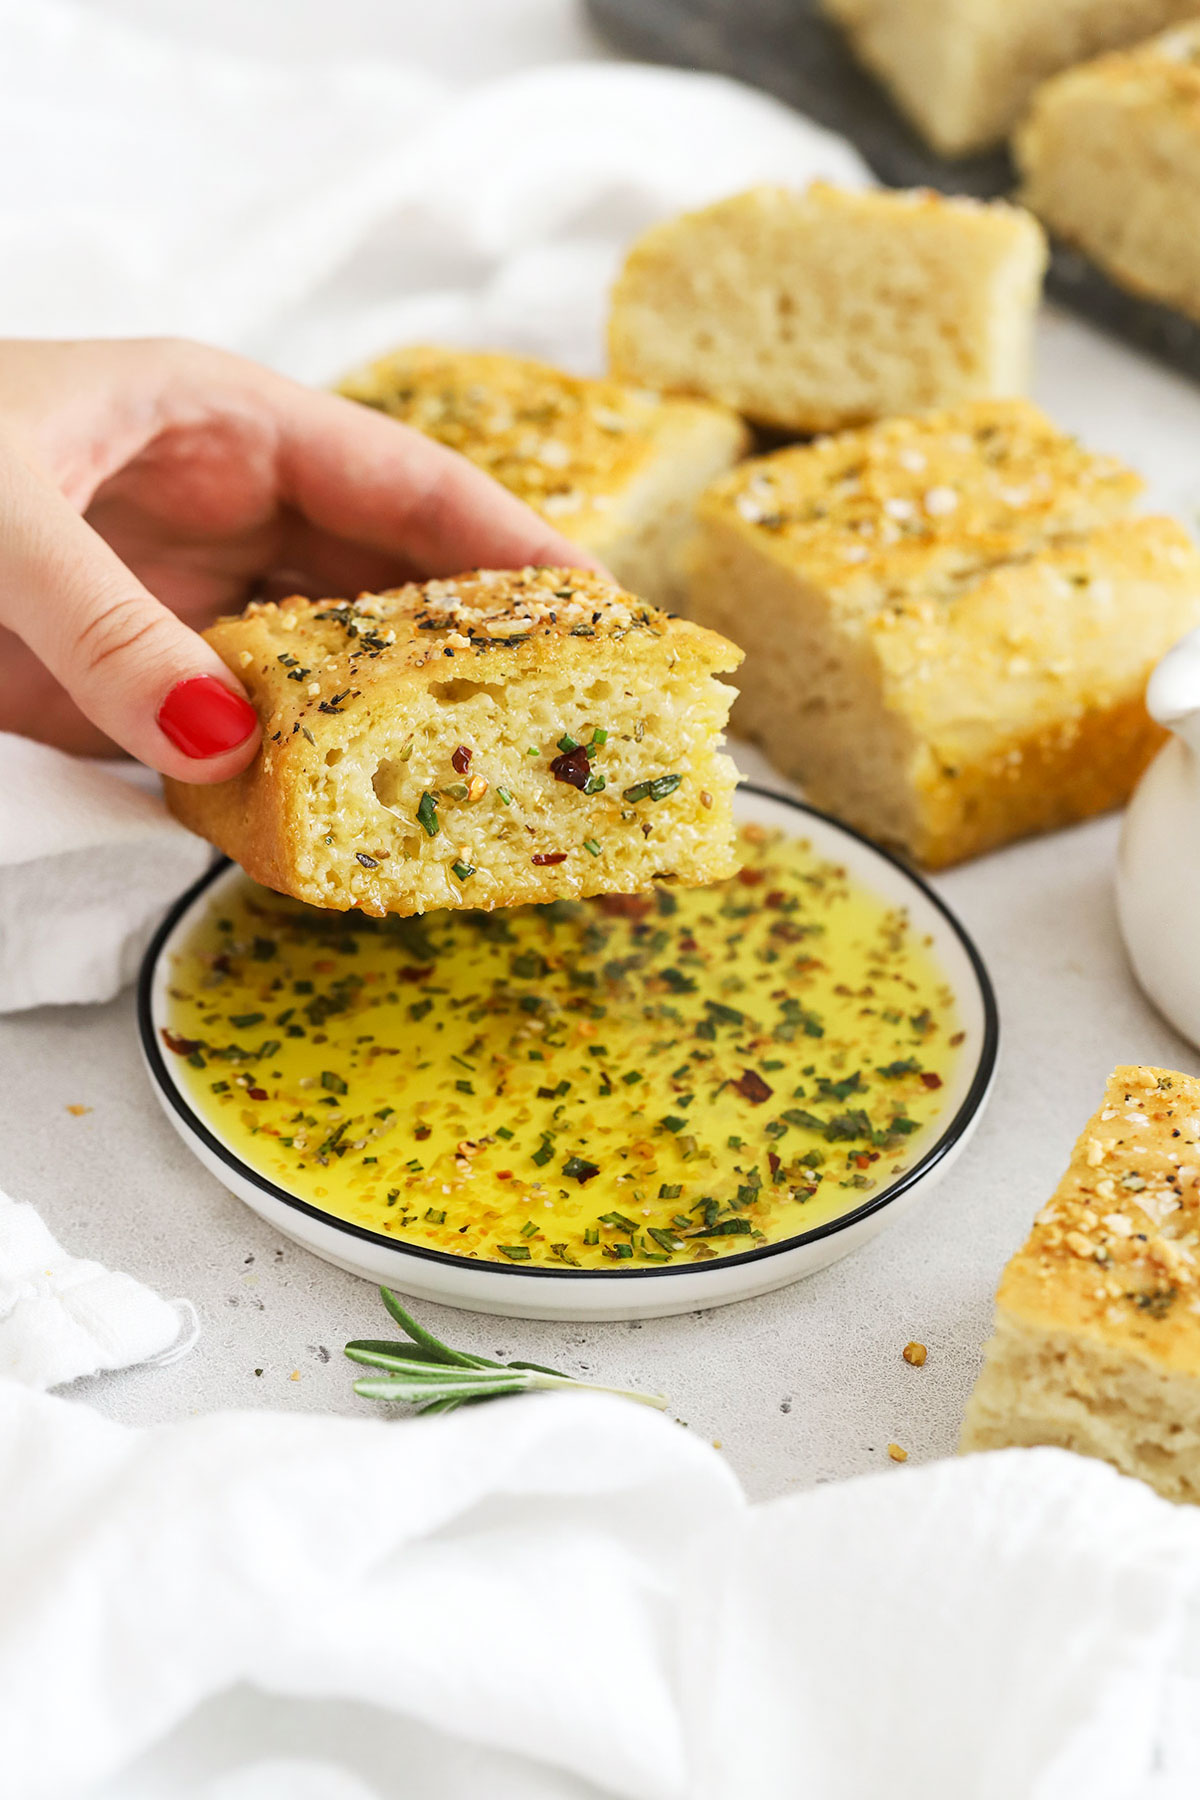
Olive oil being poured over fresh herbs and garlic Dipping gluten free focaccia into olive oil and fresh herbs A piece of gluten free focaccia dipped into olive oil and herbs

MY FAVORITE OLIVE OIL DIPPING BLEND FOR GLUTEN-FREE FOCACCIA

Dipping your gluten-free focaccia in a little herby olive oil feels so fancy and fun. Here’s our go-to combination. (The amounts are totally variable. I’ll give suggestions, but usually, I just eyeball this and do a pinch of this and that till it feels right.)

  • GOOD QUALITY OLIVE OIL. (1/3 cup) I love this one. (Use code LOVELY for 10% off your first order!)
  • FRESH ROSEMARY. If you’ve got fresh rosemary for this recipe, I recommend using an additional 1/2 tsp or so for the dipping oil. (Or, you can use a small pinch of dried rosemary)
  • DRIED GARLIC FLAKES. (1/4 tsp) This is more coarse garlic and tastes amazing here. You could certainly use fresh. This just has a little less bite and I prefer it.
  • COARSE SEA SALT. (1/4-1/2 tsp) The nice, big flakes are SO GOOD here. We also use this to sprinkle on our gluten free focaccia before baking.
  • DRIED OREGANO. A little pinch (1/8-1/4 tsp) does the trick. This is in a lot of restaurant dipping oil blends and it’s lovely.
  • RED PEPPER FLAKES. A little pinch (1/8-1/4 tsp) is perfect. It warms up the other flavors and won’t have time to get too spicy. If you *do* want it spicy, mix up your oil and herbs ahead of time and let them sit together to infuse a bit.

PS – Sometimes, we like to add a splash of aged balsamic vinegar to the mix, too. It’s so yummy!

Close up view of gluten free focaccia

FAQ + MORE IDEAS FOR THIS GLUTEN-FREE FOCACCIA

WHAT KIND OF GLUTEN-FREE FLOUR CAN I USE? I’ve only tested this with one-to-one or cup-for-cup gluten-free substitutes. My favorite for this recipe is King Arthur Flour Measure for Measure gluten free flour blend because it gets nice and golden on top. It’s my top choice for this recipe and produces the best results. I have also tried it with Bob’s Red Mill 1-to-1 gluten free baking flour with decent results. The Bob’s Red Mill blend usually doesn’t get quite as crisp or “done” as the King Arthur Blend, and some readers report their focaccia stays wet or gummy in the center when they use the Bob’s Red Mill blend. I haven’t tested it with a homemade blend or any other brands yet. You cannot substitute almond or coconut flour in this recipe.

HOW TO SERVE FOCACCIA – I’ve got to say it: my favorite way is when it’s burn-your-mouth hot from the oven. But. After it’s had enough time to actually cool down somewhat, my favorite way to enjoy gluten free focaccia is dipped in olive oil. This family-owned company makes my favorite olive oil ever. They have a specific dipping oil blend that comes with herbs already inside, or you can get a classic balanced olive oil, or one of their flavored oils, like Rosemary, Fresh Crush Basil, Meyer Lemon, or even something with some kick. Use code ONELOVELYLIFE for 10% off your first order!

HOW TO STORE FOCACCIA – Like most gluten free baked goods, this gluten free focaccia is best enjoyed in 1-2 days. I store mine wrapped tightly or in an airtight bag with extra air pressed out in the refrigerator, then heat it up in the oven (you can use the microwave or a toaster oven) before serving again.

WHERE DO YOU FIND VEGAN PARMESAN? I actually make this one and keep it in my fridge. It’s great for things like this. It doesn’t melt, but it gives a cheesy feel which is so nice here. If you tolerate dairy, feel free to use the real stuff!

Slices of gluten free rosemary focaccia stacked Slices of gluten free rosemary focaccia

Love this recipe? You might like…

  • How to Make Olive Oil & Herb Bombs (great for using in this or dipping your bread!)
  • Sun Dried Tomato Quinoa (Gluten free & vegan)
  • Gluten Free Maple Cornbread
  • Italian Chopped Salad with Italian Vinaigrette
Print
clock clock iconcutlery cutlery iconflag flag iconfolder folder iconinstagram instagram iconpinterest pinterest iconfacebook facebook iconprint print iconsquares squares icon
Close up view of gluten free focaccia

Gluten Free Focaccia with Rosemary


★★★★★

4.8 from 18 reviews

  • Author: One Lovely Life
  • Prep Time: 15 minutes + 1 hour rise time
  • Cook Time: 30 minutes
  • Total Time: 45 minutes + 1 hour rise time
  • Yield: 12 slices 1x
Print Recipe
Pin Recipe

Description

This gluten free rosemary focaccia is made entirely gluten free and vegan-friendly! It’s easier than you think and has the perfect crispy crust and tender, light center. Yum!

NOTE: I *highly* recommend King Arthur Flour Measure-for-Measure flour for this recipe. Bob’s Red Mill 1:1 flour is my other favorite, but will not get as light, as browned, or as “done” in the center as King Arthur Flour. Some readers report their focaccia stays wet or gummy in the center with Bob’s.


Scale

Ingredients

For Gluten Free Focaccia:

  • 2 1/4 cups gluten free 1:1 flour (I highly recommend King Arthur Flour Measure-for Measure flour), about 300g
  • 2 tsp baking powder
  • 1 1/2 cups warm water
  • 1 pkg. (1/4 oz.) instant or rapid rise yeast
  • 1 Tbsp honey (or agave, or sugar)
  • 1 tsp salt
  • 4 Tbsp olive oil, divided

For Topping:

  • 1 Tbsp fresh rosemary
  • 1–2 Tbsp vegan parmesan or Parmesan cheese
  • 1/2 tsp coarse salt (like Maldon)
  • 1/4 pepper

Instructions

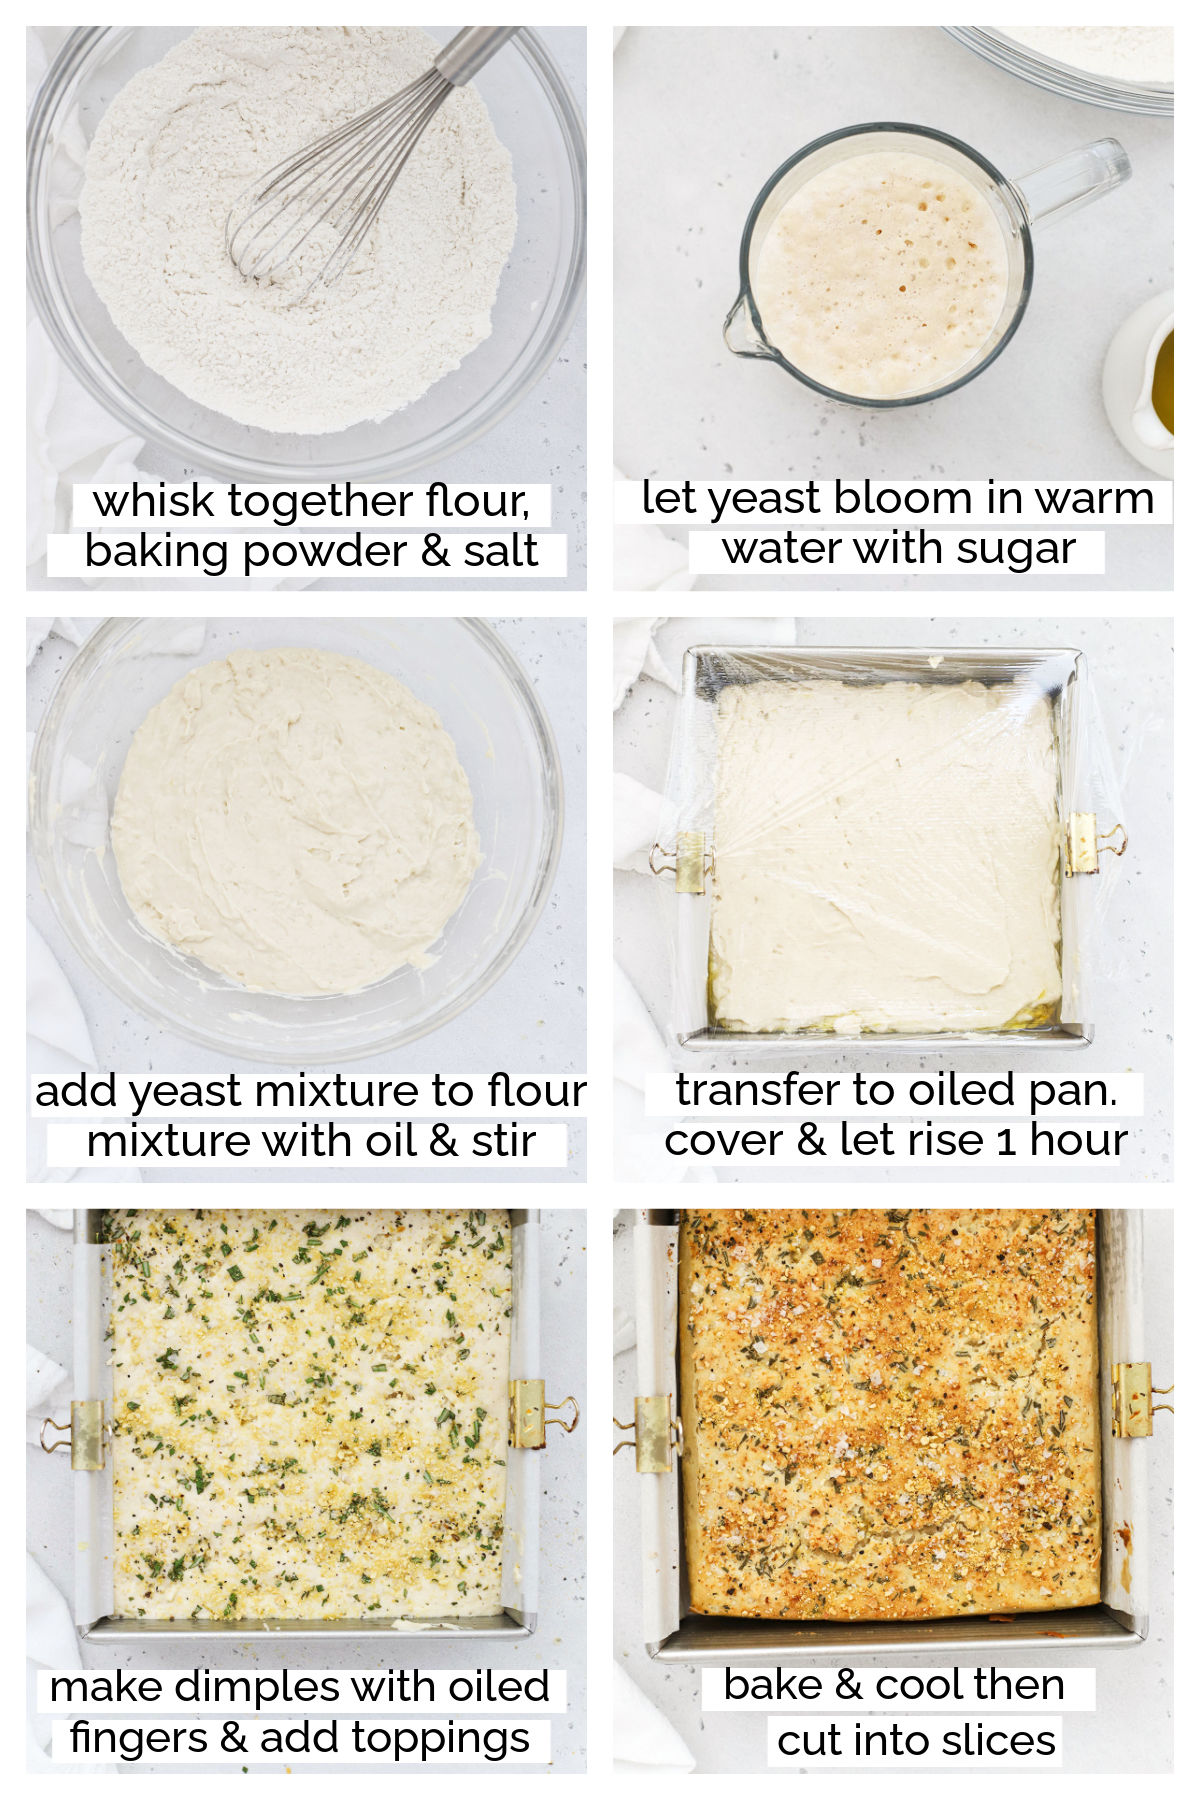
  1. In a large bowl, whisk together flour, salt, and baking powder. Set aside.
  2. Warm your water in the microwave or on the stovetop until it’s warm but not hot. (Ideally, the temperature should be between 120-130 degrees F, but you can use the touch test to tell if it’s ok. If the water is too warm to put your finger in comfortably for several seconds, it’s too hot)
  3. Add yeast, honey, and 2 Tbsp olive oil to the warm water. Stir to combine, then let it bloom by setting it aside to rest for for 3-5 minutes. (It’ll start to look foamy on top)
  4. Pour the water/yeast mixture over the dry ingredients and stir to combine. Note that the dough will actually be more like batter than dough. You will not knead it.
  5. Cover the bowl with plastic wrap or a clean dish towel and set it to rise in a warm place for at least 30 minutes if using rapid rise yeast and about an hour if you use regular yeast. The batter/dough will be roughly double in size.
  6. During the last few minutes of the rise time, preheat the oven to 400 degrees F.
  7. Line a baking sheet with parchment paper and drizzle with remaining 2 Tbsp of olive oil.
  8. Pour the batter out onto the prepared baking sheet and gently press out using your fingers or the back of a spatula into a rectangle shape (roughly 8×10″ or so) about 3/4 of an inch thick.
  9. Use your finger to poke several holes in the dough all the way to the bottom of the pan to form the characteristic “dimples” of focaccia.**
  10. Sprinkle the surface of the dough with fresh rosemary, vegan parmesan (if using), coarse sea salt and pepper.
  11. Bake at 400 degrees 25-30 minutes, or until golden brown. Remove from oven and let cool at least 10-12 minutes before slicing and eating.

Notes

**FOR MORE DEFINED DIMPLES, remove focaccia from oven after about 5 minutes of bake time and use the back of a small measuring spoon to reinforce the dimples before returning to the oven.

FOR A YUMMY DIPPING SAUCE: Pour 1/3 cup olive oil over granulated garlic, coarse salt, pepper, red pepper flakes, and rosemary, oregano, and/or basil. I usually use 1/4 tsp dried flaked garlic, 1/2 tsp fresh rosemary, 1/4 tsp oregano, 1/4 tsp coarse salt, 1/4 tsp pepper, and 1/4 tsp red pepper flakes

  • Category: Side dish, bread
  • Method: Baking
  • Cuisine: Italian American, Mediterranean

Keywords: gluten free focaccia, gluten free rosemary focaccia, gluten free bread

Did you make this recipe?

Tag @onelovelylife1 on Instagram and hashtag it #onelovelyrecipe

Gluten Free Rosemary Focaccia from One Lovely Life Gluten Free Rosemary Focaccia from One Lovely Life
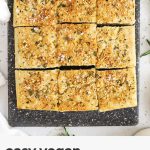
Slices of gluten free rosemary focaccia stacked with text overlay that reads "Vegan Friendly Gluten Free Rosemary Focaccia" A sliced loaf of gluten free rosemary focaccia with text overlay that reads "Vegan Friendly Gluten Free Rosemary Focaccia" Collage of images of gluten free rosemary focaccia with text overlay that reads "Vegan Friendly Gluten Free Rosemary Focaccia"

Filed Under: appetizers & dips, breads, Dairy Free, Gluten Free, Vegan, vegetables & sides

« Summer Reading + Free Printables
Farmers’ Market Quinoa Salad (Gluten Free & Vegan) »

Comments

  1. Andy says

    June 23, 2019 at 12:47 pm

    I’m confused on the amount of yeast. A package of instant yeast is 1/4 oz. you have listed 1 package but 1 oz. is that a typo somehow? thanks . Am looking forward to making it

    Reply
    • Emily says

      June 23, 2019 at 2:59 pm

      Andy – Oh my goodness!!! Thank you! I DID make a typo. I’m SO glad you said something. It should read 1/4 oz for 1 package. I’ve corrected it!

      Reply
  2. Marylue says

    September 23, 2019 at 7:20 am

    Did I miss the size of baking sheet? I want to make this for a bake sale and may adjust to smaller size pans

    Reply
    • Emily says

      September 23, 2019 at 8:46 am

      Marylue – Sorry! Just a standard cookie sheet (half sheet pan). It doesn’t fill the whole baking sheet (as you can see in the video), but that size has plenty of room to spread out the focaccia. 🙂

      Reply
  3. D says

    November 21, 2019 at 12:09 pm

    Can this recipe be cold fermented and took out to proof before baking

    Reply
    • Emily says

      November 22, 2019 at 9:52 am

      I have never tried that before. I’d love to know how it goes if you give it a try!

      Reply
  4. Pam Smith says

    February 8, 2020 at 1:26 pm

    I am Celiac and a Chef was lucky enough to find a job being the Avoiding Gluten Chef at a local college. I tried this recipe to see if we could start adding bread items to the AG area….My Chef ate 4 pieces of the test run and gave a double thumbs up on it. I tried making it 6 times the amount and baking it on a large sheet pan! Yes it works great! I have to add this are also serves food that avoids the top 8 allergens so this was right on spot. Thank You

    ★★★★★

    Reply
    • Emily says

      February 9, 2020 at 10:11 am

      Pam – WOW!!! That’s incredible! Thank you so much for sharing this with me!

      Reply
      • Pam Smith says

        February 11, 2020 at 2:23 pm

        The students devoured it!

        Reply
  5. Xanthan says

    February 25, 2020 at 7:29 pm

    The KAF flour you used (Measure for Measure) actually does have Xanthan gum in it.

    Reply
  6. Sandra Thiessen says

    February 25, 2020 at 9:33 pm

    Hi Emily, I tried this recipe but it didn’t turn out at all. It was gluey and didn’t rise. I used new baking powder and Bob’s GF. Hate to admit but it went into the garbage but it sure smelled amazing while it was baking. I followed the directions carefully…any suggestions? PS – the only thing I can think of was I keep my flour in the freezer to stay fresh, could that be it?

    Reply
    • Emily says

      February 26, 2020 at 5:33 am

      Sandra – Hmm. That’s frustrating! New baking powder and Bob’s GF are both good… and you’re sure you had active yeast, let it proof with the water/honey before adding it to the dry ingredients and allowed for enough rise time?

      Reply
      • Anonymous says

        February 27, 2020 at 12:24 pm

        Hi Emily, yes to all your questions, maybe I should let it proof longer? It was about an hour but maybe the flour was still cold before it mixed it in?? I’ll try again and see if that fixes the problem.
        I may also just buy another yeast, could be that it was a bit older.

        Reply
        • Emily says

          February 27, 2020 at 2:40 pm

          I’m just so sorry! The dough is definitely pretty liquid going onto the pan (you can see in the video that it doesn’t stick together like traditional dough–it’s more like batter), and it doesn’t rise a ton, but it should definitely puff up a bit during cooking. I’m so sorry you had trouble, and *really* hope the second test is a huge win. Another reader has been making this at a college cafeteria and the students are loving it!

          Reply
    • Anonymous says

      April 23, 2020 at 9:53 pm

      I tried it and it was gummy in the center and raw like. It was brown on the outside!

      Reply
      • Emily says

        April 27, 2020 at 5:14 am

        I’m sorry to hear that!

        Reply
  7. Anonymous says

    March 1, 2020 at 3:11 am

    Can we use almond or coconut flour

    ★★★★★

    Reply
    • Emily says

      March 1, 2020 at 2:06 pm

      Sadly, not for this recipe. You’d have to make a lot more adjustments to make that work.

      Reply
  8. Kimberly says

    March 1, 2020 at 2:03 pm

    What if my water with the quick rise yeasts and sugar and salt do the really foam? And the water was warm

    Reply
    • Anonymous says

      March 1, 2020 at 2:03 pm

      Doesn’t foam *

      Reply
      • Emily says

        March 1, 2020 at 2:04 pm

        If it doesn’t foam, after several minutes, it most likely means your yeast is dead and the bread will not rise. I’m so sorry!

        Reply
      • Yeast says

        March 1, 2020 at 2:37 pm

        I’m surprised this recipe has you add the salt in with the water, sugar and yeast. Salt kills yeast. Your yeast could be old or dead, but I’d just add the salt to the dry ingredients rather than the yeast mixture to be sure it’s not accidentally killed.

        Reply
  9. Jacquie says

    March 8, 2020 at 7:17 pm

    This sounds great. Could this recipe be used for focaccia with a crushed tomatoes and green onions topping?

    Reply
    • Emily says

      March 9, 2020 at 10:29 am

      Jacquie – That sounds tasty! You’d probably need to be careful about crushed tomatoes since they’d likely add a lot of moisture and could disrupt the texture of the bread, but sun-dried tomatoes would be delicious!

      Reply
      • Jacquie says

        March 9, 2020 at 8:57 pm

        Thanks Emily! I would probably make a marinara… !? Will absolutely use sun dried tomatoes 🍅 at some point.
        But I’ve decided to make it as described in recipe. First batch came out more like a flatbread/ scone ish! I think I didn’t add enough liquid and a semi kneaded it! :/ But flavor was awesome and my kids and grands loved it and will definitely have to make two batches at a time. Will share when I make it again.
        Five star for flavor:)

        ★★★★★

        Reply
        • Emily says

          March 10, 2020 at 7:34 am

          Tasty! I hope the next batch is even more successful! 🙂

          Reply
  10. Lauri says

    March 15, 2020 at 2:25 pm

    I am on a gluten free diet due to Ibs I was wondering can I use a warm oven to let it rise or where else would u suggest thanxs

    Reply
    • Emily says

      March 15, 2020 at 5:09 pm

      Lauri – On a countertop in a warm room is fine, or in an oven with the light on, but you don’t want it *too* warm in the oven or it can start to cook and mess up the rise. Hope that helps!

      Reply
  11. Connie Doomey says

    March 28, 2020 at 4:25 pm

    Hi Emily! This recipe was great! I used bob’s red mill 1:1 and regular yeast (rested for 1 hour as instructed). Mine didn’t rise as much as yours. Do you think I should go for King Arthur or was it because i used regular yeast?

    Reply
    • Emily says

      March 28, 2020 at 4:31 pm

      Connie – I’m so glad you enjoyed it! And I’d love to help on the rise… Did you feel like your dough rose to double its size during the 1-hour wait time? How thick was your finished bread?

      If it rose properly (and just about doubled in size while it was rising), it could be that yours was spread onto the baking sheet in a larger rectangle than mine was. Mine usually ends up about 1″ tall after baking, but if I spread it in a larger rectangle, it rises less since the dough is spread thinner.

      My “batter rectangle” is usually around 8.5×10″ or so (sometimes a little wider or longer), if that helps.

      Reply
      • Connie Doomey says

        April 4, 2020 at 5:29 pm

        Thanks so much for your tips! I made it again and it turned out so much better. I let it proof in the bowl for 1 hour and another 1 hour in the pan and it’s risen much more. I do think my spread was too thin earlier! Xx

        Reply
        • Emily says

          April 5, 2020 at 2:41 pm

          Connie – I’m SO, SO glad to hear it. Thank you so much for circling back with me! I’ve thought about you and your comments a lot!

          Reply
  12. Kellie says

    April 3, 2020 at 2:14 pm

    We love this recipe. I have used it l to make hamburger and hot dog “rolls”. Since my husband, who is GF, has not found some he has liked in stores.
    Thank you for creating an easy go to recipe that we all like.(little ones included.)

    ★★★★★

    Reply
    • Emily says

      April 3, 2020 at 4:19 pm

      Wow, that sounds great! So glad you’re enjoying it!

      Reply
  13. Anonymous says

    April 5, 2020 at 12:08 am

    This is an awesome recipe but your website is broken.

    I did the 2x button however the grams of flour did not double… so I made some really nice flat bread because I didn’t put the necessary amount of flour in.

    I demand compensation! ( ha ha kidding )
    Love you Karen

    Reply
    • Emily says

      April 5, 2020 at 2:38 pm

      Karen – So sorry you ran into trouble! I’ve tried the 2x button in two browsers on my phone, tablet, and computer and can’t replicate the problem. I’ll try to circle back with the recipe plugin folks to see if there’s an issue they know about on their end.

      Reply
  14. Sara says

    April 10, 2020 at 9:06 am

    I want to try this recipe but really don’t want it to fail! I have a question: I don’t have that size of baking sheet, can I do it in a cast iron pan instead (I have an 8” and 10” I think). Thanks so much!

    Reply
    • Emily says

      April 10, 2020 at 2:12 pm

      Sara – Honestly, cast iron would probably make for fantastic crust! If possible, I still recommend lining it with parchment and adding oil on top of the parchment as directed in the recipe to prevent sticking, then just keeping an eye on it. I usually pat my dough out into an 8×10″ rectangle, so I’d probably go with the 8″ over the 10″ for thicker focaccia. If you prefer it thinner, you can use the 10″ size.

      Reply
  15. Madison says

    April 10, 2020 at 12:31 pm

    I am in love with this bread and have made it like 8 times this past week alone! I cannot beluce how satisfying it is, as I have been searching for something so delicious since I developed sensitivities almost 10 years ago! Thank you so much for sharing this 🤤
    I dip my fingers in olive oil over and over while I’m making the dimples.
    I also add garlic and onion powder to the top before I put it in the oven!
    I have also baked it half-time and covered it in pizza toppings and continued to bake it…OMG🤤
    So obsessed with how delicious it comes out, as is everyone I have shared it with 🤤
    Thank you again!
    💗🙏🙌

    ★★★★★

    Reply
    • Emily says

      April 10, 2020 at 2:13 pm

      Madison – You TOTALLY made my day! Thank you so much for sharing this with me! We’ve done it as pizza before too and LOVED it. SO GOOD!

      Reply
  16. Jen says

    April 15, 2020 at 11:50 am

    Can I leave out the sugar? I don’t have any sugar, honey, or any sweetener handy, so will the yeast still activate with just warm water?
    Thanks for the recipe! Can’t wait to try!

    Reply
    • Emily says

      April 16, 2020 at 2:19 pm

      Jen – Totally understand. You can risk it if you like, but it may not turn out the same. Sweetener helps activate the yeast, which can be helpful with gluten-free bread baking (which is notoriously finicky). Traditional bread recipes do without sugar regularly, so it might work? I just can’t guarantee the results without having tried it first. I’m sorry!

      Reply
      • Jen says

        April 16, 2020 at 3:26 pm

        It turned out great! I decided to give it a try yesterday, and the focaccia is almost gone and it has only been 24 hours! My husband and daughter loved it.
        Thanks again!

        Reply
        • Emily says

          April 17, 2020 at 8:16 am

          Jen – Oh GOOD! I’m SO glad it turned out for you!!! That’s fantastic!

          Reply
  17. Ocean says

    April 26, 2020 at 7:54 am

    I made this recipe with Bob’s Red Mill 1-to-1 gluten free baking flour. Unfortunately, it appears that both Bob’s 1-to-1 and King Arthur’s Measure-for-Measure have Xanthan gum in the mixes. That means this focaccia comes out rather chewy and not really focaccia textured. That said, this came out about as good as the focaccia other GF restaurants serve. I think next time I might use a little more yeast and baking powder to leaven it a bit more and mitigate the chewiness?

    ★★★★

    Reply
    • Emily says

      April 27, 2020 at 2:13 pm

      Ocean – I’m sorry it wasn’t quite what you were looking for. I’d love to know if your adjustments solve the problem for you!

      Reply
  18. KL says

    April 26, 2020 at 4:33 pm

    Can I use GF all purpose flour?

    Reply
    • Emily says

      April 27, 2020 at 2:10 pm

      I’ve only tested it with King Arthur Flour Measure for Measure and Bob’s Red Mill Measure-for-Measure, so I can’t 100% guarantee your blend if you choose to use a different one. If you give it a try, I’d love to know which one you use and how it goes!

      Reply
  19. Jacque says

    May 1, 2020 at 7:56 am

    This smelled delicious while baking- but unfortunately I had similar results to some others. I’m hoping maybe you have some suggestions so I can troubleshoot. I followed the recipe exactly and used Bob’s 1-1 mix. I spoon my gluten free flour into the measuring cups when I bake. The yeast was beautiful and frothy after 5 minutes, and the dough more than doubled in size after 30 mins in a warm spot. The batter/dough looked beautiful and I baked on a silicone mat in an 8×10 stainless steel water pan. The dough barely rose in the oven though and while it smells great, the inside is gummy/raw looking and textured. The outside is done but not really a full golden brown, more light. I baked for 30 minutes and am popping it back in for an extra 5. All of the ingredients I used were fresh as we bake a lot here. Thoughts?

    ★★★

    Reply
    • Emily says

      May 1, 2020 at 8:45 am

      Jacque – That’s so frustrating, I’m so sorry. It sounds like you did all the right things.

      A few things I can think of that could possibly be at play here:
      1. Oven temperature. Many (if not most) ovens vary from their stated temperature, so if you don’t have an oven thermometer, it might be worth looking into. (My current oven is 25 degrees below the stated temperature, for instance, so I have to compensate until my thermometer shows the correct temp.)

      2. Altitude – Sometimes, if you’re at a high altitude that can impact a bake. Are you by chance at a high altitude?

      3. Lastly, one other suggestion. Another reader who wanted a higher rise (and had a similar experience to yours) allowed hers to rise a second time (until it had doubled again) on the baking sheet before putting it in the oven. She said it made a huge difference in getting the height and “fluff” she was looking for. Maybe that would be worth trying?

      Again, I’m so sorry you ran into trouble. Bread baking (especially gluten-free bread baking) is notoriously finicky, and I know how frustrating it can feel when a recipe doesn’t turn out. Wishing you ALL the best luck if you give it another go!

      Reply
      • Jacque says

        May 1, 2020 at 10:41 am

        Thank you for the thoughtful tips! I tried putting it back in for another 20 minutes and despite the outside being super crunchy, the inside is still gummy and has a raw taste. An inaccurate oven temperature could definitely be a problem for us. I’ve noticed previously that it seems to run a little hot, and perhaps that is what I’m running into here. I’m also wondering if I did not mix long enough. I don’t have a stand mixer, so used a wooden spoon and just mixed until everything was well incorporated. Maybe if I try again I’ll mix longer and add a second rise. It looks so good and I would love to have some success with it. I’ll have to change a few things on my end and see how it goes. Thank you!

        Reply
        • Emily says

          May 4, 2020 at 8:24 am

          Fingers so crossed for you!

          Reply
  20. Kels says

    May 7, 2020 at 4:28 pm

    Made this with Bob’s Red Mill gluten free flour and it turned out awesome!

    I used bread maker yeast and let it ride for about an hour on the stove (with some cookies in the oven.) The batter doubled in size.

    Instead of a cookie sheet I used two cast iron pans (highly reccomend trying this!) I only put about an inch of batter in each and made sure they were well oiled.

    Everybody loved it and it baked perfectly at 400 for 25 mins.

    ★★★★★

    Reply
    • Emily says

      May 8, 2020 at 5:24 am

      Kels – We made it in a cast iron pan a couple of weeks ago and it was DELICIOUS! I loved how crispy the bottom got! So glad you enjoyed it! 🙂

      Reply
  21. Kristen Cook says

    May 7, 2020 at 8:36 pm

    Emily, this bread was absolutely fantastic! I just made it for the first time and everyone in my family enjoyed it. I loved the texture and taste very much. Thank you for another winner recipe to go in my recipe book.

    Reply
    • Emily says

      May 8, 2020 at 5:22 am

      WONDERFUL!!! I’m so glad you liked it, Kristen! It’s our family’s favorite.

      Reply
  22. Aubrey says

    May 12, 2020 at 4:25 pm

    What a disappointment! I’m taking dinner to a family who just had a baby and the mother is celiac. The bread turned out gummy and raw inside. I am a chef by profession, but do not cook gluten free. I followed all instructions very carefully but this will have to go straight in the garbage! Now I don’t know what I’ll serve this family in 20 minutes. What a disaster!!!!!

    Reply
    • Emily says

      May 13, 2020 at 8:35 am

      Aubrey, I’m so sorry to hear this. That sounds SO frustrating. Gluten-free bread baking is definitely a different experience than traditional baking. Did you use King Arthur Flour measure-for-measure blend flour or another blend? Other flour blends will produce different results, which may have contributed to the gummy center. Again, so sorry it didn’t work out for you, especially since you were planning to bring it to a friend.

      Reply
  23. Brooke says

    May 20, 2020 at 8:06 pm

    It’s been a long time since I made focaccia. I remember loving it with spaghetti and salad. I think I will make this tomorrow.

    Reply
    • Emily says

      May 22, 2020 at 10:21 am

      Hope it’s a huge hit!

      Reply
  24. NM says

    May 24, 2020 at 5:42 pm

    Hi Emily,
    Made this exactly how stated until the toppings. Used bread art ideas for toppings. Cooking time was longer, waited until the focaccia was browned on top. Erin DM’d you on Instagram with the pics. Ate the entire bread with dipping sauce for breakfast 10/10😍

    Reply
    • Emily says

      May 26, 2020 at 3:43 pm

      The pictures were GORGEOUS!!! I LOVED how you were able to decorate it!

      Reply
  25. Katy Moffat says

    May 27, 2020 at 8:08 am

    Made this today and can’t believe how well it turned out. Thank you!

    ★★★★★

    Reply
    • Emily says

      May 27, 2020 at 3:08 pm

      I’m so glad you liked it! It’s our FAVORITE!

      Reply
  26. Tanya says

    May 31, 2020 at 7:06 pm

    Oh my gosh! This is amazing! I just made it for dinner and I don’t want anything but this. Even my gluten eating husband said it was amazing- like real focaccia. LOL. The dimples didn’t come out well but who cares, its not ugly and the flavor makes up for it. If I could attach a picture, I would. Thank you!

    ★★★★★

    Reply
    • Emily says

      June 2, 2020 at 1:19 pm

      WOW! That’s fantastic!!! I’m so glad.

      Reply
  27. haya says

    June 7, 2020 at 3:29 pm

    Thank you, I made the recipe delicious and the ingredients are correct it’s really wonderful

    Reply
    • Emily says

      June 7, 2020 at 4:12 pm

      So glad you enjoyed it Haya!

      Reply
  28. sarah says

    June 20, 2020 at 6:56 am

    thank you for this recipe it turned out perfectly, i actually used a slight raised tray so it moulded nicely into it , can’t tell its gluten free…
    Delicious !!!

    ★★★★★

    Reply
    • Emily says

      June 21, 2020 at 3:55 pm

      Ooh–great idea! We made it in a cast-iron pan once and I loved how the crust turned out. 🙂

      Reply
  29. Tsianina says

    June 21, 2020 at 10:00 am

    I am trying to make this right now, and I followed all the measurements, but it is SO liquid. It looks more like crepe batter than a thick pancake batter. I don’t know what the heck I did wrong. I used a kitchen scale to measure everything, so I am at a loss. I added more flour to thicken it before rising, so hopefully that does something? If not, I still have 5 hours before family dinner, so I can try again!

    Fingers crossed!

    Reply
    • Emily says

      June 21, 2020 at 3:53 pm

      Tsianina – Oh dear–My fingers are crossed for you! Out of curiosity, what brand of flour did you use?

      Reply
  30. Sam says

    July 30, 2020 at 5:03 pm

    Can’t rate yet, my first batch came out flat and gluey. However I did notice that the batter deflated quite a bit when I spread it on the plan. Thinking I should have let it rise again. Will try again

    Reply
    • Emily says

      July 31, 2020 at 7:49 am

      I’m sorry to hear that. I hope the second try is a HUGE win. (Out of curiosity, what kind of flour did you use?)

      Reply
  31. Elsie says

    August 2, 2020 at 11:06 am

    Hi- We made this for our Sunday lunch. It our second recipe we attempted with the San proportion of water to flour. The first recipe was just a soupy slurry. So we reduced the water to 1-1/4 cup and the dough looked a little thicker than yours on the video but more like “normal” biscuit dough. Also we use a mix of 1-1/2 cup rice flour, 1/2 cup potato starch, 1/4 cup tapioca and 1-1/2 tsp of xandamum gum. It came out well! We even topped it with roasted garlic and fresh grape tomatoes.

    Thanks for sharing the recipe

    ★★★★

    Reply
    • Emily says

      August 2, 2020 at 3:33 pm

      I’m so glad it worked out well with your flour blend and adjustments! Way to go!

      Reply
  32. Erin says

    August 11, 2020 at 9:54 pm

    Emily, THANK YOU. This recipe was such a hit, my family has been dying for some good bread to snack on with dinner, I tried making gluten free bread 7 times with no success. For the first time I made something gluten free and delicious that my whole family enjoyed.
    Also, I’d like to add that this recipe was amazing as someone with gluten, dairy, soy, nuts, AND egg allergies.

    Thank you so so so much for sharing I cannot wait to bring this to potluck dinners.

    ★★★★★

    Reply
    • Emily says

      August 12, 2020 at 3:02 pm

      That’s FANTASTIC to hear! I’m so glad you loved it! We LOVE it!

      Reply
  33. Carissa says

    September 1, 2020 at 3:20 am

    Seriously so good. Used bobs 1-1 was a little gummy, but not bad. I think lowering the temperature and letting it bake a couple minutes longer and it would be perfect. I cut the rest of the bread into breadstick and toasted them in the oven for five minutes and holy cow. So good. Taste like Pizza Hut crust/breadsticks but yummier. Recipe was super easy to follow too. Definitely going to be a staple in my house. Thank you for this recipe!

    ★★★★★

    Reply
    • Emily says

      September 1, 2020 at 9:35 am

      I’m so glad you liked this! I love your breadstick idea. I’ll totally need to try that!

      Reply
  34. JP says

    September 17, 2020 at 7:22 pm

    I never bother to comment on food blogs but after tonight I felt compelled to do so.

    Holy moley, this is hands-down the best gluten-free bread I have ever made (or eaten!). Soft, fluffy, flavorful, crispy on the edges. I made two pans this evening and between four people there are just a few crumbs left. It was so easy, too! We topped it with some fresh herbs, brushed it with olive oil, and devoured. I have more than my fair share of Pinterest fails so I was just delighted at how well this turned out!

    Quick question: I have some garlic lovers in my house; I’m wondering how best to incorporate garlic flavor into the bread. Do you think it would be better to sprinkle fresh garlic on top before baking, or maybe using garlic powder in the dry mix?

    Thank you so much for this amazing recipe!

    ★★★★★

    Reply
    • Emily says

      September 19, 2020 at 12:46 pm

      That’s SO NICE of you to say!

      For your garlic lovers, you could totally add some garlic powder on the topping or mixed in with the dry ingredients, or you could fold in roasted garlic cloves into the batter before it rises. (Or you can use roasted garlic oil as part of the olive oil in the dough!)

      Reply
  35. Marisa says

    November 2, 2020 at 1:30 pm

    This Gluten free Focaccia was so very good, that I made a second one RIGHT after tasting the first one!
    Thank you so much. I didn’t use parchment, but did use olive oil on a GreenPan non-stick pizza tray/cookie sheet. I drizzled olive oil on top of the dough, and found it was easy to spread with my fingers that way. They did not stick to the dough. The focaccia did not stick to the pan either and I had a lovely crisp brown bottom crust. I look forward to trying so many other recipes! Can some one do my laundry, while I stay in the kitchen?

    ★★★★★

    Reply
    • Emily says

      November 3, 2020 at 7:03 am

      oh, I’m so happy you loved it! Love your olive oil on top trick!

      Reply
      • Marisa says

        November 9, 2020 at 2:28 pm

        I made another one today!!! This is getting pretty obsessive with me. But I wonder if your website has an easier way to search for recipes…I forgot to put that recipe in my Favourites. I love your website and plan to work my way so many recipes of yours. But, scrolling through the Categories is a little time consuming. However, then I see something else I want to make…and so on, and so on.,,,

        ★★★★★

        Reply
        • Emily says

          November 13, 2020 at 5:11 am

          Marisa – I’m so glad you’re enjoying it all over again! I’m SO SORRY the current search function is so difficult to navigate. I’m actually in the middle of a redesign that should make this MUCH easier in the future. I hope you’ll stick with me till it’s done! 😉

          Reply
  36. Maggie says

    December 3, 2020 at 8:25 pm

    It’s delicious

    Reply
    • Emily says

      December 6, 2020 at 6:11 am

      I’m so glad you liked it Maggie! Thank you for sharing!

      Reply
  37. Pam says

    December 29, 2020 at 8:30 am

    This was the best gluten free crust ever!! I used Bob’s 1-1 flour but added 1/4 tsp. xanthan gum just for good luck since someone else found it was too gummy, and all the rest as written. Instead of your topping (which we will try later) we used carmelized onion, a ripe pear and stilton cheese since we had six ripe pears on hand. My husband says we should use this recipe from now on. It came out crispy on the outside, tender on the inside, perfectly done and soooo good! Thank you!!

    ★★★★★

    Reply
    • Emily says

      December 30, 2020 at 12:20 pm

      Pam – Thank you so much for taking the time to leave a review! I’m so glad you liked it. Your pear + cheese + caramelized onion topping sounds AMAZINGLY good. Yum!

      Reply

Leave a Reply Cancel reply

Your email address will not be published.

This site uses Akismet to reduce spam. Learn how your comment data is processed.

  • Email
  • Facebook
  • Instagram
  • Pinterest
  • RSS
  • Tumblr
Emily Dixon from One Lovely Life in a red dress in her kitchen. Hi! I'm Emily. Welcome to One Lovely Life, where you'll find fresh, flexible family recipes + inspiration for living your best life. I'm so glad you're here!

Sign Up For My Weekly Newsletter!

Get fresh recipes, menu ideas, favorite things, and more each week!

Everywhere

Connect

Hi, I'm Emily! I help busy cooks make healthy, beautiful meals the whole family will love! Learn more about me and my story here... Read More…

Copyright © 2021 • One Lovely Life • Privacy Policy

istisnasız her gün profesyonel sporlarla uğraşan sikiş yengesi bir süredir kapalı olan mekanlar yüzünden çok porno büyük sıkıntıya düşmüştür parası çok olan kadın porno özel bir eğitmen tutarak spora devam etmek istediğini sex söylediğinde yüzmeyi güneşlenmeyi ve bikini ile güneşin altında porno izle saatlerce uzanıp hiçbir şey yapmamayı çok seven porno izle sarışın kız evine çok uzakta olan sahil kesimine sex video gitmeye üşendiği için mahallesinin sonunda bulunan porno lüks villayı gözüne kestirerek kimsenin modern sex izle ve gelişmiş bir toplumun parçası olmak isteyen hd porno bir kafa yapısına sahip olan mature aşırı fazla porno bir modern yapısına evrilmiştir