


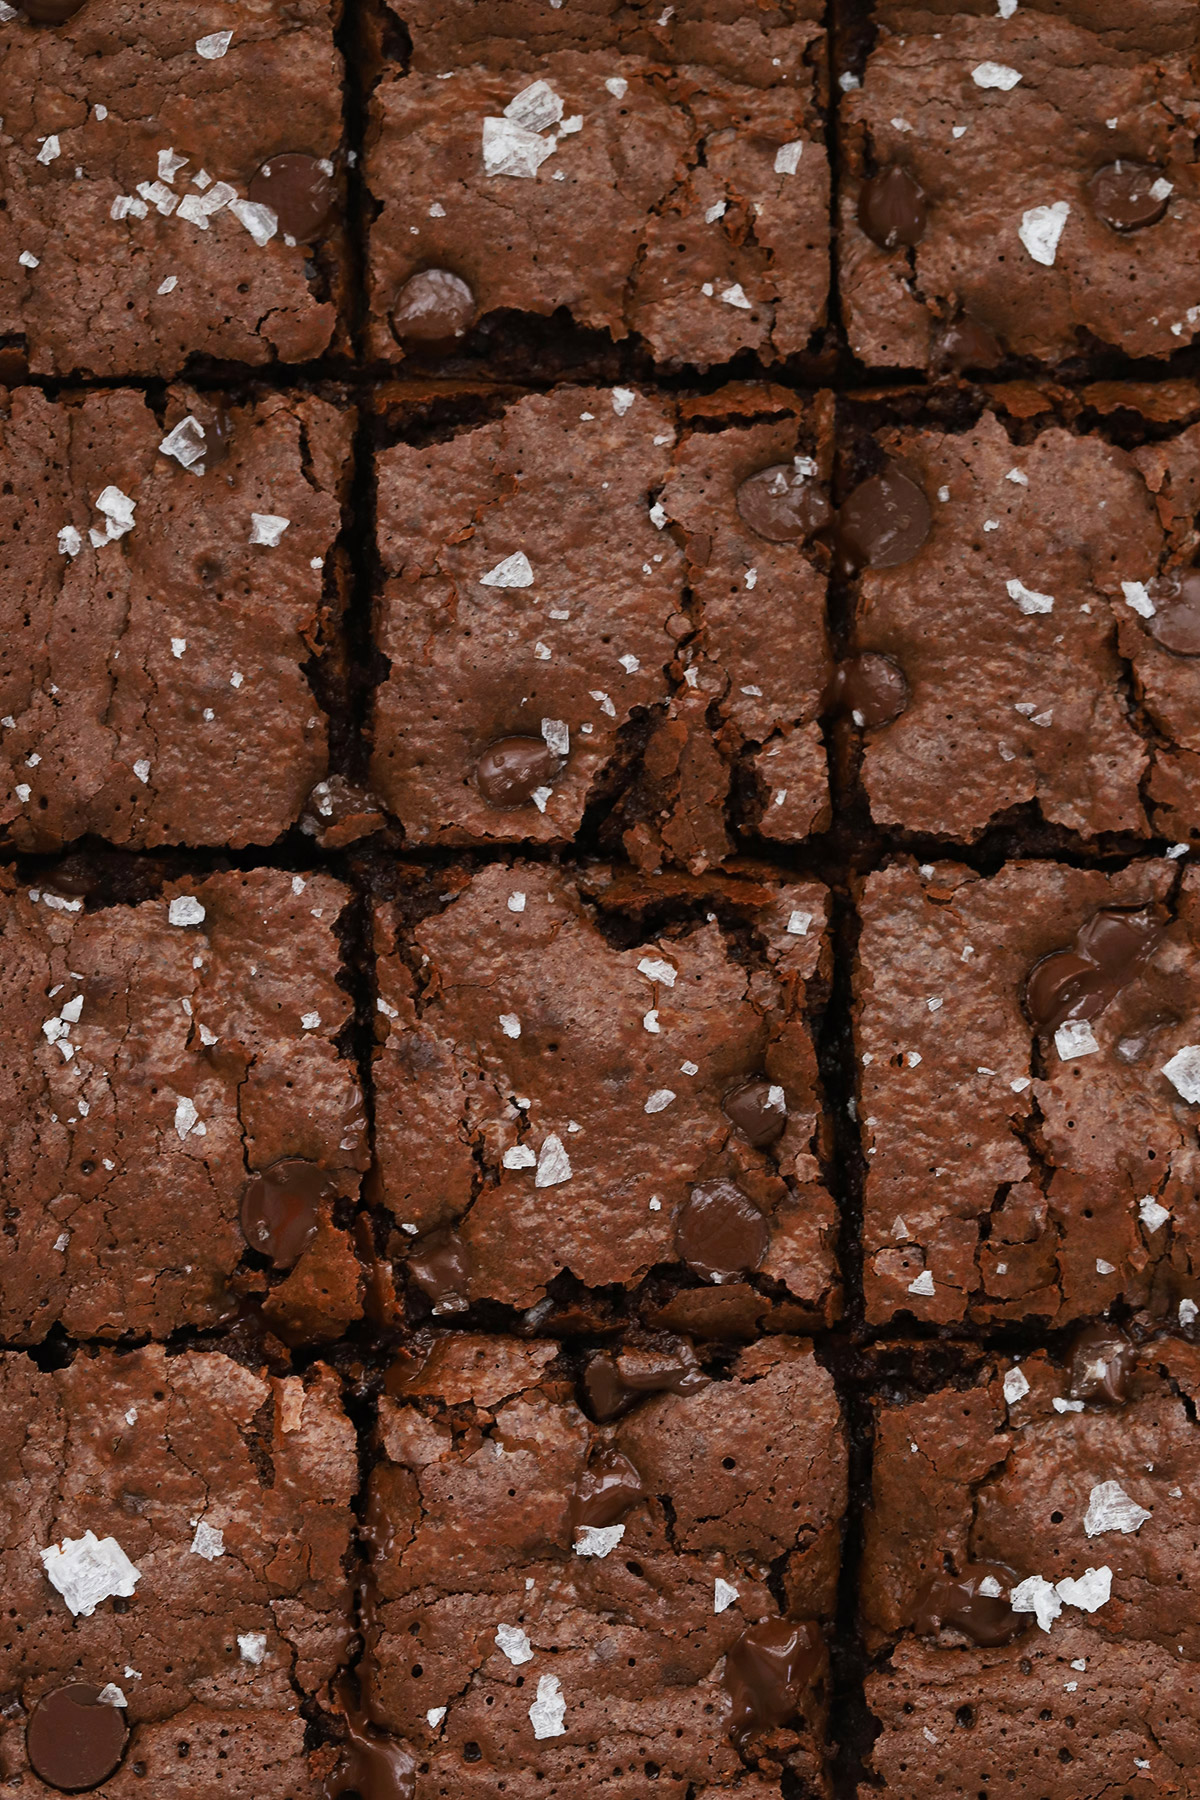
Get ready to make some of the best gluten-free brownies around! These almond flour brownies have glossy tops, fudgy centers, and delicious chocolate flavor in every bite. Even better: they’re gluten-free, dairy-free, AND grain-free!

When we went gluten-free in 2013(!!!), gluten-free dairy-free baking felt a bit like the wild west since there weren’t a ton of gluten-free blogs out there. (Yes, I feel 9,000 years old typing that.) At the beginning, gluten-free baking involved a lot of experimenting, a lot of mistakes, and some pretty serious flops.
But these gluten-free brownies? They’ve been a win since day 1.
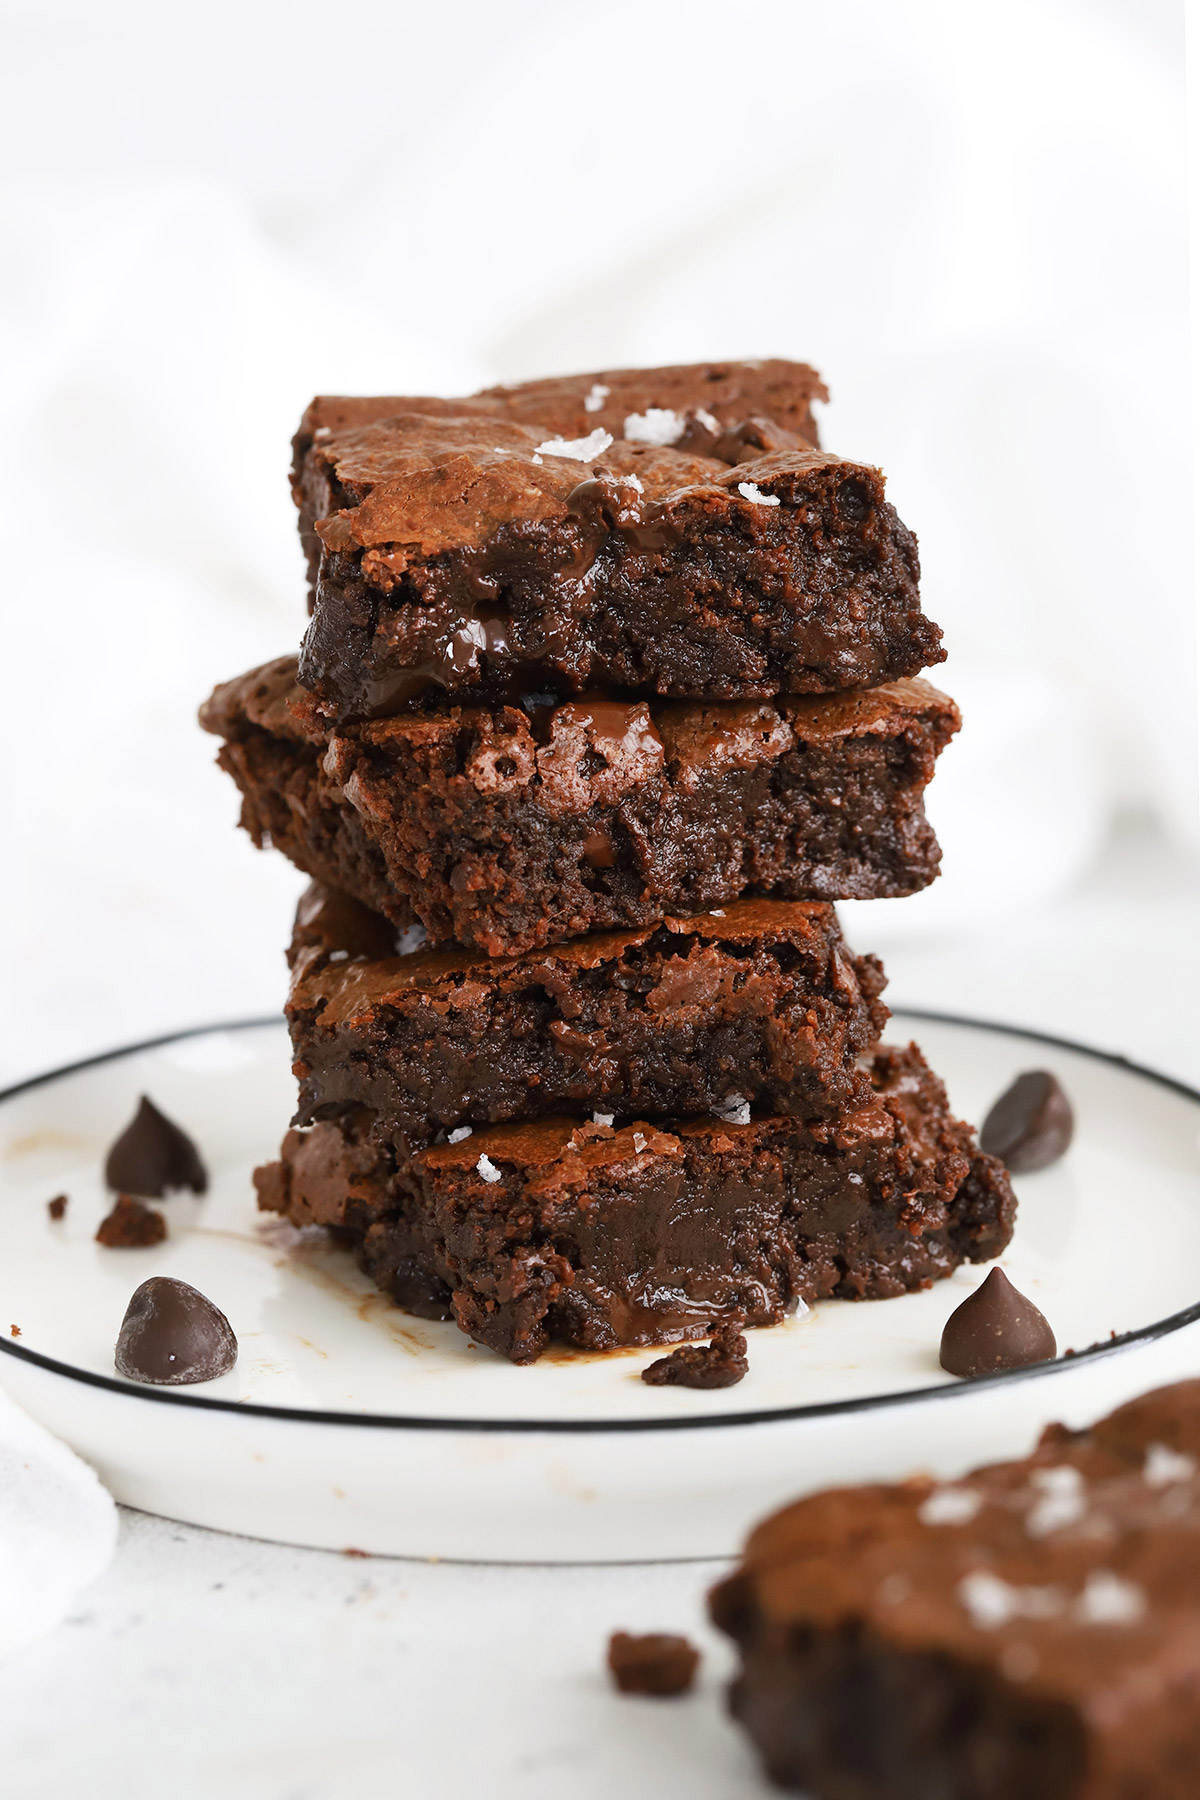
I’m not kidding when I say these almond flour brownies are some of THE BEST BROWNIES on the internet. With rave reviews from hundreds of chocolate lovers over the years (on the blog, Pinterest, FB, IG, and more!), I know it’s not just us!
They’re everything I love in a good brownie–shiny tops, fudgy middles, and delicious chocolate flavor in every bite. They delightfully easy to make and have made appearances at birthdays, parties, graduations, wedding proposals, baby showers, and more.
Whether you’re a gluten-free newbie looking for the best gluten-free brownie recipe around, or you’re a long-time pro with a chocolate craving, these easy gluten-free brownies are here to deliver.
Simple Ingredients To Start
Just like traditional brownies, the best part of this gluten-free brownie recipe is how simple the ingredients list is–no fussy ingredients in sight! Let’s take a look:

- ALMOND FLOUR. Finely ground, blanched almond flour is the base of these fudgy gluten-free brownies. Thanks to the moist texture of the almonds, these brownies get that gorgeous fudgy texture I love so much.
- UNSWEETENED COCOA POWDER. To punch up that seriously chocolate flavor we’re looking for, I add a few tablespoons of unsweetened cocoa powder. It works wonders! I’ve made these with both traditional unsweetened cocoa powder and Dutch-processed/dark cocoa powder. Both will work!
- BAKING POWDER + SALT. A little salt helps balance those lovely flavors–don’t skip it! Then, to get that lovely puff, I add some baking powder. If you’re strictly paleo, you’ll need to use paleo-approved baking powder (that doesn’t contain cornstarch)
- CHOCOLATE CHIPS. Most of the chocolate flavor and quite a bit of the structure of these gluten-free brownies comes from melting chocolate chips. I use allergy-friendly semi-sweet or dark chocolate chips like these or these, but you can use your favorite. These ones are naturally-sweetened and paleo-approved, but readers have also made them with stevia-sweetened chocolate chips and more!
- COCONUT OIL (OR BUTTER OR VEGAN BUTTER OR AVOCADO OIL!). For the fat (which helps you get that dense fudgy texture), you can make your gluten-free brownies with melted coconut oil, butter, vegan butter, or avocado oil. They will all work in this recipe!
- EGGS + COCONUT SUGAR. Another trick, which helps you get that gorgeous crackly top, is to whisk-whisk-whisk the eggs and coconut sugar together until they’re lighter in color and smooth. Don’t skimp here since it really helps with the texture! I’ve used coconut sugar in our gluten-free brownies, which is lower on the glycemic index, but if you don’t have it or like it, feel free to substitute white sugar, brown sugar, or even something like maple sugar. It will all work.
- VANILLA. To round off the wet ingredients, you’ll add some vanilla to the gluten-free brownie batter. It really punches up the chocolate flavor!
- MORE CHOCOLATE CHIPS. Lastly, I like folding in another 2/3 cup of chocolate chips. They’re DELIGHTFUL in the baked brownies, like little chocolatey surprises in every bite. If you prefer, you can use chopped nuts here instead.
Can I Use Another Flour Instead?
One of the most common questions I’ve gotten about these brownies over the years is “can I use another kind of flour?” Here are a few things to know about some of the most common gluten-free flour blends.
- Coconut Flour – NO. Coconut flour absorbs several times its own volume in liquid, so using coconut flour here would mean VERY dry, crumbly brownies instead of the gorgeous, fudgy brownies we’re going for. You cannot use it as a substitute here.
- Oat Flour – NO. I don’t recommend oat flour for these gluten-free brownies, since it tends to impact the texture.
- Gluten-Free All Purpose Flour – MAYBE. Several readers have made these brownies with gluten-free 1:1 flour blends. I don’t love it here (I prefer this recipe if I’m using a 1:1 gluten-free flour blend!), but if you HAVE to use a substitute, that’s probably your best option. Keep in mind, the brownies will be a little more dense and dry than if you use almond flour.
How To Make Gluten-Free Brownies, Step By Step
As always, you can find the full recipe with ingredient amounts, detailed instructions, and tips in the recipe card below.

- Preheat Oven & Prep The Pan. To start, preheat oven temperature to 350 degrees F. Line a metal 8×8 baking pan with parchment paper or spray with nonstick spray.
- Melt Chocolate. In a small saucepan, gently melt chocolate and oil over low heat until smooth and glossy. Remove from heat and set aside to cool slightly.
- Beat Eggs & Sugar. In a large bowl, whisk together sugar and eggs 2-3 minutes, until the mixture is lighter in color (This will be easier and faster if you use a handheld electric mixer!). If you rub the mixture between your fingers, it shouldn’t be gritty.) Set aside. Don’t rush this step, or your brownies won’t get that glossy, crackly top!
- Combine Dry Ingredients. In a medium bowl, whisk together the dry ingredients–almond flour, cocoa, baking powder, and salt.

- Combine. Pour the melted chocolate mixture into the egg mixture and stir until smooth. Add vanilla and stir to combine. Stir in the dry ingredients and fold until just mixed.
- Add Mix-Ins. Fold in the additional chocolate chips, reserving a few to sprinkle on the top, if you like.
- Pour batter into your prepared baking dish and smooth the surface. Sprinkle with reserved chocolate chips.
- Bake at 350 degrees 18-20 minutes, or until edges are set and the center is still slightly underdone. (The remaining heat should set the center as it cools.) A toothpick inserted in the center should only come out with a few moist crumbs.
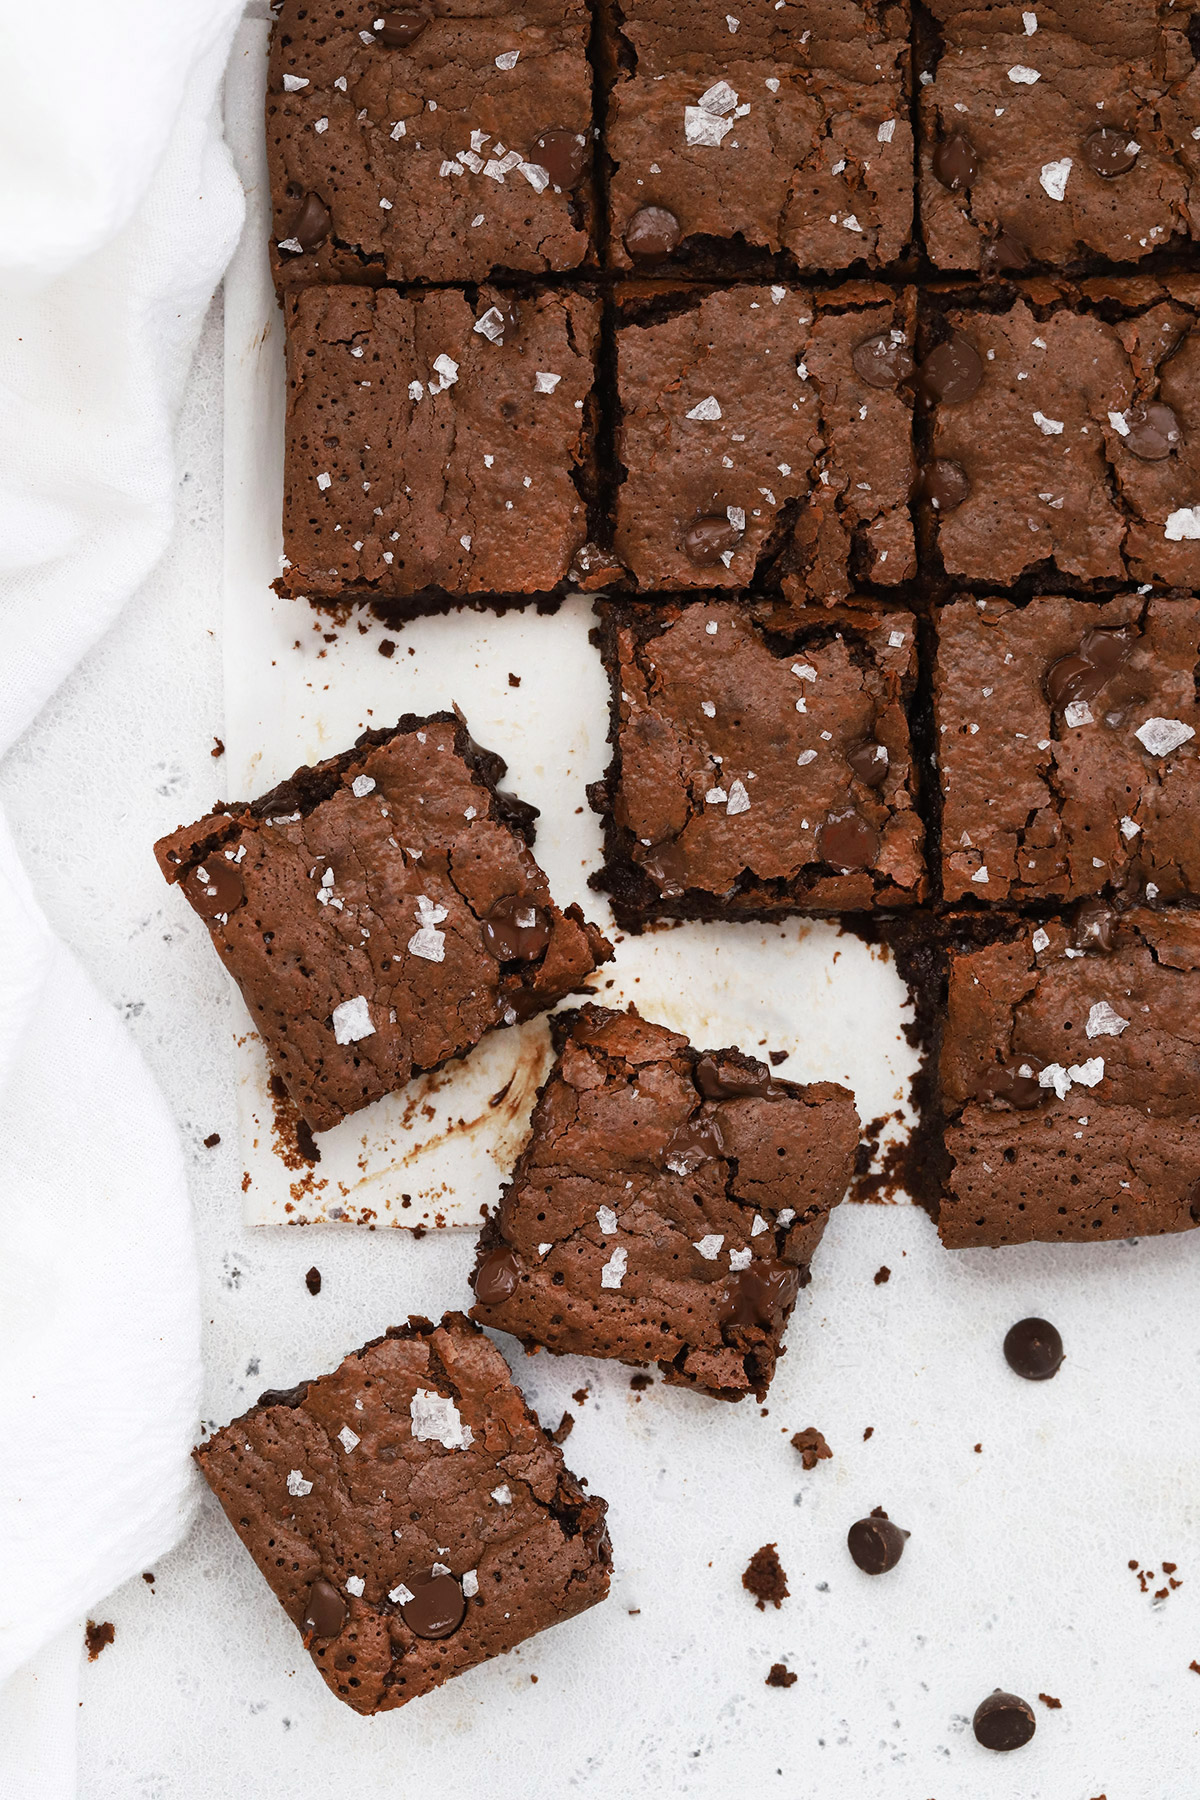
- Garnish & Cool. Sprinkle with flaky sea salt, if using, and allow brownies to cool on a wire rack before slicing.
Variations & Mix-Ins To Try
Now that you’ve mastered our base recipe for gluten-free brownies, you can play with mix-ins! Depending on your dietary needs, you can mix and match from these options when you’re craving something different:
- Chocolate Chunks. Swap out the chocolate chips for chocolate chunks for a bigger impact!
- Nuts! Add some chopped nuts to the brownies! Toasted pecans, almonds, hazelnuts, and walnuts are all delicious.
- White Chocolate Chips. Fold in white chocolate chips at the end for a black & white effect!
- Candy Cane. We use peppermint extract & crushed candy canes in our Peppermint Brownies twist!
- Almond Extract. Try adding 1/4-1/2 teaspoon almond extract along with the vanilla for a more pronounced chocolate almond flavor. It’s delicious!
- Espresso Powder. If you’re a coffee fan, you can add 1 Tablespoon espresso powder with the dry ingredients!
FAQ + Tips And Tricks For The Best Gluten-Free Brownies
USE A METAL PAN! I used to make these brownies in a ceramic pan, but in recent years, I MUCH prefer using a metal pan (this square pan, specifically!) or a glass pan or ceramic pan, since the brownies will get a better rise and a shinier crust. (You can see a visual of brownies baked in glass vs metal pans here!)
ALMOND FLOUR. There are a LOT of different brands and blends of almond flour and most of them produce different results. I recommend using a very finely ground blanched almond flour rather than a coarse grind or almond meal which is made with skins-on almonds. We often buy Blue Diamond almond flour in bulk, but check your local Costco, since they regularly rotate in different brands!
MAKE A SUNDAE! I don’t want to tell you what to do, but I *will* say these brownies are incredible with a scoop of ice cream and a drizzle of our vegan hot fudge sauce or classic hot fudge sauce.
PS – LOOKING FOR A BOX MIX? These brownies are 100% worth the effort, but if you’re looking for the best gluten-free box mix brownies, we did a whole taste test a few years ago that’s worth a look!


Did You Make This Recipe?
Tell me all about it! Leave a star rating below when you try our Almond Flour Gluten-Free Brownie recipe. I can’t wait to hear how it goes!
The PERFECT Gluten-Free Brownies
Ingredients
- 2/3 cup semi-sweet or dark chocolate chips (dairy-free, if needed)
- 5 Tablespoons coconut oil (can sub butter, avocado oil, vegan butter)
- 2/3 cup coconut sugar (can sub white or brown sugar)
- 2 large eggs
- 1 teaspoon vanilla extract
- 2/3 cup finely ground blanched almond flour
- 2 Tablespoons unsweetened cocoa powder
- 1/2 teaspoon baking powder
- 1/4 teaspoon kosher salt
- 2/3 cup additional chocolate chips or chopped chocolate can sub nuts
- Optional: flaky sea salt to sprinkle on top like Maldon
Instructions
- Preheat Oven & Prep The Pan. To start, preheat oven temperature to 350 degrees F. Line a metal 8×8 square pan with parchment paper or spray with nonstick spray.
- Melt Chocolate. In a small saucepan, gently melt chocolate and oil over low heat until smooth and glossy. Remove from heat and set aside to cool slightly.
- Beat Eggs & Sugar. In a large bowl, whisk together sugar and eggs 2-3 minutes, until the mixture is slightly lighter in color and until they pass the ribbon test (when you lift the whisk the mixture should stream down evenly in “ribbons.” If you rub the mixture between your fingers, it shouldn’t be gritty.) Set aside. Don’t rush this step, or your brownies won’t get that glossy, crackly top!
- Combine Dry Ingredients. In a medium bowl, whisk together the dry ingredients–almond flour, cocoa, baking powder, and salt.
- Combine. Pour the melted chocolate mixture into the egg mixture and stir until smooth. Add vanilla and stir to combine. Stir in the dry ingredients and fold until just mixed.
- Add Mix-Ins. Fold in the additional chocolate chips, reserving a few to sprinkle on the top, if you like.
- Pour batter into your prepared pan and smooth the surface. Sprinkle with reserved chocolate chips.
- Bake at 350 degrees 18-20 minutes, or until edges are set and the center is still slightly underdone. (The remaining heat should set the center as it cools.) A toothpick inserted in the center should only come out with a few moist crumbs.
- Garnish & Cool. Sprinkle with coarse salt, if using, and allow brownies to cool on a wire rack before slicing. (For the neatest slices, consider chilling the brownies first)
- Storage Tips. Store leftover brownies in an airtight container at room temperature 1-2 days, in the refrigerator 3-4 days, or in the freezer up to 2 months.
Notes
- For Paleo, use paleo-approved baking powder and dairy-free chocolate chips
- Cocoa Powder. I usually make these with natural cocoa powder (like Hershey’s or Ghirardelli), but you can use Dutch Process cocoa powder for a darker, richer look.
- Don’t Over-Bake. My trick for fudgy brownies is always to pull them out when the center is juuuust about set. They’ll finish setting as they cool and won’t end up too crispy or dried out.
- Use A Metal Pan. When possible, I recommend baking these brownies in a metal pan. The crust will get shinier, the brownies will bake more evenly, and consistently. Baking in glass or ceramic pans will increase the bake time (it’ll take 20-24 minutes) and the surface of your brownies will be more uneven.
- Sugar. Brown sugar or white sugar will give your brownies the glossiest, shiniest tops, but coconut sugar absolutely works if you’re avoiding refined sugar.
Video
Nutrition
Nutrition facts are an estimate only and will vary based on brands and amounts used.
Find it Online:
https://www.onelovelylife.com/the-perfect-gluten-free-brownies/Recipe originally published March 2016. Fully updated in 2018, 2021, then updated and republished again February 2025.
I’d rate these 6 stars if I could. Its cliche to say, but I don’t think a person would even know these were gluten free. They taste that good.
These are amazing! The taste and texture are perfect. I make them for a friend who is gluten sensitive and he says they are the best he’s ever had! Definitely a keeper! You would never know they are gluten free.
Oh, I’m so glad to hear that, Laurie!! Thank you so much for taking the time to leave such a kind review. You made my day!
This is strictly the lone brownie recipe of choice in my household, outstanding.
Best compliment! I’m so glad you love them, Julie! Thanks so much for sharing!
do you measure the coconut oil melted or solid?
thank you!
I measure solid!
Best GF brownies, no wait….best brownies ever! No one knows they are GF. So yummy!
I have made these brownies several times! I LOVE them so much, I could eat the whole pan by myself!! I do have a question….I need to make some sugar free for a diabetic. Can a sweetener like swerve or monk fruit be used in place of the coconut sugar?
Hi, Christy! I haven’t made them with any sugar substitutes myself, but a few other readers have said they’ve good luck with Swerve!
Thank you!!
hi Christy! I made mine with bobs red mill gf 1to1 flour and lakanto monkfruit sugar replacement, enjoy life’s allergen 14 chocolate morsels, and olive oil instead of coconut. absolutely phenomenal !!!
brothers birthday and his mate was an impressed gourmand!
I did add Nutella , berries, cream and walnuts❤️🔥
DELICIOUS! I bet that was fantastic!
By any chance, would a home ground seed meal work in place of the almond flour? Almond allergy household, but like the idea of starchy flour-free brownies. Shelled watermelon seeds is what I have in mind. Thanks!
Callee – Hi! I have never baked with seed meal, but I do not think it would be a 1:1 substitute. Almond flour isn’t starchy–it actually ADDS moisture to the recipe, where a starchy flour would likely absorb liquid from the recipe. That said, you are always welcome to experiment!
Hello! Could I sub almond flower for Bob’s red mill GF all purpose flour here?
This recipe was specifically formulated to work with almond flour, but if you want to make brownies with a gluten-free 1:1 flour, we can’t recommend these enough! (They’re on our baking blog!)
This was delicious and easy to make!
The best ever! Thank you from the bottom of my celiac heart. They truly are the best…and my friends agree. I’ve tried MANY!
You made my DAY with this review Katie!!
I made these today and they’re delicious. I doubled the recipe and used a 9×13 glass baking pan. In future I’ll bake the single recipe and use my metal
9”x9”.
However, I’m wondering why the top of the brownie had a very fine, lighter coloured crust that broke into pieces when I cut into it, making it difficult to cut. I’m
wondering if I mixed the batter too long after adding the dry ingredients.
As I say, it tastes delicious but doesn’t present well on a cake plate. Any advice?
Hi Lesley!
A couple notes–I definitely recommend a metal pan, so that’s a great plan for next time. It has an impact on the bake from start to finish, and will help with presentation.
As for the brownie crust, the ideal is a glossy, shiny crust that’s a bit delicate on top. Getting that right is a sign that you’ve properly dissolved the sugar. This kind of crust looks beautiful, but does have a tendency to be delicate and can crumble when sliced. Chilling the brownies before cutting is a great way to prevent this! It’ll provide the brownie crust with a bit more stability for slicing. Additionally, using a long, sharp knife and wiping it off in between slices will help you get neater cuts, since any brownie on the knife will create more friction and more damage to the top layer of the brownies.
I hope that helps!
Looks so good! Is there any chance almond butter would work instead of the almond flour?
Hi Kas! Almond butter isn’t a great substitute for almond flour in this recipe since the moisture levels & texture are so different.
WOW, these were so good!! I made them for a cookout where some people were gluten/dairy-free, and everyone said they tasted no different from regular brownies. It was a super simple recipe and the brownies came out so fudgy and soft. I will totally make these again!!
I’m so glad they were a hit Ally!
A+
I’m SO glad you loved them! Hope they were a fun treat for your bestie!
Such a beautiful crackly top!
It’s my gf bestie’s birthday tomorrow and I am so excited to give these to her! 🥳
May 9 2024 OH MY GOSH Girl, you have done it, The perfect gluten free brownies are superb .beyond the five stars….I have a question have you every made this with either
spelt or sorguhum flour or certified gf oat flour due to a nut allergy.
I haven’t! But if you need a nut-free option, we LOVE these nut-free gluten-free brownies! (This is our sister site!)
Deeeeeeeeelectable!
YAY! So glad you loved them Ava!
I loved these brownies. They were amazing. Has anyone tried to double the recipe? I would like to try to make a fudge brownie “cake” for a birthday. Obviously it would have to cook longer, just wondering about the temperature.
Hi Renee! You can try doubling it and putting it in a 9×13 pan. The bake time and temperature should be similar, but you may notice the edges get a bit more done while the center is a bit more gooey.
I made 1/2 the recipe to try it (it’s very warm out so not wanting to use the oven, I used a waffle iron) my husband liked it so much he offered to eat the rest because our g-f company wasn’t due for several days. Early tomorrow morning I will make the recipe in the oven and he can’t wait. BTW, I liked it too! Thank you for sharing
Wow! So glad it was a hit!
These are perfection! My kids and husband loved them 😋
I’m so glad to hear that Beatriz!
this is the second gluten free recipe I’ve made. The first was a pizza that did not turn out at all, so I was weary. However, this was absolutely delicious and I will definitely make again!
I’m SO GLAD that you loved them!
Loved these. They were surprisingly fudgy!
Really good. I want to add nuts next time.
Theeee best brownies!!!
I just made these tonight and they are AMAZING! So much better than I could have imagined! And Hubby loved them too! That’s the true test! lol Thank you so much for this recipe! It will now be my go to brownie recipe! ♥️
My go-to brownies. They are sublime! One note: don’t substitute with date sugar–texture didn’t come out right, although they were still very good.
I’m so glad you loved them Svita! I don’t like date sugar for baking since it doesn’t dissolve. It tends to make things gritty!
These are the easiest, fudgiest brownies I’ve ever tasted! Delicious!
I did not have high expectations for these brownies, but I could not have been more wrong! They were AWESOME!!!!! So delicious!
Glad we could exceed your expectations! (They’re our fave!)
Best and ONLY Brownie recipe you’ll EVER need!! We’ve been making One Lovely Life’s healthier brownie recipe for the last 5 years and it is ALWAYS on point! Thank you Emily!!
This review is EVERYTHING! I’m SO glad you love them! Thank you so much for taking the time to leave such a nice review!
I am buying the gluten free Measure for Measure flour. can I use the same amount of this flour as the almond flour? thanks!
Hi, Katrina! Almond flour and measure-for-measure aren’t a 1:1 substitute usually, since almond flour ADDS moisture to a recipe, where measure-for-measure flour absorbs moisture OUT of a recipe. That said, several readers have made them using the 1:1/measure-for-measure flour with good results. (Otherwise, you might like these brownies that use gluten-free measure for measure flour instead.
My go-to brownies. They are the best I’ve ever had, hands down. A great recipe and so glad they are gluten-free!
I couldn’t have said it better myself!
These really are tasty! I used butter, white sugar and guittard real chocolate chips.
Would date sugar work and unsweetened chocolate chips?
Hi Olivia! I would not recommend date sugar, since it doesn’t dissolve. It’ll give these brownies a gritty texture and you won’t get that glossy top you’re going for. I wouldn’t recommend unsweetened chocolate chips either since the chocolate chips help with both structure and flavor. Several folks have made these with stevia-sweetened chocolate chips or keto chocolate chips!
Date syrup instead of date sugar might be a better option, since it is already dissolved.
I don’t recommend date sweetener for these brownies, but you’re welcome to try it!
These brownies were absolutely delicious. Mine werent as fudgy as yours but still great and I added walnuts. Thank you!
I’m so glad you loved them, April! THANK YOU for your review!!! Every oven is different, but reducing the bake time by 1-2 minutes might give you a fudgier result next time!
Can I use Stevia with his recipe?
I haven’t ever tried it, Glenda. Since the sweetness of stevia is different from coconut sugar, you’d likely need to play with the amount which might throw off the texture a bit.
Love these! I’ve personally found they need much longer than 20-24 minutes in the oven
These are amazing! My kids call them crack brownies because they are as addictive as crack lol
Oh. My. Gosh!
These are soooo good and addicting! I think I’ve Made them 4x and I’m making them right now again! I used regular sugar and butter since coconut Doesn’t sit well with me and I’m in love!
I’m so glad you loved them Joli!
I haven’t bake these yet, but I know they’re going to be amazing. Please. please let me know if you’ve ever tried cooking them in mini cupcake/ muffin trays and how many minutes did you bake it for one tray. I’m about to try it out now, fingers crossed I don’t overcook them!
Hi Sylva! I hope you LOVED them!
I haven’t baked them in a mini muffin tin, but I love that idea! You’d have to eyeball the bake time, but I recommend under-baking to over-baking!
You are genius!! These are better then any homemade brownie I’ve ever made! And that they are paleo, wow! I’m new to paleo and I’ve tried several desserts and none compare to these. Thanks so much for sharing this awesome recipe!
Delicious! I used flax eggs and pecan flour due to allergies, and though they probably didn’t rise as much as if I would have used eggs, they still tasted amazing. So fudgy and good!
Hi, could I make these removing the chocolate and and adding more butter? pProbably browned butter. iIn other words, do you think I could turn these into blondies?
Sharon – I’d probably recommend looking for a blondie recipe. Butter has different fat content than chocolate, so the ratio of fat/wet ingredients to dry ingredients would be thrown off, and the recipe would definitely need more adjustments to make it work as a blondie. I’m sorry!
This was really, really good! I didn’t have almond flour so I used Bobs Red Mill 1-1 gluten free flour and they turned out great. One of my fav gluten free brownie recipes so far.
This was such a great and easy recipe!! My housemates are GF, so I’m always on the lookout for recipes we can all enjoy together. We randomly craved brownies one night and had all the necessary ingredients for this. Followed all instructions, but added an additional tsp of vanilla and baked for 20mins. They turned out perfect and everyone loved them. Thank you so much!
I’m so glad it was a win for you Monique!
These are wonderful! First thing I’ve ever made with almond flour that I actually liked. Haha. I didn’t want to wash a pot, so I used a glass bowl and microwaved my oil and chips. I accidentally added the cocoa to this as well and it still turned out great. I only have a 9×9 baking pan right now, and it worked fine. I started checking them at 15 min and took them out at 19 min. They’re a bit thinner, but still delicious. Really nice chewy/fudgey texture. Thanks so much for these!
My husband loved these and he isn’t even gluten free. A friend called them “best ever”!
YAS! I love to hear this! So glad they were a win for you, Sandy. THANK YOU for your review!
We love love this recipe! I do add 1T. of instant espresso to the dry ingredients. The hardest part of this recipe is definitely waiting to cool BEFORE sampling. Yikes! 5 stars.
Ooh! Great suggestion!
I have made this recipe two times. It is AMAZING. You cannot even tell they are gluten free. Honestly, they taste better than regular brownies in my opinion. I use brown sugar and butter. I love the versatility of this recipe, how it caters to different dietary needs, and just how delicious it is. I have even doubled the recipe and baked it for the same time in a 9 by 13 in. pan. I plan on bringing these to my church’s picnic on Sunday-I know they will love it!!
YAAAAAAS! I love hearing this Jane!
Can this recipe be doubled and baked in two separate 8×8 inch pans? Or do I need to bake two separate batches of batter? I ABSOLUTELY LOVE this recipe!! Thank you sooo much in advance!!
Oona – Lots of folks have doubled it and baked in a 9×13 pan with great results. I usually bake two separate batches of batter in 2 pans, but I think you can choose whichever is easiest for you!
I just made them again and OMG they are SERIOUSLY THE BEST BROWNIES EVER!!!!!
YAAAAAAY!!!
It’s a little dry with the almond flour. Haven’t found the trick to make gluten-free less dry still.
T – it sounds like you may have accidentally over baked them, as they should be SUPER fudgy. I’m not sure if you have an oven thermometer, but it’s common for ovens to run hotter than their stated temperature. If you try them again, I recommend pulling them out a few minutes earlier next time, which should help. Or you can try these ones which are extra fudgy.
Ummmmmm…Gluten-free? Unbelievably amazing. My husband who used to be a sugar addict said they were the best brownies he has ever had. They were moist, rich and fudge-like. Easy to make. These are a keeper!! Thank you
THIS REVIEW IS EVERYTHING!!! I’m so glad you loved them Shannon!
What is the best sub for the almond flour if you need GF but allergic to nuts?
I’d actually recommend swapping for another recipe, since changing the flour in this one will impact the texture. You might love this one from our baking blog that uses gluten-free flour and is nut-free. 🙂
Hi, Danielle!
We have a nut allergy in our family, too. We’ve always had success with tigernut flour in place of almond flour. So far it has worked in every recipe I’ve substituted.
FYI – Tigernut is a misnomer. It’s actually a tuber (part of the potato family).
I hope this is helpful to you! ❤
Thank you for this tip Amy! I appreciate you!
Hi……going to try your gf brownies. I am not mmMartha Stewart over here. I’m going to do 2x the recipe so I am surprised you show a pan size of 8×8 which you say is for 1x.
Please advise.
Thank you
Cindy – This recipe makes one 8×8 pan of brownies. For doubling, it actually works best to make two separate batches baked in 8×8 pans, but you *can* try it in a 9×13. You’ll just need to play with the baking time a bit. Cheering you on!
Can I use all purpose baking flour instead?
Gresa – These work best with almond flour. I can’t test them using regular white flour since we’re gluten-free, but if you’re looking for a great brownie with gluten-free measure for measure flour, we love these ones!
Made this for a group and only one of us followed a gluten-free diet. We all liked the brownies! The recipe lives up to the claims.
I’m so glad they were a win!
These are the most amazing brownies!! I added 1/4 tsp espresso powder to enhance the chocolatey flavor and an extra 1 tsp of vanilla. My kids don’t want me to make any other brownies but these. Thank you so much for such a terrific recipe!
I’m SO glad you loved them Sage!!! Thanks, too, for sharing your tips!
I haven’t made the brownies yet, I plan to make them for my sister for her birthday, but I need to travel with them. How long do they stay fresh after baking?
Kerri – You can freeze them if you want them to stay pristine! They can thaw on your travels. If you cover the cooled baking dish, they’ll keep well at room temp 1-2 days, or in the refrigerator 3-4. Frozen will keep them freshest if you need something longer term 🙂
Hands down the most amazing brownie recipe EVER! And the fact that they’re gluten free is such a bonus (if you’re wheat sensitive.) These will be my go-to, thank you!
These are SCRUMPTIOUS!! While I normally make vegan gluten-free baked goods, I decided to give these a try and I’m so glad I did! The whole family loves them! I choose to use olive oil, and also used the maple syrup instead of sugar option. I believe both of those choices are the reason the brownies took an extra four minutes to cook, but they came out perfect! Thank you so much for sharing this recipe!
YAY! I’m so glad they were such a win for you. Thank you so much for sharing!
These are the only gluten free brownies I’ve made so far since being diagnosed with celiac, but I don’t ever have to look any further. These are absolutely fantastic. I halved the recipe perfectly (love when there’s an even # of eggs!) to fit my 1 person mini pyrex. Made a tray of 4 perfect brownies. Yum!
Oh GOOD! I’m so glad you loved them!!!
I have been looking for a fudgy gluten free brownie recipe for over 10 years. This is it! This is the one, and who would have known it would involve almond flour. I used butter and brown sugar in my version and it turned out great. My non-gluten free husband loved them too. Can’t wait to make this my new go-to when I’m craving homemade brownies.
Emily!!! You’re the best–thank you for taking the time to leave such a kind review!
Made these brownies and they were quite delicious. Did not have coconut oil, so used 1T butter and 3 T canola oil. Still moist even though oil was cut back a little. Also cut back sugar to 1/2 c as the Hersheys special dark chocolate chips were sweet. Added an extra t pea spoon of Ghirardelli cocoa powder. Cooked on middle rack of countertop oven. Came out with dry edges and moist. Yum!
I’m so glad they worked with your swaps! Thank you so much for leaving a review–I appreciate it so much!
This is the first review I have ever made for a recipe (a girl tries out a lotttt of recipes). Oh my GOSH these are absolutely incredible. Best brownies I have ever had. I used Bobs red mill all purpose GF flour instead as well as substituting cacao powder for the cocoa. They are insanely good, even my boyfriend who was a pastry cook for a while at many great restaurants in San Francisco and knows good food absolutely loves them. The only brownies I will ever want from here on out!!! Thank you!!! ❤️
Kristen – YAAAAAY! I am SO glad you loved them! Thank you for taking the time to leave a review—I appreciate it so much!
I am not one to comment on recipes but I absolutely had to provide a review for this recipe. IT IS THE BEST BROWNIE RECIPE YOU WILL EVER MAKE! It does not matter if you are gluten, dairy or grain free – no one will know the difference. I personally am gluten/dairy/grain free and have tried numerous brownie recipes over the years. I love to bake and have made some good brownies over the years. I decided to try this recipe and I made these for a large event/crowd. They were gone in seconds, with people ranting and raving about them. Do not hesitate to make these – in fact, I strongly encourage you to make them because you will never try another brownie recipe again – this is the best one out there. Thank you for such an amazing recipe. It’s 10 stars!
Dianna!!! You completely and totally made my day. This is such an amazing review! Thank you so much for taking the time to leave such a thoughtful, sweet comment. I really *really* love them, too. Happy holidays!
My brownie batter is grainy, what should I do?
I can’t be sure (since I can’t see it), but it sounds like you either didn’t dissolve the coconut sugar properly in the eggs, or that you used coarse almond flour instead of finely ground. I recommend making sure you dissolve the coconut sugar in the eggs as directed (whisking so there’s no grit), and use finely ground blanched almond flour.
Can I use a glass pan instead of a normal one?
Annie – I recommend a metal pan for the best shape and texture.
This recipe could not be more perfect. Fantastic creation!
Thank you so much for taking the time to leave a review–they’re my favorite!
I made these with flax eggs and they didn’t come out. They tasted great but they were so liquidy I baked them for a lot longer and then we’re hard and sticky when they cooled. Is there a way to make these with an egg substitute?
Jessie – I’ve never made them with an egg substitute. I’m sorry!
Thank you for the great recipe! I added toasted pecans and home made caramel prior to baking. Gluten free is always tricky with baking time… At 24min my 8×8 batch was still liquid in the middle… Ended up baking for 15 more minutes. Finally took them out with still a little wiggle in middle. Hoping they are done and still a little not done!
Ok, I tried them and wow. Hands down one of the best brownie recipes I have ever made, gluten free and gluten! Everyone loved them! One of my friends said there is no way they can be tasty if they are gluten free and then she tried them and kept eating more! She loved them! Wow! Fantastic recipe! I’m making them again today for my work! A million thank yous again!
Would this work in a mini cupcake pan?
I’ve never tried it, but I’d love to know how it goes if you give it a try!
Absolutely amazing. I made these with Trader Joe’s almond meal and they came out perfect just in case anyone was wondering.
So good to know. Thank you for sharing Christine!
These are really tasty and moist. Will definitely make them again.
I’m so glad you loved them!
I work in a small hospital in the kitchen. These are wonderful for our gluten free staff and patients! I am always looking for new recipes for them! Thank you for this simple and delicious recipe. The recipients are very pleased!!
Kimberly – You completely and totally made my day. THANK YOU for sharing this with me! I’m so happy to know that people who could really use a good treat are enjoying these brownies!
Absolutely delicious! I have tried all kinds of homemade brownies. I never get the glossy top. The only difference is used powdered eggs. This is a keeper! Now I have to experiment with healthier sugars. Thank you for an excellent recipe.
I’m so glad you loved them! THANK YOU for leaving a review–it’s so helpful!
Have made this several times. Love it! I use avocado oil, coconut sugar and b.p. Will also throw in nuts along with the extra chips.
Do you have any good recipes for gluten free chocolate chip cookies?
I have some great cookie recipes! You might like our Classic Gluten-Free Chocolate Chip Cookies or Almond Flour Chocolate Chip Cookies
Can I use monk fruit instead of coconut sugar?
I haven’t made them this way, but several readers have and have loved them. I’d love to know how it goes if you give it a try!
I made these with cane sugar and made sure to chill them in the fridge—they were divine! A little salt and walnuts on top totally put them over the edge, too. Will be making these again and again.
I LOVE adding walnuts! I’m so glad you loved them–thank you so much for taking the time to leave a review!
Delicious recipe! I was wondering if you have ever added other ingredients such as zucchini or nuts? i would love to sneak some veggies in the batter, any thoughts?
Maria – I’m so glad you loved them! Nuts are an easy mix-in! They work great. Just add them in addition to or instead of the stirred in chocolate chips right before baking.
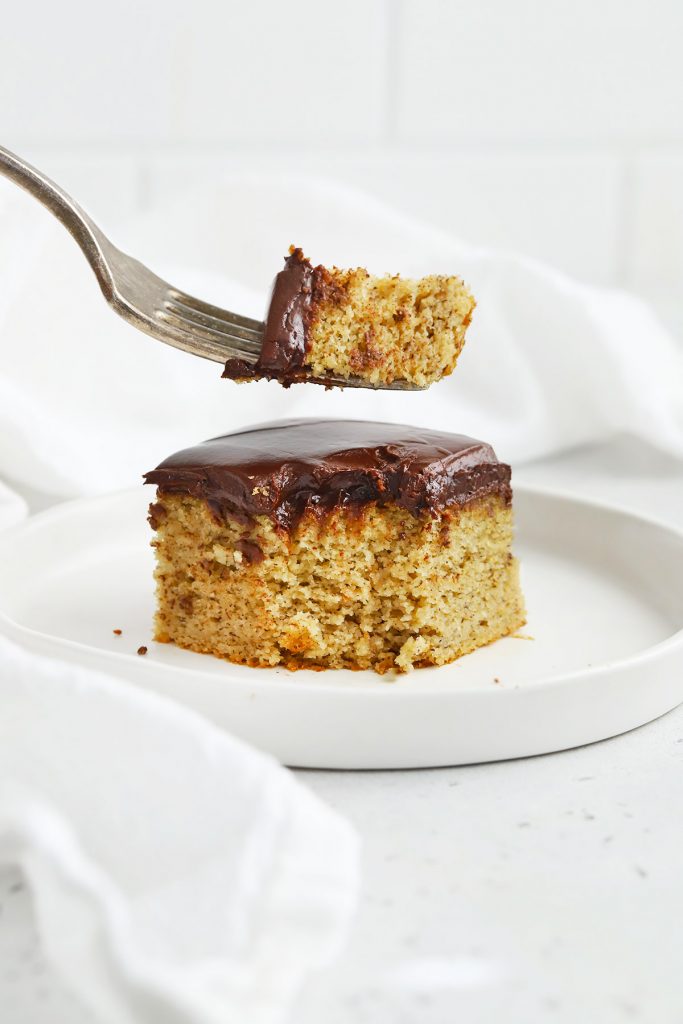
As for veggies, I haven’t put zucchini in these, but I do have a fabulous almond flour chocolate zucchini cake recipe you might love!
Thank you for sharing an amazing, awesome recipe!! I made these delicious, chocolatey, and moist brownies for a girlfriend’s birthday this am and she loved them! I used coconut flour, coconut oil and vanilla with coconut sugar….so good!
I will make them again soon and will add coconut to them!
We have made these many times and they are our favorite gf brownie😋
I’m so glad you loved them!
Hi!! I really love this recipe!! I was wondering if I could use the batter to make brownie ice cream sandwiches, do you think it could work? And how much batter would I need? I think I would just decrease the bake time. Thank you!!
Oona – I LOVE the idea of using brownie batter to make brownie ice cream sandwiches! That sounds delicious. I’d definitely have to do some experimenting before I felt comfortable advising you on bake times or adjustments, but off the top of my head, I’d think using a larger pan (so a 9×13) instead of an 8×8 or 9×9 pan would be where I’d start. This will make for thinner layers, but you’ll definitely need to adjust the bake time. You may also want to bake them slightly longer than with traditional brownies so they can hold up when sliced and sandwiched with ice cream. Again, I haven’t tested any of that, so I can’t guarantee anything, but that’s where I’d start if I were doing it myself!
Ok! Thank you so much for responding!!
Love this GF recipe!!! So yummy and delicious. I wouldn’t change anything about it.
Side Question: how much would the recipe change if you didn’t have Almond flour but had AP flour instead? My friend wants to try this recipe but doesn’t have access to Almond flour.
I’m so glad you loved it! Thank you so much for taking the time to leave a review–it’s so helpful!
To answer your question, this recipe will always have the best texture with almond flour since it’s so moist, but many readers have tried it with gluten-free flour. It’ll be slightly less fudgy unless you play with the amount of flour a bit (maybe decreasing the amount a touch), but many readers have said it’s still delicious with gluten-free flour instead of almond flour. I hope it’s a win for your friend! 🙂
I made these for a colleague who is dairy free/gluten free, she had a terrible day and needed some love. These delivered. They are the best brownies I’ve ever had. Period. So rich and tasty, recommend using quality chocolate (I used TCHO chips) and I used a dairy free butter instead of coconut oil (Earth Balance).
Ariel – What a happy, thoughtful review. You’re such a good colleague! I’m so glad they were a win for you and hope your coworker feels better soon. (THANK YOU for taking the time to leave a review!)
Yes, these are as good as everyone else says! I’ve made quite a few times and now add in 1 tbsp gluten free flour to lighten them up a touch. Thank you for this amazing recipe 🙏🏻
I’m so glad you love them Mel! THANK YOU for taking the time to leave a review and for your tip about the flour. 🙂
I must share that these are THE BEST brownies. I’m a home baker, and I’ve made them with all different types of sugar or oil/butter that I have on hand, doubled, and even tripled the recipe, and even added candies inside… always delicious! I’m not personally GF, but I made them once for a friend who’s GF, and I’ve honestly never used another brownie recipe since. Always a most requested item. THANK YOU!
Vikki – You totally made my day! I’m so glad you love them as much as we do. THANK YOU for taking the time to leave a review!
These brownies are to die for!! A crowd pleaser, and seriously you can’t tell they’re gf/df! Thank you for sharing this recipe 😊
I’m SO glad you loved them, Natalie! I totally agree-they’re my FAVORITE. Thank you so much for taking the time to leave a review! It’s so helpful.
Best brownies recipe. Super easy to make and absolutely delisious.
Yaaas! So glad you loved them! They’re my favorite. (Thank you for taking the time to leave a review–it’s SO helpful!)
With 2/3 Children gf, df and grainfree you can’t imagine how excited I was to find a recipe that met these criteria. We have substituted sugar for maple syrup as sugar is also a no-no. We also added some sultanas. The kids were so,so excited to have something cakey and delicious. Thank you
I’m so glad they were a win for you!
Best GF brownie recipe, EVER! Thank you for sharing.
You’re so nice! Thank you! We sure think it is 🙂
Thank you for taking the time to leave a review–it’s so helpful and appreciated!
I know this isn’t what you were intending, but these are perfect for Passover. I’ve made every Passover brownie recipe (and mix) out there, all of which use matzo cake meal, and they are all terrible. I was about to give up when I found this. Thank you (and thank you to the GF people generally for making Passover observance a breeze!)
I’m SO GLAD it was a win! (And Happy Passover!:))
My family LOVES this recipe!!! Best brownies ever!!! Just two questions: how do you store these brownies – room temperature or does it need to be refrigerated? And how many days usually before it spoils? Thanks a lot!!!!
Sebastian – I almost always store them in the refrigerator to prolong their freshness. They’ll keep in the refrigerator 4-5 days, or you can freeze them up to 2 months!
This recipe looks amazing! I have someone that needs sugar free and gluten free. Any suggestions on substituting something for the coconut sugar? Thanks you so much!!
Cheryl – I’ve never personally made these sugar free before. Some readers have made them with stevia-sweetened chocolate chips and monkfruit sweetener (like Swerve) and said they’ve had good results, but I haven’t personally tried it that way to guarantee. If you give it a try, I’d love to know how it goes!
We really enjoyed these! We used butter and white sugar. (My daughter made them. I probably would have used brown.) We had almond flour to use and so this was perfect. We did these and a pan of traditional homemade brownies and my husband liked these better! We don’t have any dietary restrictions in our home but I like to try new things. Thanks for these and for the whole chocolate-y week! 🙂
Yum! I’m so glad they were a hit! THANK YOU for taking the time to leave a review! It’s so helpful.
Could you pls inform how many gram is 2/3 cup of chocolate chips? Thanks a lot for the info.
Olca – 2/3 cup chocolate chips is about 4 oz. or 113 grams. Hope that helps! 🙂
These brownies are SOOOO good!!! The taste is really good, and they are fudgy!!! I used Enjoy Life mini-chips semi-sweet, and coconut sugar, and ghee, 1/3 cup (technically more than the recipe, but it tastes good!!!). I used baking powder, and they came out puffy!!! I’m making these again soon, and I think that I might not add any chocolate chips on top, because they are SOOO good on their own!!!
I’m so glad you loved them!!! Thank you so much for sharing and taking the time to leave a review! It’s so helpful!
Tried the exact recipe. Used baking soda instead of baking powder. I wonder why it failed 🙁 mine became cake-like thingy instead of gooey and fudgy brownies T.T
Anne – I’m so sorry you ran into trouble! Usually if they’re cakey, they’re over-baked. It could be a difference in oven temp (many ovens run hot or cold, so unless you use an oven thermometer, it’s tough to know how yours runs), or that based on the pan you used they baked faster than usual. I’m so sorry!
Hello,
Can I swap the chocolate chips with chopped chocolate? How many cups/grams should I use then?
You absolutely can! 6 oz. of chocolate chips = 1 cup, so 2/3 cup is 4 oz. You’ll need 4oz (about 113g or 2/3 cup chopped chocolate.) of chocolate for the brownies, and an additional 4oz chopped chocolate to stir in at the end 🙂
This is by far the best brownie GF recipe out there and I do a LOT of GF baking. I used a little bit honey instead of sugar and they still were amazing. A little more fudgy so I baked them a little longer due to the honey. Thanks for such a great recipe!
I’m so glad you love them Farah! Hooray!
Seriously, I keep doing and doing this recipe, is THE BEST! I’m addicted to the brownies and it’s so good they are allowed in my diet!
I tried and tried many recipes all over and this is my favorite by FAR!
Thank you so much for this!
Paola – This is SUCH a kind comment! You totally made my day. Thank you!!!
I made these for my husband and kids (and me!) tonight. We had to put them away because we couldn’t stop eating them! So delicious, chewy, crispy edges, and wonderful brownie flavor. My husband kept saying he couldn’t believe they were paleo.
I did use ghee instead of coconut oil but I followed the rest of the recipe exactly.
Kristie – I TOTALLY IDENTIFY! They’re crazy good! I’m so glad you enjoyed them.
Haven’t cut them yet , but they puffed up like a cake ! I mean I like cake too but I’m hoping they will deflate ! Chocolate is good either way ! Thanks !
These brownies are hands down the best, we love them. But I don’t always have almond flour easily available so how can I substitute with all purpose flour? I haven’t got a AP flour brownie recipe that turns out as nicely as this one.
RT – I really need to post a GF all-purpose flour brownie recipe! I’ll get to work!
i have used AP flour in this recipe – same amount as the gluten free that the recipe calls for – with no issues. You are right, they are they best hands down, anyway you make them 🙂
Debbie – Thanks so much for this tip! 🙂
My bf and I have been making these for two years. He found it one time when looking to try a new gf recipe and this is BY FAR our fav. So fudgy and tasty.
I’m so happy to hear that. They’re my all-time favorite!
Amazing brownies! Moist and delicious 😋
These gluten free brownies are the bomb! I’ve been gluten-free since 2010, and I’ve tried a lot of recipes, but these take the cake (pardon the pun)! My husband is a huge brownie lover, and you can’t tell the difference between these and “regular” brownies made with white flour. I love the fact that they are nutritionally better as well as gluten free. Thank you for this, and I’ll be looking out for more “better for me” recipes on your site. Based on some of the reviews here, the brownies didn’t last long, but I just want everyone to know that they freeze well also.
Oh my goodness! This is so nice of you. I LOVE popping leftovers in the freezer, too!
Can you make these brownies in mini cupcake tray? If so, how long would you recommend you bake it for?
I haven’t made them in a mini cupcake tray before. Typically, mini muffins tend to bake around 15 min or so, but brownies may work differently. I’d start checking them in the 12-15 min range, but I haven’t tried it before.
Thanks so much for this recipe! The first batch of these that I made, I used baking soda. The texture was nice and chewy, but like other reviewers, there was a significant issue with the brownies in the center of the pan collapsing. Because the texture was so delightful, I tried a few more batches with edits and here’s what made them predictably perfect: 1) Only use baking powder in this recipe if you want the entire pan evenly baked. Baking powder and baking soda are not interchangeable. 2) Double the cocoa powder and vanilla for a deeper chocolate flavor. 3) Sprinkle some Maldon salt on top. Amazing!
I just made these for my family two days ago, they. were. AMAZING! I dare say the best brownies I have ever had, period. Thank you for this recipe! I just put another batch in the oven right now as a father’s day present to myself, haha! I will share them…reluctantly. BTW, I know my oven always takes longer than directions say, so I baked my first batch for 30 min. The edges did puff up a lot and were very crackly, but they cooled and set perfectly! Only three brownies survived their first hour of life (we made short work of the rest) so I chilled them overnight and they were even better the next day!
Aaron, Thank you so much for taking the time to leave a review! I appreciate it so much. I’m so glad you loved these brownies as much as we do–they never last long here either! (PS – Happy Father’s Day!)
Thanks, Emily!
I’ve recently tried some subs in your recipe:
1) Monkfruit sweetener: This works great!
To make dairy free and sugar free I combined (1) with:
2) Tried Lily’s dairy free and stevia sweetened dark baking chocolate
3) Tried Trader Joe’s vegan “butter” (mostly coconut oil and cashew milk)
I was not thrilled about 2 and 3 in my recipe. I love coconut oil but not in my baked goods. Also they came out dry this time (maybe I overcooked and/or added too much baking soda by mistake…)
Lastly: did some research and I suspect the best combos are CACAO with baking SODA and COCOA with Baking POWDER. I’m going to experiment with both and will report back.
Thank you for the updates, Aaron! I’m sure you’re not the only one who’d like to try with substitutions. Thanks for sharing!
Can i substitute honey for coconut sugar?
You can, though it will mess with the texture a bit. I typically don’t get quite the same crackly top with liquid sweeteners. 🙂
Best brownie recipe, ever! Just made these and they turned out perfect. I baked for 20 mins. Also I used 4 tbs instead of 5 of coconut oil then greased the pan a little generously with coconut oil. I also subbed 1/2 of a 1/3 cup (filled 1/3 cup 1/2 way with almond flour and then the other 1/2 with coconut flour). I know they are not 1:1…but I like to sub a little of the almond in many of my recipes to take down the calorie load..next time I will experiment with 1/2 almond and half coconut. Simply perfection! Thank you so much for this recipe!! Can’t wait to try some of your other recipes! 🙂
Theresa – I’m so glad they worked out for you! That’s great! 🙂
I’ve already passed along this recipe to at least 5 people! Also, I forgot to add that I did use the baking powder instead of soda and they turned out perfectly chewy as a brownie should be. Thank you again!
🙏😊
I had never made gluten free brownies before and I looked at a lot of recipes beforehand. I liked the extra tips on this one and the photos.
I have to say I have NEVER tasted such amazing brownies before in my life and my family demolished the pan in a couple hours.
I used Bob’s ultra fine almond flour and put a chocolate glaze icing on top made with melted chocolate chips, Becel “butter”, icing sugar and used some boiling water to thin it.
It did take (in my oven) about 35 min and the texture was perfect. I put roasted walnuts in mine and used the baking powder and they were still very fudgey and not cake like.
This is a recipe I will make again and again!!
WOOOOW That sounds absolutely delicious! I’ll need to try that icing!
These might be the BEST brownies I’ve ever made regardless of the fact that they are gluten free. Wow!
Is this the nicest comment or what!? I’m so glad you enjoyed them! Thank you so much for taking the time to leave a review. It made my day!
I usually never write reviews but this brownie is truly the most delicious, moist and fudgey gluten free brownies I’ve had/baked! My only issue is I’ve done this twice now but they never seem to set – they break off a lot but still taste ultra delicious. I’m using the exact same recipe except using raw brown sugar instead of coconut sugar – could be that I need to leave it in the oven a few minutes longer? But the fudge consistency comes out perfect it’s just that I’m not able to cut it into a nice piece
Saachi – I’m so glad you like the brownies! They’re my absolute favorite. One of the best tips I’ve ever heard for slicing brownies neatly is to chill them first. It usually works for me! You might also appreciate some of these tips for slicing brownies. Hope that helps!
Thank you will try them next tine!
How do you store these?
Mary – I usually keep them in the refrigerator or freezer. If they’re in the fridge, I cover the pan with wrap or transfer them to an airtight bag. For the freezer, I put them in a freezer-safe bag. 🙂
Thank you for this delicious recipe! Fast and easy too.
Oh good! I’m so glad you loved them as much as we do! 🙂
They are the perfect brownies! Arm workout to whisk the eggs and sugar but worth it! Did baking soda and powder but next time would stick to one! Mine were thin but maybe that was the pan or riding agents. So yummy !
I LOVE them so much! So glad you did too. 🙂
I never leave comments on recipes Ive tried because Im too lazy 😂 but this is worthy. This is the BEST brownies I have ever had, I made exactly as instructed. I cant even tell that they are GF. Excellent recipe
Oh my GOODNESS! You’re the best! Thank you so much for making my day!!! (And THANK YOU for taking the time to leave a review. I appreciate it SO MUCH!)
I don’t normally wind up posting reviews for recipes but I had to for this one because these brownies were absolutely delicious! I made them this afternoon just as directed except I used raw cane sugar, vegan butter and baking powder instead of soda (I also used bobs redmill non-blanched “natural” fine almond flour). They were truly the best homemade brownies I’ve ever made or had and you can’t even tell they’re gluten free in my opinion! Wonderful recipe thank you!
Diana – WOW! Thank you so much for taking the time to leave a review. I’m SO glad you loved them as much as we do! They’re one of my all-time favorite desserts EVER. 🙂
I’ve been on the hunt for a healthier brownie recipe that actually tastes good for … who knows how long 😂. It’s been a real struggle to find recipes that have that fudgey consistency and a sweet flavor, while also having better-for-you ingredients. I can officially say … the hunt is over! I made these yesterday and *literally* started jumping around in my kitchen after I tried a bite! I can’t tell you how much of a struggle it’s been to get excited about a recipe, only to be disappointed later when it doesn’t work. Healthy baking is hard and you have just made it so much better! It feels like life is officially complete! Thank you, thank you, thank you!!
Maddie – Oh my GOODNESS!! This is such a kind review! Thank you so much for making my day! I’m so glad you enjoyed them 🙂
Have you ever tried making these with coconut flour instead of almond flour? Just curious because I can’t have almonds. Thanks
Jo – coconut flour isn’t a 1:1 substitute for any other flour, so you’d definitely need to adjust the amount. Coconut sugar absorbs several times its own volume of liquid, so if you directly substitute it here without making other adjustments, your brownies will be dry and crumbly.
Woah!! These are the best paleo brownies I’ve ever had! I put dark chocolate chunks and walnuts in the batter and they are wonderful! They taste just like regular brownies!
Hannah! Thank you so much for leaving a review! You totally made my day 🙂
I’ve been a baker for years, and a GF baker for about 6 of those years. I have made literally DOZENS of brownie recipes and these…. THESE by far are the BEST. EVER. HANDS. DOWN!!! Such an easy recipes and virtually fool proof! In used vegan butter and I incorporated baking powder instead of soda. I have found my go-to brownie recipe… THanK YOU! Oh, and the coarse salt? Seriously the icing on the cupcake! 😉
Tamara – You MADE MY DAY!!! This is such a sweet comment. Thank you SO much for sharing!
These brownies turned out great, although I forgot to put in the vanilla. Very fudgy!! Thank you.
Maria – Oops 🙂 They’re even better with the vanilla! I’m so glad you liked them!
Karen, 1 tbsp of butter is 14 grams so you should’ve used 70 grams of of oil. Whole cream or buttermilk can also make it softer but only a tablespoon or so. I would suggest using even something like agave if or date paste for texture and moisture without tons of added sugar.
Awesome brownies! I don’t think anyone would ever guess they were gluten free etc. I added 1/4 tsp cayenne pepper and just under 1/4 tsp cinnamon inspired by a “Mexican brownies” recipe I have and they were amazing!
Alessandra – That sounds like an AMAZING flavor twist! I need to try that!
They are becoming my go to brownies, honestly way better than any normal brownies I’ve made 😀
🎉🎉🎉
The brownies were actually edible without the oil but I would definitely put it in the next time I make them. I think it says something good if the oil was left out and they were still edible!!
Thanks!
I made the brownies but in the body of the instructions there was nothing about when to add the oil. So… it was left out! Then after I got the brownies in the oven, I saw the bottle of coconut oil sitting on the counter and realized, oops I forgot the oil. It is listed in the ingredient list but not in the instructions. I may need to remake them!
Carmela – Oh, I’m sorry you missed it! It’s right in step 2: “In a small saucepan, gently melt chocolate and oil over low heat until smooth and glossy. Remove from heat and set aside to cool slightly.”
They were probably pretty dry and crumble without the oil! (Hopefully, you get a chance to try them again. They’re truly my FAVORITE!)
Yes I just saw it there! Oh my goodness I must be REALLY tired. Merry Christmas!
I’ve TOTALLY been there! 🙂 (Merry Christmas to you, too!!)
First time I made it, the batter overflowed so I change the pan with a larger one at the second time. This time brownies came with flat surface in the center. What’s wrong?
Despite that, the taste is so great. I like it.
Anie – I’d love to help! A couple questions: are you making any changes to the recipe? (i.e. using a different kind of flour, using an egg substitute, or not whisking the eggs with the sugar, etc.) Second, what kind of pan are you using? (Is it glass, metal, ceramic, etc? Are you sure it’s an 8×8″ or 9×9″ square pan?)
What would your measurements be for a 13 x 9 pan? I have a MOPS meeting coming up and would really like to make these for it, but I need to make it for a bigger pan than an 8 x 8 pan.
Caitlin – Great question! You’ll want to double the recipe for a 9×13″ pan. In the recipe card, under the “print recipe” and “pin recipe” buttons right above the ingredients list, you’ll see some small boxes that say “scale 1x,” “2x,” and “3x.” If you tap the “2x” button, you’ll get the perfect measurements for a double recipe (9×13″ pan). Hope that helps! 🙂
I gave some to a friend who said they were the best brownie he’d ever had, regular flour or gluten free. I had to agree.
Thank you.
I LOVE this Doug! Thank you so much for sharing!!!
Can coconut flour be used in place of almond flour?
No, not for this recipe. Coconut flour isn’t a direct substitute for almond flour without adjusting the other ingredients, as it absorbs several times its own volume in liquid.
I only have coconut flour so I used 1 Tablespoon and the brownies still came super gooey and yummy!
I’m so glad it worked out for you!!! That’s fantastic!
These are so moist, chocolate-y and delicious! Both kids said best brownies ever, even my non-GF daughter. Made with the avocado oil. Thank you for this recipe!
Yum! I’m so glad you enjoyed them. They’re my favorite!
These were the best brownies I’ve made. I did add 1/4 cup of coconut flour and in place of the sugar I used 1/4 cup if sugar free, carb free Walden sugar free maple syrup. I’ll make them again this week and try using egg whites instead of the entire egg.
These were gone in one day! Made them for my employer and she just raved how delicious they were.
Thanks for sharing your fabulous recipe!
So glad you enjoyed them Esther!
Do you keep leftovers in the refrigerator?
I do! Or the freezer (we actually LOVE them from the freezer!) 🙂
Better as cupcakes than brownies for me
Ooh – did you bake them in muffin cups?
OMG These are hands down NOT paleo brownies 😍. J/K obviously they are, but WOW the taste and texture is just like “normal” fudgy brownies. Thank you for sharing this!
HA! This totally made my day. They’re honestly the best ones I’ve ever had!
I’ve tried several gluten free almond flour brownie recipes, this is my favorite. Mine always seems to “fall” upon resting however they taste delicious none the less. I use butter and sugar. Im looking to try coconut oil soon – just don’t want that coconut taste…
I’m so glad you like them! It’s my very favorite, too 🙂
I kept finding recipes that called themselves “paleo” but included baking powder, and then I finally stumbled upon this recipe. I already had most of the ingredients so I decided to get the rest and give it a try. I followed the recipe exactly and cooked the brownies for 20 minutes. I waited until they were completely cooled before cutting and tasting… and oh man these are amazing! They were fudgy and delicious. I can’t wait to make these again.
I’m so happy to hear you enjoyed it! I absolutely LOVE these brownies!
These are AMAZING! I used ghee, dairy free chocolate, and cacao powder to meet my dietary needs and they turned out so good! I want to eat the entire pan! Thank you for this incredible recipe!
I’m so happy to hear that! So glad you enjoyed them, Taylor! 🙂
Greetings! I wanted to comment on how delicious this recipe is! My family loves it. I did want to add that I have tried it with GF flour rather than almond and the result is fabulous. I too have subbed the dairy free chocolate and butter and everything tastes fantastic. Sadly, I have developed a reaction to chocolate that causes insomnia…I know tragic! However I have substituted carob powder for the cocoa powder and carob chips for the dairy free chocolate chips and my goodness…absolutely delicious! You cannot taste the difference! I do have to adjust baking time because it takes longer to set but it still comes out soft, gooey and amazing. Thank you for the recipes they make my household so warm and with happy allergy friendly feels!
Sybila – Thank you SO MUCH for sharing this with me! I’m sure other folks with that reaction will really appreciate your tips with carob! You made my day. Thank you so much!
Hello!! Loved these!! Wondering though, if I wanted to make these into cookies rather than brownies… how much extra flour do you think?
Jessica – I’ve never turned brownies into cookies before. I don’t think they’d work without some serious re-working of the recipe. But, you might like these grain free double chocolate chip cookies!
what did I do wrong-mine foamed up and overflowed the pan and made a big mess? I followed the instructions to a t.
Oh my goodness! That’s never happened to me before! Not even close! You’re sure you used an 8×8 or 9×9 pan and the correct amount of baking soda?
THESE WERE INCREDIBLE. I substituted the baking soda for baking powder, I added chopped pecans, and they came out perfectly. I would never know they were gluten free. Thanks so much for this recipe!!!!!
Kayla – That’s so wonderful to hear! (Also – PECANS!!!!) I’m so glad you liked them!
Best brownies I’ve ever made and had! Just perfectly fudgy with crisp edges but not super crunchy! I think I’ll stick with this when we get a little chocolate craving because it was perfect, thank you!
Wonderful! I love hearing that! We ADORE them too! 🙂
I made these today for Father’s Day and they were amazing. My dad has celiac and he loved them. Even my younger siblings loved them. We finished the whole thing in like 10 minutes. Would definitely reccomend this recipe
I’m SO happy to hear that! We absolutely LOVE these brownies! I’m glad you did too 🙂 Thank you for taking the time to share this with me!
Just did it and I putted shredded coconut on top to remind that coconut oil flavor. it smells amazing and it taste wonderful, it’s super fudgey!!!
Oh, yum! That sounds delicious!
just made these, they turned out perfect. I even halved the amount of sugar, and my family loved them. thanks so much for sharing this amazing recipe
YESSS! I love hearing that! So glad you enjoyed them! They’re our family favorite 🙂
Birthday party tomorrow means I need to double this recipe! Have you done so successfully? I’d be doing it in a cake pan, and I’m just awful about knowing baking times when doubling! Any help appreciated! Can’t wait to try these!
Amy – Fun for a birthday! For doubling, I actually just usually make it in two square pans so the edges don’t burn while the middle stays underdone in a larger pan, but several folks have made a double batch in a 9×13″ pan. I’d start checking them around the same baking time (20-24 min), and then check every 2-3 minutes after that to be safe.
Hello. The recipe sounds good…but what I don’t like is this: 2/3 cup semi-sweet or dark chocolate chips – ?
Why there is no back to basic simple brownie recipe.. Who knows what’s in the chocolate chips, how much butter and sugar is in them in total? I’d much prefer if we could just have kakao powder based recipe…
Peter – I’m sorry they weren’t what you were looking for. Hope you find that recipe soon!
It bakes well and the brownies are a perfect texture. I substituted the coconut oil for butter (same amount) as my daughter has celiacs and she doesn’t like the taste of coconut. They came out yummy!!!!
I’m SO GLAD you liked them Danila!
First, let me say that these brownies were DELICIOUS! I’m gluten/dairy free (Paleo) and took them to a dinner with friends where I was the only one with food restrictions. Everyone devoured them and it was great that I could join in on that devouring. There were crumbs on the plate and one of the men literally licked the plate! Haha! I did not expect that! I followed your recipe exactly and my only issue was that the top didn’t have that traditional brownie sheen on top. It was matte brown instead, but sprinkling the salt distracted from that fact. Can you think of a reason why this happened so I can try to correct it?
I have a question, I would love to make your recipe, however I cannot eat chicken eggs, could i substitute the chicken eggs with say duck eggs?
That is a GREAT question. I have no experience using duck eggs, but my friend Erica did a whole write-up about it that’s worth a full read. She says not to use them as a direct substitute unless you’re doing them by weight.
“Duck eggs are about 1.3-1.4 times as big as a large chicken egg. The average duck egg is about 70 grams, whereas the average chicken egg is about 50 grams.” (She’s got more details about how to use them or substitute them in her article!)
If you give them a go, I’d LOVE to know how they turn out!
Had a go-to brownie recipe for years and the similarity is they both use melted chocolate along with cacao powder. The difference is the flour and I am a big fan of almond flour so I had to try these! I used many reviewers suggestions and a few of my own: baking powder, butter, walnuts on top, chilling before cutting and adding salt to top half way through baking. With all of these choices these were the perfect brownies and my new go to recipe!!
Dottie – I LOVE hearing this! YUM!
Made this recipe quite a few times and the result is so, so delicious! The last few times I have swapped out the almond flour for hazelnut flour which gives them a slight ferrero rocher taste 👌🏻👌🏻👌🏻
Thanks for such a great recipe!
Oh my GOODNESS that sounds amazing. Totally have to try that!!!
I’m with Jenny on coconut sugar. I get yeast infections when I eat sugar, honey, or maple syrup. No problem with coconut sugar. That’s what I’m planning to use in this recipe.
Which I can’t rate yet but I’m psyched to try it! Just as soon as I get me some almond flour or meal. 😁
I hope you LOVE them. They’re our very favorite!!!
Can I substitute sugar for Truvia brand powdered stevia? If so, how much would it convert to? I read somewhere that powdered stevia is sweeter than sugar and should be half of whatever sugar you are subbing it for.
Bella – I haven’t ever cooked with stevia, so I’m not sure. I’m sorry!
I use 1/3 cup of stevia, it works great!
That’s great to know! Thanks for sharing!
I just took these out of the oven. Hope they’re as good tasting as they look.
Oh mercy, they are.🤗
Marsha – I laughed out loud and smiled so widely reading these comments last night! Thank you for making my day!!! I’m so glad you enjoyed them.
Best Gluten/dairy free brownies ever!! Ive made them a couple times and will make them many more. Thanks for coming up with this one!
Lori – We just LOVE THEM! I’m so glad you’re enjoying them too! Thank you so much for sharing this–you made my day!
Can I substitute almond flour with coconut flour?
You can’t, I’m sorry. Coconut flour isn’t a direct substitute for any other kind of flour because it behaves so differently. Coconut flour absorbs several times its own volume in liquid, so it will produce very dry, crumbly brownies if you substitute it here without adjusting the other liquid volumes (eggs, coconut olive etc.). I haven’t tested it successfully adapting it for coconut flour yet.
These are amazing!!!! I used monk fruit sweetener in place of coconut sugar, and I used baking powder instead of baking soda. I’m not a big chocolate fan, really made this as a healthy alternative for my kids, but they are delish!! Thanks for posting this awesome recipe!
I’m so glad they were a hit! And thanks for reporting back about using monk fruit! I’ve never used it, but several folks have asked if it works. Glad to know it does!
Practically perfect in every way!! I set out to find a gluten free brownie i coukd take friends who were gluten free and fell in LOVE with this recipe. I love it so much i make them weekly and prefer the over box! I double the recipe without any problems. Highly, highly recommend this recipe!
Thanks for following up with this for us!
These were amazing. Decadent, dangerously good:) Thank you.
Ha! That’s the PERFECT description for them!
Hey! I’m really excited to make these but I was wondering if you measure the coconut oil liquified or solid? Thank you!
Lauren – GREAT question (and sorry for the confusion!). I typically measure it solid. 🙂
I really like the brownies and so did my sister, who is the one I primarily made them for. I used homemade blanched almond flour, I use maple syrup with coconut sugar, also instead of chocolate chips I made some coconut oil, cocoa powder, coconut sugar mixture. They tasted good, but was kind of soft, so next time I will make homemade chocolate chips with cocoa butter to help out the consistency. Thanks for the recipe.
Yum! That sounds like a great way to experiment!
hi, can i take out the chocolate chips or do i have to replace them with something? i’m doing a sugar free diet!
Sasha – You must include the first 2/3c chocolate chips (that you melt) for structure reasons. The second 2/3c (which you stir through the batter as a mix-in) can be left out. You might like Lily’s stevia sweetened chocolate chips for a lower sugar version!
This recipe is PERFECT as written. YUM!! I was afraid the almond flour would make them too dense, but it does not. I even added a few chopped walnuts. The title of these is spot on! Thank you for this recipe!
I’m SO happy to hear that! (And walnuts are SO good in brownies!!!)
After a little over a month with no added sugar, chocolate, or sweets, (as well as being gluten, dairy, and corn free), my tastes buds (and stomach) have betrayed me. I ate a serving size of dairy-free chocolate chips last night, and then this evening, and felt nauseated afterwards 😢
All this to ask:
I know the taste would not be as sweet (which is fine by me), but would the brownie consistency change if I were to omit the chocolate chips? I have a brownie bite pan that I will use, so the end result would be crispy brownies 😁
Thank you 💕
Cassandra – I’m so sorry to hear that! You can absolutely leave out the additional chocolate chips that stud the interior, but you can’t leave out the ones that are melted into the batter. The texture would be too greatly impacted, since they also provide a lot of the structure. I’m sorry!
I think the 2/3-cup chocolate chips would be fine considering the quantity of the overall batter. I just won’t add the extra chips. And I’ll pace myself (and share) the end product 😁 Thanks for your help!
🙂 🙂 🙂
I have made this recipe so many times and never had an issue until today. I attempted to double the recipe and not sure what happened but my end result is gritty lumpy looking brown paste. Very disappointed….I wonder if the oil was too hot when I out the eggs in ???? Or if I need to pulse my almond flour first. Not sure but it was sad
Oh no! I’m so sorry that happened. I wonder if you’re right, or if something accidentally didn’t get doubled correctly? (I’ve done that once before and it was SUCH a bummer!) I hope it never happens again!
I just made these the other day… WOW! They are soooo fudgy and delicious. It’s hard to find a gluten free recipe that is delicious, but this nails it! Thank you!!! *side note- I added toasted coconut to the top of it and it was perfect!
I LOVE hearing this! I’m so glad you enjoyed them! (Also – TOASTED COCONUT!? That sounds AMAZING!!!)
I’ve made this recipe numerous times for my family and they’re always a hit! When my mother-in-law requests them, I KNOW they must be something special. We like the subtle flavors from the coconut sugar and oil- such a great suggestion. When we’re feeling squirrely, we’ll add white chocolate chips to mix in once the batter is complete rather than more dark/milk chocolate. These brownies never last longer than about 6 hours after I make them… and there are only three people in the house…
Sarah – Ha! I know the feeling! We polish them off SO fast every time!!!
I finally tried this recipe, and they cane out delicious and slightly fudgy and cakey. They even had that crusty top and look like brownies too. I used Lakanto monk fruit erythritol mix, Wellbee’s almond flour, half butter half coconut oil, and baked them on 350 drgrees for about 23 minutes.
I’m so glad you enjoyed them!
Can they be refrigerated? My son is asking for creme de menthe brownies and our wheat brownies needed to go in the fridge so the creme de menthe middle wouldn’t melt with the melted chocolate drizzled on top. I’m so excited to make these!
Carol – Absolutely! I LOVE them from the fridge (or even freezer!) I just cover them whenever possible so they don’t dry out. If you’re covering them with creme de menthe and chocolate, that’ll provide a “seal” of sorts. You should be in great shape! I hope your son LOVES them!!!
Omg these are the best brownies ever. Made them today and my family loved them we ate them all in one day.
YAAAAS! I love hearing that!!! So glad you loved them!
Would honey, bananas, or applesauce work instead of sugar? If so, how much? Thanks!
Nikki – Not if you want the same taste or texture. I’d for sure stay away from bananas or applesauce if you want a fudg-y texture, but some folks have tried subbing pure maple syrup instead of the coconut sugar in the past (1/2 as much). I haven’t personally tried it, so I can’t guarantee the amounts.
Thanks Emily for designing this gluten free brownie! I made it yesterday for my birthday. My husband placed three candles on a big brownie square with icecream and sang to me on my birthday! The brownies are wonderful! Better than Betty Crocker’s! I also topped the brownies with chocolate glaze. Yum!!!
Have you tried baking this in a 10 inch cast iron skillet? Any idea if this would yield a tasty result and if I should alter the baking time? I don’t want to sacrifice ANY of that fudgy goodness. Thanks!
I haven’t. I know cast iron gives a nice crust on the edges, but I’m not sure how long you’d need to adjust the baking time so you still have a good fudge-y middle. I’m sorry!
OMG! This recipe is simply prefect! Super delicious brownies. Thank you!!!
Oh, I love hearing this. THANK YOU so much for sharing!
My daughter cannot have egg whites what’s the best substitute
Melissa – I haven’t made these without eggs. If she tolerates the yolks, you could try doubling and do 2 egg yolks, otherwise, I recommend a powdered egg substitute, like Neat Egg, Ener-G egg replacer, or Bob’s Red Mill egg replacer. I hope that helps!
These brownies are tied for the best I’ve ever had – and the other recipe is traditional (wheat flour, etc)! THANK YOU, EMILY! You’re a baking rockstar! 😀
WOW!!! You just made my day! Thank YOU!
Delicious! I reduced sugar to ½ cup and the oil to 4T and they were still fudgy and sweet enough!
Yum! So glad you enjoyed them. Thanks for sharing!
I’ve been on the hunt tonperfect the perfect keto brownie that tastes good, moist not dry, not crumbly, is dense, rich, chocolatey. This gluten free brownie was the perfect base as I am sugarfree and gluten free(so I had to play with the ingredients). The first time I just subbed erythritol (granular) for the sugar 1:1, and used sugarfree lily’s Chocolate bar (1/2 cup melted) to melt and for added chunks. I could tell these bars were really good, but my subs made them fall apart after they had cooled( fromerithryitol). I ate the whole pan still , in 3 days by myself, with a spoon since it was crumbly 😂. I knew we were onto something!! Next try, I subbed egg yolks only to equal 2 eggs ( mega “ribbons” ) and I used powdered swerve and more, added more cocoa powder and more butter. And 💥 BOOM . The best brownie EVER. My husband and I ate the whole pan within 24 hrs ( even when it was hot and gooey right after the oven!) .
I’m SO glad you enjoyed them! And THANK YOU for sharing your Keto subs! I know there will be lots of folks who find that helpful!
These sound amazing, I cant wait to try this recipe….have one question though I have an allergy to nut and nut based products…..is there a substitute for the almond flour. Thanks
Alison – I haven’t tested any nut-free flours in this recipe, and don’t think the ratios would be quite the same. If you’re not using nut flours, you may like one of my older brownie recipes, like this one or this one!
These were excellent!! Thank you!
I’m SO glad you enjoyed them 🙂
I literally cannot handle these brownies. They are the most delicious tasting brownie I’ve ever had in my life. Thank you for taking the time to make allergy-friendly recipes. I featured this recipe in my Instagram of all of the Pinterest recipes I’ve tried. This recipe definitely tops any other Pinterest recipes ever.
AH! Carolyn, you totally made my morning. They’re my ALL time favorite!
Your recipe is fantastic! Thank you for your research, and expertise!
Regarding “Swerve” sweetener: it sounded interesting, so I did a search for reviews and feedback from people who have tried it, or who have been using it. I see a lot of reservations expressed, and negative input, regarding the taste, after-taste, and concerns about the undisclosed processes Swerve employs in order to produce it. Personally, I want products that have not been messed around with since nature created them. I save a lot of money, and avoid a lot of disappointment, by perusing baking sites and blogs for feedback on new products. Plus, I always wonder about the potential for product placement plugs, used by people due to potential compensation.
Pamela – Thanks for your comment! Swerve isn’t for me either, but I have lots of friends who swear by it. To each her own!
Best brownies !
Very tender ! I used the darkest chocolate I could find and topped them with walnut halfs. Super!
Oh, I LOVE hearing this! Thank you so much for sharing Carol!!!
Holy Sh*** this recipe was AMAZING!!! I am eating them right now haha and they are delicious. Moist, taste a LOT like chocolate. Heaven! 🙂 Was a bit sceptic because they are paleo but they are perfect!
HA! I’m SO glad you loved them! They’re my all-time favorite brownies.
Really delicious! This is my 1st time making a paleo-like recipe so I wasn’t sure of what to expect. I made some almond meal, added a little bit of oat flour and didn’t add any sugar (this worked for me but my daughter thought that they needed sugar so it’s definitely preference). They weren’t fudgy, but they weren’t dry either, kind of a little crumbly, maybe it’s because of my substitutions, but the flavor was delicious. I love chocolate, brownies, cakes, cookies…you name it but am trying to cut down on sugar so this is a good start. Thank you
Lexi – I’m so glad you enjoyed them! I do think the texture difference was because of the substitutions you made. Almond meal and oat flour would produce a different texture than blanched almond flour, and the sugar would also have some structural differences. It sounds like you made them work for you! Yay!!!
I love this recipe! I tweaked it a little and it came out amazing! I didn’t have chocolate chips so I mixed avocado oil with a bit of raw cacao and sugar, then heated them on low. I also used almond meal because it’s what I had on hand. I also added a cream cheese swirl on top. I only baked them for about 15 minutes. They turned out incredible and soooo fudge like. Definitely going to make these again!!!
What a clever substitution! So glad you liked them.
Im currently in Italy and was thinking of using a flour by a company called garofalo – the description say “least strong flour. Perfect for short leavening – up to 8 hours – at room temperature. Ideal for pies, shortcrust pastry and small pastries.” any help on the conversion of almond flour? thank you in advance!!
Ashlyn – I’m so sorry. I haven’t any idea! I’ve only ever tested it with almond flour. I’d love to know how it goes if you give it a try!
No worries!! That was a randomly specific question haha. What about just using a cake/pastry blend?
Ashlyn – I can’t guarantee results (since I can’t test any flour that contains gluten), but it’s worth a try!
Just made and they were amazing!! Had to sort of wing it since I’m using milileters and what not but it came out amazing! And it was a 1:1 (:
YAAAAAY!!! I’m so glad! Thank you for sharing! I’m sure your results will be helpful to others in the same boat!
I was impatient and made this without parchment paper as I didn’t have any in the cupboard! I didn’t wait for it to cool completely either before removing from pan. The result an ooey delicious broken mess! All the better to eat with a fork I say!!! Will make it with paper next time and (maybe) be patient and wait for it to cool first!! Really though, if something tastes that delicious why wait until it has cooled!!!!? Thank you so much for bringing this recipe into my life!
I’m SO glad you enjoyed them! Hopefully, they’ll be even better next time 🙂
I made these today, and I added a little over 1/3 Cup of Ghirardelli 60% Chips and the rest chopped walnuts to make the 2/3 Cup at the end
Hi Emily,
This looks amazing! I would love to try but don’t have any chocolate chips on hand. How would you recommend I tweak the recipe? Thank you!
Lexi – I’m so sorry I’m just getting this! This recipe won’t work if you don’t have some kind of meltable chocolate–whether that’s a chocolate bar or chocolate chips. If you try to omit it, the texture will get messed up and they won’t be as chocolatey. I’m sorry!
Hi there! Loved your recipe! I actually used 1/4 cup of coconut flour instead because Im sensitive to almonds and it came out great! (Less coconut flour is needed than almond flour as it is more absorbent for anyone considering trying).
Thanks again will def make in the future!
Cindy – Thanks for the tip! I’ve been too intimidated to try it with coconut flour, knowing I’d need to play with the amounts a bit. Thanks for passing that along!
This recipe is so perfect! I poured them into cupcake liners so I could properly portion them out without eating too much in one sitting. I love recipes that use simple ingredients and these are soooo dangerously good. 10/10 will be making these again and again!
Thanks for sharing this!
I’m so glad you enjoyed them Elena! You totally made my day!
This is definitely the best brownie recipe, I love that it is sweetened with coconut sugar! We used Whittakers 70% Dark Cocoa chocolate instead of chocolate chips. It makes a small amount so next time will double.
thank you
I’m SO GLAD you loved them! They’re my absolute favorite!
Hi Emily. These brownies are perfection! My first batch resulted in a more cake like brownie, so for the second batch (today), I used 1/4 tsp baking powder, mixed the sugar then the eggs into the melted chocolate without wisking them first, used Earth Balance instead coconut oil, and half white and half brown sugar, since I can’t have anything coconut. They are everything I hoped for in a brownie: fudgey, just the right amount of chocolate, with a delicate top crust.
After trying so many brownie recipes and not liking any of them enough to make again, I am so happy I found your recipe. I can stop searching.
Thanks!!
Joanne – Thank you so much for this sweet review. You MADE my day! I’m so glad you liked them 🙂
Hi Emily, I appreciate your recipes and your willingness to share your discoveries and experiments. I made your brownies with a couple of adaptations that I’ve discovered useful in successful–and delicious gf baking. I used both soda and cream of tarter (its what baking powder is made of without the corn starch). I use a high quality butter and always add a small amount of creme fraiche–it’s almost butter, but offers a bit of culture which activates the baking soda to help with the rise. I also add a small amount of flax meal to give the batter more gluey-ness since there is no gluten. They were delicious by the way! My husband and I finished them off way too quickly. Like other posters, I appreciate the protein in the almond flour–and I added walnuts, so not too guilty about it after all! Thank you so much, gfw
WOW! This is amazing. Thank you so much for your tips! I’m sure lots of other folks will love to try them your way, too!
Hey so i was wondering if it would be alright if i didn’t use unsweetened cocoa powder and a different type of cocoa powder instead…
Miya – What other cocoa powder would you substitute?
I found this on Pinterest…. Best gluten free brownies I’ve had so far! I cut the recipe in half and used a loaf pan instead of an 8×8, used Trader Joe’s blanched almond meal, and used stevia instead of sugar (not the 1:1 baking blend so I followed ratio on container which was about a 1:3 ratio of stevia to sugar). I also prefer a fudgey texture so I used just baking soda instead of powder as the original recipe calls for, so the sides did rise more than the middle but it still tasted great and texture was fine for me. Even my boyfriend loved them too!
Oh, YUM! I’m so glad you enjoyed them!!!
Can I use quinoa flour instead of almond flour? If so then would it be the same quantity?
I have never tested this with quinoa flour, so I’m not sure! If you give it a try, I’d love to know how it goes!
I used Ghirardelli 60% Cacao bittersweet chocolate baking chips, coconut oil, maple syrup instead of sugar and baking powder. I sprinkled the salt on after I took it out. It came out great. I am a chocoholic so always looking at the healthiest way I can eat my favorite chocolate treats. I’ll be making these again and probably try adding cinnamon and nutmeg like I saw in some other comments to see how it comes out.
Mahalo!
Yum! That sounds delicious! thank you so much for sharing!
Loved these except they were very thin. Didn’t rise , I used the baking powder maybe I will use soda Nextel any other suggestions?
I’m so glad you enjoyed them! That’s curious about the thin brownies–what size pan did you use? Sometimes if you use a larger pan (even a 9×9 vs and 8×8) it can make a difference.
Just made these and they are amazing! I’ve always struggled to make a good brownie, but these are just perfect! Fudgy, dense centre, chewy edges, perfectly chocolately… all that I dream for in a brownie. Will definitely be making again and again! Thank you Emily!
Grace – I’m SO glad to hear that! Honestly, that’s exactly what I love about this recipe, too. It’s just perfect!
Oh my GOOOOODNNNNESSS!!!
EMILY …brownies are just amazing.
My son who isn’t too keen on eating healthy even said they taste great …Thank you very much…
Ahh! You made my day! I’m SO GLAD! They’re my absolutely FAVORITE brownies. I’m so glad you loved them as much as we do!
hi,
I just made your brownies with chesnut flour and they were delicious.
I will definitely cook them again.
Yum! I bet that’s delicious. I’ll have to try it some time. Thank you so much for sharing!!!
Hi there! I’m planning on making these soon because they look so delicious. Would 100% cacao chocolate work in place of the melted chocolate chips? Also, if I want to replace the baking soda with baking powder do I use a larger amount of baking powder or keep it the same? Thanks!
Eliza – You’d keep the baking powder measurement the same. As for the chocolate, 100% cacao is completely unsweetened, so these would be much less sweet and more bitter unless you increase the sugar. If you like it that way, you can make the switch, but otherwise, they’ll likely be a bit on the bitter side. I usually use 70% chocolate (semi-sweet/dark).
Okay, I have commented on more recipes in the last 2 weeks than ever before in my life! I only comment on stellar recipes, and here I am! These are AMAZING. I made my own chocolate chunks, because paleo chocolate is unheard of in my area. Even with their “homemade” texture, these cake out absolutely amazing. My 9 year old asked me to make them again for her birthday on Saturday, they’re that good! I was a bit short on coconut sugar, so I added a bit of maple syrup, and they were perfect. I also used baking soda, and still had good results!!
Ahh! I’m so glad to hear that! YAY!!!
I used butter & brown sugar without the added chocolate chips. They were amazing and my Celiac granddaughter loved them. Definitely will make a double recipe next time.
I’m so glad to hear you enjoyed them! We LOVE them!!!
What are the macros on this?
Judy – Perfect timing! I *just* updated the recipe card to include the nutrition facts. You should be able to see the macros now 🙂
Hey !The recipe look AMAZING!I’m gonna make this for my mom as a sneaky present for mothers day😆.But if I half the recipe, how long does it take in the oven ?🤔 I’m soooo nervous to try this .I don’t want to fail😵😵😵😵
This recipe makes an 8×8 pan. If you’re halving it, the bake time would depend on what pan you’re using. If you’re using a loaf pan, you’d probably want to check them after 10-15 minutes or so and go from there. If you’re using something wider, you’d want to check them earlier.
Just wondering about baking these. Has anyone tried using honey yet? Would love to know how they turned out.
No one has reported back about trying it with liquid (honey or syrup), but if you give it a try I’d love to know how it goes!
I made them with honey last night! I used 1/4 cup. Really great! Maybe it is due to the extra moisture, but by this morning they no longer had any crunch and are soft on top after storing covered, still great though!
Samantha – I’m so glad you enjoyed them! I’m wondering if it was the honey. Typically, liquid sweeteners don’t produce the same strength/crispness as granulated sweeteners.
Hi,
Is there any way I would be able to use honey or maple syrup instead of the sugar?
Mia – I haven’t tested these with liquid sweetener since that can tend to mess with the texture a bit. If you want to try it, I usually swap half the amount of liquid sweetener in place of granulated sweeteners in other recipes. If you do give it a try, I’d love to know how it goes!
These were AMAZING! The whole family loved them. Thanks for the great recipe!!
I’m so glad you loved them! They’re my ALL TIME favorite brownies!
Hi I was wondering if it is safe to double this recipe or would I be better just to make two batches? Thanks
Sami – I usually make it in two batches. That way the edges don’t burn while the middle stays underdone in a larger pan. That said, many people have doubled it and report loving it!
Made these last night and my husband never came close to guessing at the ingredients! I followed the recipe exactly and made no substitutes. Even my mother-in-law, who follows a very strict gluten free and paleo diet AND doesn’t like trying things other people have made, LOVED them so much! She asked me to make more asap (such a compliment)! This recipe was perfect! The hint of coconut flavor just goes perfectly with the dark chocolate and the dark chocolate does not make the brownies bitter at all. We paired these with some Halo ice cream and had an amazing, guilt-free dessert. This recipe is being sent to everyone I know immediately! Wonderful job making this recipe, Emily!! I truly cannot thank you enough!
I LOVE hearing this! You made my day!!! They are my all-time favorite brownies ever (gluten or not!). They always get rave reviews when I serve them. I can’t get enough!!!
This didn’t work out for me. I followed the instructions exactly, the brownies came out super flat and stuck to the bottom of the pan despite using nonstick spray. After waiting for them to cool off, I tried to get them out but since they were super flat (literally no “puff” at all) they just crumbled. I used baking powder instead of baking soda as other reviewers recommended. Any idea what went wrong?
Elissa – I’m so sorry they didn’t work out! I’m so curious what happened!? I haven’t heard anyone else report those results yet. It sounds like you did everything right… I wonder if by chance your baking powder wasn’t fresh? That’s literally the only thing I can think of since you didn’t make any other substitutions.
I was going to suggest the baking powder wasn’t fresh, as I have used some of my boyfriends BP that’s very very old and my baking has been very very flat… Lol
Can you use coconuts flour as a substitute?
Samantha – No, I’m sorry you can’t. Coconut flour behaves VERY differently than almond flour and absorbs several times its volume in liquid. Coconut flour recipes need extra liquid and usually additional eggs. I haven’t tested this with coconut flour, so I couldn’t advise you about adapting it. If you substitute coconut flour for almond flour, your brownies will be VERY dry and crumbly.
Replaced your 2/3 cups sugar with sweetener blend (xylitol/erythritol/stevia) but still find it too sweet. Really ‘beat d hell outta it’ with the eggs! Will do it 1/2 cup instead of 2/3 next round. Amazing texture and none of my friends believe it’s a sugarfree & gluten-free brownie!
Thanks!
Sounds like you have a great plan for next time!
I just made these and they are amazing! I used a bar of 74% chocolate. Thank you for the recipe!
I’m SO GLAD! Yay!
OMG! It looks so good, I cant wait to make them for easter!
One question: did you use alcaline (dutch processed) or regular (raw?) cocoa? I only have the regular one, do you think it would work?
Thxs for the great recipes!
I used regular! It’ll work great!
These look fantastic! Do you think it’s possible to sub unsweetened apple sauce for the oil, like I usually do in a traditional brownie recipe?
April – You can, but applesauce will change the texture. It’ll be more cake-like than super fudgy. If that’s your preference, I say go for it! 🙂
They are in the oven for my sons birthday…. I make my own baking powder to keep the cornstarch out… 2 parts cream of tater to one part baking soda.
So great!
WOW! I have tried several Paleo/Gluten free brownies and FINALLY, I’ve found one that my family and I LOVE. I used avocado oil and added the 1/4 teaspoon of nutmeg and they turned out perfect.. Amazing treat for everyone.
Thanks so much.
Erica – you just made my weekend! Thank you so much for sharing this review! (And I’m TOTALLY doing the nutmeg next time!)
Um, I am not even paleo and these are the best brownies I have ever had. Thanks for sharing!
WOW! What an awesome review! Thank you so much for sharing this with me!!!
Just tried this the 2nd time. First time with almond meal as I didn’t have almond flour, 2nd time (today) with refined rice flour as I am living in the Dominican Republic now. Also used unrefined natural sugar which is coarse, however, they turned out wonderful and tasty! Very fluffy. If you want to respond to Gabriela living in Ecuador (lived there also), tell her to use “harina refinada de arroz” (refined rice flour) which GOYA makes and also Bisonó. While living in Ecuador, I found yucca flour but it was way too gummy for baking cakes – only good for yucca buns. This time I also tried baking “soda” instead of “powder” and actually liked it better. I have to use the products here so I found sweetened baking squares and cut them into small chunks, I’ve also used organic 100% cacao (unsweetened) 1st time, and they were less sweet, but still tasty. Lastly, tried sprinkling sea salt on them 7-10 minutes before done but it melted in – better to wait until it comes right out of the oven! Thank you for this wonderful recipe! This is a keeper!
Ruth – THANK YOU for all those helpful tips!!!
I used half almond flour because I didn’t have enough for recipe and used the other half gluten free flour.
They came out too cake like for me. The taste was great. I will try again when I get more almond flour.
Beth – I’m guessing that was the GF flour, like you thought. Bummer! I’d love to know what you think when you get a chance to try it with all almond flour!
I made these today. My husband has eaten 1/2 of them already. Excellent recipe. Thank You again Emily! I haven’t found a recipe that I don’t absolutely love.
Hugs 💗💗
Ha! I’m so glad he’s enjoying them. And so glad YOU are enjoying them. Have a wonderful weekend, Shelley!!!
I made these “perfect gluten free” brownies for my own birthday. My husband placed three candles on one decadent brownie with raw cream maple flavored icecream and sang Psalm67:7 over my life to me!
The brownie recipe is better than store bought Betty Crocker’s baking mix!
Thank you for your talent!!!!!!!
Warmly,
Cynthia Hadley
I’m so glad they could add to your celebration! Happy birthday, Cynthia!
These were AMAZING! Thank you! They curbed my PMS craving! 🙂
Ha ha ha! I’ve BEEN THERE!!!
Hi Emily,
I LOVE these brownies so much, make them ALL the time and have even converted some non-GF friends and coworkers onto almond flour!!! I just learned that I am intolerant to coconut and am wondering if you have recommendations for a sugar substitute? I use olive oil (love the flavor) in all my chocolate baking already. Do you think honey / maple syrup would work? If so, how much would you recommend using?
Thank you, thank you, thank you again for sharing this with all of us!!!
I’m so glad you liked them and so sorry about your coconut intolerance. That’s such a bummer! Hmm… I haven’t tested liquid sweeteners in this recipe yet. In general, you’d use 1/2 the amount of liquid sweetener, but I’m not sure for this if other adjustments would need to be made. For granulated sweeteners, raw cane sugar (turbinado), white or brown sugars would work, as would maple sugar (which is paleo friendly, but somewhat tricky to find). If you give them a go with 1/2 the amount of syrup or honey, I’d LOVE to know how they turn out!
Followed recipe but used baking powder. Very tasty! Nice top “crust”. Even better cold. Will make again. Only downside was dirtying up 3 bowls!
I LOVE them cold! So glad I’m not alone!
I substituted coconut flour because I could not find almond flour. The macros per brownie are
Cals 137.5
Fat 8g
Carbs 16g
Protein <1
Honestly! Fantastic. I made these for my sons 10th birthday. I subbed cashew flour for almond flour (baking powder not soda) as I can get the flour diner in my Vitamix than I can with almonds and they were perfect! Everyone loved thenm, thank you SO much!!!
Wow! That’s so great! I’m glad to hear that. I’ll have to try them with cashew flour next time!
Can I use coconut flour instead of almond flour? I can’t wait to use this recipe for a valentines party in a few weeks!
Kathryn – I wouldn’t. Coconut flour is NOT a 1-to-1 substitute for any other flour. It absorbs many times its own volume in liquid, so it would make REALLY dry brownies unless you adapted the recipe in other ways. I haven’t tested it for coconut flour, so I couldn’t advise you about how many more eggs, and how much more liquid, etc. you’d need to add to the recipe.
Has anyone calculated the macros for these that they could share? Thank you!
I can’t wait to try them.
So i’m new to your blog, stumbled upon it as I searched for a paleo brownies. found these!!! Ok I made these yesterday with few revisions (I didn’t have enough chocolate chips so I took that out, I baked them in muffin tins for only 12 mins, I also put baking powder, I had about 1/4 cup of chocolate chips which I melted in the microwave with coconut oil, little coffee and cardamom, drizzled that on top, OMG OMG OMG, these are soooo soooo ridiculously delicious!!!!!! me and my husb are only eating 1 per day but it’s so hard!!!! do you know much calories is in each cut/muffin?
I am going to make these again!!!! ty!
That glaze sounds delicious! I love cardamom! As for the nutrition facts, I don’t have them calculated, but I love using MyFitnessPal (the free site or app) for calculating recipes. It works great!
I’m a dessert lover who enjoys finding healthier ways to indulge in that sweet tooth. So as you can imagine, I’ve had some “Pinterest fails” over time. But it’s all worth it when you find that ONE magical recipe that becomes your “go to” when you want a less guilty cheat. This is it!!! Brownies are my favorite and these are just wonderful! Thanks for sharing and all of your comments/responses above help when wanting to tweak it just a bit. Great job on this one!
Brooke, you absolutely made my day! Thank you so much for your sweet comment! That’s exactly how I felt when I nailed down the proportions for these brownies. 🙂
Hi 🙂 Do these freeze well?
Thanks
They freeze like a DREAM! (And *might* just taste amazing straight from the freezer…I have a lot of experience with that 😉 )
My kinda gal 😃 🤗 … I just polished of a half dozen frozen prepackaged brownies reading your comments… While looking for a gf brownie recipe… Oven will be working tomorrow night…
Looking forward to the gf lemon bar recipe… Ummm yum …
Right? I need to get that nailed down stat!
So glad you liked the brownies!
This is the best brownie recipe ever- gooy, satisfying, perfect flavour balance and texture and yet with health benefits. A big thankyou from a food lover and healthy eating fan.
Oh my GOODNESS! What a sweet and wonderful comment to get today! Thank you so much! I’m so glad you enjoyed them!
I substituted GF flour for the almond flour and they turned out perfect! Amazing brownies!
Yay! So glad you loved them!
I tried it and LOVED. I was searching for a long time for a healthier brownies recipe that tastes good and chewy, your recipe turned to be perfect. Thank you for sharing. I have tried dark chocolate (85%). Wondering if 70% dark chocolate would taste better as they might be closer to the semi-sweet chocolate chips. Let me know if you have any recommendation.
Hayfa – I’m so glad you enjoyed them! I do think that 70% would be closer to the semi-sweet chocolate chips. 80% is probably just a little too dark unless you wanted to add more sugar. Have a great day!
OMG!! So good! You can’t even tell it is GF!
Used the baking powder.
Thank you for these…more please
Robin – I’m SO glad you enjoyed them!!!
Hola
Yo necesito sustituir la hatina de almendras ya que mi hijo es intolerante
Que otra harina me recomiendas ?o alguna mezcla de harinas vivo en ecuador aca no hay marcas para comprar solo hacer em casa 🙂
Saludos
Gabriela – Can you tell me what flours you have available? I might be able to help you come up with a mixture that would work as a substitute.
Thank you so much for this amazing recipe!! Insanely yummy and easy. I subbed Nikki’s coconut butter for the coconut oil. Rich, dense, gooey, best brownie and not terrible for you!
I’m SO happy to hear that! I’ll have to try it with coconut butter next time!
I just made these as I’m always looking for new paleo recipes but for some reason the middle was little and the edges raised and crisp even when I followed the instructions. Any advice on how to fix this or why this happened? They still tasted great so as a quick save I served the mess over vanilla coconut milk ice cream, but I’d really like to try them again because the flavor was fantastic. Thanks so much!
Claire – I’d love to help! Did you use baking powder or baking soda?
These are amaaaazing! I was a bit worried since my chocolate chips didn’t get “glossy” they were more grainy- still turned out great!
Heather – so glad you enjoyed them!!!
Hi Emily! Do you think half almond, half brown rice flour would still have an outcome of fudgy (not cake-like)? I want the fudgiest brownie possible! 😋
Carrie – I haven’t tested that combination, so I don’t feel confident in advising you. I LOVE the fudginess I get from all almond flour. If you do try the 50/50 combo, I’d love to know how it works out!
These were divine! I used baking powder, added 1/4 tsp of cinnamon and 2/3 cup of walnuts, and used 1/2 cup of GF all-purpose flour (Bob’s Red Mill) since I didn’t have almond flour on hand. They came out fudgy and delicious – and were a big hit! Thanks!
So glad you enjoyed them! I love the idea of adding cinnamon! I’ll try that next time!
Would like to try these, but need the nutrition value of them, since my husband and I are on a paleo/low carb diet.
Thanks, They Sound good!
Linda
Linda – I don’t have nutrition software on my site yet (coming soon!) so you’d need to plug the ingredients into a free online calculator, like My Fitness Pal (the app or site). Hope you enjoy them as much as we do!
I’ll be making these tonight – have been looking for a new gluten free brownie recipe that is fudgier
Question for you- my boyfriend will likely input these into his fitness pal, I’m sure I could do each ingredient one by one but any idea what the calories for one brownie would be?
Elizabeth – I’m so sorry! I don’t have the nutrition facts on hand. I usually use My Fitness Pal when I calculate them, too. I’m hoping to have nutrition facts on my site soon!
I’m trying healthier versions of recipes and I haven’t baked with coconut oil before. So I have a silly question…when you use coconut oil in your recipe, is it solid or melted?
Liz – Thanks for your patience in waiting for a reply (we just got back into town from vacation)! In this recipe, you’ll measure it when it’s solid or soft, then melt it with the chocolate chips. 🙂
(And that’s not a silly question at all! Some recipes call for it to be melted, and others call for it to be softened/solid)
These were delicious! I used butter, baking powder, half coconut sugar and half regular sugar.
I’m so glad to hear that Barbara! Thank you for your comment!
This recipe looks fab. One question: could you kindly tell me how much the 2/3 cup of choccie chips weigh (in grams if possible, though I can convert from ounces if needed). I’m not in the USA so have bars of dark choc which I’ll weigh out as needed.
Many thanks!
Absolutely! 2/3 cup is 4oz, which is about 115 grams. Hope that helps!
Made these and everyone reported they were fab. Used Lindt lime dark choccie, the entire amount mixed in with the almond flour. I discovered that it is easiest to cut them neatly after putting them in the fridge. Thanks for a great recipe!
Oh my HEAVENS. Lime dark chocolate sounds divine! I can’t wait to try that sometime!
One cup is 8 ounces, so 4 ounces would be 1/2 cup. To measure 2/3 cup by weight, I would suggest 5.33 ounces. I divided 8 by 3, then multiplied by 2. Am I missing something?
Sandy – For volume you’re right! 8oz = 1 cup in those instances.
However, 1 cup of chocolate chips = 6oz by weight. (I just double checked on my kitchen scale–also a 12oz bag of chocolate chips has 2 cups chocolate chips in it.)
So my math was 6 divided by 3, times 2 to calculate 2/3 of a cup of chocolate chips by weight. Make sense?
I’ll be honest I was a little hesitant to try these, while I like paleo desserts my work colleagues are not always a fan. However I made them and you can’t even tell they are Paleo. My work colleagues didn’t even notice. I will be making these again for sure. Thank you!
I’m so happy to hear that Victoria! Thank you for sharing!!!
I just popped the brownies in the oven so cannot wait to see if these brownies are perfect!😁
I hope you love them as much as we do Gilda!
Fabulous! Used butter and subbed baking powder for the soda after reading the comments. For sweetener, I used 1/3 cup Pyure and it was plenty. Best yet! Thank you!!
My daughter made these and it was the best brownies I have ever had. I have all the ingredients and I am definitely making them. Thank you!
I’m SO glad to hear that! Thank you for your comment!
I know my stevia package says cup for cup for sugar replacement.. have you had any experience with using stevia with this recipe? Trying to keep the carb count down
Heather – I wish I could help! I haven’t tried it with stevia. If you do, I’d LOVE to know how it turns out so I can share that with others in the future!
Can I use bobs red milk 1:1 baking flour. Don’t have almond flour on hand.
Sadie – Typically almond flour and GF all purpose flour aren’t interchangeable. I haven’t tried it in this recipe, but I’d LOVE to know how it turns out if you try it!
i always use Robin Hood Gluten Free Flour and they turn out delish. Every time i make them for my church cafe, they are gone in no time. Lots of compliments on this one.
Oh, I love hearing that! Thank you so much for sharing! Have a great day!
I am in love with these brownies. My whole house smells of chocolate! I used baking powder instead of soda and they are fabulous. Future ideas: peppermint extract, cinnamon on top, and remembering to spray the sides of the pan as well as the bottom. Thanks!
OK, these are GREAT. I am addicted! Thanks for sharing. Do you have an almond flour recipe for lemon bars?
Oooooh, not yet, but THAT sounds delicious! I’ll get to work! (So glad you enjoyed the brownies!)
These are AMAZING! As a Crohnie I have a hard time finding yummy baked goods that aren’t hard on my tummy! These are perfect! thanks so much for this!! Super grateful!!
I’m so glad to hear that! Wishing you well!
I’m definitely going to make these, but can you tell me what size pan works best, or what size you use? Thanks!
Yes! I use an 8×8 square baking dish. You can use any 2 quart dish you like. I’ll make a note of that in the recipe!
This is the best paleo baking recipe I’ve come across to date. The texture and flavor are spot on. I am always disappointed when baking paleo, but not this time! I had my mom make some too and she liked them a lot as well. Thanks for creating them!
What a sweet comment! I’m so glad you love them like we do!
Made them with baking powder instead of baking soda and added 1/4 tsp of Nutmeg and OH MY GOD these are the best things I’ve ever tasted!!! I have Celiacs and a dairy allergy so there are very few baked desserts that actually taste this good and don’t hurt my tummy at all! I also use dairy free chocolate chips and the coconut sugar. Cooking time is perfect, sprinkling the sea salt with 8-10 minutes left in cooking works beautifully. I think I am going to have to make another batch tomorrow… THANK YOU FOR SHARING THIS!!!!
YUM! The addition of nutmeg sounds incredible!!!
I’ve made these twice, and they are SOOOOO yummy!! My only problem is they come out of the oven with a thick crusty top, not moist, so the salt can’t stick… I have no idea why and what to do to prevent this… I just put the salt on after they’re sliced, so it falls between the cracks…
JustM – I’m glad you’re enjoying them! One thing you can do is pull them out about halfway through and add the salt on top them, then pop them back in to finish cooking. It sometimes helps the salt stick a little better to the tops. 🙂 Hope that helps!
LOVE love LOVED them!I have tried several different healthy brownie recipes and these are the BOMB!
Oh, I’m so glad to hear that! You made my day!!!
Hi there! I just made these exactly as listed. However, the sides raised up around the edge while the middle didnt rise at all. The top seemed a little crunchy while the inside wasn’t. I think it’s a win because they are much healthier, but thought the cooking was a bit weird, with the sides raising up so high. Wonder what happened?
Molly – Hm… My sides usually puff up a tiny bit, but not a lot. I wonder what happened? I’ll have to think about it!
I’m going to try it again and add baking powder as well, to make them raise more. I think it needs just a smidgen. Will let you know how it goes! I’m also going to reduce the oil to maybe 3.5 Tablespoons…will let you know! 🙂 I think this is a great base though, they are very fudgy and I dont mind the almond flour!
I hope your adjustments help! Thanks so much for your comments!
Hi! So I made these again today but instead used baking powder instead of soda and they turned out absolutely perfect! I checked a number of other brownie recipes and they all use baking powder (none of them use soda – soda spreads, powder puffs, which is what these need in a 8×8 pan). Maybe check it out, these are so perfect now! Thanks for the recipe!!!
Molly – THANK YOU for reporting back! Honestly, I’m wondering now if I made a typo. I’ll test it your way and update again!
Lower temp of oven a bit and add a couple minutes?
I tried these…. the center set up and the edges are still gooey… they didnt rise at all and its SUPER oily like soaked in oil. The only change i made was that i used bobs red mill egg replacer and no additional chocolate chips added.
They do taste really good…. i have to experiment more i guess.
Oh dear! I’m sorry that happened. I know that can be frustrating! I’m guessing the difference you’re seeing is because of the substitutions, but it sounds like maybe there was an ingredient missing or perhaps an accidental mix-up along the way. Mine have never been that oily. (Did you add the required water to the egg replacer?)
Hi Emily–I’m wondering whether you think this recipe would turn out using “flax eggs” in place of the regular eggs? I am looking for a vegan and gluten free dessert option. If you have a favorite recipe that meets these dietary needs, I’d love to hear it! Happy Friday 🙂
Megan – I haven’t tried them with a flax egg, but I’d LOVE to know how they turn out for you if you try them this way!
I made these and they were great but wouldn’t set. I used flax eggs. Everything else was the same. Not sure what happened but I ended up having to good them so long that all the edges burnt. Any other suggestions? I used baking powder instead of soda for less sodium.
Carrie – It could very well be the flax eggs and baking powder substitutions. (I haven’t made them with flax eggs, but someone else had a similar issue.) The brownies also tend to completely set as they cool, so if you kept testing them while hot, they’d probably continue to test gooey. I’m sorry that happened!
I just made these with ground chia seed eggs (3T water:1 T ground chia) and it turned out fine, not great. The batter hardly rose and made about 1/2″ thick brownies, whereas the original recipe makes a bit of a fluffier brownie. Taste-wise, about the same but I much prefer the “original recipe” posted here with the eggs. hope that helps anyone in the future!!
Thank you for chiming in with your results!
What would the serving size be? Also do you know how many carbs per serving?
Kathleen – I usually cut these into 16 squares. As for the carbs, I’m sorry I don’t have nutrition facts for each recipe yet, but you can plug this recipe into any online calculator to get a good idea. My favorite is MyFitnessPal (website or free app). You can import recipes from anywhere on the web!
So excited to make these! If I try coconut sugar, do you recommend the same amount?
I do! If you add much more or less it will mess with the texture.
These look amazing! I’m always on the lookout for a great gf brownie 🙂 Do you think Trader Joe’s almond meal would work here, or would I need actual almond flour?
Natalie – When I tried it, it did work, though the texture was a bit more grainy with the coarser grind of nuts. But it still worked for me! You may want to add an extra Tablespoon of almond meal.
Yes it does perfectly ❤️
The brownies look fabulous! And I already have all the ingredients to make them… I think I know what I’ll be doing tonight. Also, really jealous of your perfect brownie cutting skills.
Paige – Here’s my secret: I chill them first! They cut perfectly when chilled.
And…if you like to have them warm, cut brownies with a plastic knife!
Great suggestion! Thank you!
Could I use a cup for cup GF replacement flour? Thanks so much!
You *technically* can, but do know they won’t be as fudgey. They’ll puff a bit more and be a bit more cakelike. If you’re good with that, I say go for it!
Emily 🙂
I have tried many alternative gluten free healthy brownie recipes. Your recipe is unsurpassed delicious!
I like to also garnish the brownies while still cooling, with a natural chocolate glaze and atop it with halved walnuts.
Very pretty.
Can’t wait to try other “ONE LOVELY LIFE” recipes!
Cynthia Hadley
Oh my goodness. That chocolate glaze sounds amazing! I’m totally going to try that. (Thank you so much for sharing!!!)
Cynthia..whats your natural chocolate glaze…..
Best brownies ever period
Oh my GOSH! THANK YOU!!!
haven’t dug in yet, but the center of mine just sunk after i took them out of the oven! might be eating these with a spoon.
Oh dear! They do naturally settle a bit, but it sounds like they could possibly be underbaked?
If I could give this recipe 10 stars I would, in fact I’d give it 100 stars. I’m fairly new to Gluten and Dairy free eating and this brownie just saves the day ….every.single.time. it was the first gf brownie I tried and my search ends here 🙂