
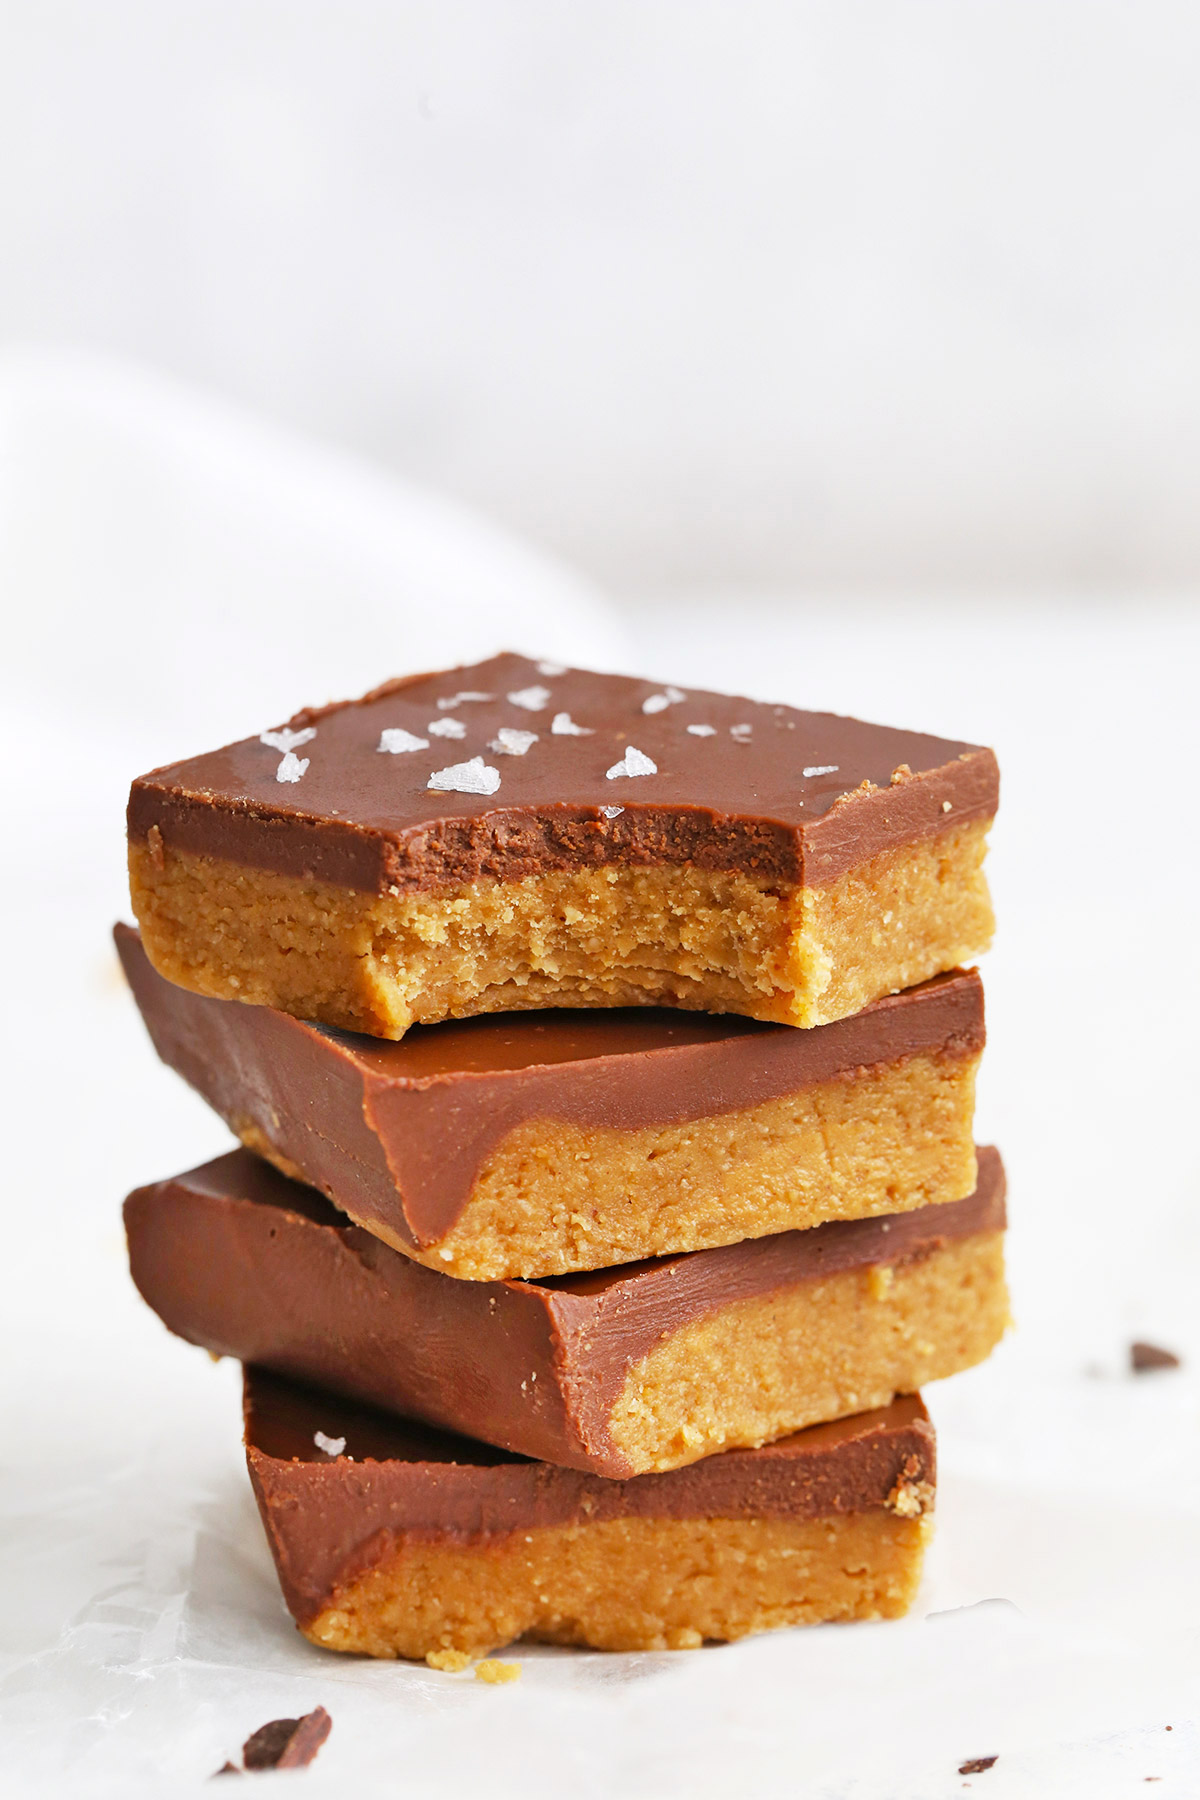
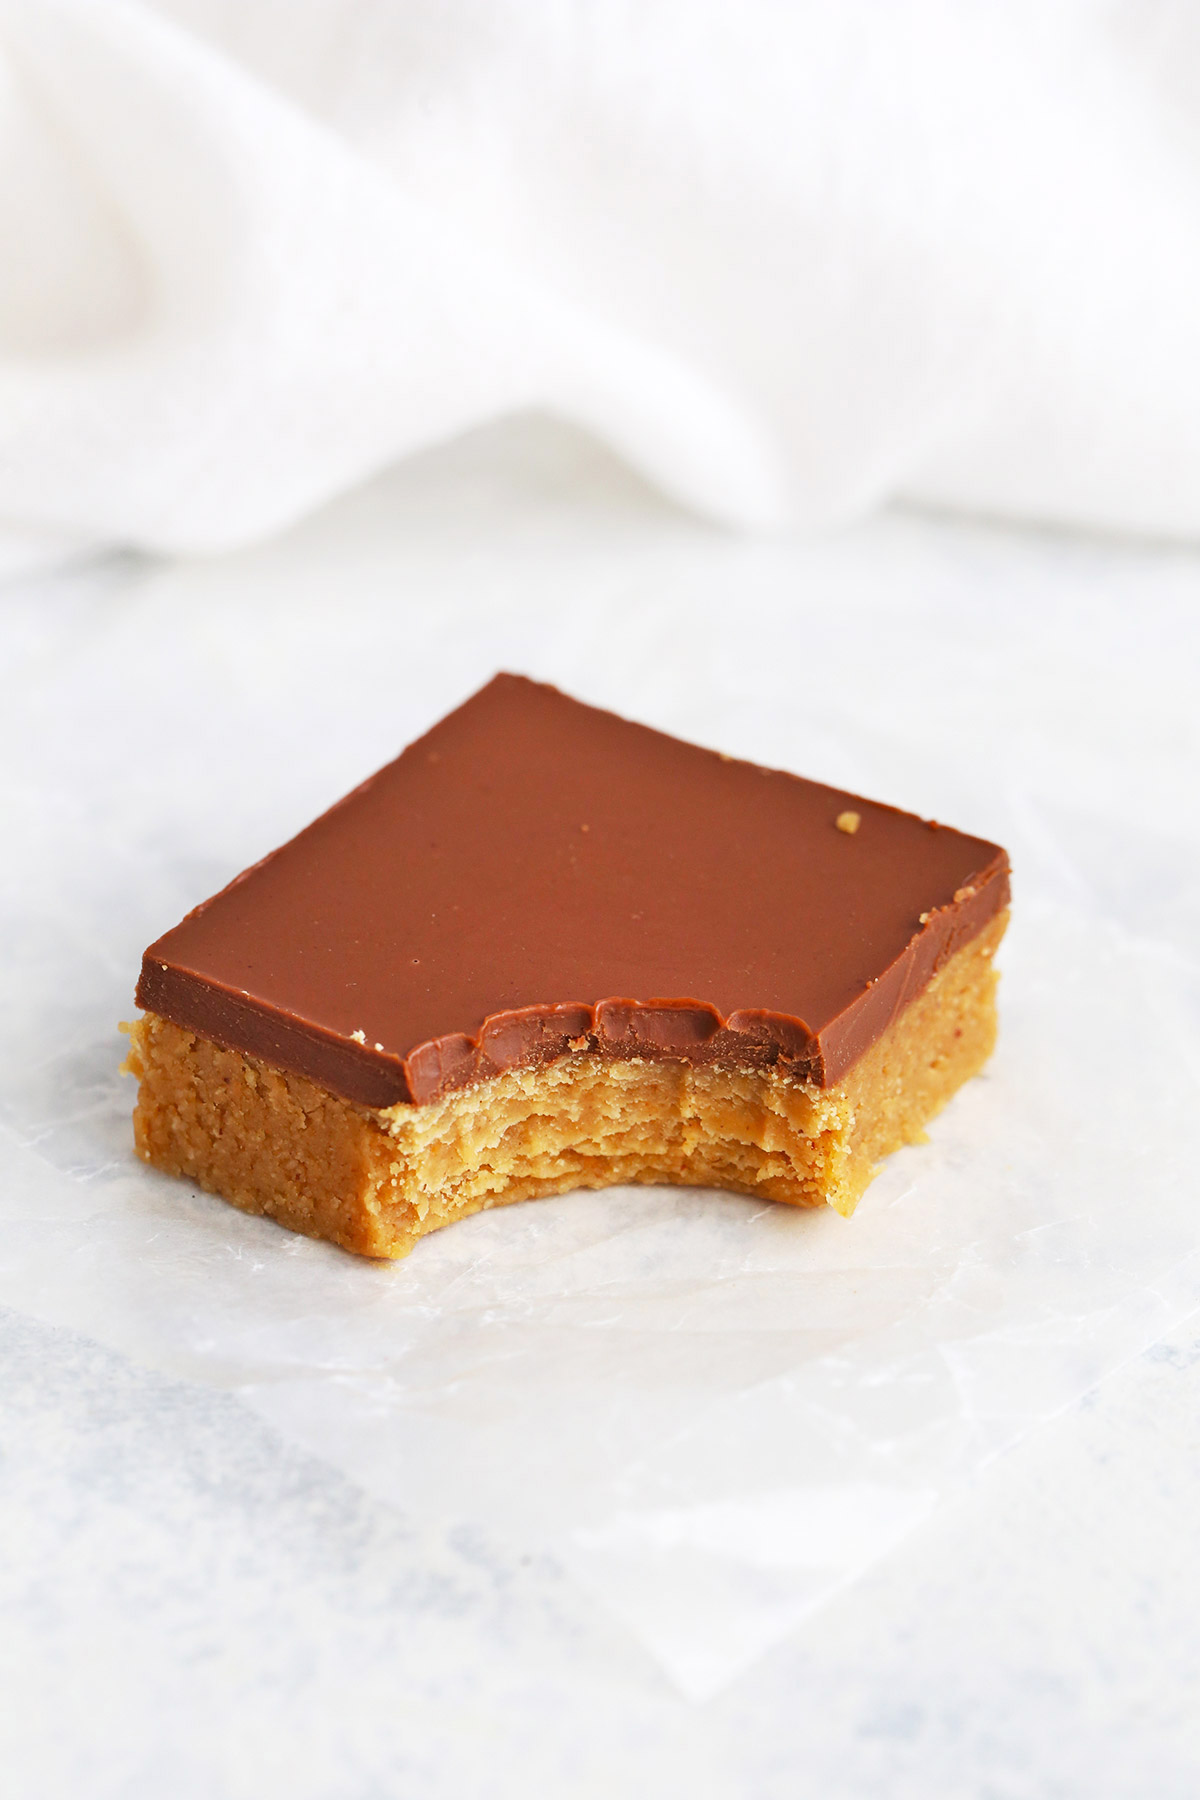
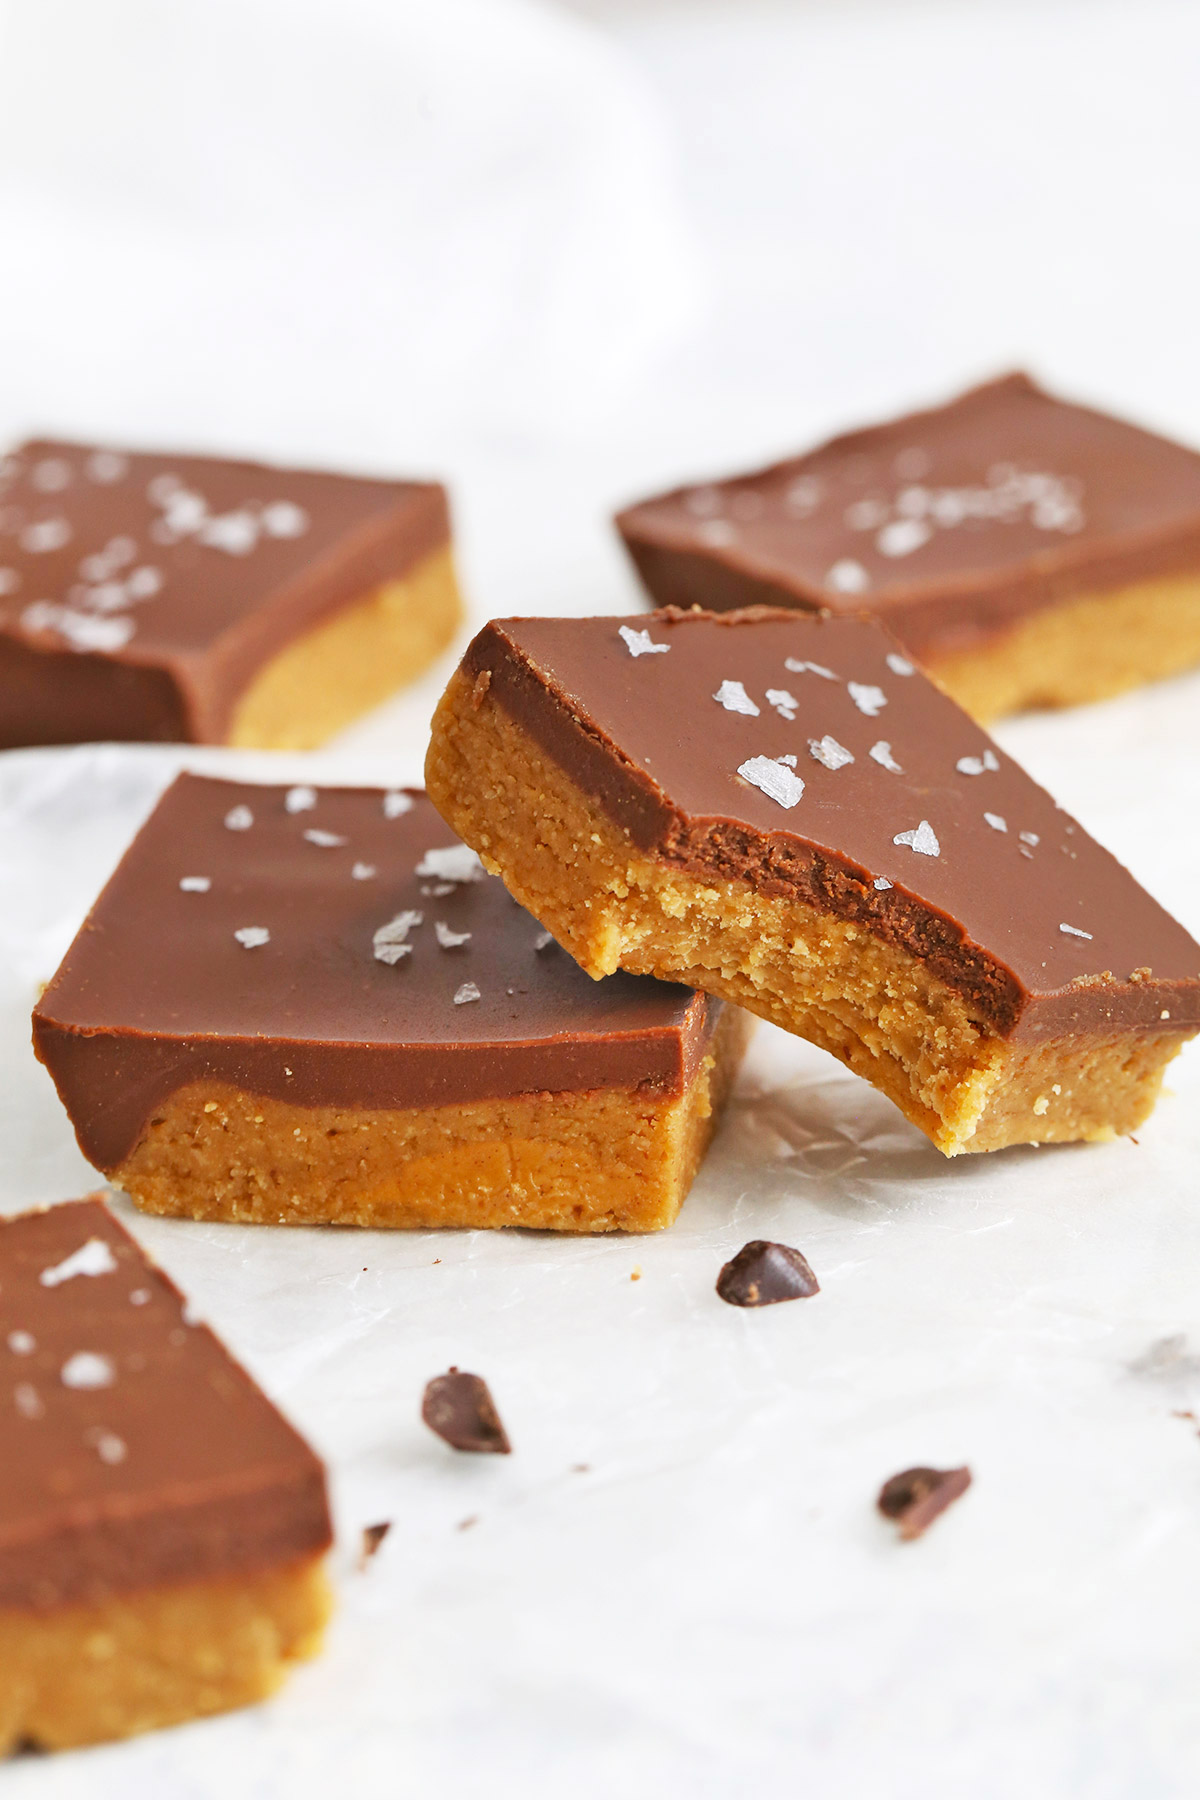
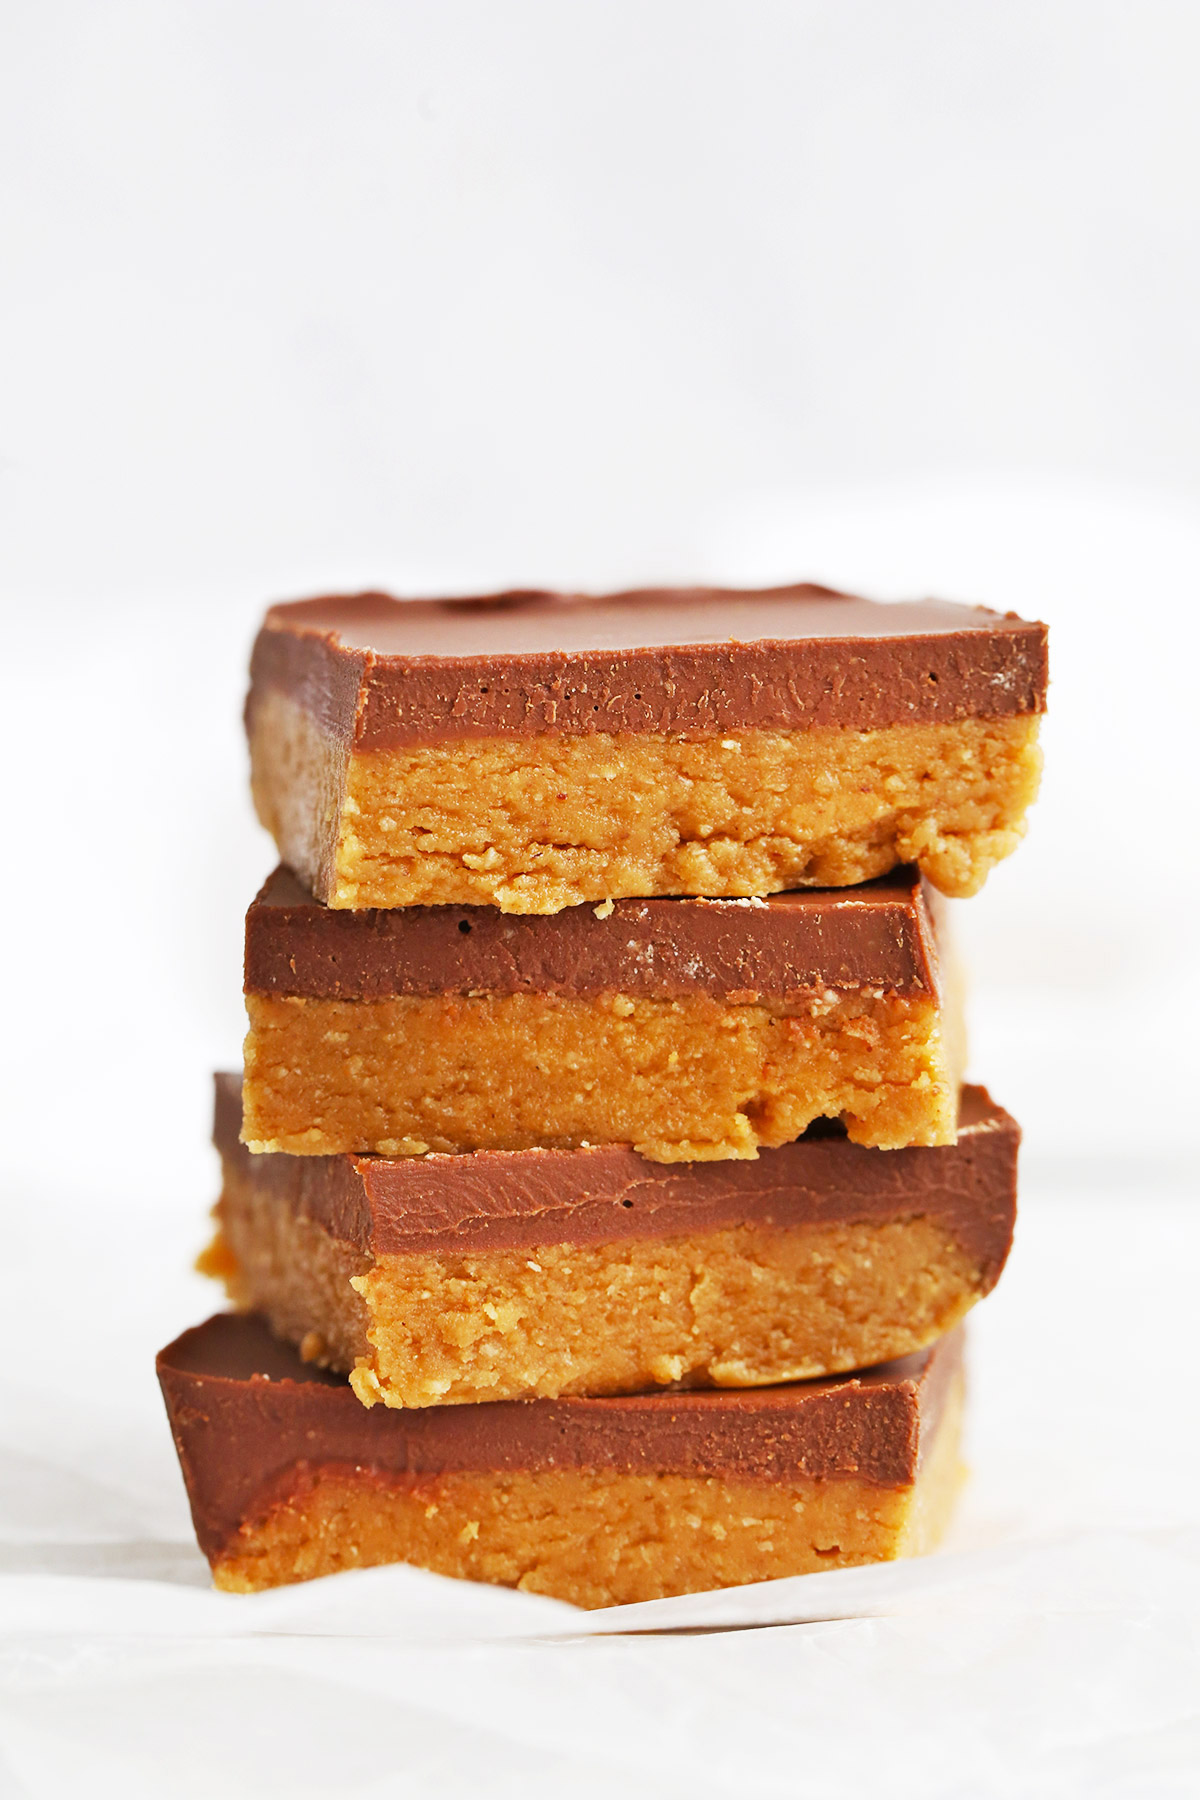
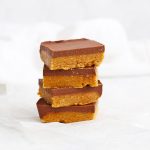
Healthy No-Bake Chocolate Peanut Butter Bars – This yummy treat tastes like peanut butter cups in bar form! (Gluten-Free, Vegan)
I moved a TON growing up (9x by the time I graduated high school), but I finished my high school years in an adorable small town in Ohio. It was (in so many ways) an idyllic small town, full of some of the NICEST people I’ve ever met, a close-knit sense of community, a single k-12 school (really!), one stoplight, and gorgeous country life I’d never experienced before.
I also wasn’t prepared for the amount of pride Ohioans take in their state and schools. Almost everywhere you turned, you could shout “O-H!” (*clap* *clap*) and someone–anyone–would call back “I-O!” (*clap* *clap*) It was the land of THE Ohio State University, Cincinnati/Skyline chili, and buckeyes–a cute little chocolate-dipped peanut butter balls that were eaten and enjoyed everywhere.
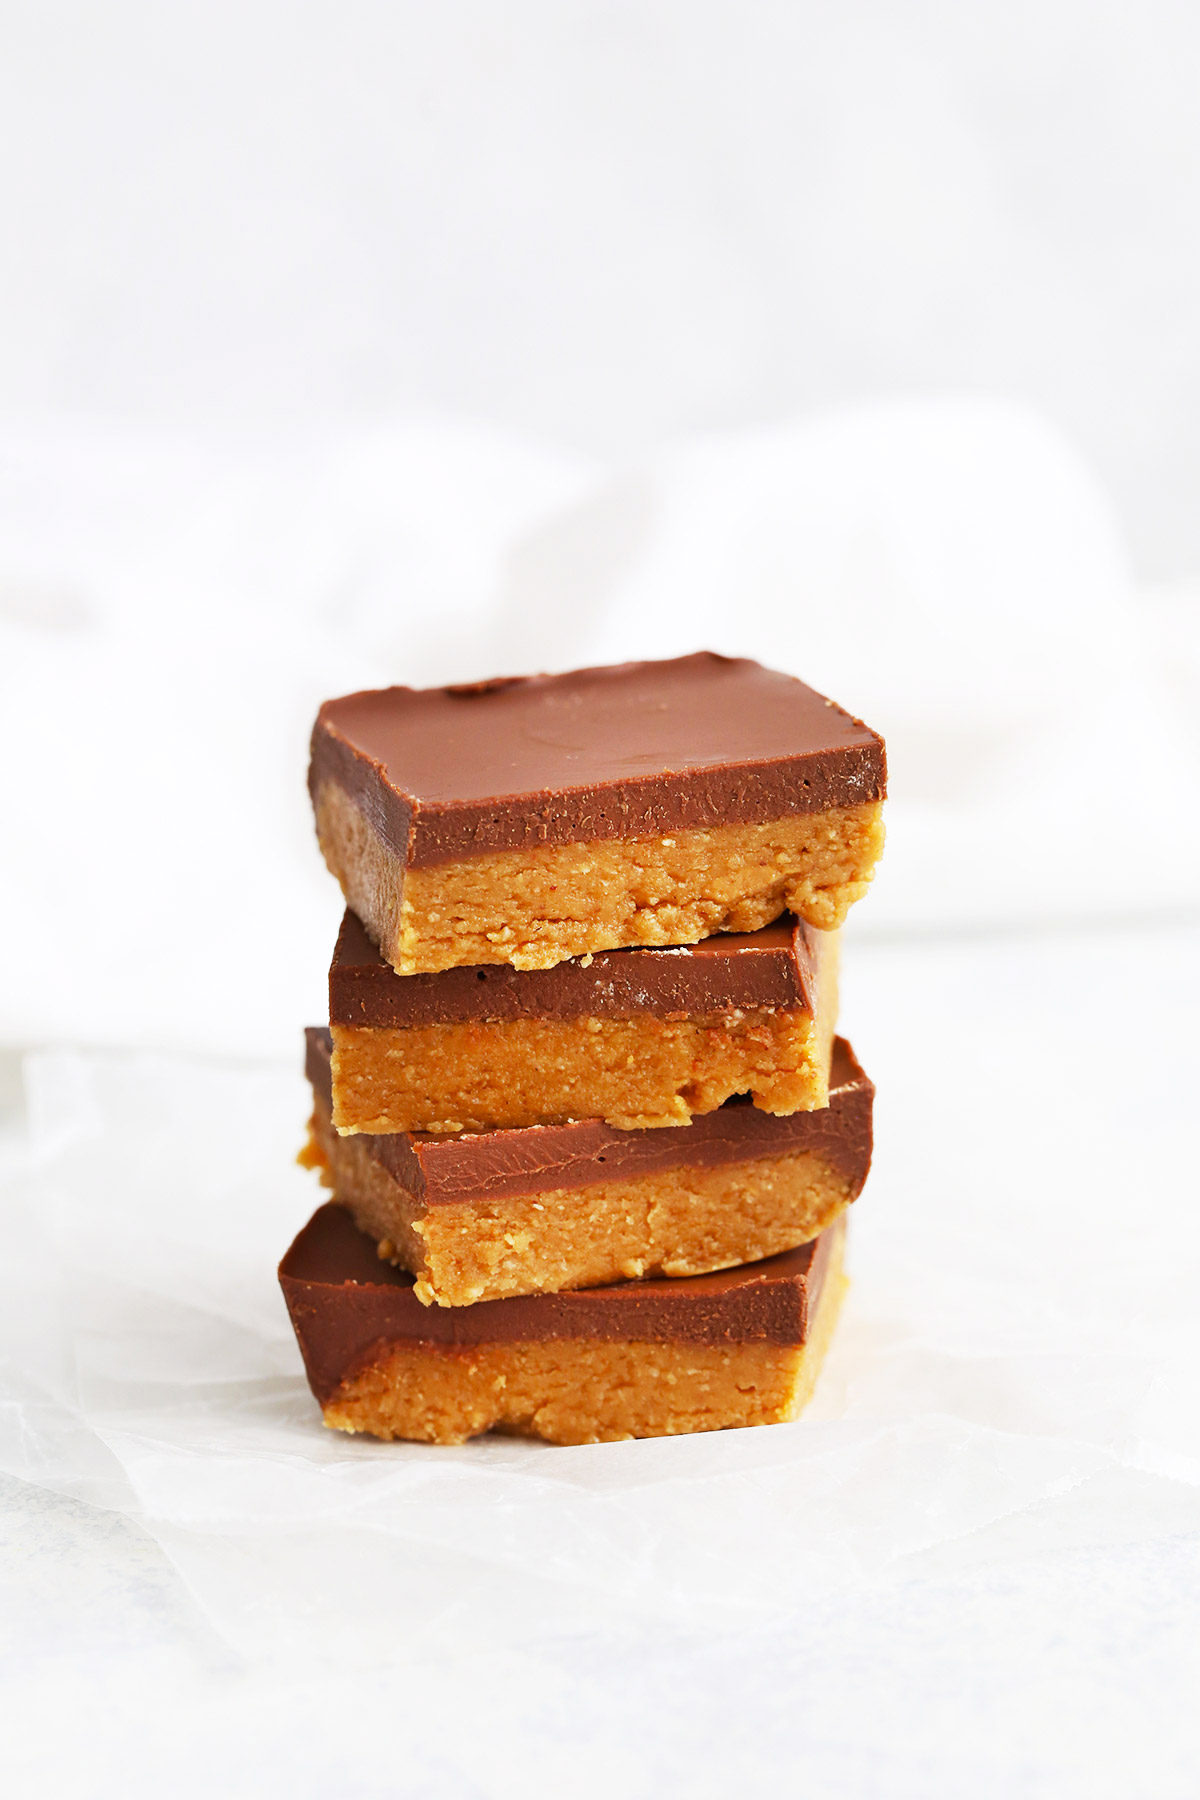
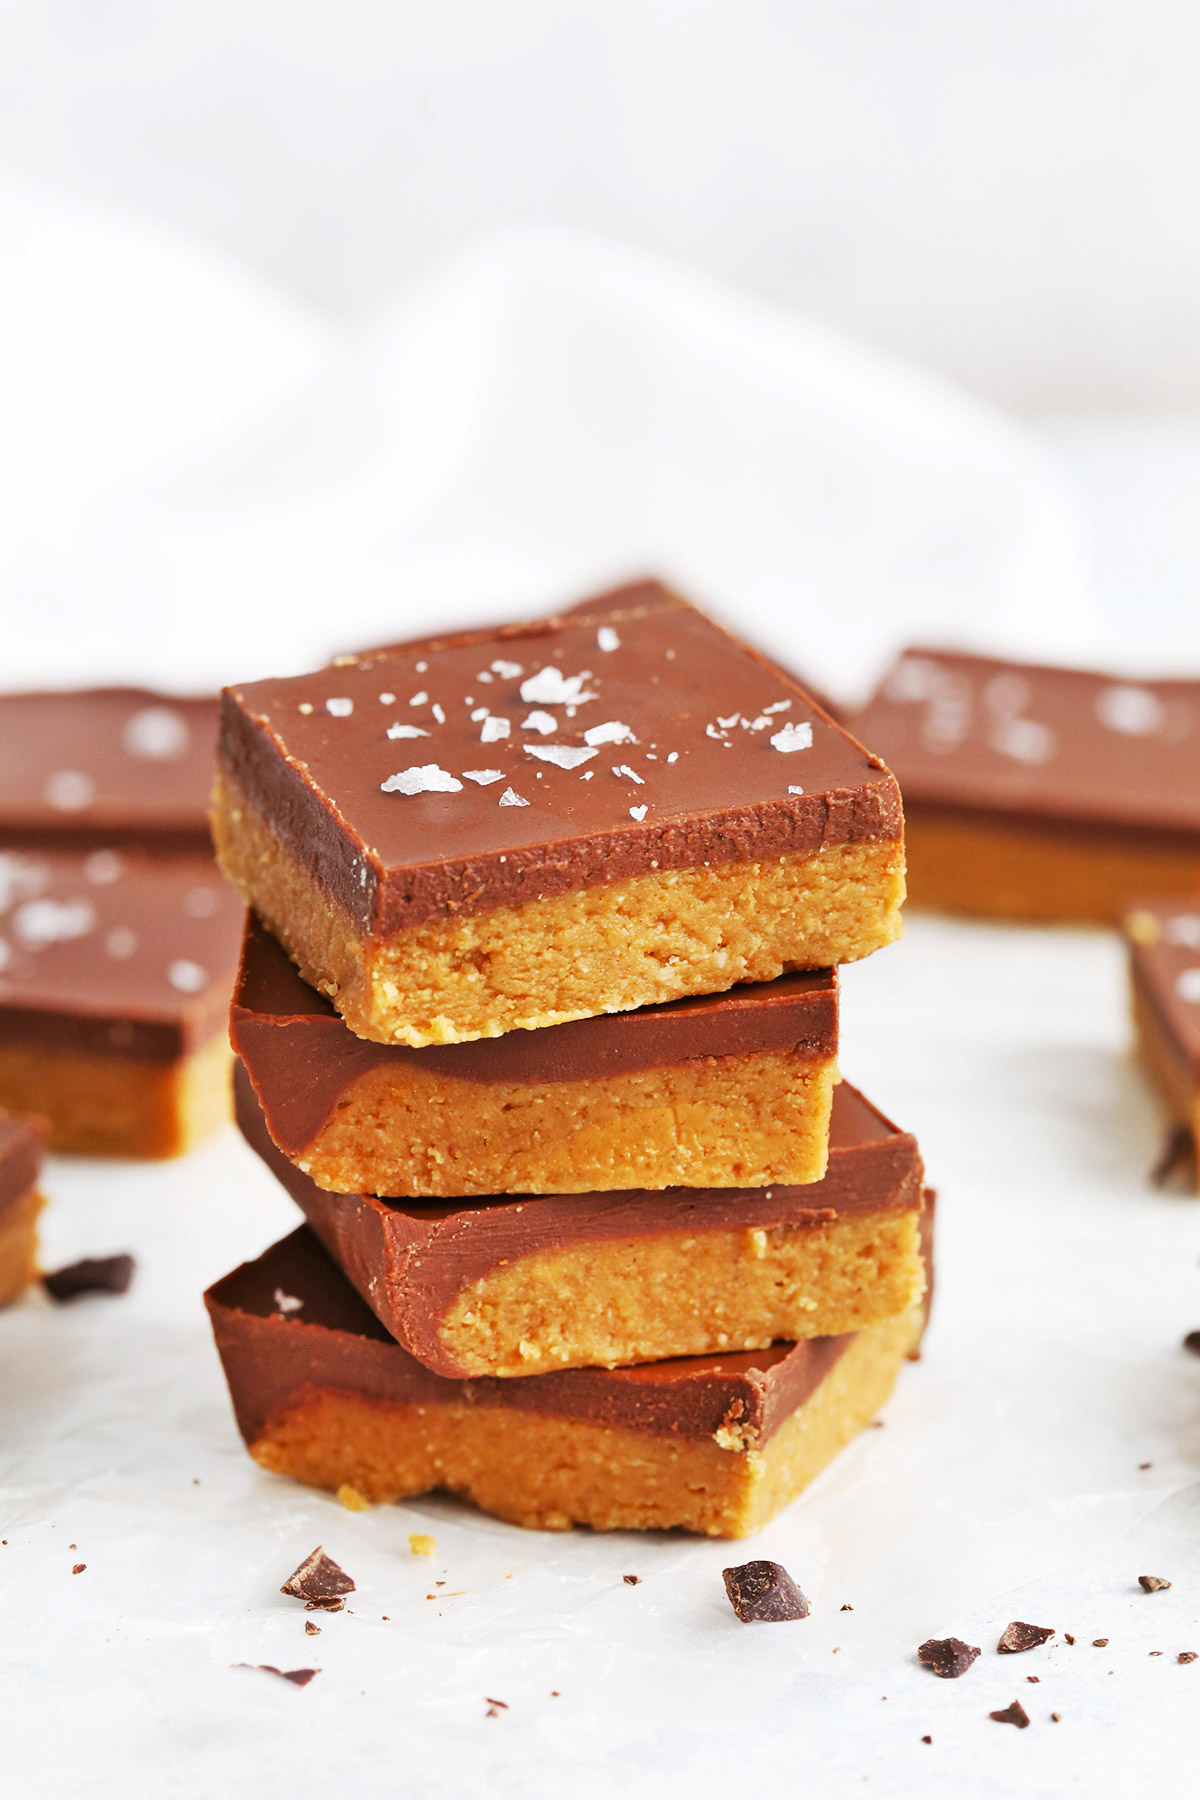
I never really picked up the OSU pride (my sincerest apologies OH friends!), but I’ll never forget the people, the community, and the FOOD. These no-bake chocolate peanut butter bars channel that nostalgic Buckeye flavor that’s impossible to forget.
With their creamy peanut butter layer and generous chocolate topping, they taste like a peanut butter cup in bar form. They’re the perfect no-bake treat to try right now! There’s no butter, no sugar, no eggs, and no baking required.
Here’s all you need to make a batch of these yummy chocolate peanut butter bars…

Gather Your Ingredients
While these peanut butter cup bars are definitely a treat, I re-worked the traditional recipe to be a bit healthier (and easier on your blood sugar). Here’s what you’ll find in the recipe:
- NATURAL PEANUT BUTTER. I recommend using natural peanut butter for this recipe. You’re looking for peanut butter with JUST peanuts or just peanuts + salt. It’ll have a more runny consistency and set up beautifully when combined with the other ingredients.
- OAT FLOUR OR ALMOND FLOUR. Then, to help these bars set up, I add a bit of oat flour (it’s easy to make your own from oats in a blender!) or almond flour. Either works great, so use what you have! Note: I don’t recommend using white or wheat flour for this recipe.
- PURE MAPLE SYRUP. Instead of the powdered or white sugar you often find in chocolate peanut butter bars, mine are sweetened with a little pure maple syrup. You can sub honey or agave if you prefer!
- VANILLA EXTRACT. Vanilla is kind of my secret ingredient here. It ties all that chocolate-peanut butter flavor together BEAUTIFULLY.
- SALT. Then, I love adding a *tiny* pinch of salt to round things out. It won’t make your chocolate peanut butter bars taste salty, it’ll just keep them from being too sweet. (You’ll notice if you forget it!)
- CHOCOLATE CHIPS. For the chocolate layer, I add a blend of chocolate chips + a little more peanut butter. It’s SO YUMMY!
Ideas For Topping & Decorating These Bars
- ADD SPRINKLES! What isn’t more fun with sprinkles? A few confetti sprinkles (THESE and THESE are dye-free) make these extra cute. (Or change them up based on the season!)
- SHAVED CHOCOLATE. I’ll never say no to more chocolate! Try adding some chopped or shaved chocolate on top for a cute effect.
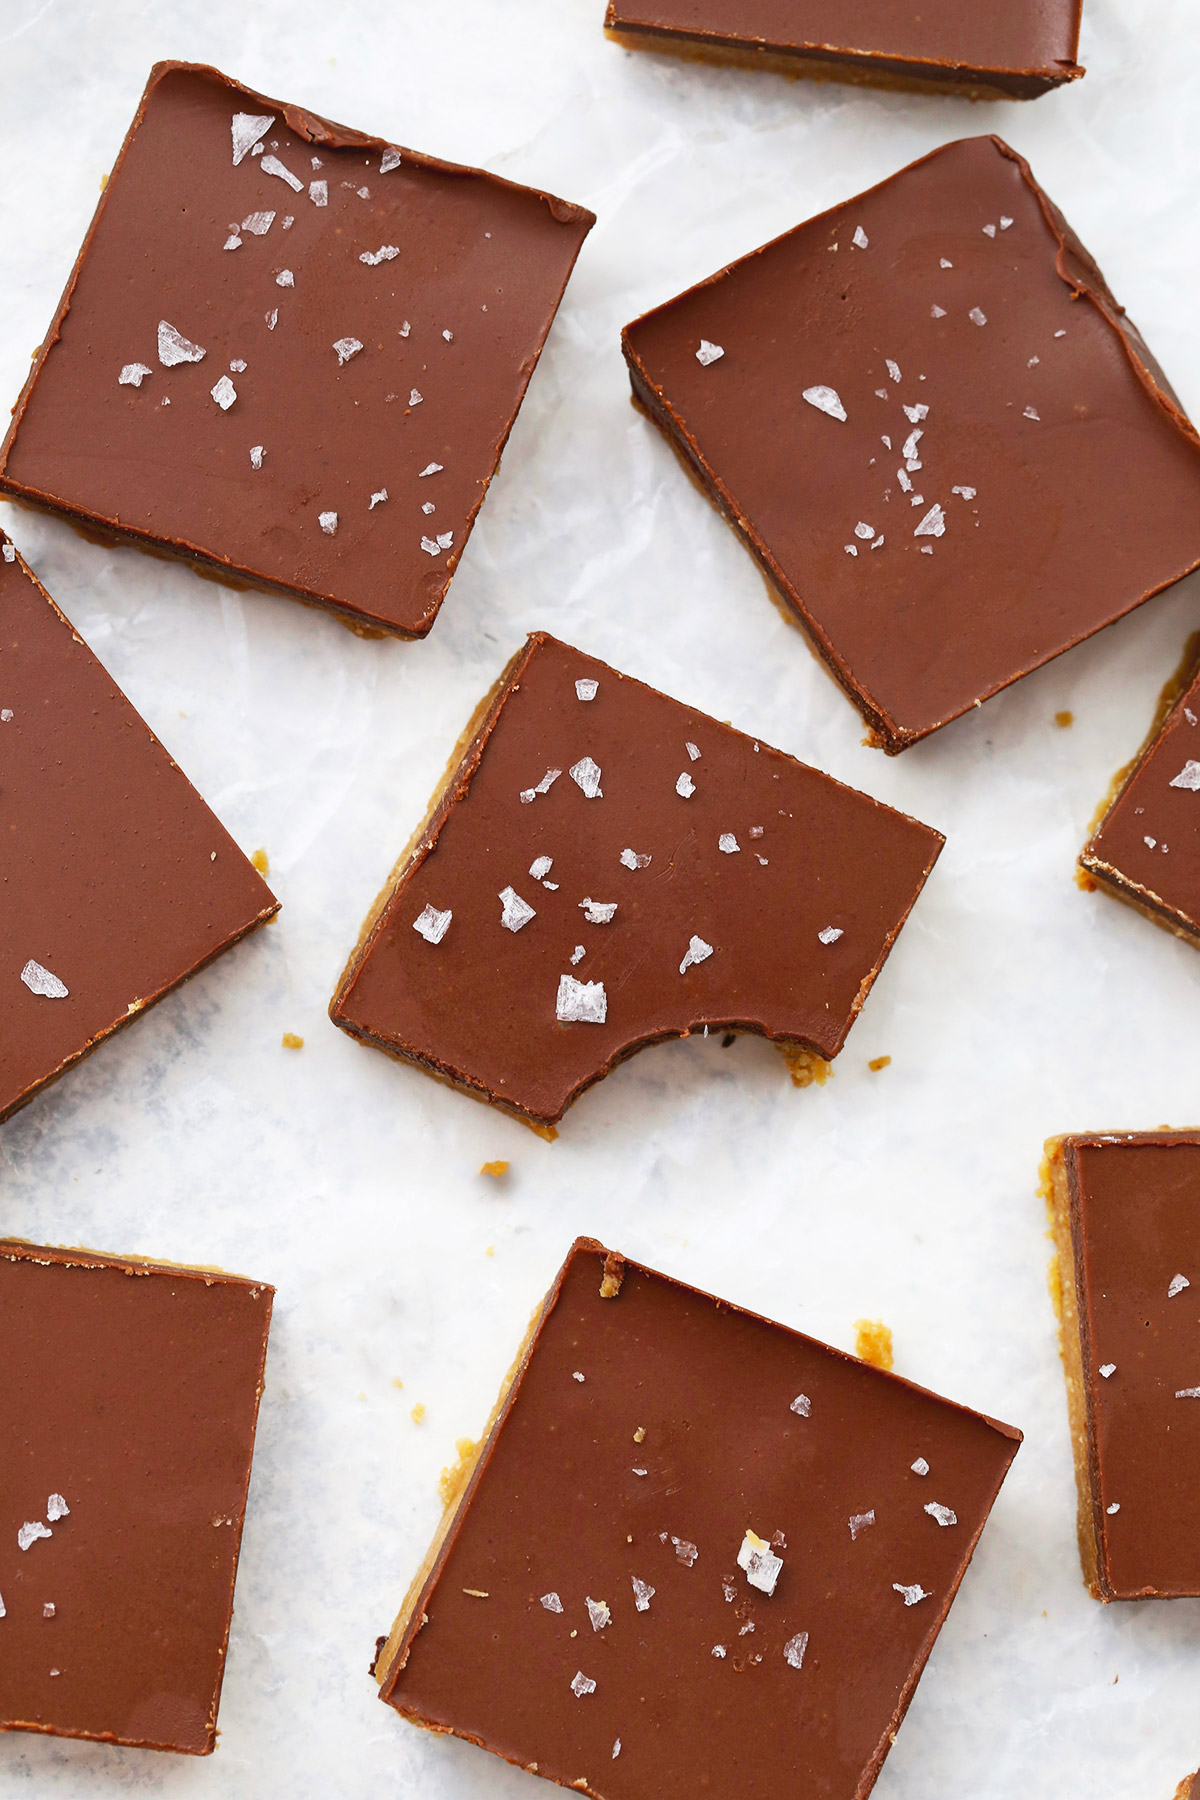
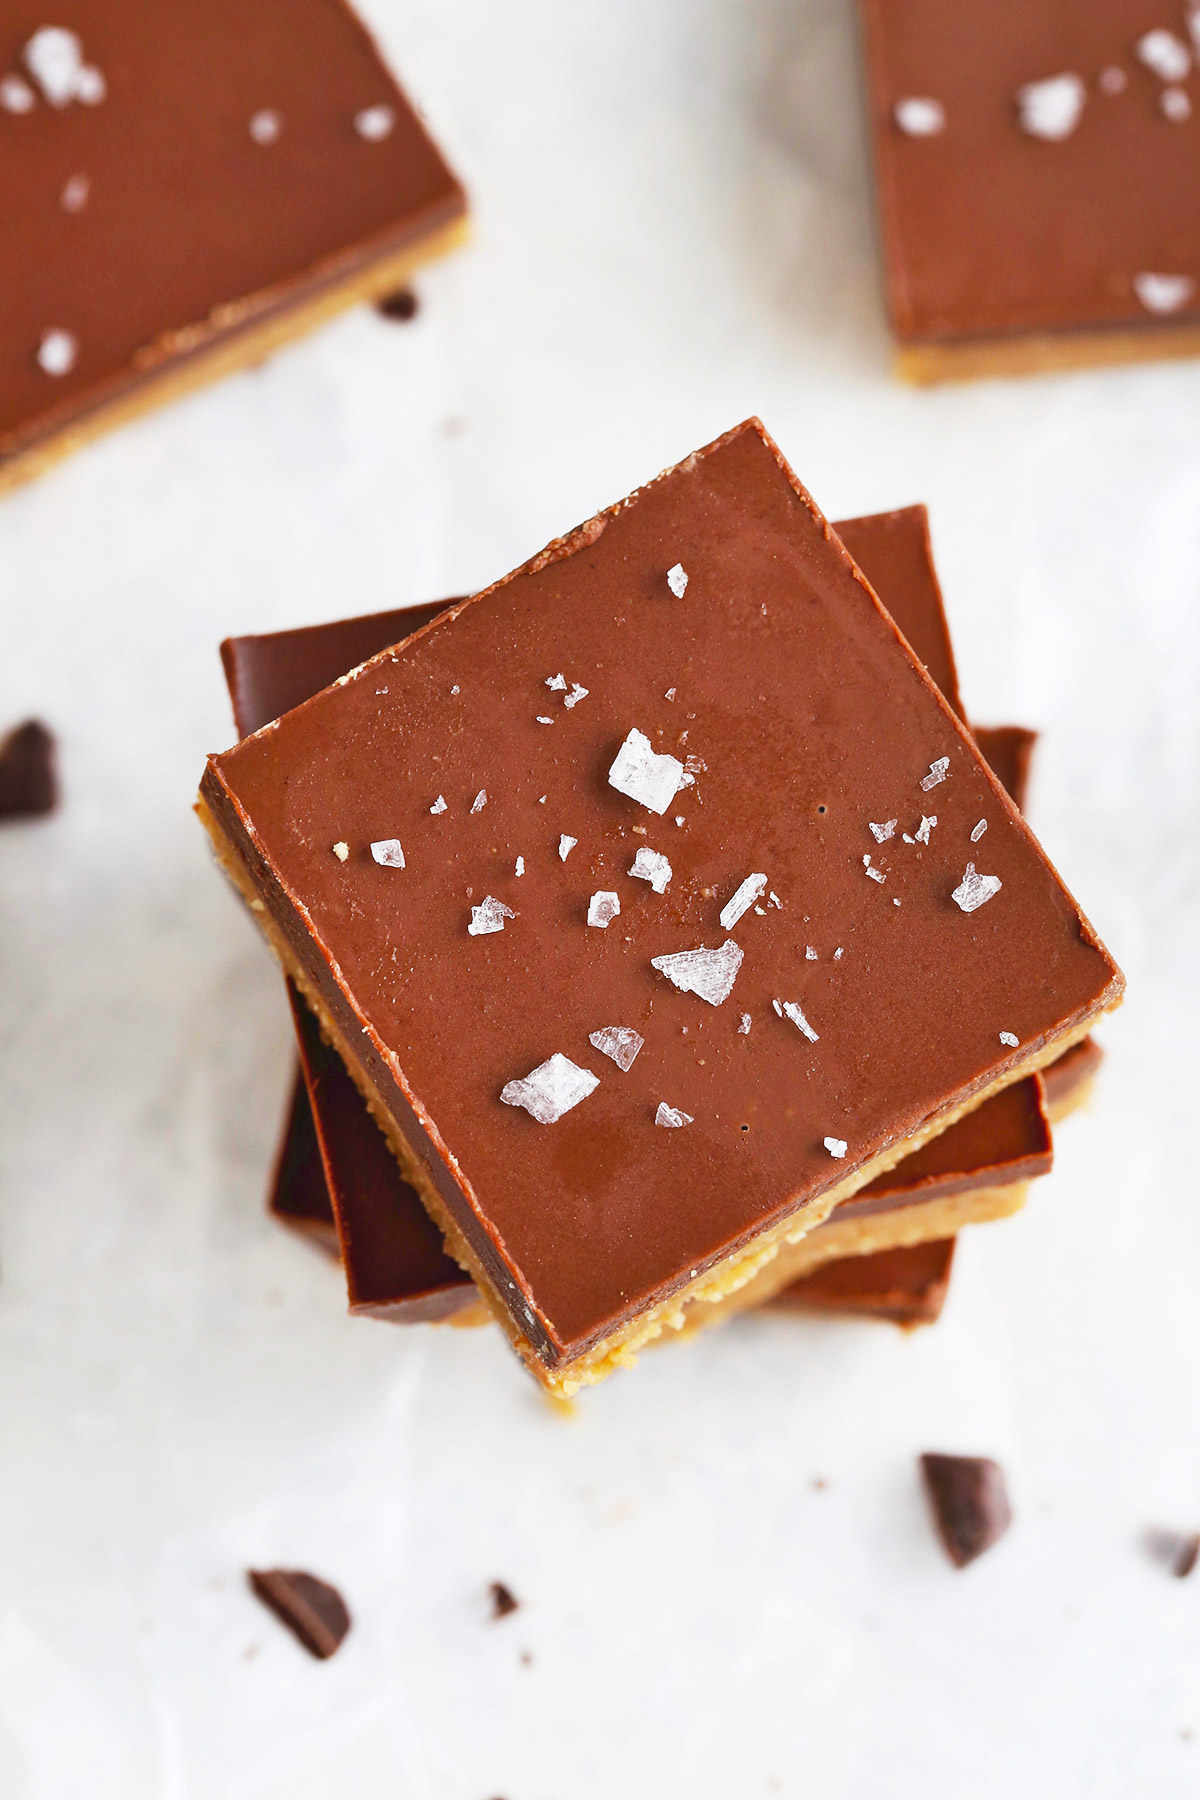
- COARSE SEA SALT FLAKES. My personal favorite. I love a tiny sprinkle of coarse flaked sea salt on top right before serving.
- DRIZZLE THEM WITH WHITE CHOCOLATE. Or, you can add a small drizzle of white chocolate over the chocolate layer and use a toothpick to create a marble design.
FAQ+ Tips For The Best Healthy Chocolate Peanut Butter Bars
CH-CH-CH-CHILL THEM! Before slicing the bars, it’s important to make sure you chill them. You’ll want to let them set at least 40-60 minutes in the fridge. You can try to hurry things along with 25-30 minutes in the freezer instead, but I recommend the fridge route if you have time.
GLUTEN-FREE? READ THIS. You’ll want to use certified oat flour or make your own (It’s easy!). Oats themselves don’t contain wheat gluten, but they’re often farmed or processed in ways that cause cross-contamination.
OUR FAVORITE DAIRY-FREE CHOCOLATE CHIPS. If you’re vegan or avoid dairy, you’ll want to use dairy-free chocolate chips. Our favorites are THESE and THESE. They both taste awesome and are allergy-friendly!
CAN I USE ANOTHER KIND OF NUT OR SEED BUTTER? I’ve only tested them with peanut butter, but I don’t see a reason that other nut or seed butters wouldn’t work. I bet almond butter or cashew butter would be delicious!
CAN I DOUBLE THIS TO MAKE A 9×13″ PAN? Yep! If you’d prefer to make a 9×13″ pan of chocolate peanut butter bars, you’ll just double the recipe. (Pro tip: tap or click the “2x” button by the ingredients list in the recipe card to easily double the amounts!)
HOW TO STORE LEFTOVER CHOCOLATE PEANUT BUTTER BARS. I recommend cutting the chocolate peanut butter bars into squares and storing covered or in an airtight container in the fridge for 4-5 days or in the freezer for up to 2 months. (They’re actually REALLY good that way!)
LOVE CHOCOLATE + PEANUT BUTTER? I BET YOU’D LIKE…
- Healthy Snickers Shake
- Chunky Monkey Overnight Oats
- Healthy No-Bake Cookies
- Peanut Butter Banana Muffins
- No-Bake Cookie Energy Bites
- Peanut Butter Crunch Brownies
No Bake Chocolate Peanut Butter Bars (Gluten Free + Vegan)
- Total Time: About 30 minutes
- Yield: 16 squares 1x
- Diet: Gluten Free
Description
Healthy No-Bake Chocolate Peanut Butter Bars – This yummy treat tastes like peanut butter cups in bar form! (Gluten-Free, Vegan)
Ingredients
FOR THE PEANUT BUTTER LAYER:
- 1 cup Natural Peanut Butter (Just peanuts or peanuts + salt)
- 3/4 cup Oat Flour (gluten free, if needed) or 1 cup almond flour
- 1/3 cup Pure Maple Syrup
- 1/2 tsp. Vanilla Extract
- Pinch Salt (about 1/8 tsp.)
FOR CHOCOLATE LAYER:
- 1 cup chocolate chips (dairy free, if needed)
- 1/2 cup natural peanut butter (smooth works best for this)
To Top (Optional): flaky sea salt or shaved chocolate.
Instructions
PREPARE THE PEANUT BUTTER LAYER:
- Line an 8×8″ or 9×9″ square pan* with parchment paper. I prefer to leave excess parchment hanging over the edge to make it easier to smooth out the peanut butter layer later.
- In the bowl of a food processor (or in a bowl with a spoon!), combine peanut butter, oat or almond flour, maple syrup, vanilla, and salt.
- Puree or mix together until smooth and cohesive (no lumps should remain)
- Transfer the peanut butter mixture to prepared baking dish and smooth out the layer with a spatula, your fingertips, or by folding the excess parchment hanging over the sides of the pan over the peanut butter layer and pressing down the and smoothing that way (see video for example)
PREPARE THE CHOCOLATE LAYER:
- In a small saucepan, combine chocolate chips and peanut butter.
- Stir with a spatula over low heat until the chocolate and peanut butter have melted together and the mixture is smooth. (Alternatively, you can microwave the chocolate and peanut butter together in a microwave safe bowl 30 seconds at a time, stirring in between until the chocolate is smooth and evenly melted.)
ASSEMBLE THE BARS:
- Pour melted chocolate mixture over the peanut butter layer in the pan and smooth gently with a spatula until the peanut butter layer is evenly coated.(For a super-smooth top, gently shake the pan side to side to even out the chocolate.)
- Refrigerate the bars about 1 hour to set and firm up. (or put them in the freezer to speed things up!)
- Remove from the refrigerator and let sit about 10 minutes before slicing into even squares. If desired, sprinkle with coarse sea salt right before serving.
- Store leftover chocolate peanut butter bars covered or in an airtight container in the refrigerator up to 1 week or in the freezer up to 2 months.
Notes
*Note: a 9×9″ pan will yield thinner bars than an 8×8″ pan
- Prep Time: 20 minutes
- Cook Time: 8 minutes
- Category: Dessert
- Method: No-Bake
- Cuisine: American
Nutrition
- Serving Size: 1 Square (2×2")
- Calories: 129
- Sugar: 11.1 g
- Sodium: 20.8 mg
- Fat: 6 g
- Carbohydrates: 16.9 g
- Fiber: 1.4 g
- Protein: 1.6 g
- Cholesterol: 0 mg
I love this recipe: simple, no-bake, vegan and gluten free. They came out really delish: I only subbed the maple syrup for agave – 1:1. I cannot wait for my Honey to come home and try one!
I only have sugar free chocolate chips. How much coconut sugar/maple syrup/honey should I add the frosting?
Are the chocolate chips sugar-free or unsweetened? If they’re sugar-free (or something like stevia-sweetened), there’s no need to sweeten any further since they’ll have used an alternative sweetener.
I’ve never made these bars with unsweetened chocolate before, so you’ll likely need to play with the amounts if your chocolate chips are unsweetened, pure cacao. If you’re using unsweetened chocolate, you’ll likely need to add a little coconut oil, and then try sweetening to taste. I recommend maple syrup, since it’ll blend in the easiest. One caveat: If you add liquid (like honey or syrup) to plain, unsweetened chocolate without adding added fat (like coconut oil), the chocolate can seize and go grainy. If you’re not a confident baker, I recommend waiting until you can pick up some regular chocolate chips.
If I wanted to use •just• chocolate for the top layer (without melting it with peanut butter) would I have to replace the fat? Maybe with coconut oil? Or could I just melt the chocolate and put it on top of the peanut butter base?
Sara – The texture will be different if you use just chocolate or chocolate and coconut oil–it’ll turn into a hard topping that will likely crack when you slice it or bite into it. Adding the peanut butter to the chocolate chips helps soften the chocolate so that it doesn’t break when you bite into it.
You’d also lose 1/3 of the volume of the chocolate coating (so it’ll be much thinner) unless you replace the peanut butter with something. If you like, you can try the ganache topping that I use on my mint brownies. It’ll stay soft when you bite into it!
Hi Emily!!
I’ve been making these PB buckeye bars for the past few months, but I’m really excited to try your recipe out! One question — I’ll be using the 3x instructions and recipe, but I noticed the Almond Flour (1 Cup) doesn’t change, is that intentional?
Can’t wait to try these out!
Mo
Mo – Thanks for catching that! The multiplier works for the first item listed in each bullet point, you I’m SO sorry you’ll have to manually triple the almond flour from 1 cup to 3 cups. (Hopefully I’ll be able to find a workaround for that soon. Thank you for your patience in the meantime!)
I only have crunchy natural PB and JIF creamy PB on hand. I am leaning towards using JIF. Have you attempted these with non organic PB? Love your site!
Great question! If you use the JIF, you’ll probably be ok, you just may want to use a little less oat flour if it’s seeming stiff. Hope you LOVE them!
Hi I’ll be using almond flour – is it a packed cup of almond flour I should use
Jennifer – I’d recommend packing it 🙂
Thanks – i thought that – they are in fridge cooling 😋😋
I just found you on the internet and I am VERY EXCITED about this recipe. Thanks so much!
Oh good! I hope it’s a huge hit at your house!
I seriously can’t wait to make these! YUM.
Oh good! I hope they’re a huge hit! My kids LOVE them!