


Let’s make the BEST glazed carrots. This easy seasoned carrots recipe has a sticky sweet glaze you’ll love. Perfect for weeknights AND Thanksgiving! (Naturally gluten-free)
One of my favorite ways to add a little elegance to the dinner table is with upgraded side dishes. A great side dish doesn’t have to be tricky to feel elevated! A little bit of care goes a long way–a simple seasoning, special preparation, glaze or sauce can make all the difference.
That’s definitely true in our go-to glazed carrots recipe!
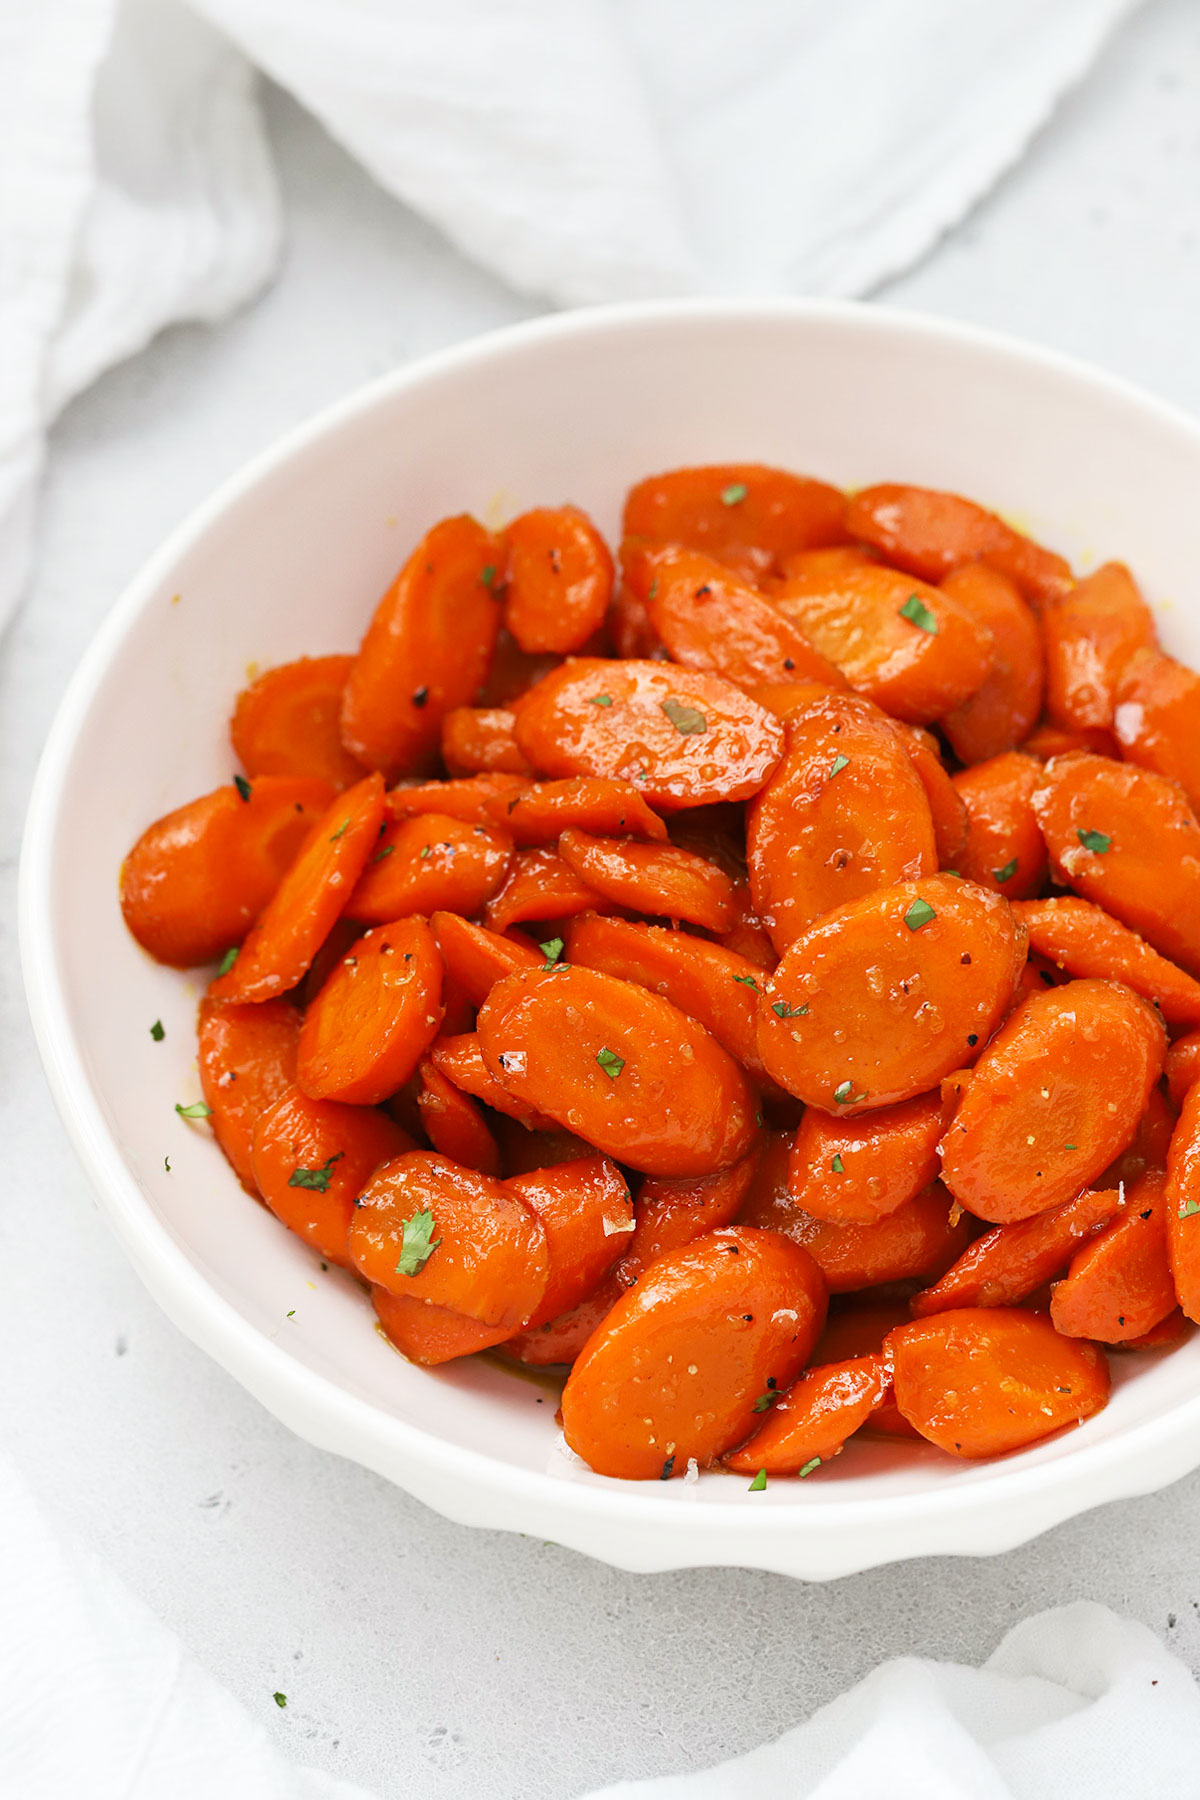
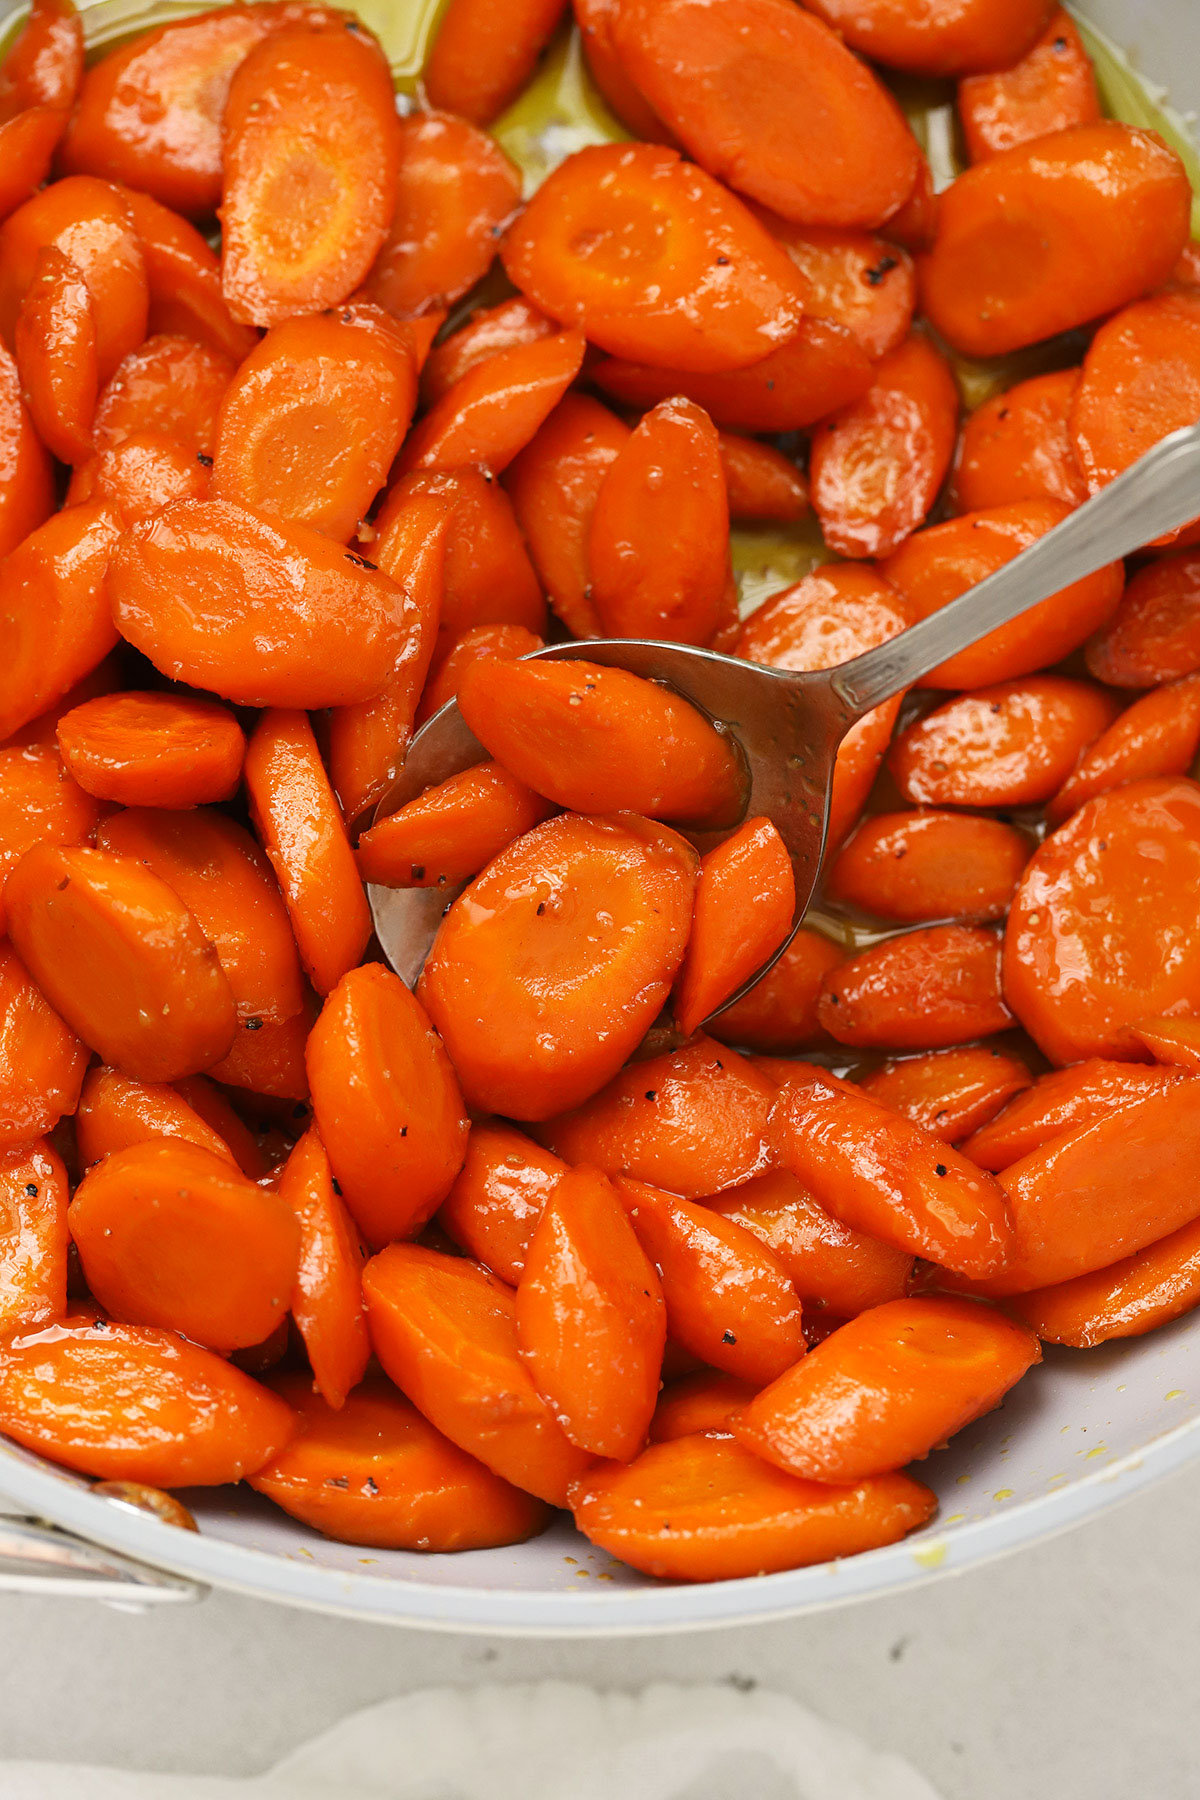
These delicious sauteed carrots have a sweet, sticky glaze that not only looks gorgeous, but tastes amazing. This easy glazed carrot recipe is simple enough for busy weeknights to go with staples like chicken, meatloaf, or salmon, but also make an elegant, easy side dish for a holiday dinner, Thanksgiving, Easter dinner, or special occasion.
With their tender texture, gentle caramelization, and extra layers of flavor in every bite, they’re a delicious side dish recipe you won’t want to miss! And you only need a handful of ingredients to get started.
Here’s what you need to make our glazed, seasoned carrots recipe…
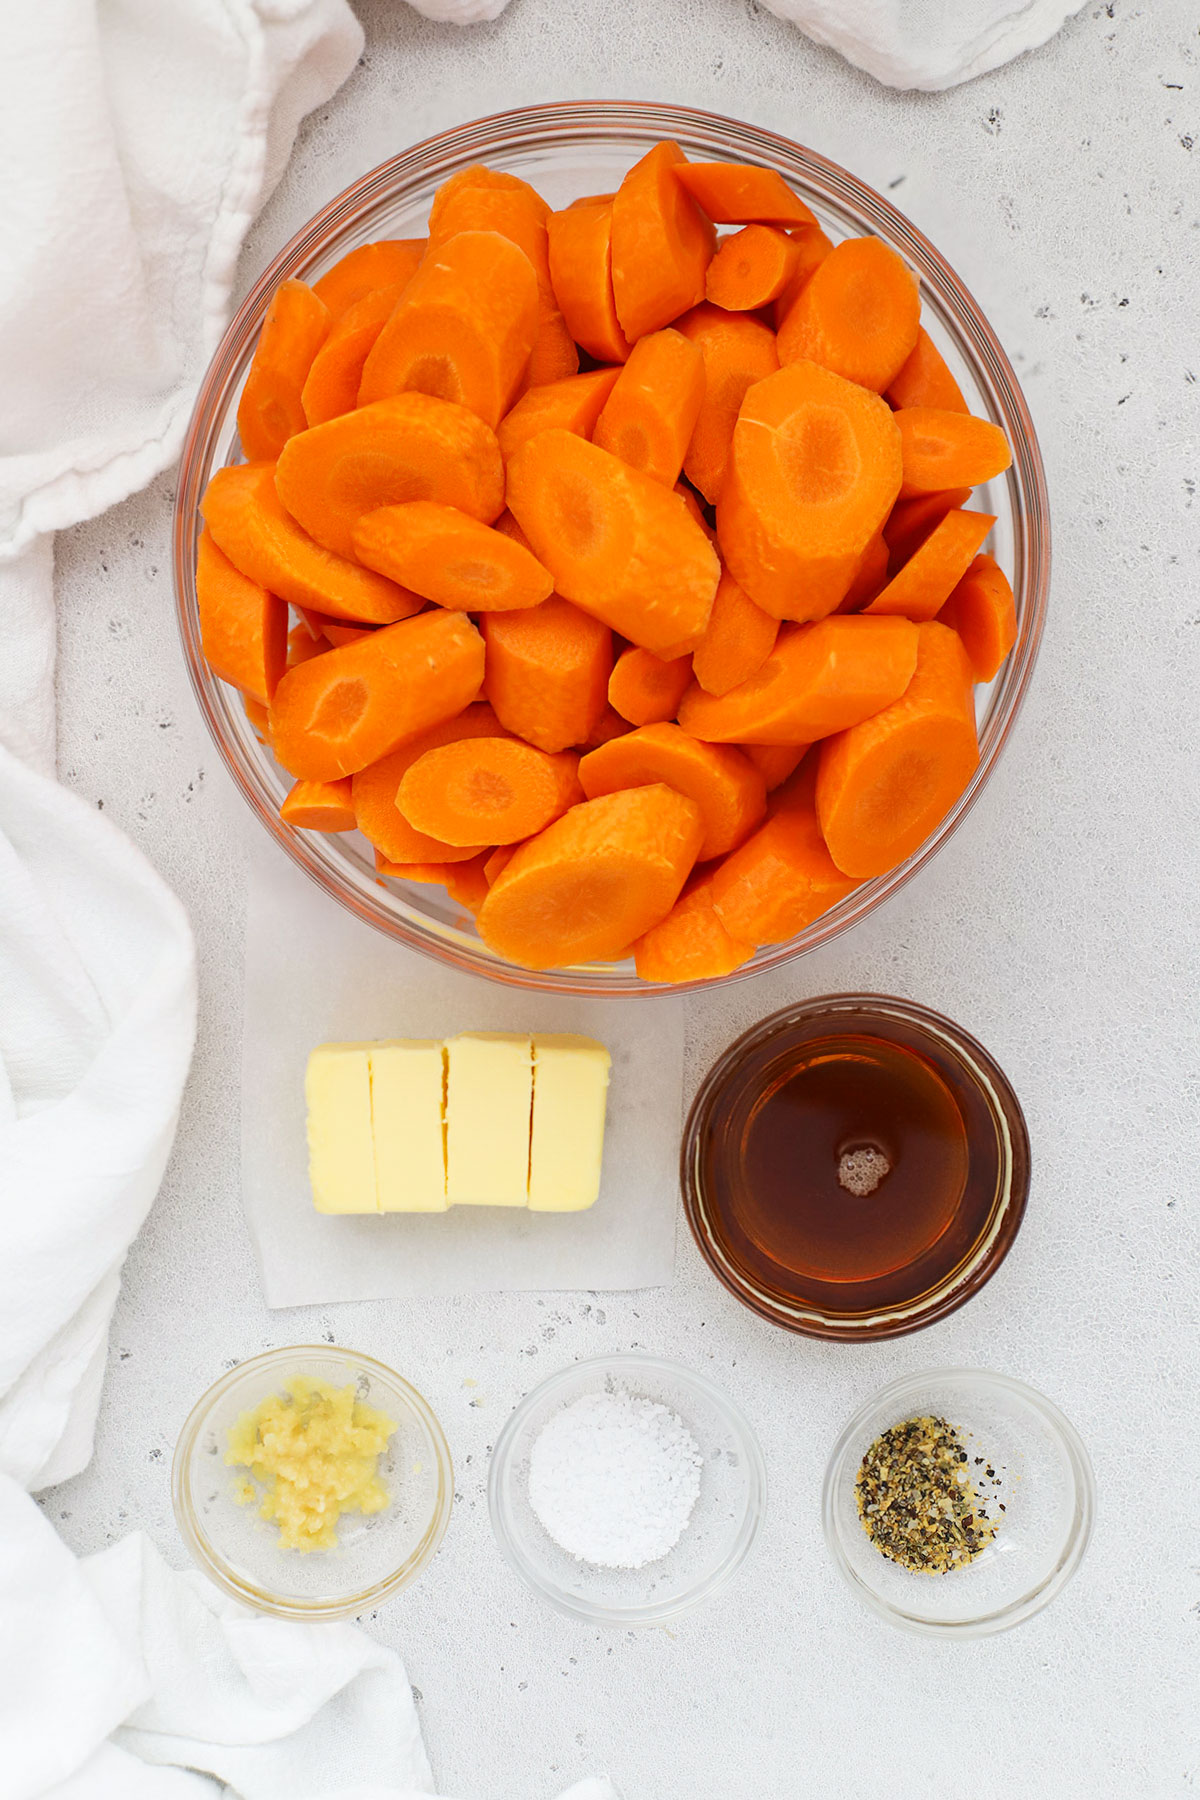
Simple Ingredients For Glazed Carrots
Let’s talk about seasoning! What’s the best seasoning for carrots? Everyone will have their own favorite, but my favorite seasoning for this popular side dish includes…
- Carrots. I recommend full-sized whole carrots rather than baby carrots for the best flavor and texture. Cutting the carrots on a diagonal makes them look elegant and elevated!
- Butter. I LOVE the flavor of using butter in my maple glazed carrots. For a dairy-free/vegan version, use vegan butter or you can swap for a mild olive oil, though the flavor will be slightly different.
- Pure Maple Syrup. I love the subtle flavor this adds. (It is possible substitute honey or brown sugar instead of maple syrup, but I love pure maple syrup best!)
- Garlic. Might sound crazy, but adding a clove of garlic does amazing things to balance the sweet flavors with a little savory. It’s a bit of secret MAGIC.
- Salt & Pepper. Always. A must for seasoned carrots!
This combination might sound simple, but it makes the sauteed carrots taste incredible! I love that there’s a great balance of savory and sweet flavor, and the presentation is beautiful!
Are Glazed Carrots Gluten-Free?
Mine are! Many glazed carrot recipes are gluten-free, so long as they don’t use a thickener like flour or broth that contains gluten. If you’re using simple ingredients like butter, brown sugar, maple syrup, honey, garlic, salt, or pepper, they’re most likely gluten-free. If you’re making gluten-free glazed carrots for someone with Celiac, make sure you’re using fresh containers of ingredients to avoid accidental cross contamination. (i.e. don’t scoop from an open bag of sugar you’ve used to make recipes with gluten)
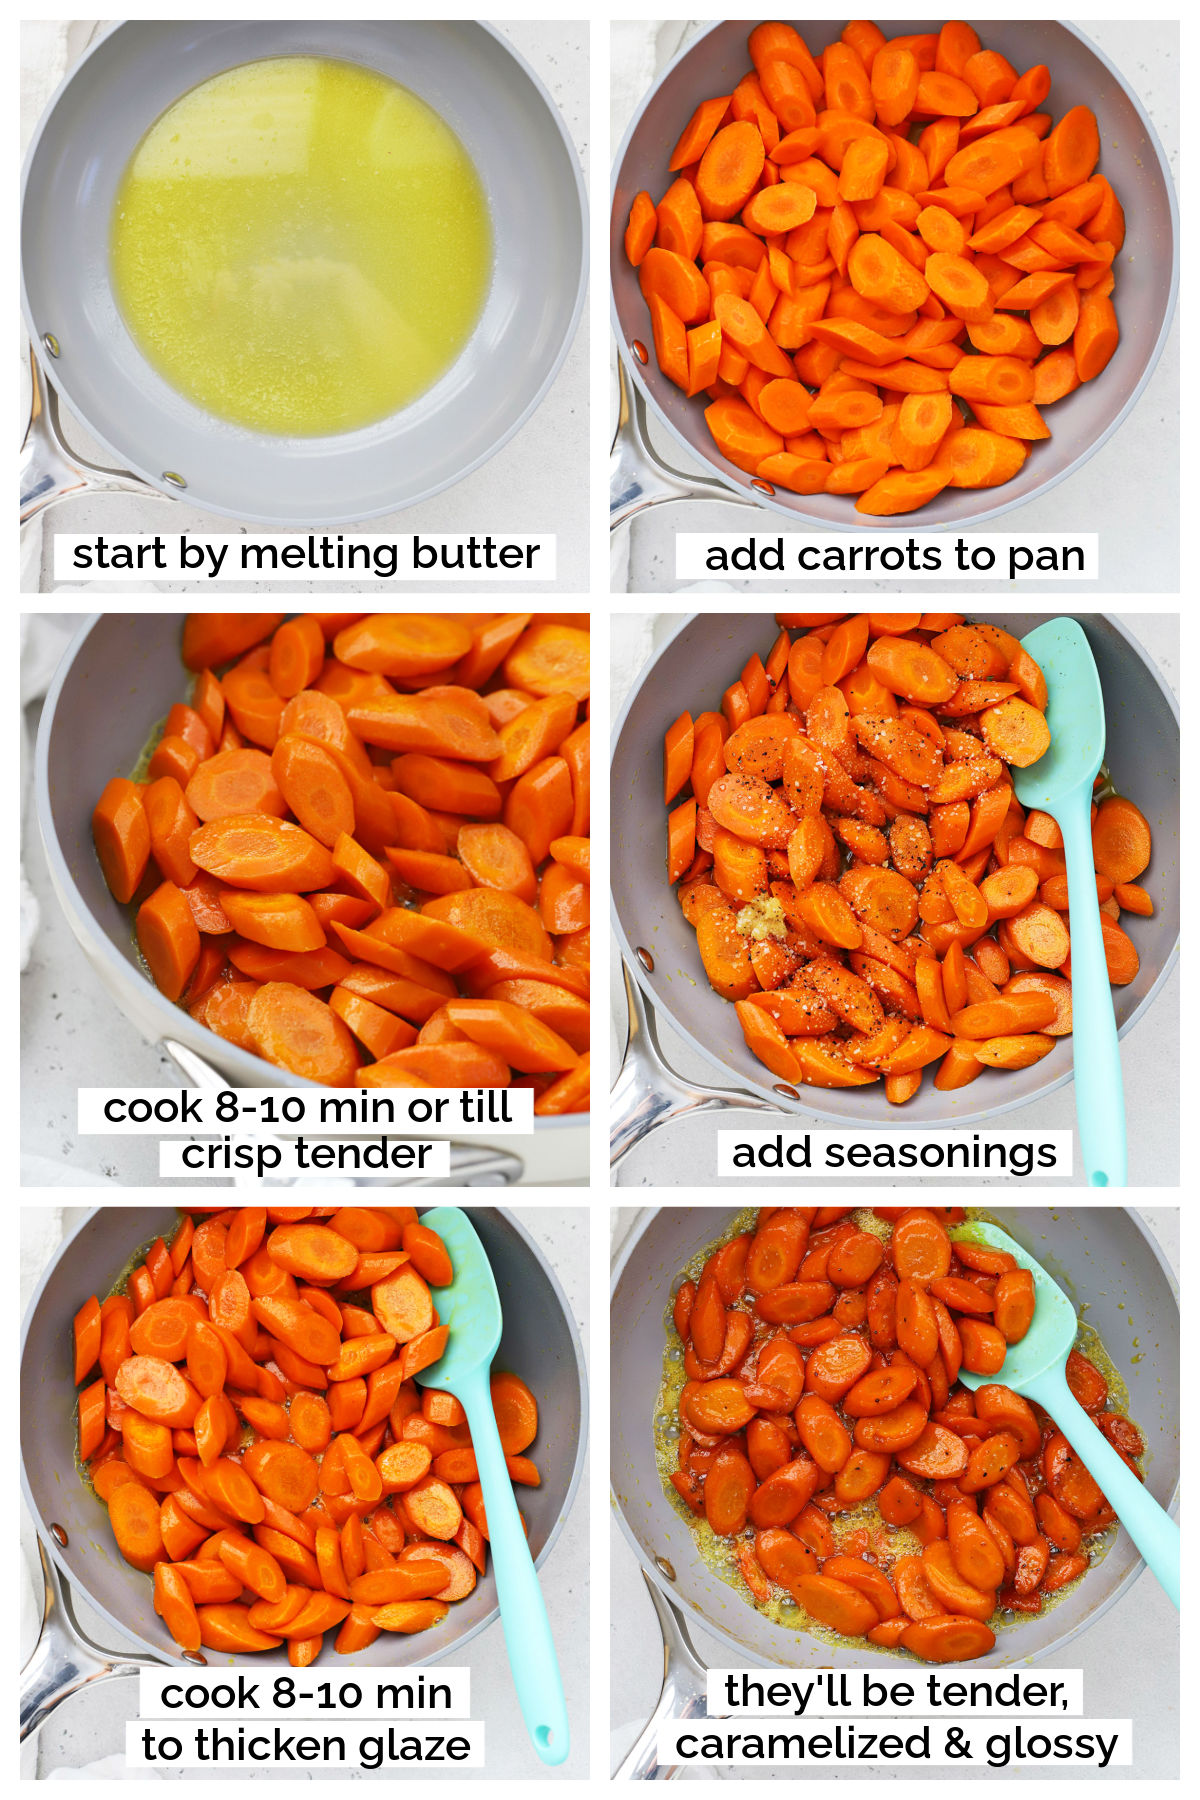
How To Make Carrots With Glaze, Step By Step
As always, you can find the full recipe, with ingredient amounts, detailed instructions, and tips in the recipe card below!
Rather than boiling or roasting, we’ll be sauteeing the carrots on the stove top in a skillet. I love how easy it makes this recipe! Let’s dive in…
- Prep Carrots. If you haven’t already, peel the carrots, wash them thoroughly, then cut off the ends. Slice the carrots diagonally into 1/2 inch thick slices for even cooking.
- Melt Butter. In a large skillet, melt butter over medium heat.
- Partially Cook Carrots. Once the butter melts, place carrots into the skillet and cook, stirring regularly 8-10 minutes, or until the carrots are crisp-tender.
- Add Seasoning & Glaze Ingredients. Then, add maple syrup, garlic clove, salt, and pepper.
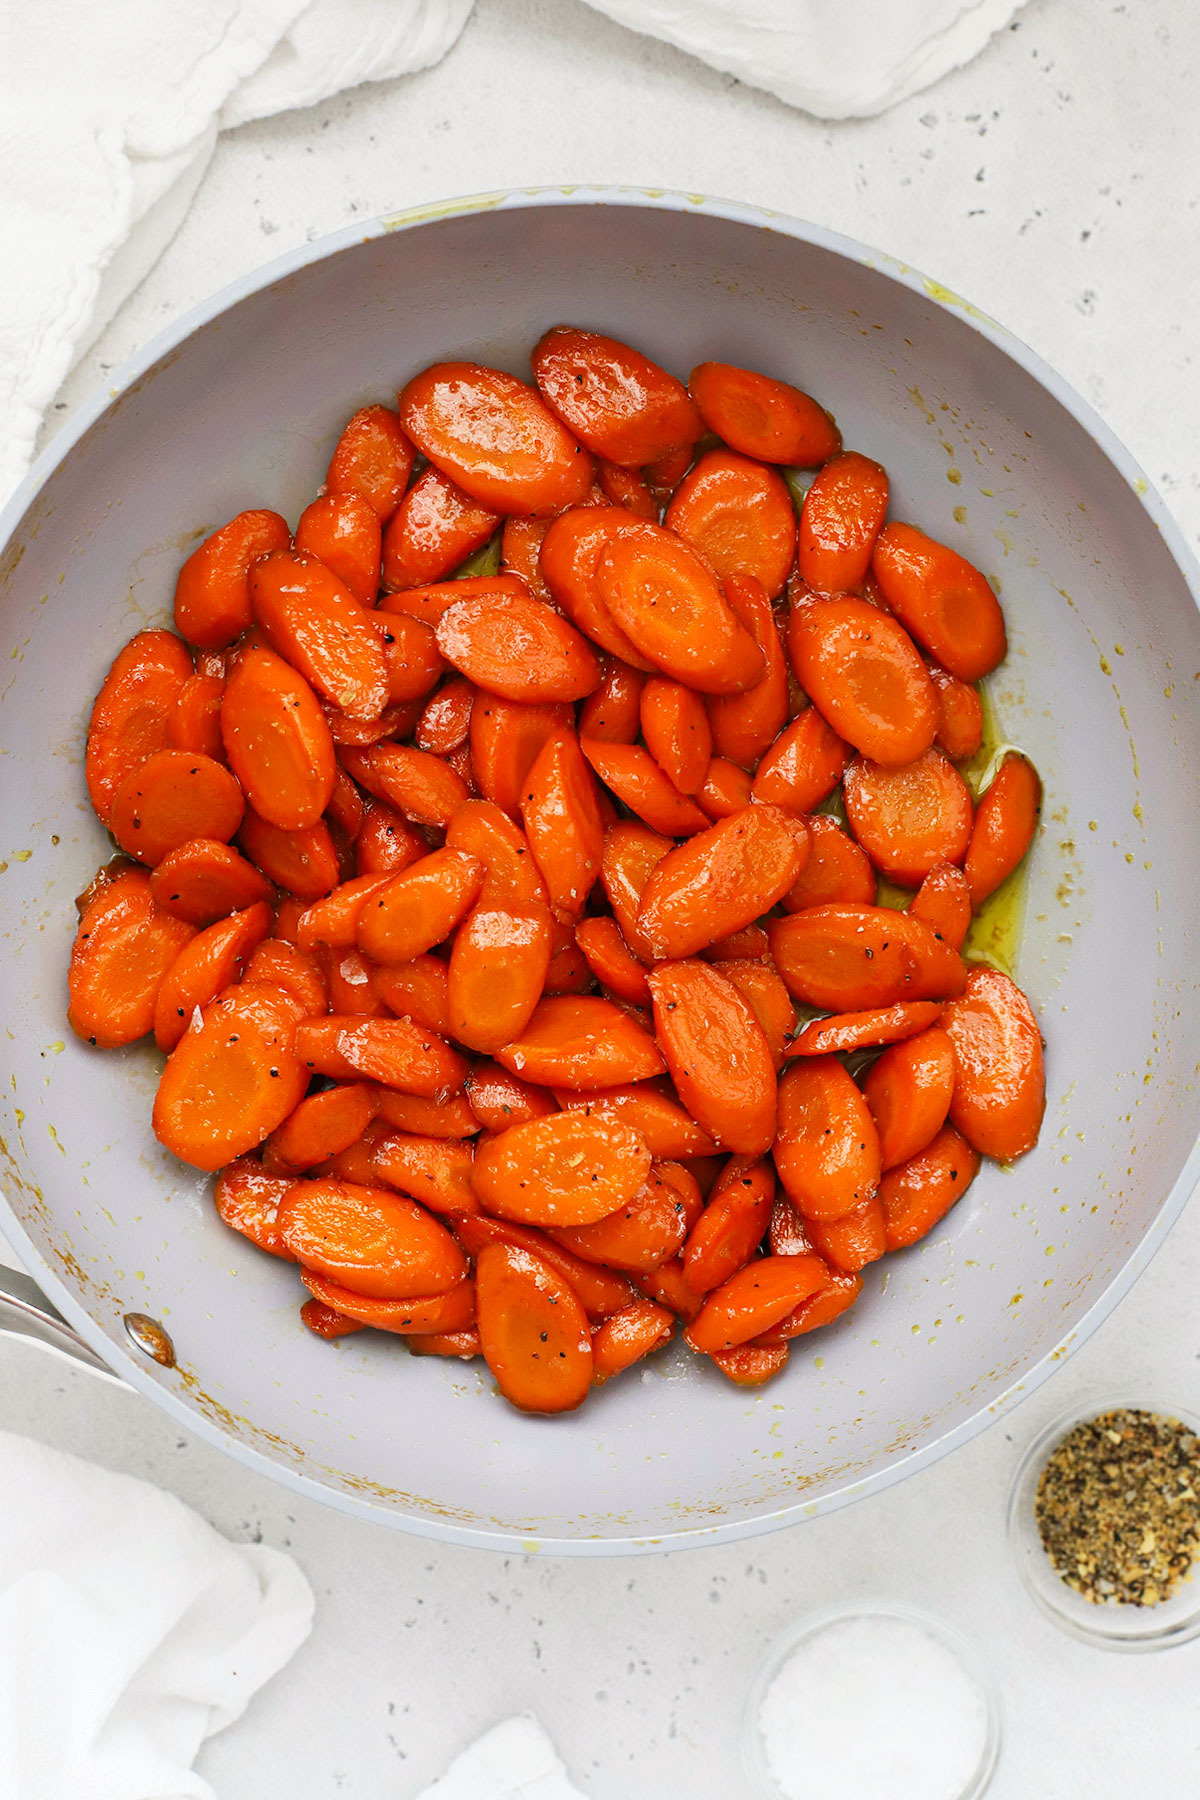
- Finish Cooking. Cook the carrots 8-10 minutes more on medium heat, or until the glaze has reduced and thickened, and the carrots are fork tender and look glossy. It’s important to stir regularly so the glaze doesn’t burn, but if it starts sticking to your pan, you can add 1 Tablespoon of water to the pan to help deglaze any brown bits. Don’t raise the heat higher than medium at this point, or you risk burning the glaze.
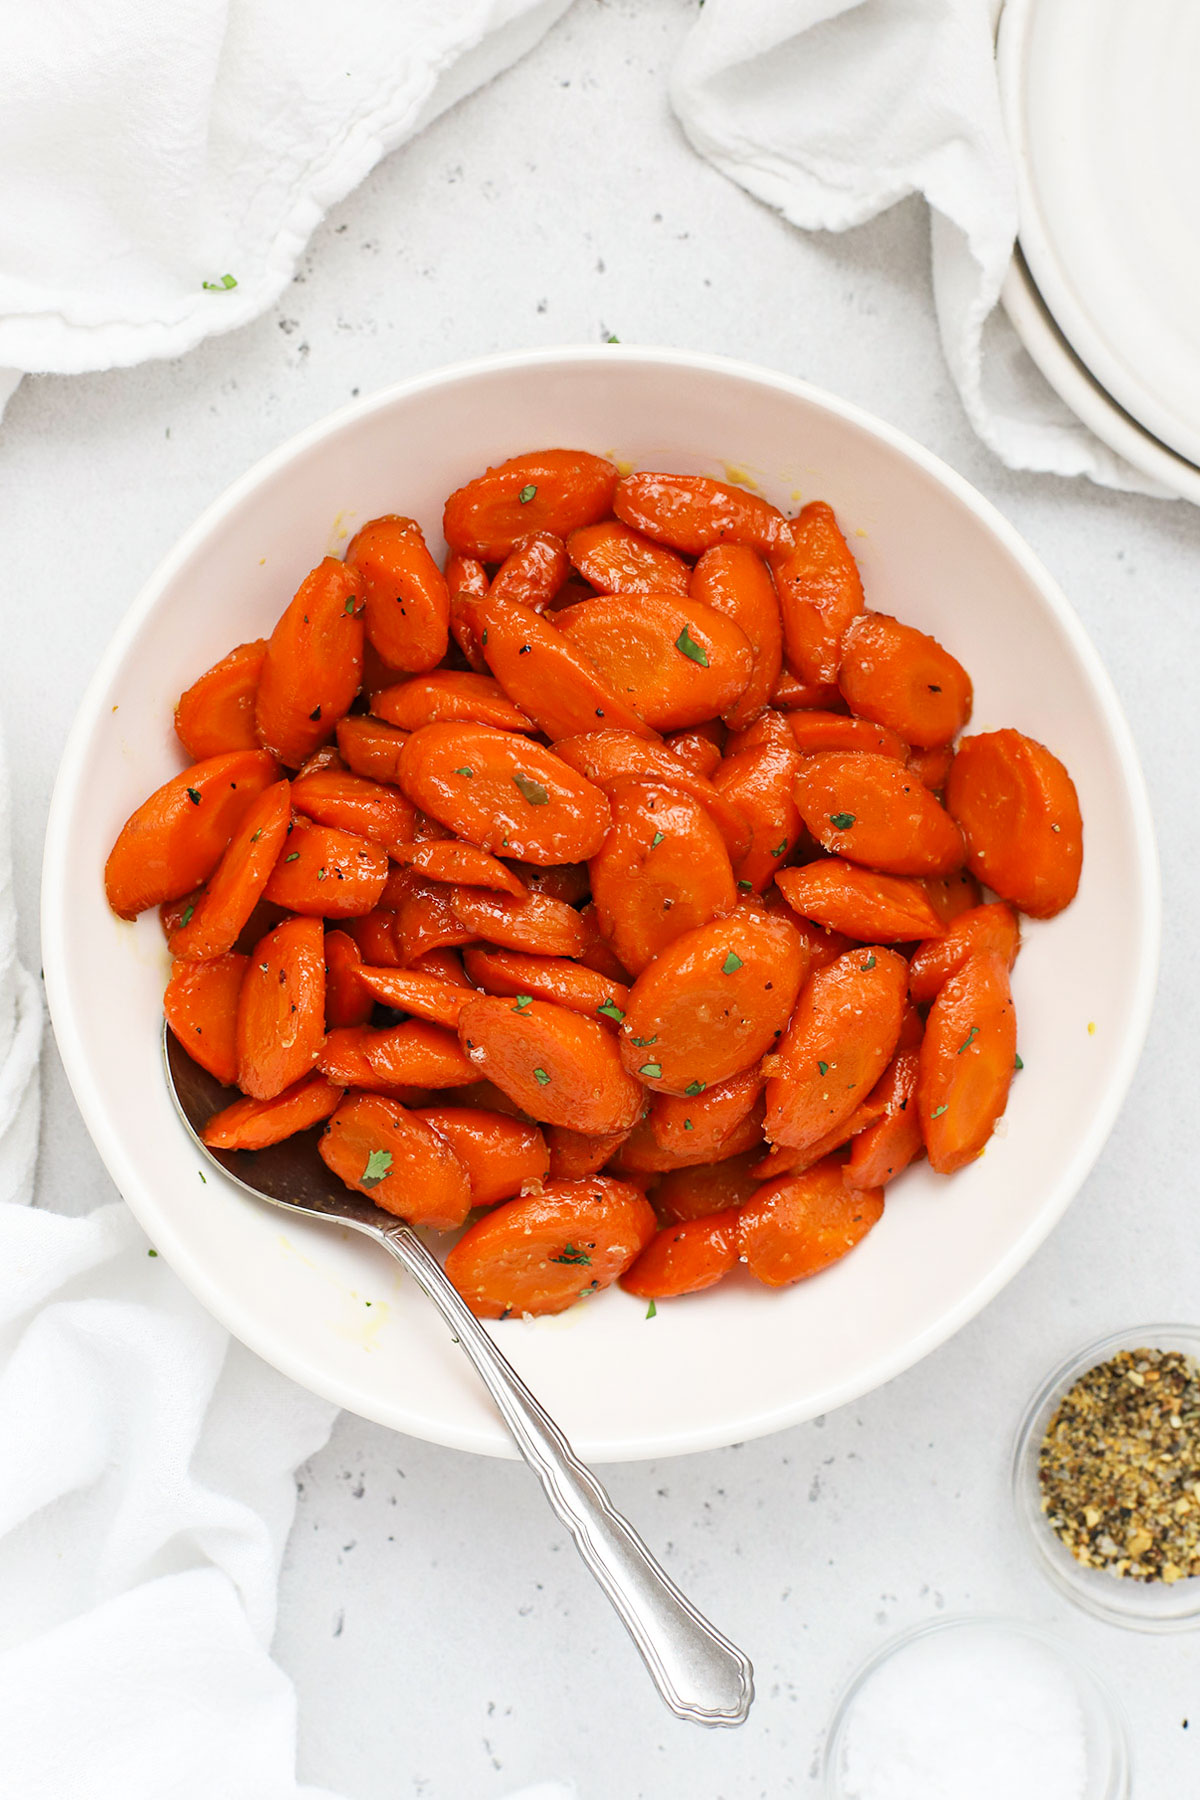
- Garnish. If desired, garnish with fresh parsley, or another sprinkle of salt & pepper.
- Serve & Store. Enjoy maple glazed carrots right away, or store leftovers in an airtight container in the refrigerator 3-4 days.
Prefer to use the oven? Try these glazed roasted carrots!
Variations To Try
I love this inexpensive side dish exactly as written, but if you’re looking for different ways to add your own special twist, try one of these variations:
- Orange Zest. A tiny bit of orange zest right at the end (just a touch!) adds vibrance and fresh citrus notes.
- Brown Sugar. Swap the maple syrup for light brown sugar or dark brown sugar to make brown sugar carrots instead.
- Fresh Herbs. Feel free to add a little fresh herb flourish! Thyme is a great herb to try, and parsley always looks beautiful.
FAQ + Tips And Tricks For The Best Glazed Carrots Recipe
Watch The Temperature!
Any time you’re reducing a glaze or something with sugar, it’s important to watch the temperature to avoid scorching or burning. I don’t raise the temperature more than medium on my stove. (5/10 on my temperature settings.) It’s also important to stir regularly so the glaze doesn’t burn, but if it starts sticking to your pan, you can add 1 Tablespoon of water to the pan to help deglaze any brown bits.
What Type Of Carrots Do You Use For Glazed Carrots?
While you can use baby carrots, full-size fresh carrots will give you the best texture and flavor in this easy carrot side dish. As for the kind of carrots, I usually use orange carrots, though rainbow carrots will also work! I recommend cutting them at a diagonal for best results. This not only makes them look beautiful, it also helps them cook more evenly. The more evenly you can cut the carrots, the more evenly they will cook!
Do You Have To Peel Carrots For Glazed Carrots?
I always recommend peeling carrots before making glazed carrots so they look as neat and tidy as possible. The glossy sheen of the glaze really highlights imperfections, so rough patches, bumps and discoloration on the peel really stand out.
Swaps & Substitutions
- Can I Use Honey Instead? Yes. Feel free to swap out the maple syrup for honey to make honey glazed carrots. Keep an eye on it so it doesn’t burn!
- Can I Use Brown Sugar Instead? If you prefer, you can absolutely use brown sugar here. Brown sugar glazed carrots have delicious flavor!


Did You Make This Recipe?
Tell me all about it! Leave a star rating below when you try our Glazed Carrots recipe. I can’t wait to hear how it goes!
Easy Glazed Carrots
Ingredients
- 2 pounds of carrots peeled and ends cut off
- 3 Tablespoons butter
- 3 Tablespoons pure maple syrup
- 1 clove garlic
- 1/4 teaspoon salt kosher salt
- 1/8-1/4 teaspoon black pepper
Instructions
- Prep Carrots. If you haven’t already, peel the carrots, wash them thoroughly, then cut off the ends. Slice the carrots diagonally into 1/2 inch thick slices for even cooking.
- Melt Butter. In a large skillet, melt butter over medium heat.
- Partially Cook Carrots. Add the carrots to the skillet and cook, stirring regularly 8-10 minutes, or until the carrots are crisp-tender.
- Add Glaze & Seasoning Ingredients. Then, add maple syrup, garlic clove, salt, and pepper to crisp tender carrots. Stir to coat evenly.
- Finish Cooking. Cook the carrots 8-10 minutes more on medium heat, or until the glaze has reduced and thickened, and the carrots are tender and look glossy. It’s important to stir regularly so the glaze doesn’t burn, but if it starts sticking to your pan, you can add 1 Tablespoon of water to the pan to help deglaze any brown bits. Don’t raise the heat higher than medium at this point, or you risk burning the glaze.
- Garnish. If desired, garnish with fresh parsley, or another sprinkle of salt & pepper.
- Serve & Store. Enjoy carrots right away, or store leftover carrots in an airtight container in the fridge 3-4 days.
Notes
Video
Nutrition
Nutrition facts are an estimate only and will vary based on brands and amounts used.
Find it Online:
https://www.onelovelylife.com/easy-glazed-carrots/
This is one of the best side dishes ever!
I didn’t think I liked cooked carrots – until I made these! Oh, they are SO yummy!!