

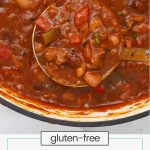


This easy gluten-free chili recipe is thick, hearty, and PACKED with flavor. It’s a great recipe for a chili cook-off or a cozy night in. Don’t miss all our favorite side dishes to serve with it!
A big batch of chili is just the ticket this time of year! It’s like the dinner that keeps on giving. Not only is it delicious on day 1, but the leftovers are even better the next day. Plus, you can freeze some for later!
If you’ve been looking for a classic gluten-free chili recipe to try, this is where your search ends! I think this chili recipe has it all:
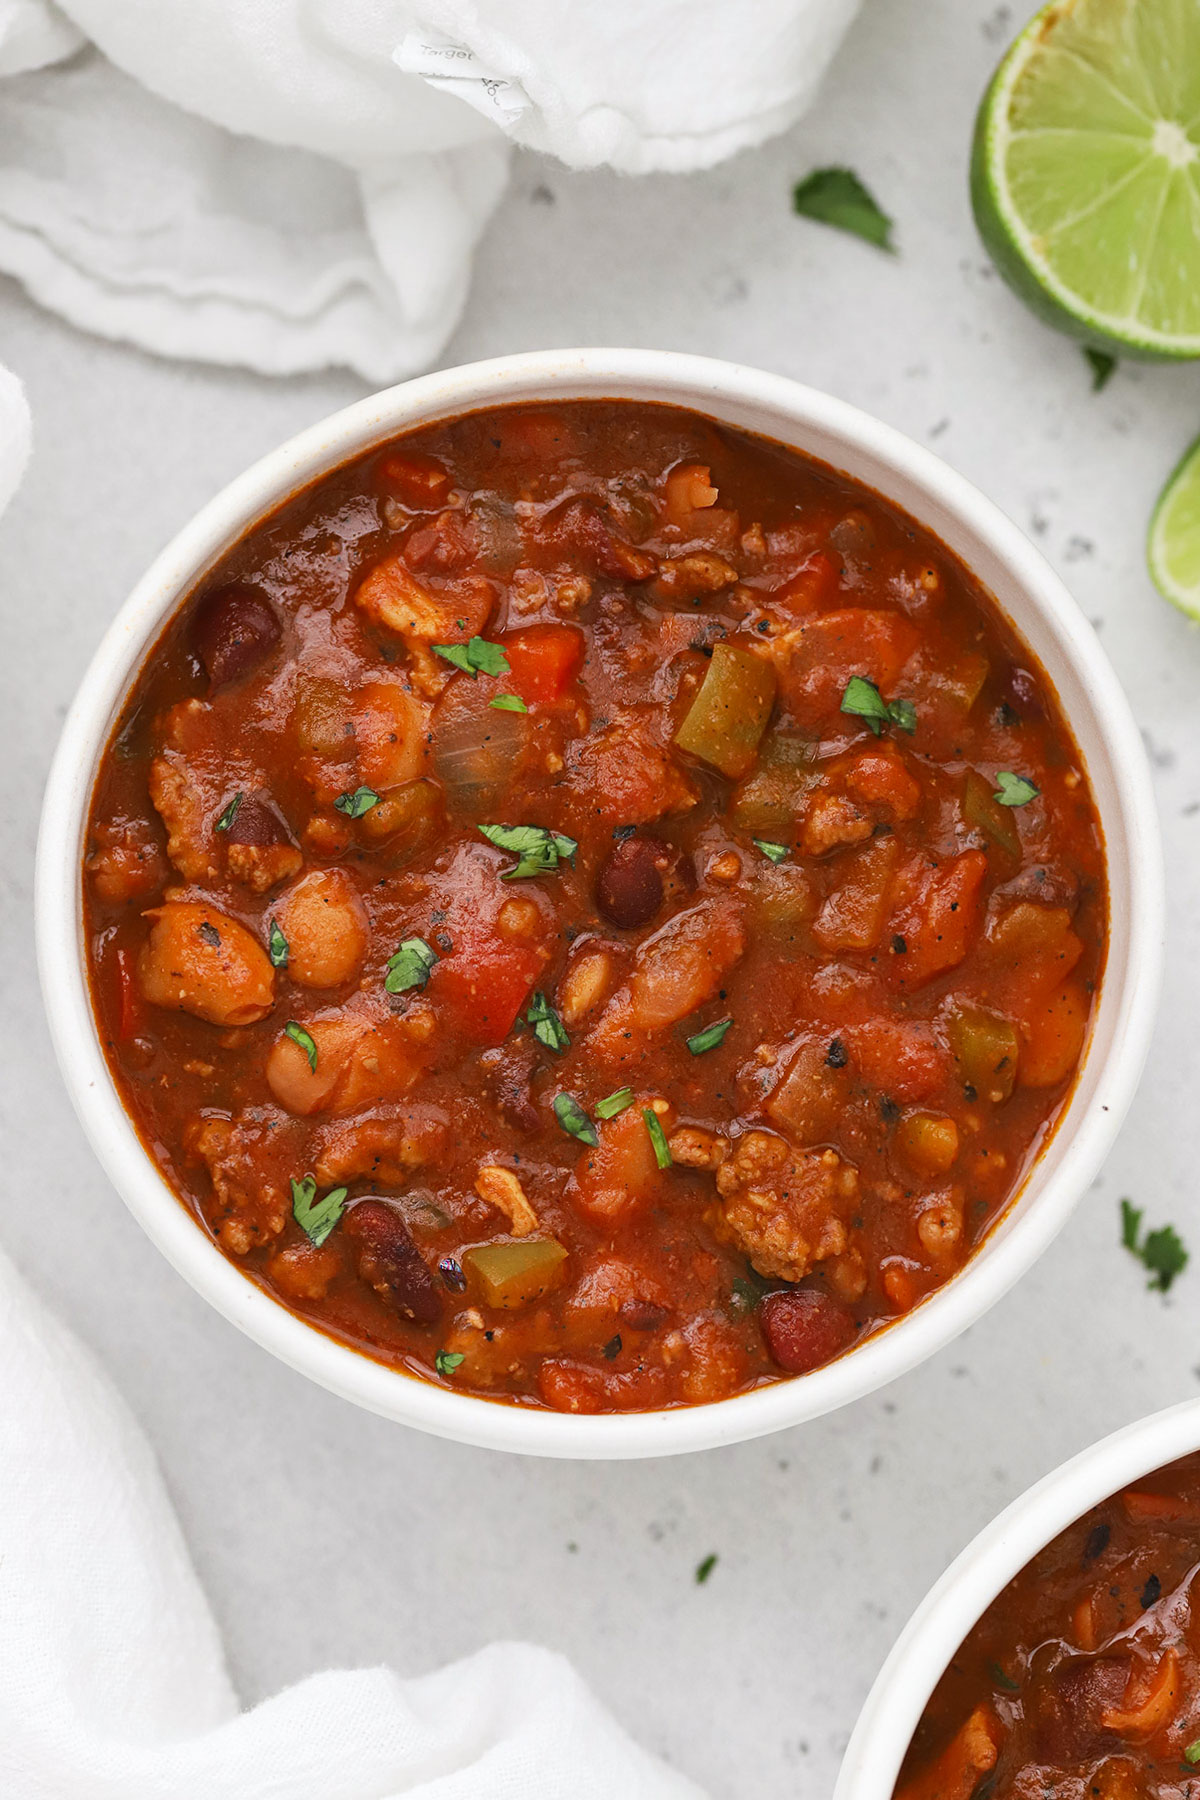
- It’s thick and hearty with no big tomato chunks.
- It’s got our signature chili seasoning for incredible flavor (smoky, savory, amazing!) AND
- It’s got a delicious mix of veggies and beans to round things out.
- It makes enough to feed a crowd or freeze some for another day! (The leftovers are amazing!)
This cozy homemade chili is the perfect easy dinner to add to your rotation. And it starts with simple ingredients. Here’s all you need to make this easy chili recipe…
Um, isn’t All Chili Gluten-Free?
Most of the basic ingredients for chili (beans, meat, tomatoes, individual spices, etc.) are naturally gluten-free BUT there are still a lot of sneaky ways gluten can get into traditional chili recipes. The biggest culprit is packaged spice mixes, thickeners, and broth that contain gluten. (For instance, a lot of chili seasoning packets have wheat flour or wheat starch added as a thickener.) To make sure your chili recipe is gluten-free and safe for Celiac disease, you need to check each ingredient. Thankfully, the ingredients for our gluten-free chili couldn’t be easier:
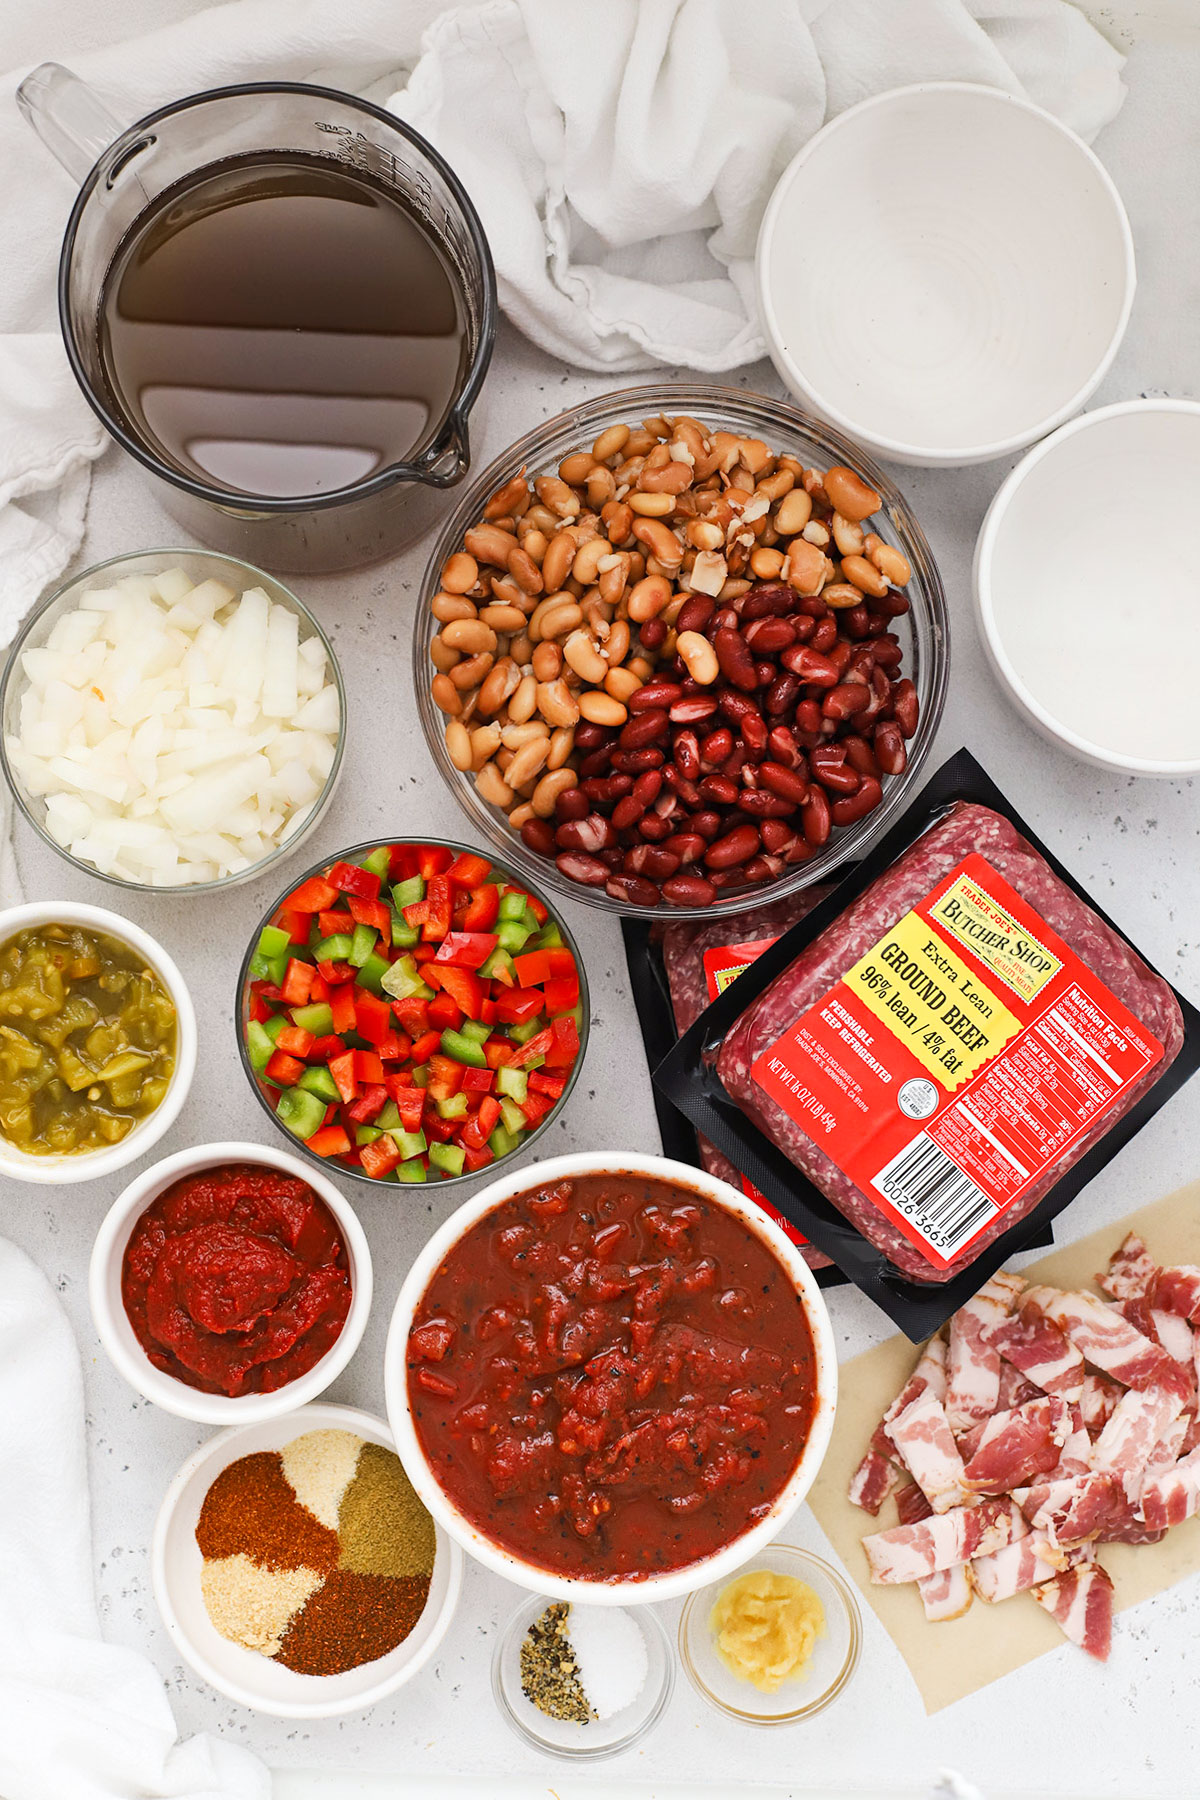
Simple Ingredients For This Gluten-Free Chili:
Gluten-free chili starts with gluten-free ingredients! Here’s what goes into ours:
- A Few Slices Of Bacon. Yes, really. This “secret ingredient” adds a great smoky base of flavor. I use uncured pork bacon, but you can try turkey bacon.
- Ground Meat. You can make this gluten-free chili with lean ground beef, ground chicken or ground turkey. I prefer beef or chicken since I don’t *love* the flavor of ground turkey, but you can choose whichever works best for your dietary needs & preferences.
- Simple Seasonings. We’re taking a cue from our Gluten-Free Chili Seasoning and using a mix of chili powder, cumin, garlic powder, onion powder, smoked paprika, salt, and pepper. This mixture gives your chili a lovely depth of flavor! For a little more kick, you can also add the optional chipotle chili powder–yum!
- Onion & Bell Pepper. For a savory base of veggies, I like a mix of onion and bell peppers.
- Garlic & Green Chiles. Then, we add another layer of flavor with fresh garlic cloves and canned green chilis. If you want more heat, you can swap out the green chilis for a diced jalapeño instead!
- Plenty of Beans. I love my gluten-free chili with beans, so you’ll add 3 cans of beans. I like to add 2 cans of pinto beans and 1 can of red kidney beans, but you can use 1 can pinto beans, 1 can black beans, and 1 can kidney beans if you like more color!
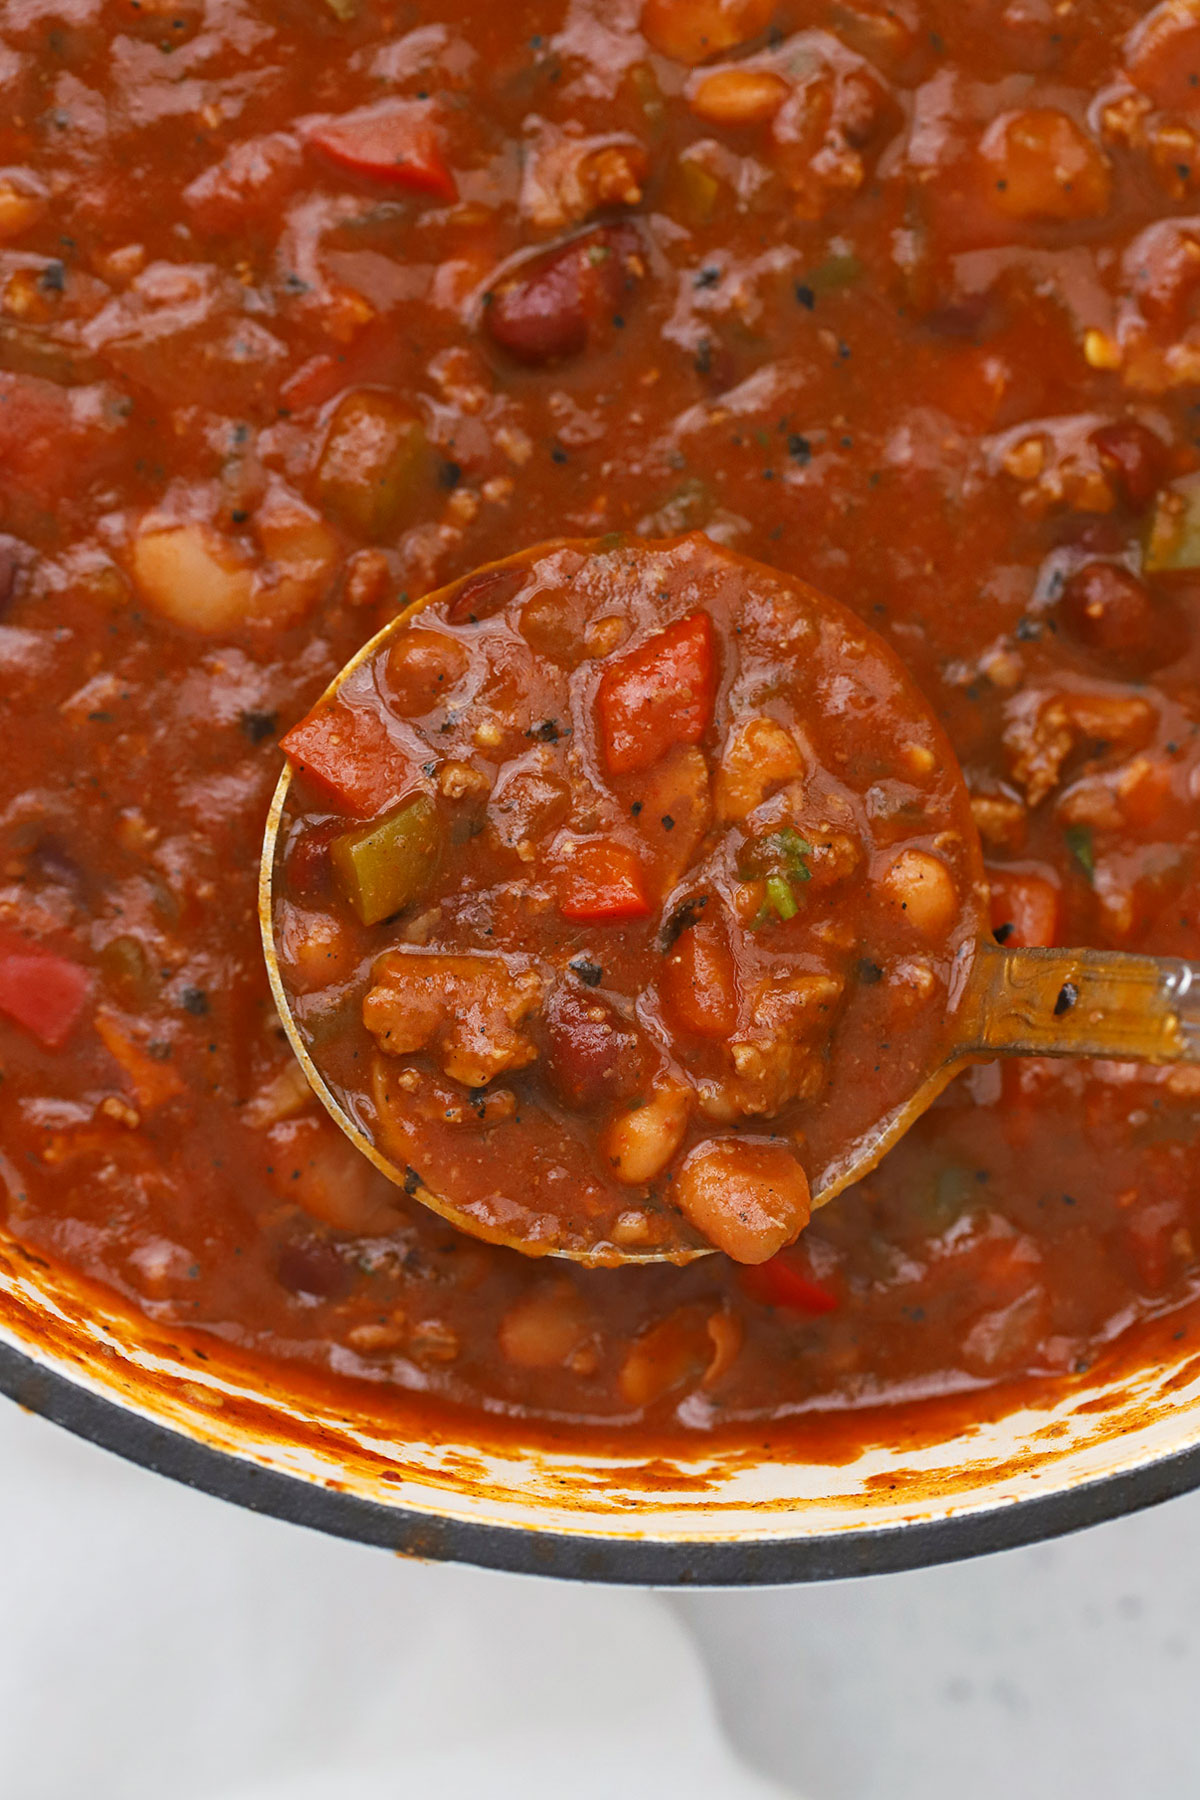
- Tomatoes & Tomato Paste. I use crushed fire-roasted tomatoes and tomato paste for a thick hearty texture and no big tomato chunks.
- Some Water or Broth. Then, you’ll pull it all together with a little broth or water. I usually use vegetable broth, but using beef bone broth or chicken bone broth is a great way to add more protein! Make sure your broth is gluten-free!
How To MAke Gluten-Free chili, Step By Step:
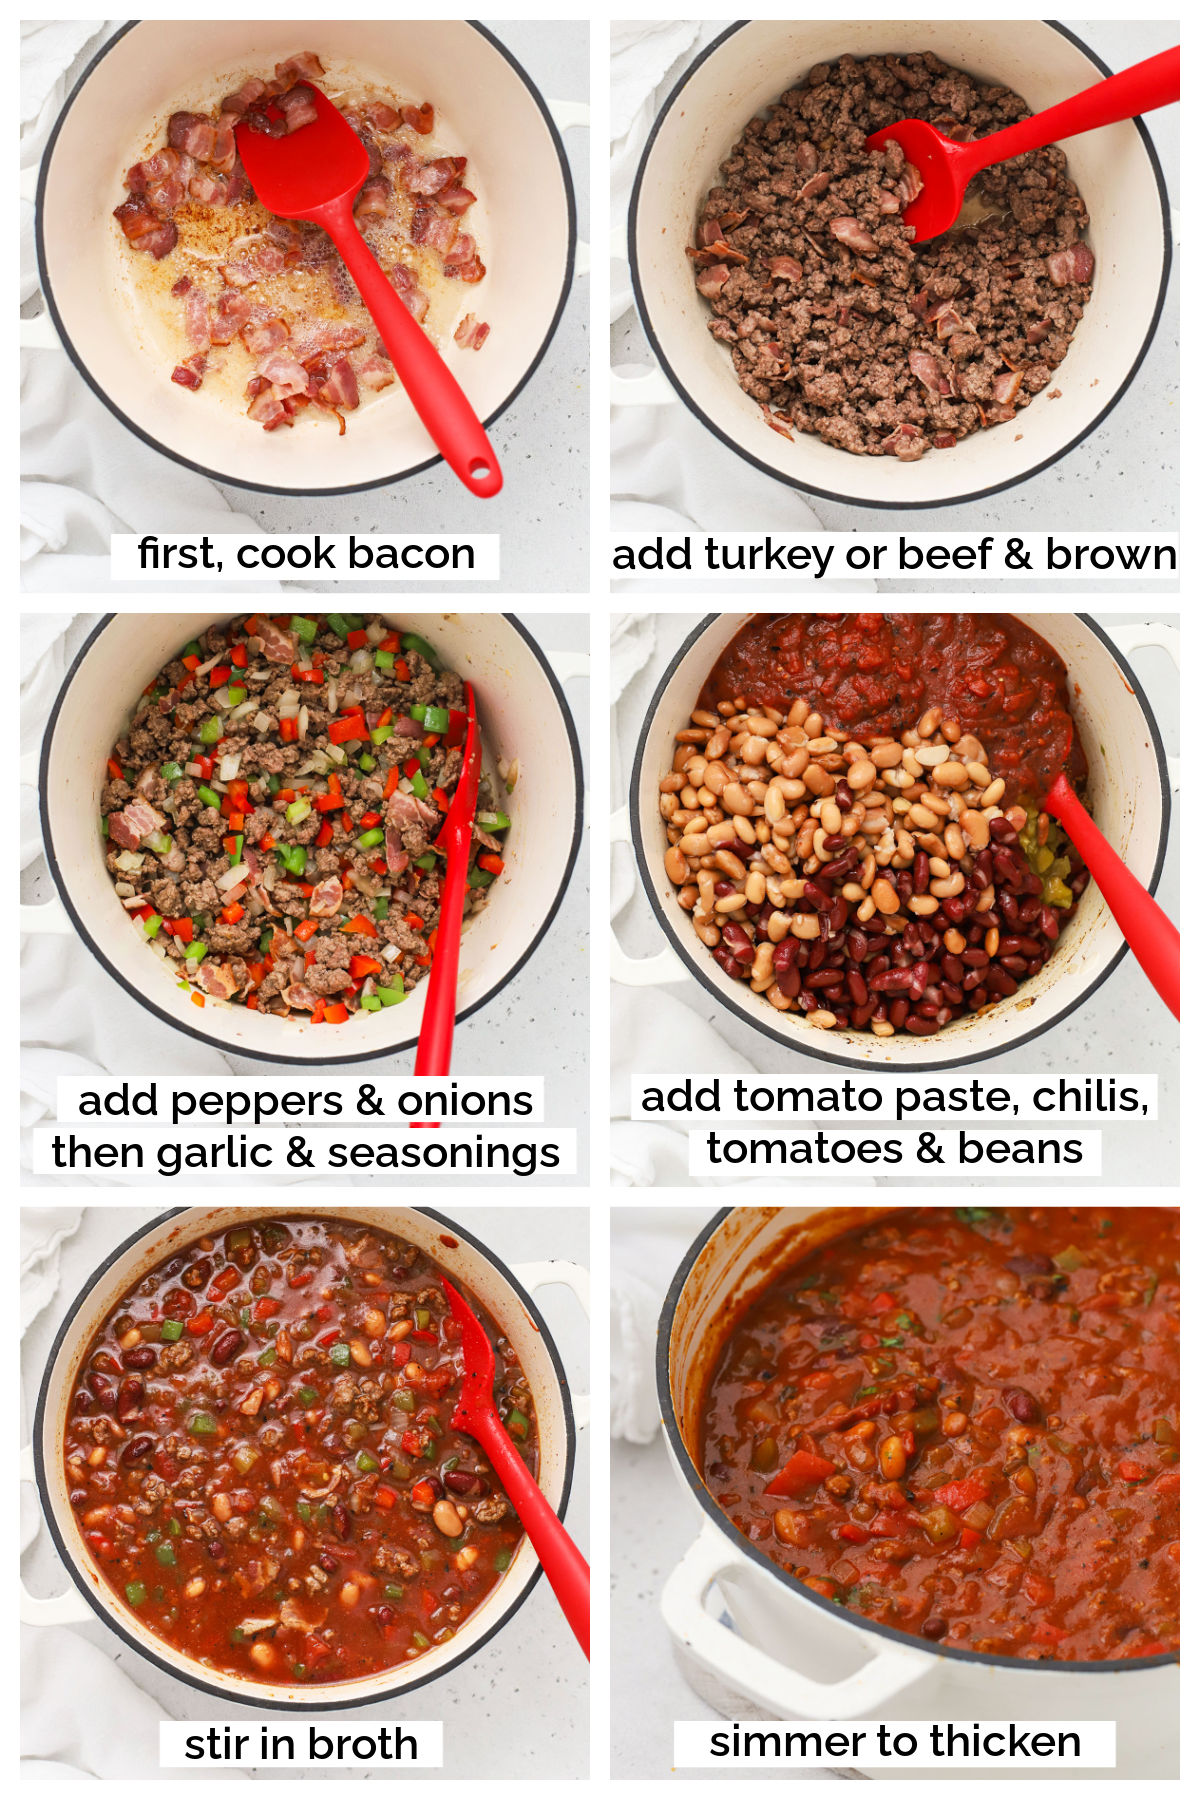
- Start By Cooking The Bacon. In a large pot or Dutch oven, cook the bacon over medium heat until crisped and browned.
- Cook The Meat. Add the ground beef to the pot and stir, breaking up the beef with your spoon until the meat is cooked through and browned. I use extra-lean ground beef so I don’t have extra fat to drain, but if needed, you can drain extra fat from the pan. I recommend leaving in at least 1-2 Tablespoons for flavor.
- Cook The Veggies. Next, add the onion and bell peppers to the pan. Cook 4-5 minutes over medium heat, stirring to scrape up any browned bits from the bottom of the pan. Add garlic cloves and green chiles and cook 1-2 minutes more.
- Add Spices. Sprinkle in chili powder, cumin, garlic powder, onion powder, smoked paprika, salt, and pepper (and chipotle chili powder, if using). Cook and stir 1-2 minutes, or until fragrant.
- Stir In Beans & Tomatoes. Then, add pinto beans, kidney beans, fire roasted tomatoes, and tomato paste. Pour in the water or broth and stir to combine.
- Bring To A Simmer. Bring the chili to a boil over medium-high heat, then reduce heat to medium-low and simmer 20-30 minutes, stirring periodically. This will help the veggies soften and help the flavor develop.
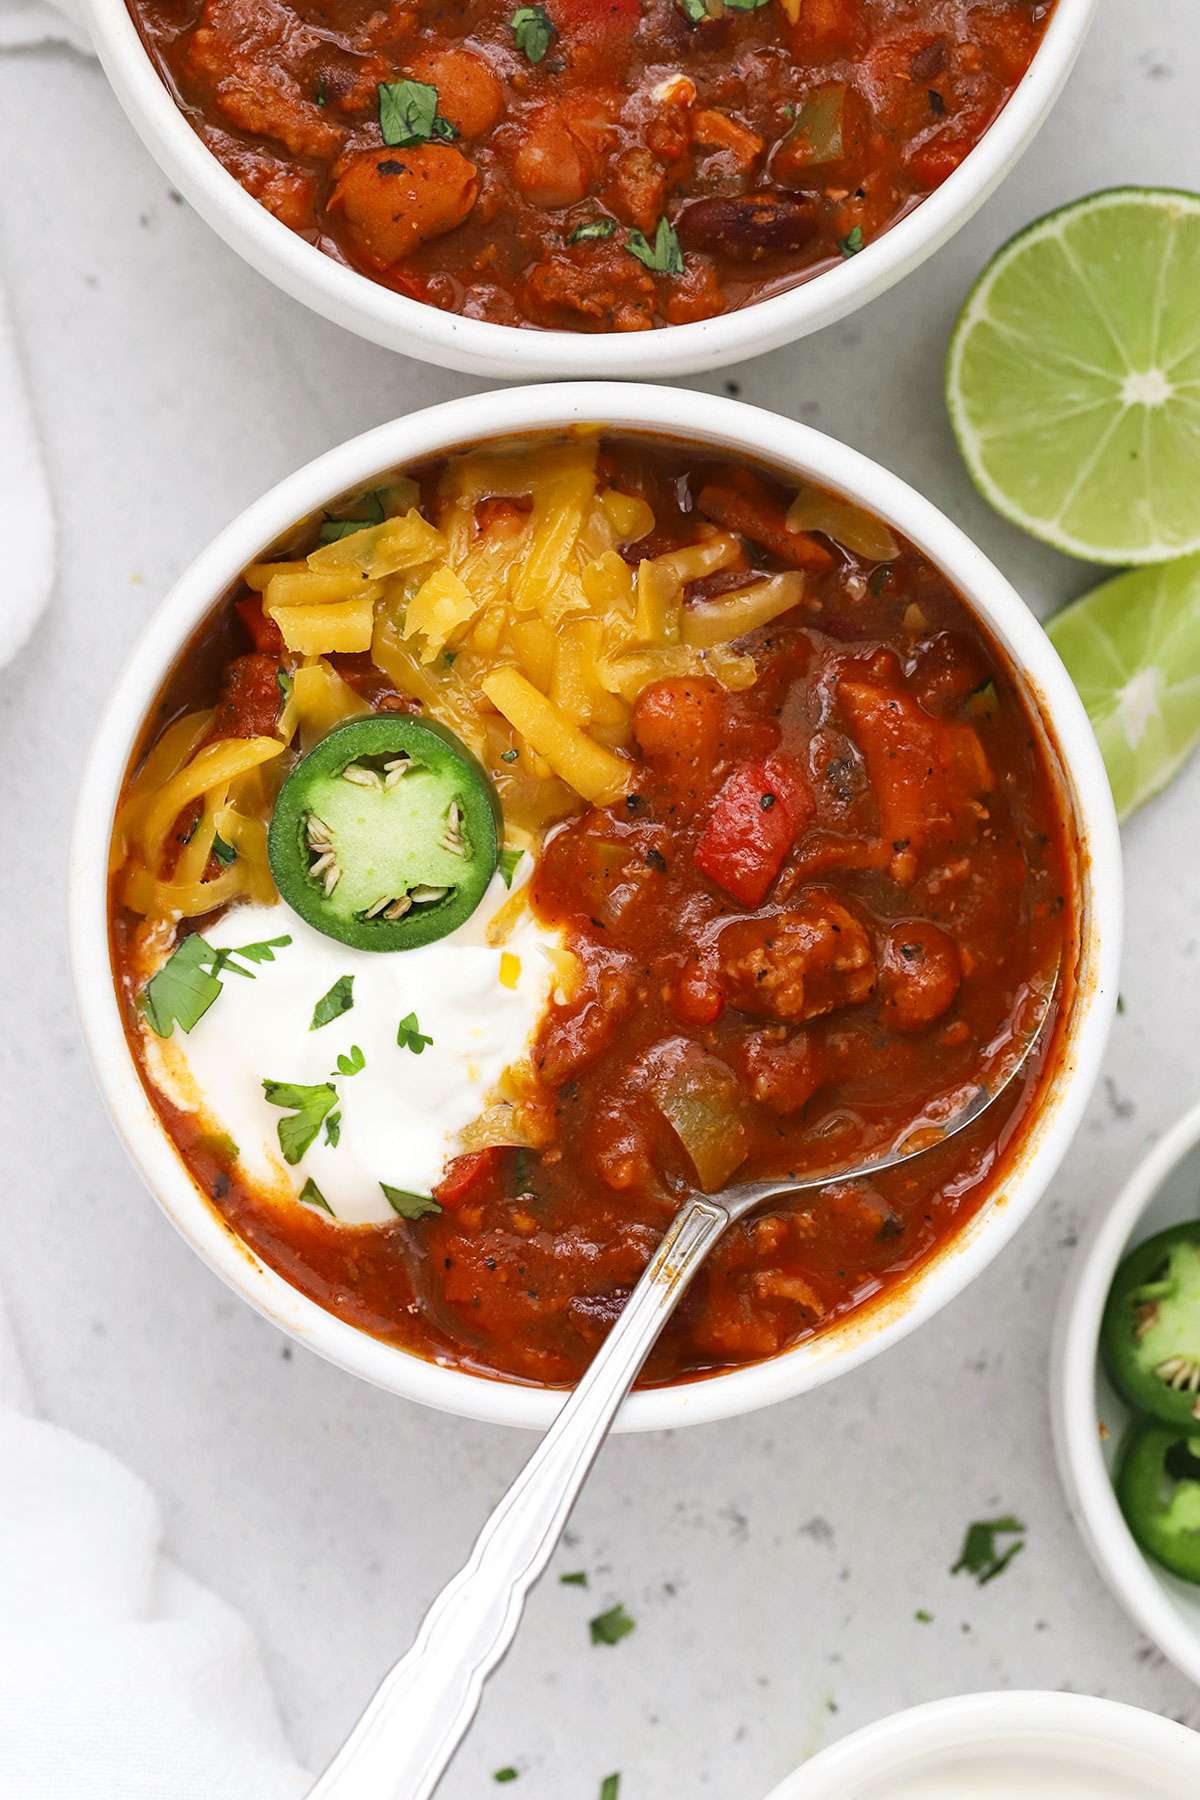
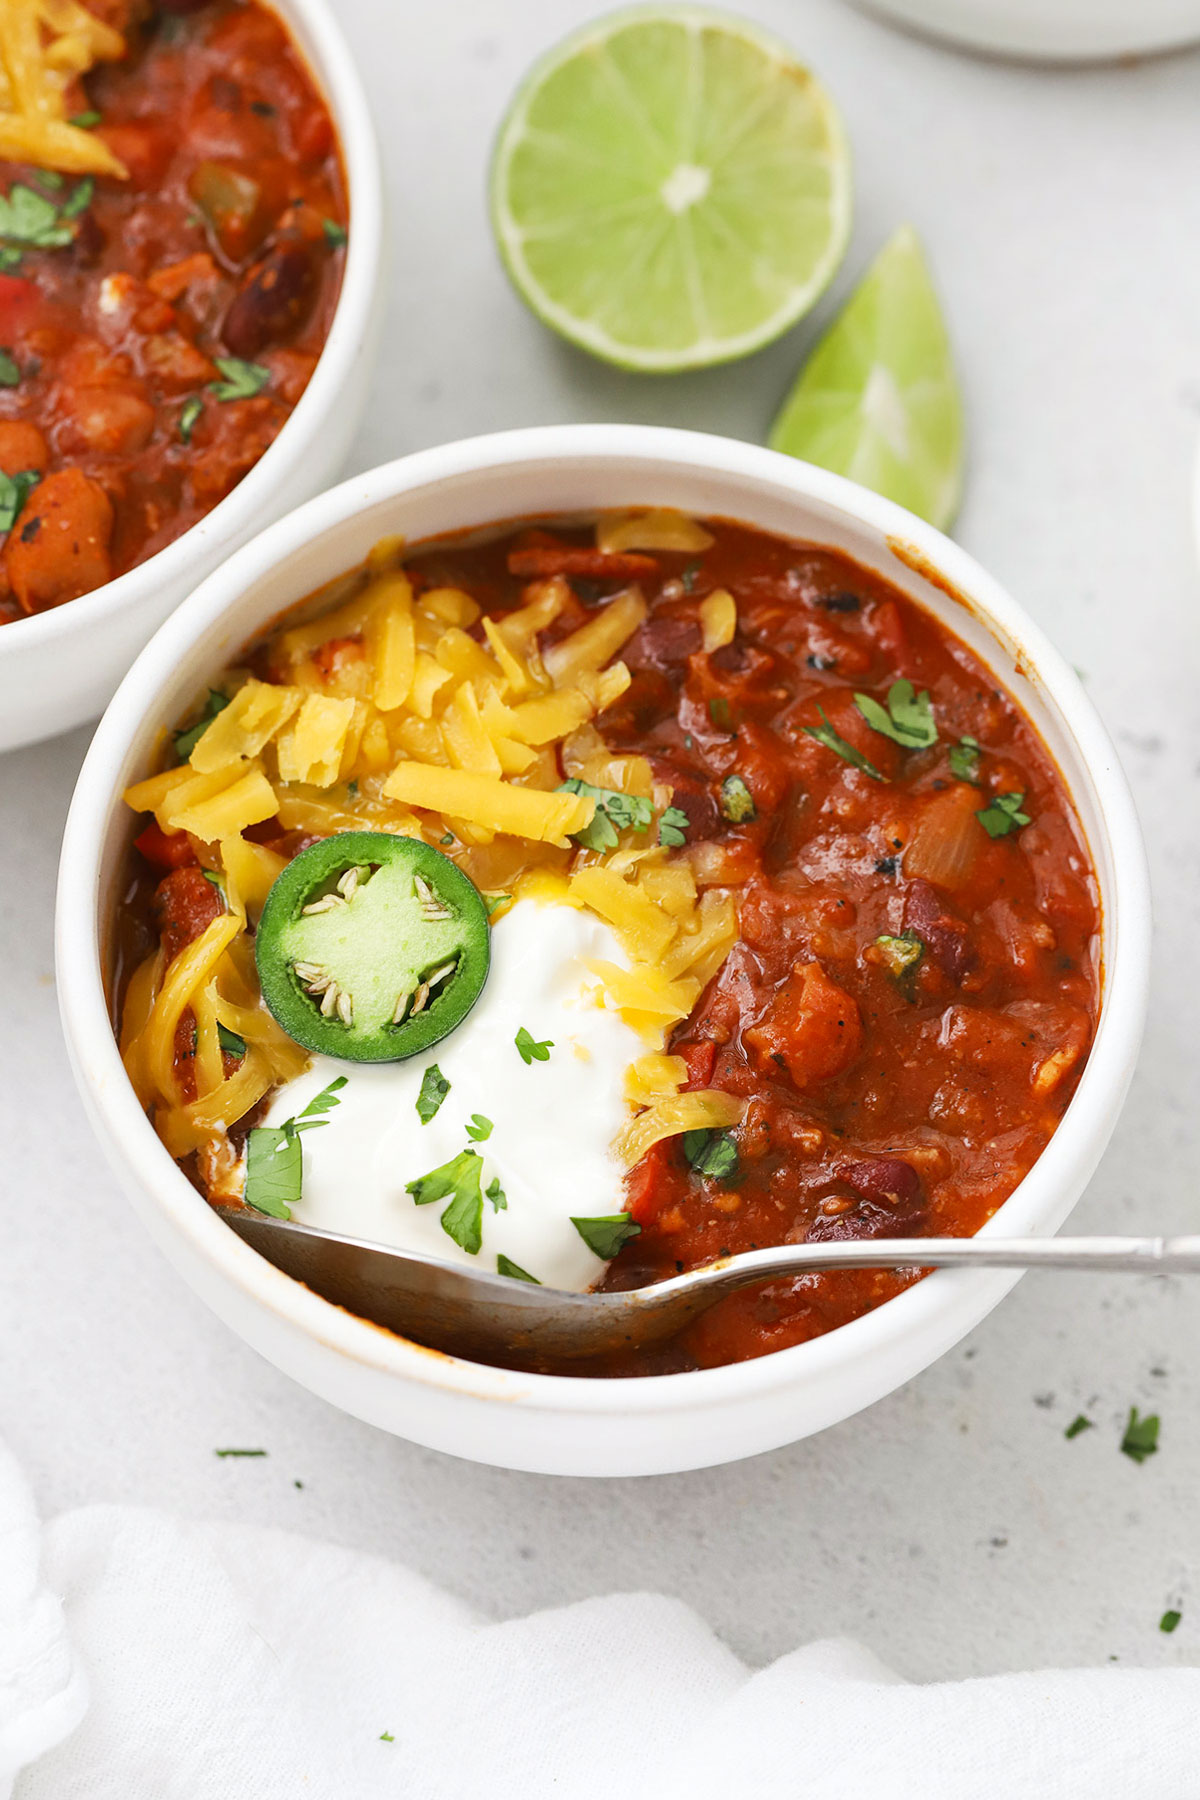
- Serve & Store. Spoon chili into bowls and top with your favorite chili toppings. Store leftover chili in an airtight container in the fridge 3-4 days, or freeze up to 2 months.
A Trick For Freezing Chili:
To freeze chili, I recommend storing flat in freezer bags. (Scoop cooled chili into freezer bags, seal shut, then lay bags flat on a plate or cutting board until frozen solid. This way they store better and thaw faster later. Thaw frozen chili in the refrigerator or heat up on the stove to enjoy later.
Make It A Meal: Gluten-Free Sides For Chili
Okay, now that you have an amazing pot of chili, what should you serve with it? Complete this hearty meal with one of these yummy side dishes:
- Fluffy Gluten-Free Cornbread. If you’re looking for fluffy, classic, sweet gluten-free cornbread, THIS is the recipe for you!
- A Simple Green Salad. I love to balance flavors and textures in my meals and our House Salad recipe is the perfect cool, fresh, crunchy counterpart to a bowl of warm chili.
- Pumpkin Cornbread Muffins. My kids LOVE these cornbread muffins! They’re easy and have an extra layer of nutrients, thanks to the pumpkin!
- Maple Cornbread. Naturally sweetened with pure maple syrup, this yummy cornbread is perfect with a bowl of hearty chili!
- Baked Potatoes. Always a classic! Try serving your chili with a baked potato or baked sweet potatoes.
- Gluten-Free Biscuits. I love biscuits and chili!
FAQ + Tips And Tricks For The Best Gluten-Free Chili:
Can I Make This Homemade Chili Without Beans?
Yep! If you prefer your gluten-free chili without beans, I just recommend at least doubling the meat (using 2-2.5 pounds of beef instead of 1 pound). I’ll help fill out the chili and give it that thick, meaty texture you’re looking for.
How Do You Thicken Gluten-Free Chili?
The easiest way is to manage the ratio of liquid to ingredients, like we do here. (Using crushed tomatoes and tomato paste helps naturally thicken chili). You can also simmer it down to reduce extra liquid. But for a quick fix, you can always use a cornstarch slurry. Combine 1 Tablespoon cornstarch with 1 Tablespoon COLD water. Mix to dissolve then stir into the chili. Cook until thickened, and repeat as needed until you reach your desired thickness.
Let’s Talk Toppings!
To me, a big bowl of chili is almost as much about the toppings as it is the seasonings! I love to set out different toppings to let everyone garnish their own bowl of chili just the way they like. Try some of our favorite chili toppings:
- Cheese – Cheddar cheese, Monterey Jack, or Cotija
- Sour cream or plain greek yogurt
- Cilantro
- Lime wedges
- Crushed corn chips or tortilla chips
- Avocado
- Onions – diced onion, red onion, or green onions!
More Gluten-Free Chili Recipes To Try:
⭐ Don’t forget to leave a star rating and comment below when you make our Gluten-Free Chili recipe. I can’t wait to hear how it goes!
Print
Easy Gluten-Free Chili
- Total Time: 55 minutes
- Yield: 10–11 cups 1x
- Diet: Gluten Free
Description
This easy gluten-free chili recipe is thick, hearty, and PACKED with flavor. It’s a great recipe for a cook-off or a cozy night in.
Ingredients
For The Chili:
- 4 slices bacon, diced
- 1 pound lean ground beef (or ground turkey/ground chicken)
- 1 onion, diced
- 1 green bell pepper, diced
- 1 red bell pepper, diced
- 2 cloves garlic, minced
- 1 (4-ounce) can diced green chiles
- 2 Tablespoons chili powder
- 1 1/2 teaspoons ground cumin
- 1/2 teaspoon garlic powder
- 1/2 teaspoon onion powder
- 1/2 teaspoon smoked paprika
- 1/2 teaspoon kosher salt (start with less if using fine table salt)
- 1/2 teaspoon black pepper
- optional: 1/2-1 teaspoon chipotle chili powder
- 2 (15-ounce) cans pinto beans, drained and rinsed
- 1 (15-ounce) can red kidney beans, drained and rinsed
- 2 (14-ounce) cans crushed fire-roasted tomatoes
- 1 (6-ounce) can tomato paste
- 3 cups water or broth
To Serve (Optional Toppings):
- Fresh cilantro
- Grated cheddar cheese
- Sour cream or plain Greek yogurt
- Sliced jalapeño
- Avocado
- Crushed corn chips
Instructions
- Start By Cooking The Bacon. In a large pot or Dutch oven, cook the bacon over medium heat until crisped and browned.
- Cook The Meat. Add the ground beef to the pot and stir, breaking up the beef with your spoon until the meat is cooked through and browned. I use extra-lean ground beef so I don’t have extra fat to drain, but if needed, you can drain extra fat from the pan. I recommend leaving in at least 1-2 Tablespoons for flavor.
- Cook The Veggies. Next, add the onion and bell peppers to the pan. Cook 4-5 minutes over medium heat, stirring to scrape up any browned bits from the bottom of the pan. Add garlic cloves and green chiles and cook 1-2 minutes more.
- Add Spices. Sprinkle in chili powder, cumin, garlic powder, onion powder, smoked paprika, salt, and pepper (and chipotle chili powder, if using). Cook and stir 1-2 minutes, or until fragrant.
- Stir In Beans & Tomatoes. Then, add pinto beans, kidney beans, fire roasted tomatoes, and tomato paste. Pour in the water or broth and stir to combine.
- Bring To A Simmer. Bring the chili to a boil over medium-high heat, then reduce heat to medium-low and simmer 20-30 minutes, stirring periodically. This will help the veggies soften and help the flavor develop.
- Serve & Store. Spoon chili into bowls and top with your favorite chili toppings. Store leftover chili in an airtight container in the fridge 3-4 days, or freeze up to 2 months.
To Freeze:
To freeze chili, I recommend storing flat in freezer bags. (Scoop cooled chili into freezer bags, seal shut, then lay bags flat on a plate or cutting board until frozen solid. This way they store better and thaw faster later. Thaw frozen chili in the refrigerator or heat up on the stove to enjoy later.
Notes
- Meat. This chili recipe works with ground beef, ground turkey, or ground chicken. Use what works best for you! I like to use 90-95% lean ground beef so I don’t need to drain any extra fat.
- Chilis. If you want more heat, you can swap out the can of green chiles for a diced jalapeño!
- Beans. I like a mix of 2 cans pinto beans + 1 can kidney beans, but you can use 1 can pinto beans + 1 can black beans + 1 can kidney beans for more color, if you like.
- Broth. Make sure your broth is gluten-free! We like Imagine vegetable broth, or Bonafide Provisions chicken or beef bone broth.
- Prep Time: 15 minutes
- Cook Time: 40 minutes
- Category: Soup
- Method: Stovetop
- Cuisine: American
Nutrition
- Serving Size: 1 cup chili
- Calories: 210
- Sugar: 8.1 g
- Sodium: 467.3 mg
- Fat: 3.6 g
- Saturated Fat: 1.4 g
- Carbohydrates: 26.8 g
- Fiber: 8.2 g
- Protein: 18.4 g
- Cholesterol: 30.2 mg
This was so hearty and cozy! I loved the subtle smokiness
This is a great recipe! 👌
I made this in the crock pot and it was delicious! I had meat already browned and just tossed the rest in. Today was a perfect day for it; cool and rainy. It was a hit!
AWESOME! I’m so glad you loved it! (It’s so perfect on a rainy day!)